
Related Manuals for Ruizu X02


Summary of Contents for Ruizu X02
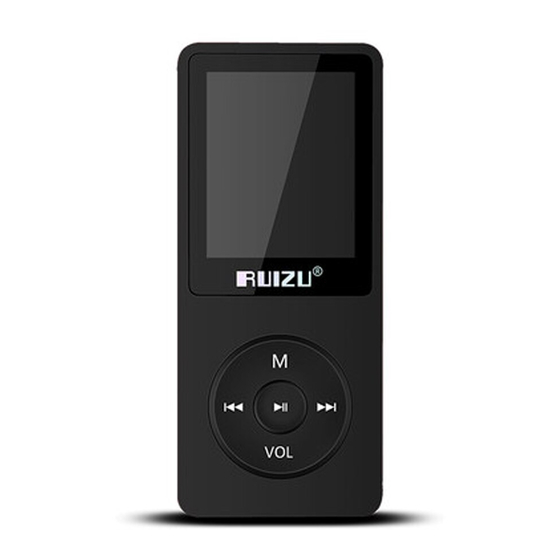
- Page 1 RUIZU Music Player X02 User Manual RUIZU Customer Service ruizuservice@hotmail.com...
-
Page 2: Table Of Contents
User Guide Quick Guide...................1 Basic Operations................2 1.Charge the Player..............3 2.Power ON/OFF and Sleep Mode..........3 3.Date Transfer................4 4.Lock Screen................4 5.Return..................5 6.Volume Adjustment..............5 Record................... 6 1.Start voice recording..............6 2.Recordings library..............6 3.Record Format................6 4.Record Setting................6 Folder.................... - Page 3 2.3 Language learning............12 2.4 Sound Settings..............12 2.5 A-B Repeat Mode............13 2.6 Bookmarks...............13 2.7 Delete................14 2.8 Add to playlist..............14 2.9 Remove from playlist............14 Video................... 15 Tools....................16 1.Calendar...................16 2.Stopwatch................16 3.Alarm..................16 Setting..................17 Radio................... 18 Support and Troubleshooting............ 20 Specifications................
-
Page 4: Quick Guide
Quick Guide While the player is powered on, use direction buttons to access to its 9 different functions, including Record, Folder, EBook, Pictures, Music, Video, Tools, Setting, Radio. Press button to enter. Plug your earphone into the jack to enjoy the music and radio you like. -
Page 5: Basic Operations
Basic Operations... -
Page 6: Charge The Player
1.Charge the Player 1. Plug the attached USB cable into the USB port of a computer to charge the player. When you start charging, it will show two options: “Charge & Transfer” and “Charge & Play”. An indicate on the top right will show the charging statue. -
Page 7: Date Transfer
Note: if your computer cannot detect the MP3 Player, try to update your USB driver or use another cable. If it still can’t work for you. Ask RUIZU Customer Service for additional help (See Cover) 4.Lock Screen Press M button and button together to lock the screen. -
Page 8: Return
5.Return While on playing interface, press the VOL button to exit, and the press the left arrow button continually to back to the main menu. While on sub menu, press the button to up level menu. 6.Volume Adjustment Hold the button VOL to open volume control interface, press M/VOL button to increase/decrease the volume. -
Page 9: Record
Record Press button with “Record” on main interface to access to its function. And then a related list will show as follows: 1.Start voice recording Select "Start voice recording" and click button to start your recording. Press VOL and then click button to save your recording;... -
Page 10: Folder
Folder Press button with “Folder”on main interface to access to its function. All the files and folders in the player will be listed. If the micro SD card is inserted, you can choose to go to "Local folder" or "Card folder". Note: Create your own folders to sort your songs. -
Page 11: Ebook
Ebook Press button with ”Ebook” on main interface to access to its function. Please kindly note this player only can recognize the article in TXT format. Click middle button to enter. Auto Play While reading the text, press button to play automatically, click again to back to normal playing. - Page 12 Delete ebook Delete the ebook you current reading. Bookmark Select Select a bookmark added before. Delete bookmark Delete a bookmark added before. Add bookmark Add a bookmark on current page. Page Select Select a page you want to go.
-
Page 13: Pictures
Pictures Press button with “Pictures” on main interface to access to its function. Settings While it’s on picture viewing interface, click M button to access to its sub-menu. The related list will show: Home: Back to Main interface. Backlight timer: Set time backlight turn off. Slideshow settings: Time per slide: Set how many seconds for a slide. -
Page 14: Music
Music Press button with “Music” on main interface to access to its function. And then a related list will show as follows: Now Playing: View the music currently playing. All songs: View the music list in alphabet order. Update Card Data: Update the Data you just edited. Artists: Play songs from Artist you like. -
Page 15: Home
2.1 Home Back to main interface. 2.2 Shuffle Turn on/off shuffle mode. 2.3 Language learning Repeat off: Turn off repeat function. Repeat 1: Repeat play the audio currently playing. Repeat all: Play all of your audios and repeat. View Playing: View the audio currently playing. 2.4 Sound Settings There are 3 options in Sound settings: Equalizer: Choose from the 7 sound effects, or choose "off"... -
Page 16: A-B Repeat Mode
2.5 A-B Repeat Mode There are 3 options in A-B Repeat Mode: A-B Repeat: Play music as A-B loop. 1) Enter Replay Mode, an ”A” on the top left will flash. Press button to set a start time. 2) The “B” on the top left will flash once you Press button Press button again to set an end time and begin A-B loop, or press button... -
Page 17: Delete
2.7 Delete Delete the currently playing song from Mp3 player or card. 2.8 Add to playlist Add the currently playing song to 1 of 3 playlists. 2.9 Remove from playlist Remove the currently playing song from 1 of 3 playlists. -
Page 18: Video
Video Press button with “Video” on main interface to access to its function. Settings While it’s on video playing interface, click M button to access to its sub-menu. The related list will show: Home: Back to Main interface. Repeat: Repeat off: Turn off repeat function. Repeat 1: Repeat play the video currently playing. -
Page 19: Tools
Tools Press button with “Tools” on main interface to access to its function. And then a related list will show "Calendar", "Stopwatch", "Alarm". 1.Calendar Choose "Calendar", click button to access to its function and view the date and time. Click button to go back. -
Page 20: Setting
Setting Press button with “Setting” on main interface to access to its function. And then a related list will show as follows: Power Off: Set up time of auto turn off. Sleep timer: Set up time of into sleep mode. Display settings: Set Backlight timer, Screensaver. -
Page 21: Radio
Radio Press button with “Radio” on main interface to access to its function. And then a related list will show as follows: Note: Wired headphones are required as antenna for FM radio function. Station list: Play the FM radio frequency you saved before. Manual tune: Manual Searching FM signal (87.50-107.00Hz). - Page 22 Home Back to Main interface. Previous menu Back to previous menu. Start FM radio recording Record current playing FM radio. Save Save current FM frequency to “Station list”. Clear preset Clear one of saved FM frequency from “Station list”. Auto tune Auto Searching FM signal and save to “Station list”.
-
Page 23: Support And Troubleshooting
You can create folders in the disk to sort your music. Q: Why my computer can’t detect mp3 player? A: RUIZU Mp3 player can be paired for all computer system with latest USB driver. Please update your USB driver before plug in Mp3 player or try another charging cable. - Page 24 Q: Why buttons on the player can’t work? A: Sometime customer will accidentally active lock screen function which prevent button been used. Please see”Lock Screen” to unlock the button. If it still won’t work for you, please contact RUIZU Customer Service to claim your warranty. See Cover.
-
Page 25: Specifications
Specifications Screen 1.8" LCD screen Weight Dimension 89*38*8mm Flash memory Audio format MP3/WAV/APE/WMA/FLAC etc. Video format 160*128 AMV(converted video) Recording format MP3/WAV/ACT Recording range 5-8 meters Playing time 80 hours for music playback Battery 3.7 V/420 mAh Charging time 1-1.5 hours SD card expansion Up to 128G Lyric Format Any more problems, please feel free to contact with our...
Need help?
Do you have a question about the X02 and is the answer not in the manual?
Questions and answers