
Subscribe to Our Youtube Channel
Related Manuals for Uninet iColor

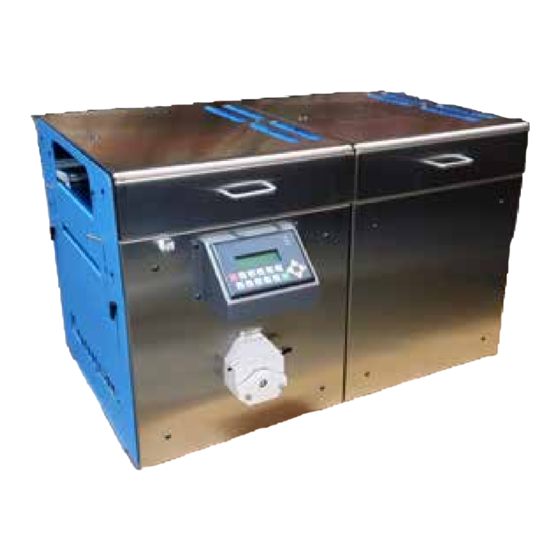
Summary of Contents for Uninet iColor
- Page 1 ICDS 10” (254mm) Digital UV Coating System with Auto Pump User Manual www.icolorprint.com Sales@icolorprint.com...
-
Page 2: Table Of Contents
Operator Do’s Operator Don’ts Chapter 3 Unpacking your iColor coater Installing Your iColor coater - Electrical Installing Your iColor coater - Drip Pan Installing/Replacing Your - UV Lamp Chapter 4 Make Ready & Operating Instructions Digital Control Panel Establishing iColor Coating Unit Settings Testing the... - Page 3 Table of Contents (continued) Chapter 5 Troubleshooting & Maintenance Troubleshooting Guidelines Daily UV Cleanup Procedure Weekly or Holiday UV Cleanup Procedure Aqueous Coating & Primer Cleanup Procedure Lubrication Schedule Replacing the Doctor Blade Procedure Tracking the Conveyor Belt Replacing the Conveyor Belt Decimal &...
-
Page 4: Symbology
Chapter 1 Symbology: Notes, Caution, Remarks, Warnings Below is a guide to the symbols used throughout this manual. NOTE: A NOTE symbol indicates important information that helps you in your install / operation. CAUTION: A CAUTION symbol indicates that special attention and care should be taken to avoid injury or damage. -
Page 5: Introduction & Technical Assistance
• Coating & Consumables Please familiarize yourself with the content of this manual before unpacking, installing and operating the iColor coater. In an effort to ensure safety, please read and pay close attention to all safety relat-ed comments. UNITED STATES... -
Page 6: Equipment Specifications
Equipment Specifications SPECIFICATIONS STANDARD METRIC Maximum Sheet Size 10” x Virtually Any Length 254mm x Virtually Any Length Minimum Sheet Size Business Card Business Card Speed up to 80 feet/minute up to 24 meter/minute Stock Weight 7pt. to 30pt. 150 up to 600 g/m² 70 watts to ~200 watts 70 watts to ~200 watts UV Lamp - Solid State UV... -
Page 7: Safety & Precautions
Fire! CAUTION: A Class A,B,C fire extinguisher and a metal garbage can with a metal lid should be located in close proximity to the iColor coater system in case a coated sheet gets caught under the lamp and catches fire. - Page 8 If you do not properly clean and maintain your iColor coater, it will not perform properly. Also, failure to clean and maintain your iColor coater will void your...
- Page 9 At Uninet, Safety is our number one priority! Interlocking Guards, Fixed Guards and Warning Labels are used when necessary and are clearly visible, to protect all operators. If a safety sticker becomes damaged, please contact Uninet to purchase a replacement! Please find below a visual representation of our Safety Guards.
-
Page 10: Features, Advantages & Benefits
• Handle a variety of substrates and thicknesses NOTE: The iColor coater is rated to handle a minimum stock weight of 100# text (150 gsm), but some lighter stocks may work depending on grain direction and surface finish when running sheets, when running roll to roll, (50# text (75 gsm)) stocks may be run. -
Page 11: Operator Do's
4. Clean the Coating Station regularly and for each job setting. 5. Keep the rollers clean. 6. Lubricate Uninet Coating Unit Gears once a week. 7. Use the correct size Allen key for the corresponding size bolts. 8. Follow daily wash up procedures. -
Page 12: Operator Don'ts
A Class A, B, C fire extinguisher and metal gar-bage can with a metal lid should be located in close proximity to the iColor Coater. See Safety & Precautions section for fire extinguisher details. -
Page 13: Unpacking Your Icolor Coater
Chapter 3 Unpacking your iColor UV Coater Your iColor coater has been inspected prior to delivery. Please take note if any items are missing or damaged. Once your iColor coater has been placed in your facility you can begin unpacking the equipment and supplies. -
Page 14: Installing Your Icolor Coater - Electrical
Installing your iColor coater - Electrical Once you have placed your iColor coater it is time to install the equipment. The iColor coater can be installed by Certified iColorTechnician / iColor Dealer or by the customer after reading and following the detailed directions provided in this manual. -
Page 15: Installing Your Icolor Coater - Drip Pan
Installing your iColor coater - Drip Pan 1. Turn the Main Power disconnect to the OFF position! 2. Make sure the Drip Pan Plug is securely installed in the Drip Pan. If not, do so by pulling the rubber plug through the drain hole until secure. -
Page 16: Installing/Replacing Your - Uv Lamp
Installing / Replacing your iColor coater - UV Lamp 1. Turn the Main Power disconnect to the OFF position. 2. Remove Control Panel mount and unplug control panel (OP Side). 3. Remove both side covers using a 3mm Allen key. - Page 17 Installing / Replacing your iColor coater - UV Lamp (continued) 9. With the UV bulb access covers and heat sink removed. Taking care not to touch the UV bulb, gen- tly pull UV bulb by the white end cap through either the OP or NOP side UV bulb access hole.
-
Page 18: Make Ready & Operating Instructions
You will soon be on your way to coating and curing! Once the iColor coater is installed by you or your iColor certified technician and connected by a licensed electrician you will be able to start coating and curing. Please follow the step-by-step instruc- tions on the operation of the iColor coater to guarantee success. -
Page 19: Digital Control Panel
The iColor coater Digital Control Panel: • Provides quick & easy control of the • Adjust UV bulb intensity & belt speed on- iColor coater at the touch of a button the-fly • Manually pump coating to the coating unit •... - Page 20 Coater - Digital Control Panel (continued) NOTE: The Control Panel is “NOT” a touchscreen and is only controlled by the function keys. HOME SCREEN Get to this screen by pressing the “F0” Function Key in any screen F1 =...
- Page 21 Coater - Digital Control Panel (continued) NOTE: This machine is equipped with “Rotating UV Reflector” technology which enables the lamp to be turned on without the belt in motion. This allows you to warm up the system during set up or work with the front guard open while the lamp is ON.
- Page 22 Coater - Digital Control Panel (continued) JOG SCREEN Get to this screen by pressing “F4” Function Key from the Home Screen • Press “F8” Function Key to FORWARD Jog the Belt • Press “F9” Function Key to REVERSE Jog the Belt •...
-
Page 23: Establishing Icolor Coating Unit Settings Testing The
& EZ adjustment of the coating thickness, on the fly. Applying an even and precise thin layer of coating, the Coating Unit produces the highest gloss and a perfect finish every time. The iColor Coating Unit has Six (6) main settings with additional positions between each settings for precise coating control: •... -
Page 24: Icolor Coating Unit Calibration Calibrating The Icolor
Testing the Coating Unit Calibration NOTE: In order to properly calibrate the Coating Unit, please be sure the coating unit is as clean and dry as possible. Any coating on the rollers will cause inaccurate results. Calibrating a Coating Unit involves measuring and adjusting the metering roller to form roller to make them as parallel as possible. -
Page 25: Coating Unit
Calibrating the Coating Unit 1. Remove the Coating Unit from the iColor coater by performing the following steps. a. Using a 4mm Allen wrench, remove the (4) four Coating Unit Spring Rod Mounting Bolts b. Using a 4mm Allen wrench, remove the (4) four Coating Unit Mounting Pivot Bolts c. -
Page 26: Setting Form To Impression Roller Pressure
Setting Form to Impression Roller Pressure 1. Set the Coating Form Roller to the Impression Roller Pressure NOTE: Make sure the Coating Unit is completely clean with NO coating in the unit! a. Take a sheet of the stock that you plan to coat and cut (2) two 1” x 12” (25mm x 305mm) strips. b. -
Page 27: Power On The Coater
CAUTION: Operator should first put on UV Safety Glasses and protective gloves before running the iColor coater. Apply power to the iColor coater System as follows: 1. Turn the Main Power Switch, located on the back of the machine, to the ON position. -
Page 28: Make Ready The Coating Pump & Unit
6. Press “F7” to turn ON the AUTO Pump option (If Equipped w/ Sensor) NOTE: If your iColor coater is equipped with the Automatic Coating Sensor, see the next section on “Setting the Optional Automatic Coating Sensor” before completing the set up. -
Page 29: Setting The "Optional" Automatic Uv Coating Sensor
Setting the “Optional” Automatic UV Coating Sensor NOTE: If your iColor coater is equipped with the Automatic Coating Sensor proceed with setting the coating sensor. If it is NOT, proceed to the next page. Your Automatic Coating Sensor is preset in the factory. Before you begin the coating process it is im- portant that you test the settings and make the appropriate adjustments for your current job. -
Page 30: Coating Information
Coating can separate due to excessive heat and cold. It should be stored in a climate-controlled area • Uninet recommends storing & using your coatings at a temperature between 70°- 90° F (21°- 32° C). Temperatures lower than 70° F (21° C) could cause the coating to thicken, resulting in a textured appearance. -
Page 31: Production Considerations
5. When operating the iColor coater, the form roller SHOULD NOT be in contact with the impression roller except the very ends of the roller that are slightly larger due to the pressure from the seals. - Page 32 Production Considerations (continued) 7. Some papers when coated have a tendency to curl, which could cause them not to exit the coater. Constantly monitor the delivery area to make sure this does not happen. 8. When working at the delivery end of the coater you MUST wear UV blocker glasses to protect your eyes from the reflected UV rays from the exiting paper.
-
Page 33: Testing & Evaluating The Coating Finish
Testing & Evaluating the Coating Finish You are now ready to begin Testing & Evaluating the coating finish. 1. Turn the Power Button, UV Lamp & Belt ON per the previous “Power ON” instructions a. The average time that the UV lamp takes to reach full capacity can vary from 30 seconds to 90 seconds. -
Page 34: Five Kwik & Ez Ways To Perfect The Coating Finish
Five Kwik & EZ Ways to Perfect the Coating Finish 1. Increasing/Decreasing Belt Speed. BELT SCREEN • The speed is controlled by the Left & Right Arrow Keys, whether the belt is ON or OFF 2. Increasing/Decreasing UV Lamp Intensity. UV LAMP SCREEN •... -
Page 35: Troubleshooting & Maintenance
Testing for Absorbent Paper, Toner & Ink 1. With the iColor coater Belt ON (UV OFF) run and coat one (1) sheet through the iColor coater and remove it. 2. Set this paper aside for 2 or 3 minutes and then inspect it. If it appears that almost no change has occurred to the coating, then your print media and paper are not the absorbent type. -
Page 36: Troubleshooting Guidelines
Troubleshooting Guidelines PROBLEM POSSIBLE CAUSE POSSIBLE REMEDY UV Bulb is not turning on a. Main disconnect off a. Turn to on b. Main breaker tripped b. Reset c. Rear guard open c. Close guard, check switch d. Internal breakers tripped d. - Page 37 “Optional” Oscillating roller. (See the Komplete Roller section of the Con- sumables page or contact Uninet Customer Service for more information) Coating scratching off a. Improper coating solution a. Make sure coating is correct for print type and substrate b.
-
Page 38: Daily Uv Cleanup Procedure
2. If your iColor coater is equipped with the optional Automatic Coating Sensor, the lack of coating in the nip will cause the pump to turn on and put the coating in the hose back into the bucket. If you are using the manual pump, you must press F9 from the pump screen. -
Page 39: Weekly Or Holiday Uv Cleanup Procedure
2. Put both ends of the hose into a container with a small amount of UV Klean and energize the pump by running the iColor coater. Allow the pump to circulate the UV Klean for one to two minutes. 3. Disconnect the hoses from the pump, then pour a small amount of UV Klean into each hose and slosh back and forth until the UV Klean flows freely in the hoses and then discard the UV Klean into a cup with a paper towel and dispose of in the trash (no biohazard will exist). -
Page 40: Aqueous Coating & Primer Cleanup Procedure
2. If your iColor coater is equipped with the optional Automatic Coating Sensor, the lack of coating in the nip will cause the pump to turn on and put the coating in the hose back into the bucket. If you are using the manual pump, you must press F9 from the pump screen. - Page 41 14. Rinse the hose kit with Aque Klean by either of the following methods: a. Put both ends of the hose into a container with a small amount of Aque Klean and energize the pump by running the iColor coater. Allow the pump to circulate the Aque Klean for one to two minutes.
-
Page 42: Lubrication Schedule
Lubrication Schedule COATING UNIT/IMPRESSION ROLLER GEARS - It is very important to Grease the Coating Unit Gears, Impression Roller Gear and Optional Oscillating Roller every 80 - 100 hours. Coating Unit Gear Impression Roller Gear Figure - Lubrication Locations DRIVE SPROCKETS - It is very important to Grease the NOP side Drive Sprockets at least twice a year. -
Page 43: Replacing The Doctor Blade Procedure
The iColor coater is equipped with a Doctor Blade system designed to remove any excess coating that reaches the Impression roller. There should always be a gap between the Form and Impression roller - which is why the iColor coater can successfully apply UV and Aqueous coating & primers and perform two-sided coating with a perfect finish every time. - Page 44 Replacing the Doctor Blade Procedure (continued) CAUTION: Always use Genuine Uninet Parts. The use of other than a genuine Uninet Doctor Blade could cause damage to the Impression Roller and Void the Warranty. To change the Doctor Blade: 1. Place the Doctor Blade Assembly on a flat surface.
- Page 45 Replacing the Doctor Blade Procedure (continued) 5. Tighten the four (4) mounting screws using a 3mm Allen key. 6. Insert the Doctor Blade Assembly into the mounting bracket. 7. Replace the Doctor Blade Spring and Guide Pin 8. Tighten the two cap screws, on each side, using a 4mm Allen key 9.
-
Page 46: Tracking The Conveyor Belt
Tracking the Conveyor Belt The iColor coater is designed for a long life and production. The Conveyor Belt has been tracked in manufacturing based on normal operating conditions. To test if your belt is tracking correctly, turn the Belt & UV on and let it run for approximately 5 - 10 minutes under normal operating conditions (i.e. -
Page 47: Replacing The Conveyor Belt
Replacing the Conveyor Belt The iColor coater is designed for a long life and production. Should the conveyor belt become damaged or worn and needs to be replaced contact Uninet Customer Service CAUTION: The act of replacing your conveyor belt should be performed by a Qualified Uninet Technician or your Authorized Uninet Coating Equipment Dealer. -
Page 48: Decimal & Millimeter Conversion Table
Decimal & Millimeter Conversion Table DECIMAL AND MILLIMETER EQUIVALENTS OF FRACTIONAL PARTS OF AN INCH (TO CONVERT TO MM, MULTIPLY INCHES BY 25.4 - TO CONVERT TO INCHES MULTIPLY MM BY .0397 OR DIVIDE BY 25.4) INCHES INCHES INCHES INCHES 1/64 0.01563 0.397...
Need help?
Do you have a question about the iColor and is the answer not in the manual?
Questions and answers