Table of Contents
Advertisement
Quick Links
Advertisement
Table of Contents

Subscribe to Our Youtube Channel
Related Manuals for Blackmagicdesign Fairlight


Summary of Contents for Blackmagicdesign Fairlight
- Page 1 Instruction Manual Fairlight Console Assembly June 2019...
- Page 2 Thank you for purchasing a Blackmagic Fairlight console for your audio post production! Fairlight has been the premiere audio post production suite in the film and television industries for decades. It has a long history of innovative software and hardware engineering that’s led the way for music and audio production.
-
Page 3: Table Of Contents
Attaching the Monitor Infill Module Powering the Modules Arranging Cables and Replacing the Leg Side Covers Connecting the Fairlight Modules Connecting the Fairlight Console to your Computer Connecting the Computer’s HDMI or SDI Output Reattaching the Chassis Back Panel Configuring the Fairlight Modules... -
Page 4: Fairlight Console Components
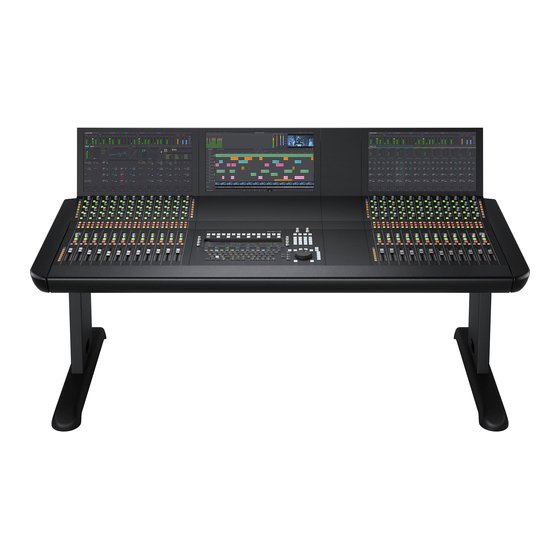
Fairlight Console Components The Fairlight console is available in 4 configurations that let you build your console to suit your production requirements. Fairlight modules, for example the Fairlight Console Channel Control, Fairlight Console Channel Fader, Fairlight Console Audio Editor, and the Fairlight Console LCD Monitor, are installed into the module slots within the Fairlight console chassis. -
Page 5: Unpacking And Assembling
For example you may be left handed and want to have the mouse on the left side of the audio editor module. Fairlight modules are mounted in a module bracket that can be lifted out and repositioned. Keep reading this manual for more information on how to install the Fairlight modules into the module brackets. -
Page 6: Tools Required
The surface your Fairlight console will be placed onto for assembly needs to be high enough from the ground to ensure the legs are elevated when attaching to the chassis. Allow for at least 550mm. -
Page 7: Attaching The Legs To The Console Chassis
Attaching the Legs to the Console Chassis The road case contains two legs that attach to each side of the console chassis. However, before attaching to the chassis, you should first secure the feet to each leg. Each assembled leg weighs 10 kilograms, so please take care when lifting. The feet are attached to the console chassis with their length longer at one end. - Page 8 Now place the support plate on the bottom of the foot and secure the foot to the leg using the two M12 screws. Tighten to a torque of 35 Nm. Repeat steps 1 to 3 for the second leg. To attach the legs to the console chassis: Remove the side cover from each leg by unscrewing the four M3 screws from the opposite side of the leg using a Pozidriv 2 screwdriver.
-
Page 9: Alternative Assembly With Two Or More People
We recommend placing the assembled chassis as close to its intended position as possible, as once Fairlight modules are installed, the overall weight of the unit will increase substantially. Ensure there is enough space at the rear of the chassis to replace the back panel before securing your console into position. - Page 10 Once the legs and feet are attached, lean the chassis onto its feet into its standing position. Lean the Fairlight console onto its feet, ready to install the Fairlight panels With the legs and feet attached to the console chassis, you can now install the Fairlight panels.
-
Page 11: Installing The Fairlight Panels
Installing the Fairlight Panels The most common layout Fairlight audio engineers use for mounting the modules is to place the Fairlight Console Audio Editor directly in front of the operator, the Fairlight Console Channel Control and Channel Fader modules on each side, and the channel control modules above each channel fader module. - Page 12 With the module bracket removed from the chassis, place it on a stable surface, ready for attaching the Fairlight modules. We recommend installing modules starting with the LCD monitor at the top, the Fairlight Console Channel Control module in the middle, then the Fairlight Console Channel Fader module closest to the audio operator.
-
Page 13: Attaching The Monitor Infill Module
Lower the support brace by holding the brace handles and rotating the brace down from the bracket. Allow the feet of the brace to rest inside and against the front of the chassis so it cannot move. Attaching the Monitor Infill Module Inside the road case, you’ll find a small cardboard box. -
Page 14: Powering The Modules
IEC power cable. We recommend using five way power boards to distribute power to the Fairlight modules, with each power board to supply up to five modules only. Ensure the power boards are not daisy chained and are each independently connected to mains power. -
Page 15: Connecting The Fairlight Modules
Ethernet switch inside the console where there is lots of space. Then you can connect each panel module to the switch directly. Below is an example of how you could connect the Fairlight modules in a daisy chain. HDMI Ethernet... -
Page 16: Connecting The Computer's Hdmi Or Sdi Output
Fairlight console. Reattaching the Chassis Back Panel Now that all your Fairlight modules are installed, powered and connected, the final step to complete the assembly of your console is to reattach the chassis’ back panel. Secure in place using the M3 Pozidriv screws and tighten to a torque of 0.45 Nm. -
Page 17: Fairlight Panel Setup
Fairlight Panel Setup Fairlight Panel Setup can be connected to the Fairlight module via USB or Ethernet using DHCP. If you are not using a DHCP server, you can set the network settings to a fixed IP address via USB. More information for changing network settings is provided later in this manual. - Page 18 Each Fairlight Console LCD Monitor can be set as a data display or video monitor. This means the monitor can be set to display the Fairlight page connected via Ethernet, or a video image if there is a signal connected to the monitor's HDMI or SDI video input.
-
Page 19: Changing Network Settings
Rec 709, or you may want to load a preset 'look' designed during post production. You can also use this 3D LUT to fine tune the display on each of your Fairlight console's LCD monitors if the color reproduction between them is a little different. -
Page 20: Fairlight Studio Utility
LCD monitors. The Fairlight Desktop Audio Editor does not need to be added to a studio configuration to be selected by DaVinci Resolve. If you have only a Desktop Audio Editor in your studio, go to the next section, ‘Selecting your Fairlight Console in DaVinci Resolve’, and follow the instructions... - Page 21 Click on the light bulb icon to identify each module in your Fairlight console Click 'add'. The monitor will be assigned to the top left slot on your Fairlight console. You can now follow the same procedure to assign all the other panels to the corresponding positions in the configuration utility.
-
Page 22: Selecting Your Fairlight Console In Davinci Resolve
In the ‘Control Panels’ menu, you’ll notice an option for ‘Audio Console’ and a drop down menu where you can select your console for Fairlight. Click on the drop down menu and select the studio name for your console. If you have a standalone Fairlight Desktop Audio Editor, you can also select it here. -
Page 23: Technical Specifications
Depth = 1101 mm Weight = 180 kg Weight = 205 kg Weight = 280 kg Weight = 300 kg Fairlight Console Dimensions and Weight 2 bay Console 3 bay Console 4 bay Console 5 bay Console Width = 1295 mm... -
Page 24: Fairlight Panels Dimensions And Weight
Fairlight Panels Dimensions and Weight BLUE BLUE MSTR PATH PLUG FLIT CHAN ENAB COMP COPY CURVE SPILL SHOW SHOW SHOW SHOW SHOW SHOW SHOW SHOW SHOW SHOW SHOW SHOW PLUGS PLUGS PLUGS PLUGS PLUGS PLUGS PLUGS PLUGS PLUGS PLUGS PLUGS... -
Page 25: Help
Checking the Software Version Currently Installed To check which version of Fairlight Console software is installed on your computer, open the Fairlight Console Components Setup utility and click on the ‘about’ tab. The current version number will be displayed. -
Page 26: Regulatory Notices
Regulatory Notices Disposal of waste of electrical and electronic equipment within the European union. The symbol on the product indicates that this equipment must not be disposed of with other waste materials. In order to dispose of your waste equipment, it must be handed over to a designated collection point for recycling. -
Page 27: Safety Information
110 kg empty, and 157 kg fully assembled. You should always move a Fairlight console with at least 4 people using safe lifting procedures, such as keeping the back straight, bending the knees and lifting with careful, controlled movements. -
Page 28: Warranty
Warranty 12 Month Limited Warranty Blackmagic Design warrants that this product will be free from defects in materials and workmanship for a period of 12 months from the date of purchase. If a product proves to be defective during this warranty period, Blackmagic Design, at its option, either will repair the defective product without charge for parts and labor, or will provide a replacement in exchange for the defective product.
Need help?
Do you have a question about the Fairlight and is the answer not in the manual?
Questions and answers