Table of Contents
Advertisement
Advertisement
Table of Contents

Subscribe to Our Youtube Channel
Related Manuals for Labconco FreeZone Triad 7940010 Series


Summary of Contents for Labconco FreeZone Triad 7940010 Series
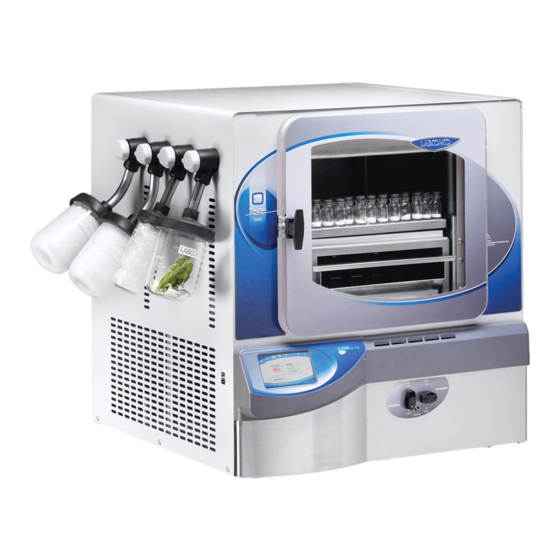
- Page 1 Original instructions Triad™ Freeze Dryers ® FreeZone Models 7940010** Series...
- Page 2 Warranty Labconco Corporation provides a warranty to the original buyer for the repair or replacement of parts and reasonable labor as a result of normal and proper use of the equipment with compatible chemicals. Broken glassware and maintenance items, such as filters, gaskets, light bulbs, finishes and lubrication are not warranted.
-
Page 3: Table Of Contents
Original instructions ABLE ONTENTS CHAPTER 1: INTRODUCTION Intended Use Freeze Dry Process Freeze Dry Rates Freeze Dry Capacity Samples Containing Volatile Substances About This Manual Typographical Conventions CHAPTER 2: PREREQUISITES Electrical Requirements Location Requirements Vacuum Pump Requirements CHAPTER 3: GETTING STARTED Unpacking Your Freeze Dryer Freeze Dryer Components Setting Up Your Freeze Dryer... - Page 4 Original instructions Language Time & Date Units Security Alerts Configure Email Settings Maintenance Vacuum Pump Settings Refrigeration System Settings Freeze Dryer Line Voltage Offset Vacuum Pump Protection Calibration Display Network Sensors screen End Point Detection screen Help screen Diagnostics User’s Manual About CHAPTER 5: USING YOUR FREEZE DRYER Operation Checklist...
- Page 5 Original instructions CHAPTER 7: TROUBLESHOOTING Vacuum Pump Gaskets, Tubing, Connections, Sample Valves System Components & Collector Chamber Isolation Refrigeration Module Operation APPENDIX A: FREEZE DRYER COMPONENTS APPENDIX B: FREEZE DRYER DIMENSIONS APPENDIX C: FREEZE DRYER SPECIFICATIONS Electrical Specifications Environmental Conditions APPENDIX D: FREEZE DRYER ACCESSORIES...
-
Page 6: Chapter 1: Introduction
The unit is easy to install and maintain. Proper care and maintenance of this product will result in many years of dependable service. Intended Use The Labconco Freeze Dryers described in this manual are intended for laboratory use to facilitate the lyophilization process. Freeze Dry Process Freeze drying is an important process in sample preparation and for the preservation and storage of biologicals, pharmaceuticals and foods. -
Page 7: Freeze Dry Rates
Original instructions Chapter 1: Introduction Freeze Dry Rates The efficiency of the Freeze Drying process is dependent upon the surface area and the thickness of the sample, the collector temperature and vacuum obtained, the eutectic point and solute concentration of the sample. It is important to remember these factors when trying to obtain efficient utilization of your Freeze Dry system. -
Page 8: Freeze Dry Capacity
Original instructions Chapter 1: Introduction efficient rate. In many applications, the maintenance of a vacuum of 0.133 mbar or less is recommended. The rate of freeze drying is directly proportional to the vapor pressure and the vapor pressure is dependent upon both eutectic temperature and solute concentration of the sample. -
Page 9: Samples Containing Volatile Substances
Original instructions Chapter 1: Introduction Samples Containing Volatile Substances In certain cases the solvent in a sample to be freeze dried may contain volatile components such as acetonitrile, methanol, acetic acid, formic acid or pyridine. In addition to these substances having an effect on the eutectic temperature, they may increase the vapor pressure at the surface of the sample. -
Page 10: Typographical Conventions
Original instructions Chapter 1: Introduction Appendix C: Freeze Dryer Specifications contains product specifications. Appendix D: Freeze Dryer Accessories see www.labconco.com for a complete list of Freeze Dry accessories. Typographical Conventions Recognizing the following typographical conventions will help you understand and use this manual: ... -
Page 11: Chapter 2 Prerequisites
Original instructions HAPTER REREQUISITES Before you install your Freeze Dryer, you need to prepare your site for installation. Carefully examine the location where you intend to install your Freeze Dryer. You must be certain that the area is level and of solid construction. An electrical source must be located near the installation site. -
Page 12: Location Requirements
Vacuum pumps should be equipped with a reverse IEC plug (included with 230V pumps purchased from Labconco). This will allow the vacuum pump to be plugged into the receptacle on the back panel of the freeze dryer. -
Page 13: Chapter 3 Getting Started
Commission rules require that claims be DO NOT RETURN GOODS WITHOUT THE PRIOR filed with the AUTHORIZATION OF LABCONCO. UNAUTHORIZED delivery carrier RETURNS WILL NOT BE ACCEPTED. within fifteen (15) days of delivery. Product Service 816-333-8811 or 1-800-522-7658... -
Page 14: Freeze Dryer Components
1488800 Hose Clamp If you did not receive one or more of the components listed for your Freeze Dryer, or if any of the components are damaged, contact Labconco Corporation immediately for further instructions. Setting Up Your Freeze Dryer After you verify receipt of the proper components, move your Freeze Dryer to the location where you want to install it. -
Page 15: Component Identification
Original instructions Chapter 3: Getting Started Component Identification Sample Valves USB Port Vacuum Release Touch Screen Backfill Port On/Standby Button Stoppering Control LED Indicator Ethernet Port End Point Detection Vacuum Connection Vacuum Pump Outlet Circuit Breaker Reset Power Inlet Product Service 816-333-8811 or 1-800-522-7658 dheck DRAWN BY CHECKED BY... -
Page 16: Vacuum Pump Connection
Original instructions Chapter 3: Getting Started Vacuum Pump Connection A vacuum pump (as described in Chapter 2: Prerequisites) is required to operate your Freeze Dryer properly. The Freeze Dryer is equipped with a 3/4" ID vacuum hose for connecting the collector chamber to the vacuum pump. VACUUM HOSE 3/4"... -
Page 17: Electrical Connection
Original instructions Chapter 3: Getting Started 7. VERIFY THE VACUUM PUMP VOLTAGE SETTING AGREES WITH THE FREEZE DRYER VOLTAGE SHOWN ON THE SERIAL NUMBER LABEL. Reconfigure if necessary (see vacuum pump instructions). 8. Connect the vacuum pump power cord to the receptacle labeled “vacuum pump”... - Page 18 (> 10mbar), oil may be expelled from the pump and damage could occur. Another way to extend the life of the vacuum pump is to install an optional secondary trap in the line between the Freeze Dryer and the vacuum pump. Contact Labconco for ordering information. Product Service 816-333-8811 or 1-800-522-7658...
-
Page 19: Solvent Safety Precautions
Warranty on the affected parts will be voided if maintenance has been obviously neglected. If you have questions about using specific compounds in the Freeze Dryer, contact Labconco Technical Service at 1-800-821-5525 or 816-333-8811 or e-mail: labconco@labconco.com. Solvent Safety Precautions Solvents used in the Freeze Dryer may be flammable or hazardous to your health. -
Page 20: Chapter 4: Lyo-Works ™ Operating System
Original instructions HAPTER ORKS™ PERATING YSTEM After your Freeze Dryer has been installed as detailed in Chapter 3: Getting Started, read this chapter to learn how to: Operate the controls. Understand the display. Do not use the Freeze Dryer in a manner not specified by the manufacturer (refer to Appendix C: Freeze Dryer Specifications). -
Page 21: Control Panel
Original instructions Chapter 4: Lyo-Works Operating System Control Panel The control panel for the Freeze Dryer is shown below with a description of its functions. 1. Touch Screen Display – Capacitive touch screen displays system operating parameters, set-up parameters and alarm messages. All user interface will take place via the touch screen. -
Page 22: Touch Screen Operation
Original instructions Chapter 4: Lyo-Works Operating System Touch Screen Operation Home Screen After initial power up, the Home screen will be displayed. Most of the general operation and system monitoring can be done from the Home screen. Menu Indicator Bar Line 1 Line 2 Operation... -
Page 23: System Parameters Display
Original instructions Chapter 4: Lyo-Works Operating System System Parameters Display Line 1 COLLECTOR, VACUUM & TEMP HEADING – Describes the measurement that is displayed directly below the text. Line 2 COLLECTOR MEASUREMENT - Displays the temperature of the collector coil in °C or °F (as selected in Settings). The value displayed will be if the temperature is >... -
Page 24: Operation Buttons (Program, Manual, Vacuum, Defrost)
Original instructions Chapter 4: Lyo-Works Operating System Operation Buttons Operation buttons are displayed across the bottom of the Home screen. PROGRAM – This button opens the PROGAMS screen described in the next section. MANUAL – Use this button to turn the collector & shelf control ON/OFF. There are 3 different modes to choose from within the MANUAL function: o Max Cold –... -
Page 25: Programs Screen
Original instructions Chapter 4: Lyo-Works Operating System Programs Screen The Programs screen will allow you to create and store up to 30 programs with up to 16 segments per program. When no program has been selected the “New” button will be the only active button along the bottom of the screen. A program can be selected from the program list by pressing the program name. - Page 26 Original instructions Chapter 4: Lyo-Works Operating System “New” program When the “New” button is selected, the following screen will be displayed. Pressing the program name field will allow you to edit the program name. The Step numbers are listed in numerical order. Ramp Rate, Shelf Temp., Time, and Vacuum can be edited by pressing any of these cells.
-
Page 27: Data Logging Screen
Original instructions Chapter 4: Lyo-Works Operating System Shelf Temp. - May be set anywhere from +50°C to –55°C in 1°C increments. There is also a Max Cold (MC) setting that allows the system to reach its lowest possible temperature (approximately -75°C). Max Cold should only be used for pre-freezing samples, not for freeze drying, since the collector coil is not being cooled in this mode. -
Page 28: Settings Screen
Original instructions Chapter 4: Lyo-Works Operating System will be highlighted (blue). With a data log file selected, the rest of the buttons along the bottom of the screen will become active (Data View, Chart, Copy & Delete). If a data log file is currently running (collecting data), the “running man” icon will appear to the left of data log file name. -
Page 29: Units
Original instructions Chapter 4: Lyo-Works Operating System Time Zone – Enter the Greenwich Mean Time (GMT) offset value for your location (integer value between -12 & +12). NTP server – Enter the “web address” (URL) of the NTP server (of your choice) that will provide clock synchronization data to the Freeze Dryer via the Ethernet connection. -
Page 30: Alerts
Original instructions Chapter 4: Lyo-Works Operating System System – If the System security feature is selected (box checked), users will be required to enter the security code to gain access to the touch screen controls when the screen is reactivated from a screen timeout (sleep mode) or power failure (screen timeout described in the Settings/Display section). -
Page 31: Configure Email Settings
Chapter 4: Lyo-Works Operating System Delete – Use this button to delete an existing email address. Device Name – The default name for this field will be “Labconco Freeze Dryer”. The name can be edited by pressing the name field. -
Page 32: Maintenance
Original instructions Chapter 4: Lyo-Works Operating System 6. Maintenance – This screen contains data and settings pertaining to the operation hours and maintenance period for the vacuum pump and refrigeration system. Scroll up and down to view the entire page. ... -
Page 33: Calibration
Original instructions Chapter 4: Lyo-Works Operating System 7. Calibration – Some sensors in the Freeze Dryer can be calibrated. This process should be done by a qualified technician or metrologist with reference sensors that are known with certainty. An external reference sensor must be placed at the same measurement point (as close as physically possible) as the sensor being calibrated. -
Page 34: Display
Original instructions Chapter 4: Lyo-Works Operating System CALIBRATION Offset: ________ Cancel Calibrate Calibrate - Pressing this button will save the entered offset value. Temperature sensor offset values can range from -5 to +5° C. Vacuum Sensor offset values can range from -0.020 to +0.020 mbar. -
Page 35: Network
Original instructions Chapter 4: Lyo-Works Operating System Default Gateway fields can then be manually entered to establish a network connection. If you do not know the proper information to enter into each of the Network fields, consult your IT personnel. Sensors Screen This screen contains a list of all sensors currently installed on the Freeze Dryer and any attached accessory. - Page 36 Original instructions Chapter 4: Lyo-Works Operating System End Point Detection status – Shows the current status for each flask. The status will be one of the following: ON, OFF or COMPLETE. Touching the end point detection cell for any given flask will allow you to turn the end point detection ON/OFF.
-
Page 37: Help Screen
Manual or Auto Diagnostics on the unit. User’s Manual – Go to for user’s manual www.labconco.com About – Displays the catalog number of the Freeze Dryer and the software versions currently installed. Product Service 816-333-8811 or 1-800-522-7658... -
Page 38: Chapter 5: Using Your Freeze Dryer
Original instructions HAPTER SING REEZE RYER Operation Checklist The following checklist should be followed prior to each use of your Freeze Dryer: 1. Wipe out the interior of the chamber with a soft cloth or paper towel to remove any moisture or debris. 2. -
Page 39: Shelf Loading
Original instructions Chapter 5: Using Your Freeze Dryer THE VACUUM SHOULD ALWAYS BE TURNED OFF WHILE USING THE SHELVES TO FREEZE SAMPLES The sample container volume should be at least two to three times greater than the sample volume. The temperature required for pre-freezing is dependent on the characteristics of the sample. - Page 40 Original instructions Chapter 5: Using Your Freeze Dryer Vapor pressure above ice Temp. Pressure Temp. Pressure Temp. Pressure Temp. Pressure Temp. Pressure (°C) (mbar) (°C) (mbar) (°C) (mbar) (°C) (mbar) (°C) (mbar) 6.11 2.37 0.94 0.34 0.039 5.63 2.17 0.85 0.31 0.011 5.18...
-
Page 41: Freeze Drying Inside The Chamber
Original instructions Chapter 5: Using Your Freeze Dryer Freeze Drying Inside the Chamber The following procedure should be followed when freeze drying using the temperature controlled shelf inside the vacuum chamber. Manual Mode with Pre-frozen Samples Go to the Home Screen and press MANUAL Enter the desired shelf set point temperature and press Start. -
Page 42: Manual Mode With Unfrozen Samples
Original instructions Chapter 5: Using Your Freeze Dryer Manual Mode with Unfrozen Samples 1. Place unfrozen samples on the shelf and close the door. The sample probe can be placed in the sample if desired. 2. Start the refrigeration system by pressing MANUAL, then select Max Cold or enter a Shelf Temp Set Point (depending on the desired shelf temperature), then press Start. -
Page 43: Program Mode With Unfrozen Samples
Original instructions Chapter 5: Using Your Freeze Dryer 1. Go to the Programs screen. 2. Select a program from the saved programs list, or create a new program. 3. With the desired program selected from the list, press the START button. 4. -
Page 44: Freeze Drying Using Sample Valves (In-Flask Mode)
Original instructions Chapter 5: Using Your Freeze Dryer To stop a program (at any time) go to the Programs screen, select (highlight) the program that is currently running, press Stop. This will turn OFF the refrigeration system & vacuum pump. Position the “Vac Release”... -
Page 45: Stoppering Vials
Original instructions Chapter 5: Using Your Freeze Dryer 5. To remove a container after freeze drying is complete, turn the plastic knob on the valve to the “VENT” position, which closes the valve and vents the container. Should backfilling with an inert gas be required, connect the gas supply line to the vent port on the valve before turning the plastic knob on the valve to vent position. -
Page 46: Defrosting
Original instructions Chapter 5: Using Your Freeze Dryer Defrosting After the freeze dry process is complete the ice that has accumulated on the collector coil must be removed. The Triad Freeze Dry System is equipped with a rapid defrost feature. The following procedure should be followed when defrosting the collector coil: 1. - Page 47 Original instructions Chapter 5: Using Your Freeze Dryer automatically restart. This prevents melted sample from being drawn into the collector and prevents liquid from being drawn into the vacuum pump. When power is restored, the POWER FAIL alert message will be displayed on the touch screen and the audible alarm will sound.
-
Page 48: Copy (Export) A Data Log File
Original instructions Chapter 5: Using Your Freeze Dryer Shelf Temp Set Point If during a Ramp segment the shelf temperature stabilizes without reaching the Shelf Temp Set Point, the control will automatically enter the next Hold segment and the “Shelf Temp Set Point” alert will be displayed. Platen Tilt If the stoppering platen tilts more than 4°... -
Page 49: Copy A Program
Original instructions Chapter 5: Using Your Freeze Dryer 4. Open an internet browser of your choice from a computer that is connected to your LAN. 5. Type the following into the address bar at the top of the browser screen: http://“IP Address”:8080 where “IP Address”... -
Page 50: Chapter 6: Maintaining Your Freeze Dryer
Alcohol may craze the acrylic door. Before using any cleaning or decontamination method except those recommended by Labconco, users should check with Labconco to determine that the proposed method will not damage the equipment. 2. Clean up all spills; remove liquids from the chamber. - Page 51 A surface decontaminant should be used to clean the accessible surfaces. The use of ethylene oxide is not recommended because of its hazardous and corrosive nature. Contact Labconco for additional information. Monthly: 1. The rubber components on the freeze dry system may eventually deteriorate and require replacement.
-
Page 52: Chapter 7: Troubleshooting
Original instructions HAPTER ROUBLESHOOTING Refer to the following if your Freeze Dryer fails to operate properly. If the suggested corrective actions do not solve your problem, contact Labconco for additional assistance. Vacuum System Performance FreeZone Triad Freeze Dry Systems that are clean and dry and without samples attached should reach a vacuum of 0.133 mbar within 30 minutes... -
Page 53: Gaskets, Tubing, Connections, Sample Valves
Chapter 7: Troubleshooting If vacuum problems continue, consider obtaining a second vacuum gauge capable of reading a vacuum of 0.010 mbar. It is often useful in determining if the vacuum pump is operating properly and the vacuum sensor reading is accurate. 4. - Page 54 20°C, the freeze dry system refrigeration system can achieve a shelf temperature of –75°C or lower within 4 hours. If any repairs are required on the refrigeration module, please call Labconco. Repairs should only be undertaken by a competent refrigeration technician or through an authorized Labconco service agency.
-
Page 55: System Components & Collector Chamber Isolation
Chapter 7: Troubleshooting Filling the Fluid System Disconnect power cord from supply outlet. Remove the rear cover to expose the marked back foam insulation. Cut through the foam along the marked lines and remove center cutout. Remove the insulation and both caps from the fluid circulation valve. Attach a flexible tube to the exposed port (service port). - Page 56 Chapter 7: Troubleshooting Connect the unit to the proper power source. Activate the pump from the display screen (Home screen) by selecting MANUAL, entering 24°C (in Shelf Temp Set Point entry field), and pressing Start. This will start the heat transfer fluid pump and also the refrigeration system. The fluid system will circulate with the fluid going through the add-on tubing, purging itself of air.
-
Page 57: Refrigeration Module Operation
Chapter 7: Troubleshooting Heat Transfer Fluid First Aid Procedures Eye Contact: Immediately flush eyes with fresh water for at least 15 minutes. If irritation persists, get medical attention. Skin Contact: Wash contaminated areas with soap and water. Remove contaminated clothing and footwear. Wash clothing before reuse. -
Page 58: Appendix A: Freeze Dryer Components
Original instructions PPENDIX REEZE RYER OMPONENTS The following pages list components that are available for your Freeze Dryer. The parts shown are the most common replacement parts. If other parts are required, contact Product Service. Product Service 816-333-8811 or 1-800-522-7658... - Page 59 Original instructions Appendix A: Freeze Dryer Components Item Part No. Qty. Description Compressor 230V – 50 Hz 7591806 (Not Shown) Compressor 230V – 60 Hz 7591807 (Not Shown) 7501902 Lexsol Pump 230V 7365401 Heater 230V 7211100 Door Gasket 7210900 Chamber Door Assembly (includes Gasket) Temperature Sensor –...
-
Page 60: Appendix B: Freeze Dryer Dimensions
27.6 71.9cm 70.2cm 27.7 70.4cm 29.5 26.0 74.9cm 66cm Serum Bottle Capacity of the Triad Freeze Dry System Size Labconco No (100 pcs.). Shelf Capacity 2 ml 7575010 3 ml 7575210 5 ml 7573010 10 ml 7573210 20 ml 7573410... -
Page 61: Appendix C Freeze Dryer Specifications
Original instructions PPENDIX REEZE RYER PECIFICATIONS This Appendix contains technical information about the Freeze Dryer including electrical specifications and operating conditions. Electrical Specifications Voltage Frequency Amps Operating Max. with Catalog # Description Nominal (Hz) Range Vacuum Pump 794001010 Triad Freeze 230V 187-253 794001015... -
Page 62: Environmental Conditions
Original instructions Appendix C: Freeze Dryer Specifications Environmental Conditions Indoor use only. Ambient temperature range: 41° to 104°F (5° to 40°C). Maximum relative humidity: 80% for temperatures up to 88°F (31°C), decreasing linearly to 50% relative humidity at 104°F (40°C). ... -
Page 63: Appendix D Freeze Dryer Accessories
Original instructions PPENDIX REEZE RYER CCESSORIES Labconco offers a full line of accessories to enhance your Freeze Dryer’s operation and usability. For a complete list of these accessories, please consult our website at www.labconco.com. Product Service 816-333-8811 or 1-800-522-7658...
Need help?
Do you have a question about the FreeZone Triad 7940010 Series and is the answer not in the manual?
Questions and answers