Table of Contents
Advertisement
IMPORTANT INSTRUCTIONS
AND OPERATING MANUAL
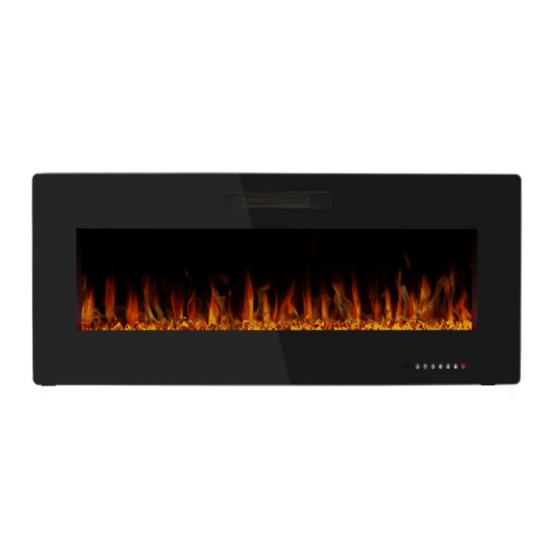
Electric Fireplace
RFH-3001LA(B) / RFH-3601LA(B) / RFH-4001LA(B) / RFH-4201LA(B) /
RFH-4801LA(B) / RFH-5001LA(B) / RFH-6001LA(B/H) / RFH-7401LA(B) / RFH-10201LA(B)
NO VENTING REQUIRED
Read and understand this entire owner's manual, including all safety information
before plugging in or using this appliance. Failure to do so could result in fire, electric
WARNING
shock, or serious personal injury.
9733 Topanga Canyon Blvd. APT310, Chatsworth, CA 91311
Phone: 213-4467172
CERTIFIED UNDER CANADIAN AND AMERICAN NATIONAL STANDARDS: ETL
Advertisement
Table of Contents

Related Manuals for RW Flame RFH-3001LA

Summary of Contents for RW Flame RFH-3001LA
-
Page 1: Important Instructions
IMPORTANT INSTRUCTIONS AND OPERATING MANUAL Electric Fireplace RFH-3001LA(B) / RFH-3601LA(B) / RFH-4001LA(B) / RFH-4201LA(B) / RFH-4801LA(B) / RFH-5001LA(B) / RFH-6001LA(B/H) / RFH-7401LA(B) / RFH-10201LA(B) NO VENTING REQUIRED Read and understand this entire owner's manual, including all safety information before plugging in or using this appliance. Failure to do so could result in fire, electric WARNING shock, or serious personal injury. -
Page 3: Table Of Contents
TABLE OF CONTENTS IMPORTANT SAFETY INSTRUCTIONS ........................4 1.0 PACKING LIST ..............................6 1.1 DIMENSIONS ............................... 8 2.0 ELECTRICAL INSTALLATION NOTES ........................ 10 2.1 GENERAL INSTRUCTIONS ..........................10 3.0 INSTALLATION INSTRUCTIONS ........................11 3.1 UNPACKING AND TESTING APPLIANCE WALL ....................11 3.2 GROUNDING APPLIANCE ........................... -
Page 4: Important Safety Instructions
IMPORTANT SAFETY INSTRUCTION WARNING These instructions should be carefully read before installation and retained by the user. The booklet must be kept and delivered to the new user in case of disposal of the heater. The Manufacturer reserves the right to vary the features of the product without prior notice. -
Page 5: Save These Instructions
18. Always unplug appliance when not in use. 19. Do not operate this appliance with a damaged cord or plug after the appliance malfunctions, has been dropped or damaged in any manner. Return appliance to authorized service facility for examination, electrical or mechanical adjustment, or repair. -
Page 6: Packing List
1.0 PACKING LIST Description Quantity Front Frame 1 pc Electric Fireplace 1 pc Mounting Bracket (Pre-attached) 1 pc Manual 1 pc Decorative Stuff Varies Remote Control(Battery included) 1 pc - 6 -... -
Page 7: Hardware Included
HARDWARE INCLUDED Part Description Quantity Model RFH-3001LA(B) / RFH-3601LA(B) / ST4.2X12 4 PCS RFH-4001LA(B) / RFH-4201LA(B) / RFH-4801LA(B) / RFH-5001LA(B) M5X12 1 PC RFH-6001LB(H) RFH-3001LA(B) / RFH-3601LA(B) / Foot Pad - Small 4 PCS RFH-4001LA(B) / RFH-4201LA(B) / RFH-4801LA(B) / RFH-5001LA(B) -
Page 8: Dimensions
1.1 DIMENSIONS Model A(mm) B(mm) C(mm) D(mm) E(mm) A(in.) B(in.) C(in.) D(in.) E(in.) RFH-3001LA(B) 17.72 28.81 5.94 16.54 RFH-3601LA(B) 17.72 34.84 5.94 16.54 RFH-4001LA(B) 1016 17.72 38.82 5.94 16.54 RFH-4201LA(B) 1066 1026 18.11 40.39 5.94 16.54 RFH-4801LA(B) 1219 1179 18.11 46.42... - Page 9 Model A(mm) B(mm) C(mm) A(in.) B(in.) C(in.) RFH-3001LA(B) 742-752 115-125 435-448 29.21-29.61 4.53-4.92 17.13-17.64 RFH-3601LA(B) 895-905 115-125 435-448 35.24-35.63 4.53-4.92 17.13-17.64 RFH-4001LA(B) 996-1006 115-125 435-448 39.21-39.61 4.53-4.92 17.13-17.64 RFH-4201LA(B) 1036-1056 115-125 435-448 40.79-41.57 4.53-4.92 17.13-17.64 RFH-4801LA(B) 1190-1209 115-125 435-448 46.85-47.60 4.53-4.92...
-
Page 10: Electrical Installation Notes
LISTING APPROVALS This appliance has been tested in accordance with the ETL Standards for Model No. fixed and location-dedicated electric room appliances in the United States Wall-mount, recessed, or free and Canada. If you need assistance during installation, please contact your Description standing Appliance local dealer. -
Page 11: Installation Instructions
Follow all National and local electrical codes. 1. The heaters should be installed only using the mounting brackets we provided if you want to mount it. 2. The heater must not be recessed in the ceiling. There must be enough space around the top of the heater to ensure adequate ventilation. -
Page 12: Assembly
3.3 ASSEMBLY The fireplace can be installed with 3 options: 1. Wall hanging with provided mounting bracket. 2. Built in construction (in wall recessed). Follow installation instructions below based on installation preference. 13-16 16-19 - 12 -... -
Page 13: Wall Hanging
- Take the glass frame 10-20cm away from the appliance, pull out the data cable connector with the help of others or put the glass panel down on the ground before complete separation. (Only for model No.: RFH-3001LA(B) / RFH-3601LA(B) / RFH-4001LA(B) / RFH-4201LA(B) / RFH-4801LA(B) / RFH-5001LA(B) / RFH-6001LA / RFH-7401LA(B) / RFH-10201LA(B) ) - Page 14 Step 2. Removing the Mounting Bracket - Unscrew the two screws by Phillips screwdriver from both ends (Do not discard them), then remove the pre-attached mounting bracket. Step 3. Choosing a Wall Location - Find a safe location. Minimum clearance from the ceiling and the mantel must be at least 8 inches (200mm);...
- Page 15 Step 5. Hanging the Fireplace on the Bracket - Hang the slotting behind the appliance on the hooks at the left and right sides of the bracket. (Please hold the appliance to avoid dropping down before the installation is finished) Step 6.
-
Page 16: Built In Construction
Step 7. Placing the Decorations - Carefully place crystal (together with the appliance) or other decoration into the bottom tray on the front of the appliance as illustrated. NOTE: Media bed kits may have sharp edges, wear safety glasses and gloves when handling. - Page 17 Step 3. Fixing the 4 Foot Pads -Fix the 4 foot pads (Part C) to the bottom of the fireplace with the screws (Part A) provided. (Only for model No.: RFH-3001LA(B)/ RFH-3601LA(B)/ RFH-4001LA(B)/ RFH-4201LA(B)/ RFH-5001LA(B)) Step 4. Settling the Holes of Screw - The appropriate cavity (1-2cm bigger for each side) needs to be prepared according to the size of the appliance.
- Page 18 Step 5. Drilling & Installing the Wall Anchors - Drill the holes 7/25 in. (7mm) on the prepared marks. - Insert the wall anchors (Part E) into the holes using a hammer Step 6. Placing the Pads and Fixing the Fireplace - Screws (Part D) pass through the holes from the front of fireplace with screwdriver.
-
Page 19: Finishing
Step 8. Hanging the Glass Frame - Connect the data cable connector before hanging the glass frame on the appliance. - Gently push on the glass panel by aligning the 4 hooks until it snaps into position (sinks down 1-2 cm). -Secure the glass panel with the screw removed in Step 1 (or part B). -
Page 20: Operating Instructions
5.0 OPERATING INSTRUCTIONS Once the appliance has been plugged into a grounded electrical outlet, it is ready to operate. 5.1 MAIN POWER BUTTON The Main Power Button is located on the upper right of the fireplace as illustrated. Press indicator to turn on the appliance, press the other side turns it off. - Page 21 Turn the appliance ON/OFF. POWER NOTE: Make sure the main switch on the top of fireplace is turned on before operating. Control Flame brightness. 5 Settings: (L1-L2-L3-L4-L5) Flame dims from L1 to L5. L5 is the brightest setting. DIMMER NOTE: Long-press the "DIMMER" button for 6 seconds, the appliance will go into sleep mode.
-
Page 22: Remove Control
5.3 REMOTE CONTROL ◆Move the battery's transparent insulating piece away before using. Battery must be recycled or disposed of properly. Check with your Local Authority or Retailer for recycling advice in your area. 6.0 TROUBLE SHOOTING GUIDE PROBLEM SOLUTION 1. The mounting bracket is pre-attached. Unscrew the two screws at both sides of the The mounting bracket fireplace by Phillips screw driver, then remove the pre-attached mounting bracket. - Page 23 1. Main Power supply switch is off. Turn the main power supply switch to position. "ON" Too many appliances on this circuit. Be sure that 2. Circuit breaker has tripped. electrical supply for this unit is an individual circuit. Make sure the power cord is plugged into a 3.
- Page 24 1. The heater system is Check the air inlet and outlet. Turn off the power overheated. Temperature Limit switch and unplug it. Wait 10 minutes, and then turn thermostat is cutoff. the heater on again. "HEAT " switch has Contact us via Amazon Message or call customer 2.
-
Page 25: Maintenance
7.0 MAINTENANCE DISCONNECT POWER AND ALLOW HEATER TO COOL BEFORE ATTEMPTING ANY MAINTENANCE OR CLEANING TOREDUCE THE RISK OF FIRE, ELECTRIC SHOCK OR DAMAGE TO PERSON. THE FIREPLACE SHOULD NOT BE OPERATED WITH AN ACCUMULATION OF DUST OR DIRT ON OR IN THE UNIT, ASTHIS CAN CAUSE A BUILD UP OF HEAT AND SUBSEQUENT EVENTUAL DAMAGE. -
Page 26: Limited Warranty
8.0 LIMITED WARRANTY This warrants to the original purchaser that this product is free from defects in material and workmanship as of the date of purchase and that it will, under normal use and proper care, remain so for one year from the date of purchase. - Page 27 Thank you for purchasing this product! If you have questions about assembly or operation of this product, are missing parts, or if the product is damaged, please contact us via Amazon Message or call customer serve Phone: 213-4467172. IMPORTANT Do not return this product to the store. Simply call our customer service department for any questions or concerns: 213-4467172 (8:30am - 5:30pm P.S.T.)
Need help?
Do you have a question about the RFH-3001LA and is the answer not in the manual?
Questions and answers