
Related Manuals for LD STINGER G3


Summary of Contents for LD STINGER G3
- Page 1 USER´S MANUAL BEDIENUNGSANLEITUNG MANUEL D`UTILISATION MANUAL DE USUARIO INSTRUKCJA OBSŁUGI MANUALE D‘ USO STINGER G3 INSTALLATION KITS ®...
-
Page 2: Table Of Contents
CONTENTS / INHALTSVERZEICHNIS / CONTENU / CONTENIDO / TREŚĆ / CONTENUTO ENGLISH ESPAÑOL PREVENTIVE MEASURES MEDIDAS DE SEGURIDAD 50-51 OVERVIEW 5-16 VISTA GENERAL 52-63 TECHNICAL DATA 17-18 DATOS TÉCNICOS 64-65 MANUFACTURER’S DECLARATIONS DECLARACIONES DEL FABRICANTE DEUTSCH POLSKI SICHERHEITSHINWEISE 19-20 ŚRODKI OSTROŻNOŚCI 66-67 ÜBERSICHT 21-32... -
Page 3: English
YOU‘VE MADE THE RIGHT CHOICE! We have designed this product to operate reliably over many years. LD Systems stands for this with its name and many years of experience as a manufacturer of high-quality audio products. Please read this User‘s Manual carefully, so that you can begin making optimum use of your LD Systems product quickly. - Page 4 CAUTION: To reduce the risk of electric shock, do not remove cover (or back). There are no user serviceable parts inside. Maintenance and repairs should be exclusively carried out by qualified service personnel. The warning triangle with lightning symbol indicates dangerous uninsulated voltage inside the unit, which may cause an electrical shock.
-
Page 5: Overview
OVERVIEW Product number Suitable for Installation Type LDEB82G3WMB LDEB82G3 LDEB82AG3 LDEB102G3WMB LDEB102G3 LDEB102AG3 Wall & ceiling LDEB282G3WMB LDEB282G3 LDEB282AG3 LDEB122G3 LDEB122AG3 Wall, ceiling, LDEBG3WMB traverse LDEB152G3 LDEB152AG3 LDEB82G3WMB1 LDEB82G3 Wall LDEB82AG3WMB1 LDEB82AG3 Wall & GSPWMBS30B LDEB282G3 Wall LDEB282AG3WMB1 LDEB282AG3 Wall &... - Page 6 LDEB282G3WMB (suitable for LDEB282G3, LDEB282AG3) Screw the U-bracket of the desired Stinger G3 speaker in a suitable position to a load-bearing wall or ceiling (A). Use suitable screws and plugs etc. to ensure secure mounting. Remove the M8 screws on the top and bottom of the speaker and lift the speaker into the bracket so that the thread locations in the speaker and the holes in the bracket are aligned.
- Page 7 LDEBG3WMB (suitable for LDEB122G3, LDEB122AG3, LDEB152G3, LDEB152AG3) Screw the adjustable U-bracket (in a suitable position) to a load-bearing wall or ceiling (A). Use suitable screws and plugs etc. to ensure secure mounting. The 35mm mounting stud can be installed on the bracket at four different distances from the wall (or ceiling). Select the appropriate position for the speaker and screw it tightly to the bracket (B, position the supplied rubber ring on the mounting stud).
- Page 8 LDEB82G3WMB1 (suitable for LDEB82G3) 1. Remove the two M6 screws A on the back of the speaker. 2. Slightly loosen bolt E on the wall bracket (do not remove), loosen and remove bolt D from the tilt & swivel arm, remove it and lift the U-bracket B from its mounting.
- Page 9 GSPWMBS30B (suitable for LDEB282G3) 1. Remove the four M6 screws A on the back of the speaker. 2. Slightly loosen bolt E of the wall bracket (do not remove), loosen and remove bolt D from the tilt & swivel arm, remove and lift the U-bracket with mounting plate B from its mounting.
- Page 10 LDEB282AG3WMB1 (suitable for LDEB282AG3) 1. Remove six M4 screws A on the back of the speaker in the positions for fastening the adapter plate. Ensure that the cutouts for the LINE OUT jack and POWER switch are correctly positioned. Attach the adapter plate to the speaker with the supplied M4 screws so that the LINE OUT jack and POWER switch are freely accessible.
- Page 11 LDEB102G3WMB1 (suitable for LDEB102G3, LDEB102AG3) 1. Remove the four M6 screws A on the back of the speaker. 2. Slightly loosen bolt E of the wall bracket (do not remove), loosen and remove bolt D from the tilt & swivel arm, remove and lift the U-bracket with mounting plate B from its mounting.
- Page 12 LDEBG3WMB1 (suitable for LDEB122G3, LDEB122AG3, LDEB152G3, LDEB152AG3) 1. Remove the four M6 screws A on the back of the speaker. 2. Slightly loosen bolt E of the wall bracket (do not remove), loosen and remove bolt D from the tilt & swivel arm, remove and lift the U-bracket with mounting plate B from its mounting.
- Page 13 LDEBG3TMB (suitable for LDEB122G3, LDEB122AG3, LDEB152G3, LDEB152AG3) ASSEMBLY OF THE MOUNTING BRACKET AND TRAVERSE CLAMP 1. Release the safety splint (A) from the two M8 screws (B, C) in the cylindrical pivot/tilt head (D) of the mounting bracket. 2. Unscrew the two screws (B, C) from the pivot/tilt head (D), separate the two cylinder halves and remove the cast piece (E). 3.
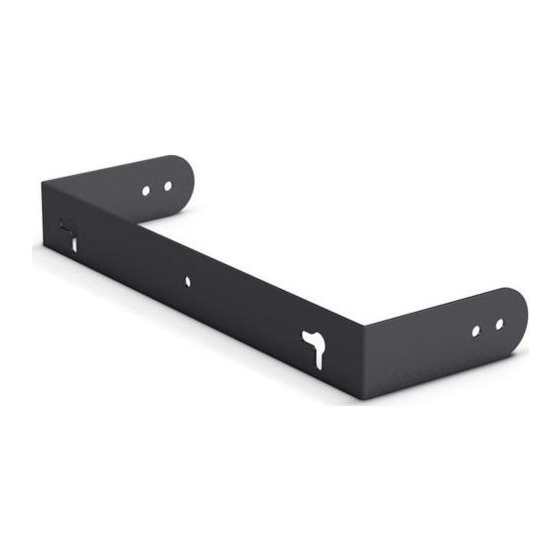
- Page 14 PARTS DESCRIPTION AND INSTALLATION Traverse clamp for mounting on a horizontal traverse. Wing nut for clamping to a traverse. T-screw to lock the horizontal and vertical axes Mounting rail with slots to adjust the vertical dispersion of the speaker. Retaining pin. Rotation mechanism for adjusting the horizontal dispersion of the speaker.
- Page 15 Insert all three steel hooks of the EasyMount bracket into the corresponding retaining sockets on the speaker. Slide the entire bracket towards the back of the speaker. When installing the mounting bracket, ensure that the spring-loaded locking pins engage fully. Ensure that locking pins are functioning correctly before every installation.
- Page 16 LDEBG3SCP (suitable for LDEB82G3, LDEB82AG3, LDEB102G3, LDEB102AG3) Traverse clamp with adjustable T-screw and flange for mounting pin (only for mounting on horizontal traverses). Mounting pin with M10 thread and wing nut. Adapter for attaching the clamp to square-section tubes. Remove the M10 screw on the top of the speaker. Remove the M10 wing nut from the mounting pin (No.
-
Page 17: Technical Data
TECHNICAL DATA Model name: LDEB82G3WMB LDEB102G3WMB Type: PA Loudspeaker Accessories PA Loudspeaker Accessories Part: Wall/Ceiling Mount Bracket Wall/Ceiling Mount Bracket Suitable for: LDEB82G3, LDEB82AG3 LDEB102G3, LDEB102AG3 Material: Steel Steel Surface: Powder Coated Powder Coated Colour: Black Black Max. Load 12 kg 15 kg Dimensions (W x H x D): 60mm x 460mm x 170mm... -
Page 18: Manufacturer's Declarations
Model name: LDEB102G3WMB1 LDEBG3WMB1 Type: PA Loudspeaker Accessories PA Loudspeaker Accessories Part: Wall Mount Bracket Wall Mount Bracket Suitable for: LDEB102G3, LDEB102AG3 LDEB122G3, LDEB122AG3 LDEB152G3, LDEB152AG3 Material: Steel Steel Surface: Powder Coated Powder Coated Colour: Black Black Max. Load 20 kg 30 kg Dimensions (W x H x D): 100mm x 157mm x 160mm... -
Page 19: Deutsch
Dieses Gerät wurde unter hohen Qualitätsanforderungen entwickelt und gefertigt, um viele Jahre einen reibungslosen Betrieb zu gewährleisten. Dafür steht LD Systems mit seinem Namen und der langjährigen Erfahrung als Hersteller hochwertiger Audioprodukte. Bitte lesen Sie diese Bedienungsanleitung sorgfältig, damit Sie Ihr neues Produkt von LD Systems schnell optimal einsetzen können. - Page 20 ACHTUNG Entfernen Sie niemals die Abdeckung, da sonst das Risiko eines elektrischen Schlages besteht. Im Inneren des Geräts befinden sich keine Teile, die vom Bediener repariert oder gewartet werden können. Lassen Sie Wartung und Reparaturen ausschließlich von qualifiziertem Servicepersonal durchführen. Das gleichseitige Dreieck mit Blitzsymbol warnt vor nichtisolierten, gefährlichen Spannungen im Geräteinneren, die einen elektrischen Schlag verursachen können.
-
Page 21: Übersicht
ÜBERSICHT Artikelnummer Geeignet für Montage Bauart LDEB82G3WMB LDEB82G3 LDEB82AG3 LDEB102G3WMB LDEB102G3 LDEB102AG3 Wand & Decke LDEB282G3WMB LDEB282G3 LDEB282AG3 LDEB122G3 LDEB122AG3 Wand, Decke, LDEBG3WMB Traverse LDEB152G3 LDEB152AG3 LDEB82G3WMB1 LDEB82G3 Wand LDEB82AG3WMB1 LDEB82AG3 Wand & GSPWMBS30B LDEB282G3 Wand LDEB282AG3WMB1 LDEB282AG3 Wand & LDEB102G3WMB1 LDEB102G3 LDEB102AG3... - Page 22 LDEB282G3WMB (geeignet für LDEB282G3, LDEB282AG3) Schrauben Sie den des gewünschten Stinger G3 Lautsprechers entsprechenden U-Bügel an einer geeigneten Stelle an eine tragfähige Wand oder Decke (A). Verwenden Sie dazu geeignete Schrauben und Dübel etc. und achten auf festen Halt. Entfernen Sie nun die M8 Schrauben auf Ober- und Unterseite des Lautsprechers und heben den Lautsprecher in den Bügel, so, dass die Positionen der Gewinde im Lautsprecher und die...
- Page 23 LDEBG3WMB (geeignet für LDEB122G3, LDEB122AG3, LDEB152G3, LDEB152AG3) Schrauben Sie den größenverstellbaren U-Bügel an einer geeigneten Stelle an eine tragfähige Wand oder Decke (A). Verwenden Sie dazu geeignete Schrauben und Dübel etc. und achten auf festen Halt. Der 35mm Aufsteckbolzen ist in vier unterschiedlichen Distanzen zur Wand (oder Decke) am Bügel zu befestigen, wählen Sie die für Lautsprecher und Einsatzzweck geeignete Position und schrauben ihn am Bügel fest (B, beiliegenden Gummiring auf den Aufsteckbolzen setzen).
- Page 24 LDEB82G3WMB1 (geeignet für LDEB82G3) 1. Entfernen Sie die zwei M6 Schrauben A auf der Rückseite des Lautsprechers. 2. Lösen Sie die Schraube E der Wandhalterung leicht (nicht entnehmen), lösen Schraube D vom Kipp- & Schwenkarm, entnehmen sie und heben den U-Bügel B aus der Halterung. Schrauben Sie den U-Bügel B mit Hilfe der mitgelieferten Schrauben hinten am Lautsprecher fest. 3.
- Page 25 GSPWMBS30B (geeignet für LDEB282G3) 1. Entfernen Sie die vier M6 Schrauben A auf der Rückseite des Lautsprechers. 2. Lösen Sie die Schraube E der Wandhalterung leicht (nicht entnehmen), lösen Schraube D vom Kipp- & Schwenkarm, entnehmen sie und heben den U-Bügel mit Halteplatte B aus der Halterung. Schrauben Sie den U-Bügel mit Halteplatte B mit Hilfe der mitgelieferten Schrauben auf der Rückseite des Lautsprechers fest.
- Page 26 LDEB282AG3WMB1 (geeignet für LDEB282AG3) 1. Entfernen Sie sechs M4 Schrauben A auf der Rückseite des Lautsprechers an den Positionen, die für die Befestigung der Adapterplatte vorgesehen sind. Achten Sie dabei auf die Aussparungen für die Ausgangsbuchse LINE OUT und den Schalter POWER. Befestigen Sie nun die Adapterplatte mit Hilfe der mitgelieferten M4 Schrauben am Lautsprecher in der Art, dass Ausgangsbuchse LINE OUT und Schalter POWER frei zugänglich sind.
- Page 27 LDEB102G3WMB1 (geeignet für LDEB102G3, LDEB102AG3) 1. Entfernen Sie die vier M6 Schrauben A auf der Rückseite des Lautsprechers. 2. Lösen Sie die Schraube E der Wandhalterung leicht (nicht entnehmen), lösen Schraube D vom Kipp- & Schwenkarm, entnehmen sie und heben den U-Bügel mit Halteplatte B aus der Halterung. Schrauben Sie den U-Bügel mit Halteplatte B mit Hilfe der mitgelieferten Schrauben auf der Rückseite des Lautsprechers fest.
- Page 28 LDEBG3WMB1 (geeignet für LDEB122G3, LDEB122AG3, LDEB152G3, LDEB152AG3) 1. Entfernen Sie die vier M6 Schrauben A auf der Rückseite des Lautsprechers. 2. Lösen Sie die Schraube E der Wandhalterung leicht (nicht entnehmen), lösen Schraube D vom Kipp- & Schwenkarm, entnehmen sie und heben den U-Bügel mit Halteplatte B aus der Halterung.
- Page 29 LDEBG3TMB (geeignet für LDEB122G3, LDEB122AG3, LDEB152G3, LDEB152AG3) ZUSAMMENBAU VON HALTEBÜGEL UND TRAVERSENKLEMME 1. Lösen Sie die Sicherungssplinte (A) von den beiden M8 Schrauben (B, C) im zylindrischen Schwenk- / Neigekopf (D) des Haltebügels. 2. Drehen Sie beide Schrauben (B, C) aus dem Schwenk- / Neigekopf (D), trennen die beiden Zylinderhälften und entnehmen das Gußstück (E). 3.
- Page 30 TEILEBESCHREIBUNG UND MONTAGE Traversenklemme zum Einhängen in einer horizontal installierten Traverse. Flügelmutter zum Festklemmen an einer Traverse. Knebelschraube zum Arretieren der horizontalen und vertikalen Schwenkachsen. Halteschiene mit Rastaussparungen zum Einstellen der vertikalen Abstrahlrichtung des Lautsprechers. Haltebolzen. Drehvorrichtung zum Einstellen der horizontalen Abstrahlrichtung des Lautsprechers. Drei Stahlhaken, die in die Haltebuchsen auf der Oberseite des Lautsprechers greifen.
- Page 31 Führen Sie alle drei Stahlhaken des EasyMount Haltebügels in die entsprechenden Haltebuchsen des Lautsprechers ein. Schieben Sie nun den gesamten Haltebügel in Richtung Lautsprecherrückseite. Achten Sie bei der Montage des Haltebügels darauf, dass die gefederten Sicherungs-Sperrbolzen komplett einrasten. Überprüfen Sie die korrekte Funktion der Sperrbolzen vor jeder Montage.
- Page 32 LDEBG3SCP (geeignet für LDEB82G3, LDEB82AG3, LDEB102G3, LDEB102AG3) Traversenklemme mit verstellbarer Knebelschraube und Flansch für den Befestigungsbolzen (ausschließlich für die Montage an horizontal installierten Traversen). Befestigungsbolzen mit M10 Gewinde und Flügelmutter. Adapter für die Montage der Klemme an Vierkantrohren. Entfernen Sie die M10 Schraube auf der Oberseite des Lautsprechers. Entfernen Sie die M10 Flügelmutter vom Befestigungsbolzen (Nr.
-
Page 33: Technische Daten
TECHNISCHE DATEN Modellbezeichnung: LDEB82G3WMB LDEB102G3WMB Typ: PA-Lautsprecher-Zubehör PA-Lautsprecher-Zubehör Teil: Wand-/Deckenhalterung Wand-/Deckenhalterung Passend für: LDEB82G3, LDEB82AG3 LDEB102G3, LDEB102AG3 Material: Stahl Stahl Oberfläche: pulverbeschichtet pulverbeschichtet Farbe: Schwarz Schwarz Max. Belastbarkeit 12 kg 15 kg Abmessungen (B x H x T): 60 mm x 460 mm x 170 mm 60 mm x 535 mm x 170 mm Gewicht: 1,1 kg... -
Page 34: Herstellererklärungen
Modellbezeichnung: LDEB102G3WMB1 LDEBG3WMB1 Typ: PA-Lautsprecher-Zubehör PA-Lautsprecher-Zubehör Teil: Wandhalterung Wandhalterung Passend für: LDEB102G3, LDEB102AG3 LDEB122G3, LDEB122AG3 LDEB152G3, LDEB152AG3 Material: Stahl Stahl Oberfläche: pulverbeschichtet pulverbeschichtet Farbe: Schwarz Schwarz Max. Belastbarkeit 20 kg 30 kg Abmessungen (B x H x T): 100 mm x 157 mm x 160 mm 120 mm x 220 mm x 160 mm Gewicht: 1,4 kg... -
Page 35: Francais
Cet appareil a été développé et fabriqué en appliquant des exigences de qualité très élevées : il garantit des années de fonctionnement sans problème. Grâce à de nombreuses années d‘expérience, LD Systems est un nom connu dans le domaine des produits audio haut de gamme. - Page 36 33. Débranchez la fiche secteur ou l‘adaptateur de la prise murale en cas d‘orage, ou si vous n‘utilisez pas l‘appareil pendant une longue période. ATTENTION : Ne démontez jamais le couvercle de l‘appareil, vous risquez de recevoir un choc électrique. L‘appareil ne renferme aucune pièce ni composant réparable ou remplaçable par l‘utilisateur.
-
Page 37: Vue D'ensemble
VUE D'ENSEMBLE Référence de Convient pour Montage Conception l'article LDEB82G3WMB LDEB82G3 LDEB82AG3 LDEB102G3WMB LDEB102G3 LDEB102AG3 Mural et au plafond LDEB282G3WMB LDEB282G3 LDEB282AG3 LDEB122G3 LDEB122AG3 Mural, au plafond, LDEBG3WMB sur traverse LDEB152G3 LDEB152AG3 LDEB82G3WMB1 LDEB82G3 Mural LDEB82AG3WMB1 LDEB82AG3 Mural GSPWMBS30B LDEB282G3 Mural LDEB282AG3WMB1 LDEB282AG3... - Page 38 LDEB282G3WMB (convient pour LDEB282G3, LDEB282AG3) Visser l'étrier en U correspondant au haut-parleur Stinger G3 souhaité à un endroit approprié sur un mur ou un plafond suffisamment solide (A). Utiliser pour cela des vis, des chevilles, etc. adaptées et s'assurer qu'il est solidement fixé. Ôter ensuite les vis M8 se trouvant sur les parties supérieure et inférieure du haut-parleur et soulever le haut-parleur pour le placer dans l'étrier de manière à...
- Page 39 LDEBG3WMB (convient pour LDEB122G3, LDEB122AG3, LDEB152G3, LDEB152AG3) Visser l'étrier en U réglable à un endroit approprié sur un mur ou un plafond suffisamment solide (A). Utiliser pour cela des vis, des chevilles, etc. adaptées et s'assurer qu'il est solidement fixé. La tige emboîtable de 35 mm doit être fixée sur l'étrier à quatre distances différentes du mur (ou du plafond), choisir la position adéquate en fonction du haut-parleur et de l'usage recherché...
- Page 40 LDEB82G3WMB1 (convient pour LDEB82G3) 1. Ôter les deux vis M6 A se trouvant au dos du haut-parleur. 2. Desserrer légèrement la vis E du support mural (ne pas la retirer), puis desserrer la vis D du bras inclinable et orientable, la retirer et soulever l'étrier en U B du support.
- Page 41 GSPWMBS30B (convient pour LDEB282G3) 1. Ôter les quatre vis M6 A se trouvant au dos du haut-parleur. 2. Desserrer légèrement la vis E du support mural (ne pas la retirer), puis desserrer la vis D du bras inclinable et orientable, la retirer et soulever l'étrier en U avec plaque de fixation B du support.
- Page 42 LDEB282AG3WMB1 (convient pour LDEB282AG3) 1. Ôter les six vis M4 A se trouvant au dos du haut-parleur aux positions prévues pour la fixation de la plaque d'adaptation. Faire attention aux emplacements destinés à la prise de sortie LINE OUT et au bouton POWER. Fixer ensuite à l'aide des vis M4 fournies la plaque d'ad- aptation au haut-parleur de manière à...
- Page 43 LDEB102G3WMB1 (convient pour LDEB102G3, LDEB102AG3) 1. Ôter les quatre vis M6 A se trouvant au dos du haut-parleur. 2. Desserrer légèrement la vis E du support mural (ne pas la retirer), puis desserrer la vis D du bras inclinable et orientable, la retirer et soulever l'étrier en U avec plaque de fixation B du support.
- Page 44 LDEBG3TMB (convient pour LDEB122G3, LDEB122AG3, LDEB152G3, LDEB152AG3) ASSEMBLAGE DE L’ÉTRIER DE FIXATION ET DU DISPOSITIF DE SERRAGE SUR TRAVERSE 1. Retirer les goupilles de sécurité (A) des deux vis M8 (B, C) situées sur la tête pivotante et inclinable (D) de l’étrier de fixation. 2.
- Page 45 DESCRIPTION DES PIÈCES ET MONTAGE Pince de serrage sur traverse pour l'accrochage à une traverse installée horizontalement. Écrou papillon pour le serrage sur une traverse. Molette à vis pour le blocage des axes pivotants horizontaux et verticaux. Rail de support avec emplacements d'encliquetage pour le réglage de la direction verticale de rayonnement du haut-parleur. Boulon de fixation.
- Page 46 Introduire les trois crochets en acier de l'étrier de fixation EasyMount dans les douilles de fixation du haut-parleur. Faire glisser ensuite l'ensemble de l'étrier de fixation vers l'arrière du haut-parleur. Lors du montage de l'étrier de fixation, veiller à ce que les goupilles de blocage de sécurité à ressort soient complètement encliquetées. Vérifier le fonctionnement correct des goupilles de blocage avant tout montage.
- Page 47 LDEBG3SCP (convient pour LDEB82G3, LDEB82AG3, LDEB102G3, LDEB102AG3) Pince de serrage sur traverse avec molette à vis réglable et bride pour le boulon de fixation (exclusivement pour le montage sur des traverses installées horizontalement). Boulon de fixation avec filetage M10 et écrou papillon. Adaptateur pour le montage de la pince sur des tubes carrés.
-
Page 48: Caractéristiques Techniques
CARACTÉRISTIQUES TECHNIQUES Nom du modèle : LDEB82G3WMB LDEB102G3WMB Type : Accessoires pour haut-parleurs de sonorisation Accessoires pour haut-parleurs de sonorisation Pièce : Support de montage mural/au plafond Support de montage mural/au plafond Convient pour : LDEB82G3, LDEB82AG3 LDEB102G3, LDEB102AG3 Matériau : Acier Acier Surface : Revêtement poudre Revêtement poudre Couleur : Noir... -
Page 49: Déclarations Du Fabricant
Nom du modèle : LDEB102G3WMB1 LDEBG3WMB1 Type : Accessoires pour haut-parleurs de sonorisation Accessoires pour haut-parleurs de sonorisation Pièce : Support de montage mural Support de montage mural Convient pour : LDEB102G3, LDEB102AG3 LDEB122G3, LDEB122AG3 LDEB152G3, LDEB152AG3 Matériau : Acier Acier Surface : Revêtement poudre Revêtement poudre Couleur : Noir Noir... -
Page 50: Español
Este equipo está diseñado y fabricado con los estándares de calidad más exigentes, para garantizar un correcto funcionamiento durante muchos años. Los productos de LD-Systems se caracterizan por su gran calidad, avalada por el prestigio de la marca y una dilatada expe- riencia como fabricante. - Page 51 33. Si es probable que caiga un rayo por una tormenta eléctrica o si no va a emplear el equipo durante mucho tiempo, desenchufe el cable eléctrico y el adaptador de corriente. ATENCIÓN: Para evitar el riesgo de descarga eléctrica, no retire la tapa. El equipo no contiene elementos que el usuario pueda reparar o sustituir.
-
Page 52: Vista General
VISTA GENERAL Número de Apto para Montaje Tipo de construcción artículo LDEB82G3WMB LDEB82G3 LDEB82AG3 LDEB102G3WMB LDEB102G3 LDEB102AG3 Pared y techo LDEB282G3WMB LDEB282G3 LDEB282AG3 LDEB122G3 LDEB122AG3 Pared, techo, LDEBG3WMB travesaño LDEB152G3 LDEB152AG3 LDEB82G3WMB1 LDEB82G3 Pared LDEB82AG3WMB1 LDEB82AG3 Pared GSPWMBS30B LDEB282G3 Pared LDEB282AG3WMB1 LDEB282AG3 Pared... - Page 53 LDEB282G3WMB (adecuado para LDEB282G3, LDEB282AG3) Atornille la abrazadera en U del altavoz Stinger G3 deseado a un lugar adecuado en una pared que soporte el peso o en el techo (A). Para ello, utilice los tornillos, tacos y demás elementos adecuados, y asegúrese de fijarlos bien. A continuación, saque los tornillos M8 de las partes superior e infe- rior del altavoz y coloque el altavoz en la abrazadera de forma que las posiciones de las roscas en el altavoz coincidan con los agujeros para tornillo de la abrazadera.
- Page 54 LDEBG3WMB (adecuado para LDEB122G3, LDEB122AG3, LDEB152G3, LDEB152AG3) Atornille la abrazadera en U, cuyo tamaño es ajustable, a un lugar adecuado de una pared que pueda soportar el peso o del techo (A). Para ello, utilice los tornillos, tacos y demás elementos adecuados, y asegúrese de fijarlos bien. El perno de sujeción de 35 mm se puede fijar en cuatro puntos de la abrazadera a diferente distancia de la pared (o del techo).
- Page 55 LDEB82G3WMB1 (adecuado para LDEB82G3) 1. Retire los dos tornillos M6 (A) de la parte posterior del altavoz. 2. Afloje levemente el tornillo (E) del soporte de pared (no lo retire), afloje el tornillo (D) del brazo basculante y giratorio, retírelo y eleve la abrazadera en U (B) sacándola del soporte.
- Page 56 GSPWMBS30B (adecuado para LDEB282G3) 1. Retire los cuatro tornillos M6 (A) de la parte posterior del altavoz. 2. Afloje levemente el tornillo (E) del soporte de pared (no lo retire), afloje el tornillo (D) del brazo basculante y giratorio, retírelo y eleve la abrazadera en U con la placa adaptadora (B) sacándola del soporte.
- Page 57 LDEB282AG3WMB1 (adecuado para LDEB282AG3) 1. Retire seis tornillos M4 (A) de la parte posterior del altavoz sacándolos de las posiciones previstas para fijar la placa adaptadora. Al hacer- lo, tenga en cuenta las ranuras para la toma de salida LINE OUT y el interruptor POWER. Ahora, fije la placa adaptadora al altavoz con los tornillos M4 suministrados de forma que se pueda acceder libremente a la toma de salida LINE OUT y al interruptor POWER.
- Page 58 LDEB102G3WMB1 (adecuado para LDEB102G3, LDEB102AG3) 1. Retire los cuatro tornillos M6 (A) de la parte posterior del altavoz. 2. Afloje levemente el tornillo (E) del soporte de pared (no lo retire), afloje el tornillo (D) del brazo basculante y giratorio, retírelo y eleve la abrazadera en U con la placa adaptadora (B) sacándola del soporte.
- Page 59 LDEBG3WMB1 (adecuado para LDEB122G3, LDEB122AG3, LDEB152G3, LDEB152AG3) 1. Retire los cuatro tornillos M6 (A) de la parte posterior del altavoz. 2. Afloje levemente el tornillo (E) del soporte de pared (no lo retire), afloje el tornillo (D) del brazo basculante y giratorio, retírelo y eleve la abrazadera en U con la placa adaptadora (B) sacándola del soporte.
- Page 60 LDEBG3TMB (adecuado para LDEB122G3, LDEB122AG3, LDEB152G3, LDEB152AG3) ENSAMBLAJE DE LA PERCHA DE SOPORTE Y LA PINZA PARA TRAVESAÑO 1. Afloje las chavetas de seguridad (A) de los dos tornillos M8 (B, C) de la cabeza giratoria/inclinable cilíndrica (D) de la percha de soporte. 2.
- Page 61 DESCRIPCIÓN DE PIEZAS Y MONTAJE Pinza de travesaño para colgar en un travesaño instalado horizontalmente. Tuerca de mariposa para fijar en un travesaño. Tornillo de muletilla para fijar los ejes de giro horizontal y vertical. Riel de sujeción con ranuras de encaje para ajustar la dirección vertical de dispersión del altavoz. Perno de fijación.
- Page 62 Introduzca los tres ganchos de acero de la percha EasyMount en las ranuras de fijación correspondientes del altavoz. Deslice toda la percha hacia la parte posterior del altavoz. Durante el montaje de la percha, asegúrese de que los pernos de bloqueo de seguridad con resorte encajen completamente en su sitio. Compruebe que los pernos de bloqueo funcionen correctamente antes de cada montaje.
- Page 63 LDEBG3SCP (adecuado para LDEB82G3, LDEB82AG3, LDEB102G3, LDEB102AG3) Pinza de travesaño con tornillo de muletilla ajustable y brida para el perno de fijación (solo para el montaje en travesaños instalados horizontalmente). Perno de fijación con rosca M10 y rosca de mariposa. Adaptador para el montaje de la pinza en tubos cuadrados.
-
Page 64: Datos Técnicos
DATOS TÉCNICOS Nombre del modelo: LDEB82G3WMB LDEB102G3WMB Tipo: Accesorios para altavoces de PA Accesorios para altavoces de PA Pieza: Soporte para montaje en pared/techo Soporte para montaje en pared/techo Adecuado para: LDEB82G3, LDEB82AG3 LDEB102G3, LDEB102AG3 Material: Acero Acero Superficie: Recubrimiento de pintura en polvo Recubrimiento de pintura en polvo Color: Negro... -
Page 65: Declaraciones Del Fabricante
Nombre del modelo: LDEB102G3WMB1 LDEBG3WMB1 Tipo: Accesorios para altavoces de PA Accesorios para altavoces de PA Pieza: Soporte para montaje en pared Soporte para montaje en pared Adecuado para: LDEB102G3, LDEB102AG3 LDEB122G3, LDEB122AG3 LDEB152G3, LDEB152AG3 Material: Acero Acero Superficie: Recubrimiento de pintura en polvo Recubrimiento de pintura en polvo Color: Negro... -
Page 66: Polski
To urządzenie zostało zaprojektowane i wyprodukowane przy zastosowaniu najwyższych kryteriów jakościowych w celu zapewnienia wie- loletniej bezawaryjnej eksploatacji. Firma LD Systems gwarantuje to swoją marką i wieloletnim doświadczeniem w wytwarzaniu wysokiej jakości produktów audio. Proszę starannie przeczytać niniejszą instrukcję obsługi, aby móc jak najszybciej zacząć użytkować ten produkt marki LD Systems. - Page 67 32. Jeśli urządzenie jest wyposażone w przyłącze sieciowe Volex, konieczne jest odblokowanie odpowiedniej wtyczki urządzenia Volex, zanim będzie możliwe jej odłączenie. Oznacza to także, iż w wyniku pociągnięcia za kabel urządzenie może się przesunąć i spaść, co może spowodować obrażenia ciała i/lub inne szkody, dlatego ważne jest, aby przewody były odpowiednio poprowadzone. 33.
-
Page 68: Przegląd
PRZEGLĄD Numer artykułu Odpowiednie do Montaż Rodzaj konstrukcji LDEB82G3WMB LDEB82G3 LDEB82AG3 LDEB102G3WMB LDEB102G3 LDEB102AG3 Ścienny i sufitowy LDEB282G3WMB LDEB282G3 LDEB282AG3 LDEB122G3 LDEB122AG3 Ścienny, sufitowy i LDEBG3WMB na trawersie LDEB152G3 LDEB152AG3 LDEB82G3WMB1 LDEB82G3 Ścienny LDEB82AG3WMB1 LDEB82AG3 Ścienny & GSPWMBS30B LDEB282G3 Ścienny LDEB282AG3WMB1 LDEB282AG3 Ścienny... - Page 69 LDEB282G3WMB (odpowiedni do LDEB282G3, LDEB282AG3) Przykręć uchwyt U do wybranego głośnika Stinger G3, odpowiednio do ściany lub sufitu (A). Użyj do tego odpowiednich śrub, kołków itp. Upewnij się, że szyna została solidnie zamocowana. Wyjmij śruby M8 z góry i z dołu głośnika oraz unieś głośnik do wspornika tak, aby gwintowane śruby i otwory znalazły się...
- Page 70 LDEBG3WMB (odpowiedni do LDEB122G3, LDEB122AG3, LDEB152G3, LDEB152AG3) Przykręć uchwyt U o zmiennym rozmiarze do żądanego miejsca, odpowiednio do ściany lub sufitu (A). Użyj do tego odpowiednich śrub, kołków itp. Upewnij się, że szyna została solidnie zamocowana. Śruba mocująca 35 mm musi być przymocowana do wspornika w jednej z czterech odległości od ściany (lub sufitu), wybierz pozycję...
- Page 71 LDEB82G3WMB1 (odpowiedni do LDEB82G3) 1. Wyjmij dwie śruby M6 z tyłu głośnika. 2. Poluzuj lekko śrubę E wspornika ściennego (nie wyjmuj jej), poluzuj śrubę D z ramienia pochylnego i obrotowego, zdejmij uchwyt U ze wspornika. Użyj dołączonych śrub, aby zamocować wspornik U z tyłu głośnika. 3.
- Page 72 GSPWMBS30B (odpowiedni do LDEB282G3) 1. Wyjmij cztery śruby M6 z tyłu głośnika. 2. Poluzuj lekko śrubę E wspornika ściennego (nie wyjmuj), odkręć śrubę D z ramienia uchylno-obrotowego, zdejmij i podnieś wspornik U z płytą montażową B z uchwytu. Do zamocowania wspornika U z płytą montażową z tyłu wspornika należy użyć dołączonych śrub. 3.
- Page 73 LDEB282AG3WMB1 (odpowiedni do LDEB282AG3) 1. Wyjmij sześć śrub M4 A z tyłu głośnika z miejsc, które służą do mocowania płyty adaptera. Upewnij się, że otwory gniazd wyjściowych LINE OUT i przełącznika POWER są zamaskowane. Użyj dostarczonych śrub M4 do mocowania płyty adaptera do głośnika w taki sposób, aby gniazdo LINE OUT i przełącznik POWER były dostępne.
- Page 74 LDEB102G3WMB1 (odpowiedni do LDEB102G3, LDEB102AG3) 1. Wyjmij cztery śruby M6 z tyłu głośnika. 2. Poluzuj lekko śrubę E wspornika ściennego (nie wyjmuj), odkręć śrubę D z ramienia uchylno-obrotowego, zdejmij i podnieś wspornik U z płytą montażową B z uchwytu. Do zamocowania wspornika U z płytą montażową z tyłu wspornika należy użyć dołączonych śrub. 3.
- Page 75 LDEBG3WMB1 (odpowiedni do LDEB122G3, LDEB122AG3, LDEB152G3, LDEB152AG3) 1. Wyjmij cztery śruby M6 z tyłu głośnika. 2. Poluzuj lekko śrubę E wspornika ściennego (nie wyjmuj), odkręć śrubę D z ramienia uchylno-obrotowego, zdejmij i podnieś wspornik U z płytą montażową B z uchwytu. Do zamocowania wspornika U z płytą montażową z tyłu wspornika należy użyć dołączonych śrub. 3.
- Page 76 LDEBG3TMB (odpowiedni do LDEB122G3, LDEB122AG3, LDEB152G3, LDEB152AG3) ZESPÓŁ PAŁĄKA MONTAŻOWEGO I ZACISKU KRATOWNICY 1. Należy odkręcić sworznie blokujące (A) z dwóch śrub M8 (B, C) w cylindrycznej głowicy uchylno-obrotowej (D) uchwytu mocującego. 2. Odkręcić obie śruby (B, C) z głowicy obrotowej/ uchylnej (D), rozdzielić obie połówki cylindra i zdjąć odlew (E). 3.
- Page 77 OPIS CZĘŚCI I MONTAŻ Zaciski trawersu do zawieszania zamontowanego trawersu w pozycji poziomej Nakrętka motylkowa do mocowania na trawersie Śruba dociskowa z przetyczką do blokowania pionowej lub poziomej osi obrotu Szyna mocująca z wgłębieniem do ustawiania kierunku emisji głośnika w pionie Kołki ustalające Kierunek obrotów do ustawiania kierunku emisji głośnika w pionie Trzy haki stalowe, które pasują...
- Page 78 Wsuń wszystkie trzy haki stalowe wspornika EasyMount w odpowiednie tuleje uchwytów głośnika. Przesuń cały wspornik ku tyłowi głośnika. Podczas montażu wspornika należy upewnić się, że sprężynowe śruby blokujące działają prawidłowo. Przed każdym montażem sprawdź prawidłowość działania śrub blokujących. W celu odblokowania połączenia obie śruby blokujące muszą ze względów bezpieczeństwa być jednocześnie wyciągnięte do góry (odblokowane z obu stron).
- Page 79 LDEBG3SCP (odpowiedni do LDEB82G3, LDEB82AG3, LDEB102G3, LDEB102AG3) Zacisk trawersu z regulowaną śrubą zaciskową z przetyczką i kołnierzem do śrub mocujących (tylko do montażu w poziomie na trawersach) Śruby mocujące z gwintem M10 i nakrętką motylkową Adapter do montażu zacisków na szynach o przekroju kwadratowym Wyjmij śrubę...
-
Page 80: Dane Techniczne
DANE TECHNICZNE Nazwa modelu: LDEB82G3WMB LDEB102G3WMB Typ: Akcesoria do głośnika PA Akcesoria do głośnika PA Część: Ścienny/sufitowy wspornik montażowy Ścienny/sufitowy wspornik montażowy Odpowiedni do: LDEB82G3, LDEB82AG3 LDEB102G3, LDEB102AG3 Materiał: Stal Stal Powierzchnia: Malowana proszkowo Malowana proszkowo Kolor: Czarny Czarny Maks. Obciążenie 12 kg 15 kg Wymiary (szer. -
Page 81: Oświadczenia Producenta
Nazwa modelu: LDEB102G3WMB1 LDEBG3WMB1 Typ: Akcesoria do głośnika PA Akcesoria do głośnika PA Część: Ścienny wspornik montażowy Ścienny wspornik montażowy Odpowiedni do: LDEB102G3, LDEB102AG3 LDEB122G3, LDEB122AG3 LDEB152G3, LDEB152AG3 Materiał: Stal Stal Powierzchnia: Malowana proszkowo Malowana proszkowo Kolor: Czarny Czarny Maks. Obciążenie 20 kg 30 kg Wymiary (szer. -
Page 82: Italiano
Quest‘apparecchio è stato sviluppato e prodotto secondo elevati standard qualitativi che garantiscono un funzionamento regolare per molti anni. Per questo motivo LD Systems, con il suo nome e la pluriennale esperienza, rappresenta un‘azienda produttrice di prodotti audio di qualità. Leggete attentamente questo manuale d‘uso per utilizzare al meglio il vostro nuovo prodotto LD Systems. - Page 83 ATTENZIONE: non togliere mai il coperchio di protezione perché sussiste il pericolo di scosse elettriche. L‘interno del dispositivo non contiene parti che possono essere riparate o sottoposte a manutenzione da parte dell‘utente. Per gli interventi di manutenzione e di riparazione rivolgersi esclusivamente a personale qualificato.
-
Page 84: Panoramica
PANORAMICA Numero articolo Adatto per Montaggio Tipo LDEB82G3WMB LDEB82G3 LDEB82AG3 LDEB102G3WMB LDEB102G3 LDEB102AG3 Parete e soffitto LDEB282G3WMB LDEB282G3 LDEB282AG3 LDEB122G3 LDEB122AG3 Parete, soffitto, LDEBG3WMB traversa LDEB152G3 LDEB152AG3 LDEB82G3WMB1 LDEB82G3 Parete LDEB82AG3WMB1 LDEB82AG3 Parete & GSPWMBS30B LDEB282G3 Parete LDEB282AG3WMB1 LDEB282AG3 Parete &... - Page 85 LDEB282G3WMB (adatto per LDEB282G3, LDEB282AG3) Avvitare la staffa ad U corrispondente all'altoparlante Stinger G3 desiderato in una posizione adatta su una parete o un soffitto portante (A). A tal fine utilizzare viti e tasselli adatti e prestare attenzione al loro fissaggio. Rimuovere le viti M8 inserite nella parte superiore e inferiore dell'altoparlante e sollevare quest'ultimo inserendolo nella staffa in modo che le posizioni delle filettature nell'altoparlante e i fori per le viti nella staffa corrispondano.
- Page 86 LDEBG3WMB (adatto per LDEB122G3, LDEB122AG3, LDEB152G3, LDEB152AG3) Avvitare la staffa a U regolabile in una posizione adatta su una parete o soffitto portante (A). A tal fine utilizzare viti e tasselli adatti e accertarsi che siano fissati saldamente. Il perno ad innesto da 35 mm deve essere fissato alla staffa a quattro diverse distanze dalla parete (o dal soffitto), selezionare la posizione adatta per l'altoparlante e l'applicazione e avvitarlo alla staffa (B, inserire l'anello di gomma in dotazione sul perno ad innesto).
- Page 87 LDEB82G3WMB1 (adatto per LDEB82G3) 1. Rimuovere le due viti M6 A sul retro dell'altoparlante. 2. Allentare leggermente la vite E del supporto da parete (non rimuovere), allentare la vite D dal braccio inclinabile e girevole, rimuoverla e sollevare la staffa ad U B dal supporto. Avvitare la staffa ad U B nella parte posteriore dell'altoparlante utilizzando le viti in dotazione. 3.
- Page 88 GSPWMBS30B (adatto per LDEB282G3) 1. Rimuovere le quattro viti M6 A sul retro dell'altoparlante. 2. Allentare leggermente la vite E del supporto da parete (non rimuovere), allentare la vite D dal braccio inclinabile e girevole, rimuoverla e sollevare la staffa ad U con piastra di supporto B dal supporto. Avvitare la staffa a U con la piastra di fissaggio B in posizione sul retro dell'altoparlante utilizzando le viti in dotazione.
- Page 89 LDEB282AG3WMB1 (adatto per LDEB282AG3) 1. Rimuovere sei viti M4 A sul retro dell'altoparlante nelle posizioni previste per il montaggio della piastra adattatore. Prestare attenzione alle rientranze per la presa di uscita LINE OUT e l' interruttore POWER. A questo punto fissare la piastra adattatore all'altoparlante utilizzando le viti M4 in dotazione, in modo che la presa di uscita LINE OUT e l'interruttore POWER siano liberamente accessibili.
- Page 90 LDEB102G3WMB1 (adatto per LDEB102G3, LDEB102AG3) 1. Rimuovere le quattro viti M6 A sul retro dell'altoparlante. 2. Allentare leggermente la vite E del supporto da parete (non rimuovere), allentare la vite D dal braccio inclinabile e girevole, rimuoverla e sollevare la staffa ad U con piastra di supporto B dal supporto. Avvitare la staffa a U con la piastra di fissaggio B in posizione sul retro dell'altoparlante utilizzando le viti in dotazione.
- Page 91 LDEBG3WMB1 (adatto per LDEB122G3, LDEB122AG3, LDEB152G3, LDEB152AG3) 1. Rimuovere le quattro viti M6 A sul retro dell'altoparlante. 2. Allentare leggermente la vite E del supporto da parete (non rimuovere), allentare la vite D dal braccio inclinabile e girevole, rimuoverla e sollevare la staffa ad U con piastra di supporto B dal supporto.
- Page 92 LDEBG3TMB (adatto per LDEB122G3, LDEB122AG3, LDEB152G3, LDEB152AG3) ASSEMBLAGGIO STAFFA DI BLOCCAGGIO E MORSETTO PER TRALICCI 1. Allentare le coppiglie di sicurezza (A) dalle due viti M8 (B, C) nella testa cilindrica pan/tilt (D) della staffa di fissaggio. 2. Svitare entrambe le viti (B, C) dalla testa pan/tilt (D), separare le due metà cilindro e rimuovere il getto (E). 3.
- Page 93 DESCRIZIONE E MONTAGGIO DEI PEZZI Morsetto per tralicci per il montaggio su una traversa installata in posizione orizzontale. Dado ad alette per il fissaggio su una traversa. Avvitare il galletto per bloccare gli assi autodirezionali orizzontali e verticali. Guida di supporto con tacche per la regolazione della direzione di dispersione verticale dell'altoparlante. Perno di fissaggio.
- Page 94 Inserire tutti e tre i ganci in acciaio della staffa EasyMount nelle corrispondenti boccole di fissaggio degli altoparlanti. A questo punto far scorrere l'intera staffa di fissaggio verso la parte posteriore dell'altoparlante. Durante il montaggio della staffa di fissaggio, accertarsi che i perni di bloccaggio a molla siano completamente innestati. Prima di ogni installazione controllare il corretto funzionamento dei perni di bloccaggio.
- Page 95 LDEBG3SCP (adatto per LDEB82G3, LDEB82AG3, LDEB102G3, LDEB102AG3) Morsetto per tralicci con galletto regolabile e flangia per il bullone di fissaggio (esclusivamente per montaggio su traverse installate in posizione orizzontale). Bullone di fissaggio con filettatura M10 e dado ad alette. Adattatore per il montaggio del morsetto su tubi quadrati. Rimuovere la vite M10 sulla parte superiore dell'altoparlante.
-
Page 96: Dati Tecnici
DATI TECNICI Denominazione modello: LDEB82G3WMB LDEB102G3WMB Tipo: Accessori per altoparlanti PA Accessori per altoparlanti PA Parte: Staffa per montaggio a parete/soffitto Staffa per montaggio a parete/soffitto Adatta per: LDEB82G3, LDEB82AG3 LDEB102G3, LDEB102AG3 Materiale: Acciaio Acciaio Superficie: Verniciatura a polvere Verniciatura a polvere Colore: Nero Nero... -
Page 97: Dichiarazioni Del Produttore
Denominazione modello: LDEB102G3WMB1 LDEBG3WMB1 Tipo: Accessori per altoparlanti PA Accessori per altoparlanti PA Parte: Staffa a parete Staffa a parete Adatta per: LDEB102G3, LDEB102AG3 LDEB122G3, LDEB122AG3 LDEB152G3, LDEB152AG3 Materiale: Acciaio Acciaio Superficie: Verniciatura a polvere Verniciatura a polvere Colore: Nero Nero Carico max 20 kg... - Page 100 WWW.LD-SYSTEMS.COM Adam Hall GmbH | Daimlerstrasse 9 | 61267 Neu-Anspach | Germany Tel. +49(0)6081/9419-0 | Fax +49(0)6081/9419-1000 web : www.adamhall.com | e-mail : mail@adamhall.com REV: 02...
Need help?
Do you have a question about the STINGER G3 and is the answer not in the manual?
Questions and answers