Sign In
Upload
Download
Table of Contents
Contents
Add to my manuals
Delete from my manuals
Share
URL of this page:
HTML Link:
Bookmark this page
Add
Manual will be automatically added to "My Manuals"
Print this page
×
Bookmark added
×
Added to my manuals
Manuals
Brands
Westerbeke Manuals
Portable Generator
7.5 MCGA
Operator's manual
Westerbeke 7.5 MCGA Operator's Manual
Marine gasoline generators
Hide thumbs
1
2
3
Table Of Contents
4
5
6
7
8
9
10
11
12
13
14
15
16
17
18
19
20
21
22
23
24
25
26
27
28
29
30
31
32
33
34
35
36
37
38
39
40
41
42
43
44
45
46
47
48
49
50
page
of
50
Go
/
50
Contents
Table of Contents
Troubleshooting
Bookmarks
Table of Contents
Operators Manual
Table of Contents
Important Safety Information
2 Introduction
Documentation
Quick Start Operators Guide
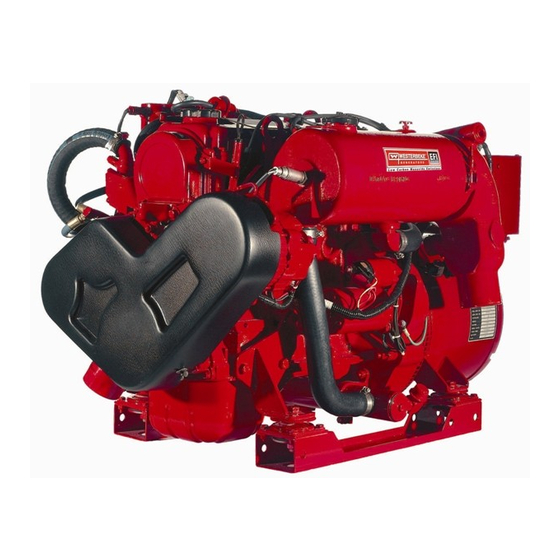
Figure 1: Parts Diagram
Parts Diagram
Figure 2: Customer Identification Card
Figure 3: Product Serial Number, Model Number, and Other Specifications
Warranty Procedures
Checklist: Protecting Your Investment
Conventions Used in this Manual
Gasoline Engines
Manuals and Software
Amperage Drain
Figure 4: Spare Parts Kit
Ordering Parts
Spare Parts, Kits, and Accessories
Figure 5: Suggested Spare Parts
Figure 6: Siphon-Break (Anti-Siphon Valve) with Stainless Steel Loop
Exhaust System Requirements
How to Install a Remote Oil Filter
3 Installation
Codes and Regulations
Carbon Monoxide Detector
Siphon-Break Requirements
Figure 7: Remote Oil Filter (Detailed View)
Figure 8: Remote Oil Filter (after Installation)
4 Startup and Basic Operation
Engine Coolant
Engine Oil
Fuel Source
Fuel Supply Components
Coolant Recovery Tank
Figure 9: Engine Coolant Recovery Tank
How to Bleed the Fuel System
Figure 10: Fuel System
Figure 14: Coolant Temperature Sensor
Figure 13: Exhaust Temperature Switch
Figure 15: Control Panel DC Circuit Breaker
Break-In Procedure for Daily Operation
Checklist: Initial Startup
Checklist: Daily Startup
How to Start and Stop the Generator
Figure 11: Control Panel DC Circuit Breaker and Start/Stop Switch
Figure 12: Remote Start/Stop Panels
Safety Shutdown Switches and Leds
Figure 16: Engine Oil and Coolant System Components
5 Maintenance
Maintenance Schedule
Figure 17: Fuel System Components
Maintenance: Fuel System
Figure 18: Harness Lift Pump DC Auxiliary Power Adapter (Part Number 056264)
Figure 19: Cooling System Heat Exchanger (Left) and Thermostat (Right)
Maintenance: Engine
Maintenance: Cooling System
Figure 20: Engine Oil Drain Hose (Left) and Oil Filter Assembly (Right)
Figure 21: Engine Oil Sump
Figure 24: Engine Oil Filter, Oil Pressure Sender, and Oil Pressure Switch
Figure 23: Air Screen/Flame Arrestor
Figure 25: Battery Charger and 30A Fuse
Figure 26: Catalyst Installation
Maintenance: Connections, Motors, and Circuit Breakers
Figure 27: BC Generator AC Terminal Connections
Figure 28: Generator Windings Schematic Diagram
Figure 29: Shore Power Transfer Switch
Figure 30: Shore Power Transfer Switch Configurations
Figure 31: Typical Diagnostic Software Kit (Control Box, Cable, and Other Components)
Engine Troubleshooting
6 Diagnostics and Troubleshooting
Diagnostics Software for Microsoft Windows
Figure 32: Wiring Diagram for Start/Stop Panel with Fault Display
Figure 33: Wiring Diagram for Start/Stop Panel Rocker Switch Only
7 Wiring Diagrams
Remote Start/Stop Panels
8 Lay-Up and Recommissioning
Lay-Up Prep: Lubrication System
Lay-Up Prep: Intake Manifold
Lay-Up Prep: Cylinder Lubrication
Lay-Up Prep: Fuel System
Lay-Up Prep: Starter Motor
Lay-Up Prep: Raw Water Cooling Circuit
Lay-Up Prep: Batteries
Lay-Up Prep: Spare Parts
How to Recommission after a Lay-Up
9 Generator Specifications
Specifications: Engine
Specifications: Fuel System
Specifications: Electrical System
Specifications: Air Requirements
Specifications: Cooling System
Specifications: Lubrication System
Specifications: AC Generator (Single Phase)
Specifications: Ignition System
Specifications: Engine Component Tightening Torque
Figure 22: Spark Plug
Advertisement
Quick Links
1
Parts Diagram
2
Engine Oil
Download this manual
M U LT I - P O RT S I N G L E – P H A S E
MARINE GASOLINE GENERATORS
OPERATORS MANUAL
7.5 MCGA or 5.0 MCGA 60 Hz
6.2 MCGA or 4.2 MCGA 50 Hz
PART NUMBER 056556
REVISION
AUGUST 2018
Table of
Contents
Previous
Page
Next
Page
1
2
3
4
5
Advertisement
Table of Contents
Troubleshooting
Diagnostics and Troubleshooting
42
Engine Troubleshooting
43
Need help?
Do you have a question about the 7.5 MCGA and is the answer not in the manual?
Ask a question
Questions and answers
Related Manuals for Westerbeke 7.5 MCGA
Portable Generator Westerbeke 5.0KW BCG-60Hz Operator's Manual
Gasoline, single phase generators (53 pages)
Portable Generator Westerbeke 5.0KW BCG-60Hz Service Manual
Gasoline generators single phase (90 pages)
Portable Generator Westerbeke 4.5 KW BCGTC 60Hz Service Manual
Bcgt gasoline generators (92 pages)
Portable Generator Westerbeke 7.6KW BTD 60Hz Operator's Manual
Marine diesel single phase generators (64 pages)
Portable Generator Westerbeke 4.5KW BCGB-60HZ Operator's Manual
Gasoline, single phase generators (69 pages)
Portable Generator Westerbeke 7.0 KW BGC -60Hz Technical Manual
Marine gasoline generator sets (158 pages)
Portable Generator Westerbeke 7.6kw-60Hz EDT Service Manual
D-net diesel, single phase generators (79 pages)
Portable Generator Westerbeke 8.0KW BCDT60Hz Owner's Manual
Marine diesel generators, single phase (55 pages)
Portable Generator Westerbeke 7.6KW ETD 60HZ Operator's Manual
(54 pages)
Portable Generator Westerbeke 7.6KW ETD 60HZ Operator's Manual
Marine diesel generators (54 pages)
Portable Generator Westerbeke 7.6 KW BTD 60Hz Operator's Manual
Marine diesel generator set (86 pages)
Portable Generator Westerbeke 4.5 BCGB - 60HZ Operator's Manual
(64 pages)
Portable Generator Westerbeke 7.0 BCG Operator's Manual
Gasoline generatos (55 pages)
Portable Generator Westerbeke 8.0 BTD Operator's Manual
Marine diesel generators (70 pages)
Portable Generator Westerbeke 9.5 MCGA 60 Hz Operator's Manual
Marine gasoline generators (52 pages)
Portable Generator Westerbeke 7.6 EGTD Operator's Manual
Marine diesel generators (62 pages)
This manual is also suitable for:
5.0 mcga
6.2 mcga
4.2 mcga
Table of Contents
Save PDF
Print
Rename the bookmark
Delete bookmark?
Delete from my manuals?
Login
Sign In
OR
Sign in with Facebook
Sign in with Google
Upload manual
Upload from disk
Upload from URL


Need help?
Do you have a question about the 7.5 MCGA and is the answer not in the manual?
Questions and answers