Table of Contents
Advertisement
Quick Links
Advertisement
Table of Contents

Related Manuals for IQue Trinidad2200

Summary of Contents for IQue Trinidad2200
- Page 1 Thank You for Choosing an IQUE Spa Developed and Designed in Sweden by IQue Sweden AB Grustagsgatan 13 254 64 Helsingborg Sweden Here is your manual, please read and follow the instructions carefully Diamond Version www.iquehottubs.com Ver.14.0 December 2013...
-
Page 2: Table Of Contents
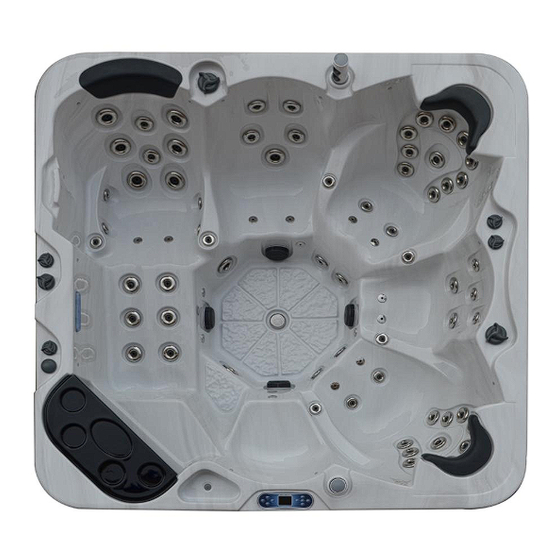
10. SPA MAINTENANCE _____________________________________________ 42 11.TROUBLESHOOTING ____________________________________________ 44 12. WINTER AND SUMMER INSULATION _____________________________ 45 13. IMPORTANT additional information_________________________________ 47 14. ADJUST THE DRAINAGE VALVE FOR BLOWER____________________50 15. HOW TO REPLACE THE JETS PUMPS AND CIRCULATION PUMP____51 Picture shows Model Trinidad2200 Model2310 Ver.14.0... -
Page 3: Safety Instructions
PLEASE FILL IN THE INFORMATION BELOW AND KEEP FOR FUTURE REFERENCE Do remember to study the warranty form sign it and give it to your dealer, warranty null and void if not the warranty form has been signed. Name of Purchaser Date of Purchase Address City... - Page 4 (c) DANGER: RISK OF INJURY: The suction fittings included in this spa are designed to match the water flow of the pump. To ensure safety and compatible flow rates, install the same model suction fitting or pump, in the event a replacement is required.
-
Page 5: Warning
2 WARNING! During pregnancy, soaking in hot water may cause damage to the fetus. Limit use to 10 minutes at a time. Prevent drowning: Prevent child drowning: Spa heat speeds up effects of alcohol, Water attracts children. drugs or medicine and can cause Always attach a spa cover after each use. - Page 6 People with infections, sores, or skin abrasions should not use the spa. Warm temperatures may allow the growth of infectious bacteria if not properly disinfected. Test the GFCI (Ground Fault Circuit Interrupter) unit before each use. (Refer to instructions provided by GFCI manufacturer.) k) Only service or repair any equipment if the circuit breaker and/or all power to the spa are off.
-
Page 7: Installation Diamond Gold Family & Silver Series
SAFETY DEVICES Your spa is equipped with the following safety features: Over Heat Protection-- An electronic high limit switch is located under water. It shuts off the heater, pumps and accessories when the water temperature exceeds 112'F or 44'C. This function automatically resets when the spa water temperature drops below 109'F or 43'C. - Page 8 Electrical installation requirements: IMPROPER INSTALLATION MAY RESULT IN EQUIPMENT DAMAGE AND VOID THE WARRANTY NOTE:DO not turn on electrical power to your spa until instructed in the owner manual. 1) Improper electrical connections may damage the equipment, cause injury, a fire, and void your spa warranty. We strongly recommend that only a licensed and bonded electrician perform the electrical installation.
-
Page 9: Electrical Service Configuration
6. ELECTRICAL SERVICE CONFIGURATION The settings made from factory as default is usually 1 x 32Amp or 3 x16Amp If not the setting had been agreed to change for a specific country, check with the Distributor/Retailer 6.1 MAINS CONNECTIONS (a) Services Configuration Options 1, or 3 phases Balboa System BP2001G1 PN: 56389-01 Configuration Setting... - Page 10 400V, 3X16AMP (when any/all high-speed pumps or blower is running, the heater enable) 1, 2, 3 BRN – Live BLU – Neutral Remove the black wire J51-J88 Remove the black wire J52-J62 Relocate the Black wire from J60-J36 to J60-J45 Relocate the Black wire from J41-J12 to J41-J79 (b) Dip Switch Reference...
- Page 11 WARNING Main Power to system should be turned OFF BEFORE adjusting DIP SWITCH Persistent Memory (A6) must be RESET to allow new DIP switch settings to take effect To reset Persistent Memory: Power down. Set A6 ON Power up. Wait until ―Pr‖is displayed on your panel.
- Page 12 Press Select bottom to choose the ―Exit‖ icon to exit priming mode and go inside the spa working menu screen. Temperature Setting The last measured temperature is constantly displayed on the LCD. Note that the last measured spa temperature displayed is current only when the pump has been running for at least 2 minutes. The only item that can be changed on the left side of the Main Screen is the Set Temperature.
- Page 13 On the right side of the screen, the menu selections can be selected with the Up and Down buttons. Use the Select Button to choose an Item. Selecting one of these items will change to a different screen with additional controls.
- Page 14 Heat Mode-Ready vs. Rest Press the Select button to adjust the heat mode. Then press the select button to confirm the selection. Ready mode: the heater circulation pump runs continuously, Since the heater circ pump is always running, the spa will maintain set temperature and heat as needed in Ready mode. Out of the Filtration &...
- Page 15 Note: If power is interrupted to the system, Time-of-Day will be maintained for several days. Main Filtration Using the same navigation and adjustment as Setting the Time, Filter Cycles are set using a start time and a duration. Each setting can be adjusted in 15-minute increments. The panel calculates the end time and displays it automatically.
- Page 16 An Unlock Sequence using the navigation buttons can be used from the Lock Screen. The Unlock Sequence is the same for both Panel Lock and Settings Lock. To unlock the set temperature, press double times ―Select‖button then press the ―Down‖ arrow Button Hold Mode Hold Mode is used to disable the pumps during service functions like cleaning or replacing the filter.
- Page 17 Cleanup Cleanup Cycle Duration is not always enabled, so it may not appear. When it is available, set the length of time Pump1 will run after each use. 0-4 hours are available. Dolphin II and Dolphin III (Applies to RF Dolphin only) When set to 0, no addressing is used.
- Page 18 then press ―Jet2‖ again, the pump2 will work at high speed. The low speed will turn off automatically after 30minutes, and the high speed will turn off automatically after 15minutes. Press the third time ―Jet2‖ the pump2 will stop. Blower ...
- Page 19 example, the Left arrow button is matched the Jets2 Icon. Directly press the Left Arrow button to control the pump2, The control way is same to the left control buttons on the panel. (c )General Messages Most messages and alerts will appear at the bottom of the normally used screens. Several alerts and messages may be displayed in a sequence.
- Page 20 The heater is dry* – M027 There is not enough water in the heater to start it. The spa is shut down. After the problem has been resolved, you must clear the message to restart heater start up. See ―Flow Related Checks‖ below. The heater is too hot* –...
- Page 21 Reminder Messages Check the pH May appear on a regular schedule, i.e. every 7 days. Check pH with a test kit and adjust pH with the appropriate chemicals. Check the sanitizer May appear on a regular schedule, i.e. every 7 days. Check sanitizer level and other water chemistry with a test kit and adjust with the appropriate chemicals.
- Page 22 (D) BWG WiFi Spa Control Iphone/Ipad or Android Phone Transforming the control of hot tubs Check the BWA CONTROL YOUR TUB Balboa manual. Step 1 Download the app to your smart device from either the Google® Play or the iTunes® store. Once you have it loaded on your phone you are ready to connect to your hot tub.
- Page 23 Step 2 Make sure your device’s Wi-Fi is turned on.(Check with your device instructions on how to access your Wi-Fi settings). For this example we are using an Android™ device, iOS® would be similar. Make sure you are near your tub. Go to your Wi-Fi settings screen and look for the BWG SPA network (it will be named similar to BWGSpa_12345).
- Page 24 If you do not have a home Internet network, you can stop here. If you do have a home Internet network,you will be able to control your tub while you are in the near proximity of 65 feet or 20 meters.The detailed operation of the bwa app is explained in the app user guide which can be found here:http://www.balboawater.com/bwa If you have a home Internet network the next step is to connect your tub to it.
- Page 25 Step 4 Setting up your Local / Home Wi-Fi is a one-time process. Once connected, you will not need to change your settings again unless your network SSID changes. You are now ready to connect your tub to your local / home network. Press the Settings button. Model2310 Ver.14.0...
- Page 26 Model2310 Ver.14.0...
- Page 27 Model2310 Ver.14.0...
- Page 28 Model2310 Ver.14.0...
- Page 29 Model2310 Ver.14.0...
- Page 30 Model2310 Ver.14.0...
- Page 31 Model2310 Ver.14.0...
- Page 32 6.2 Additional fuse and jump wire There are one set additional fuses for the control box in the package, adhered on one white board fixed on the frame, in pump area, in case any fuse in box is burnt can be replaced in time.
- Page 33 6.3 The power cable cap There are both power cable caps on the corner shirt. you can use a drill machine to drill the suitable hole for the power cable. Model2310 Ver.14.0...
-
Page 34: Initial Start Up& Spa Cover Basket Lifter
7. INITIAL START-UP PROCEDURES AND SPA COVER BASKET LIFTER DO NOT TURN ON THE POWER TO THE SPA WHEN THE SPA IS PARTIALLY FILLED OR EMPTY 1) Ensure the circuit breaker to the spa is off 2) Rotate all the jets in the spa to a clockwise—fully open position Executed in FACTORY 3) If the spa is equipped with valves (a handle located near the jet pumps), ensure the handle is open. - Page 35 The side of the skirts panel for install the spa cover basket lifter Note: the spa cover basket lifter should install the back skirt panel that side faces to the control box/panel side, one this side shirt we have drilled the holes for the fixing screws, just need to use the screw to fix the spa cover basket lifter.
-
Page 36: Start Up & Care
8. SPA START-UP and CARE IMPORTANT Your spa has passed stringent quality assurance testing by trained technicians to ensure reliability and your long –term satisfaction. Before filling the spa, wipe the shell clean with a soft dry rag. Follow these instructions to ensure a successful start-up or refill. 1) Fill spa to correct level (approximately 4 inches 10 cm above the top of the filter cartridge). - Page 37 12) Run jet pump/s and blower if installed for 1/2 hour 13) Be sure to regularly check your sanitizer levels! 14) Check for air locks in the circulation pump system, there are five small jets installed in the foot well walls turn off the jet pumps and blower check for small bubbles coming out from the small jets.
- Page 38 Warning! Shock Hazard! No User Serviceable Parts Do not attempt service of this control system. Contact your dealer or service organization for assistance. Follow all owners’ manual power connection instructions. A licensed electrician must perform installation and all grounding connections must be properly installed. Jet Selector Valves (Diverter) Your spa is equipped with a spa side selector valve.
-
Page 39: Water Chemistry
9. WATER CHEMISTRY Maintaining water chemistry will aid in preventing possible damage to your spa and ensuring safe water conditions for users. Water Quality: Filtering the water helps maintain clean, clear and safe water. You spa is equipped with a 2 cartridges filter system. - Page 40 WARNING: Sanitizers such as Tri-chlor (tablets or sticks), calcium hypochlorite, sodium hypochlorite, peroxide based chemicals or any chemical compound that remains undeserved in direct contact or adheres to the spa surface will damage the spa and void the warranty. Bromine: Maintaining a proper total bromine level of 3.0-5.0 PPM can control bacteria.
- Page 41 Super Chlorination: Super chlorination quickly oxidizes the spa water to burn away waste such as hairspray and lotions that the spa filter cannot remove. This waste build-up reduces the power of the sanitizer resulting in dull water and may cause irritation to the user’s eyes and skin.
- Page 42 Keeping your water clean & safe MONDAY FRIDAY TEST: Bromine/Chlorine PH Total Alkalinity TEST: Bromine/Chlorine PH Total Alkalinity ADJUST: Follow steps 1-4 ADJUST: Follow steps 1-3 ADD: stain and Scale control STEP#1: Adjust total alkalinity: (ideal range = 130-160). Test water (follow directions on manufacturer’s label) and add required amount of chemicals with jets on.
-
Page 43: Spa Maintenance
10. SPA MAINTENANCE Draining your spa: Do not drain water onto your lawn or garden until all chemicals are negligible in the water. To dissipate the sanitizer, leave the spa cover off to expose the water to direct sunlight. Remember to drain and refill your spa at least every 4 months depending on use. - Page 44 refilling the spa, rinse the surface well. CAUTION: Do not use any cleaning products containing abrasives or solvents. This could damage the surface and void your warranty. Care of the spa cabinet (Thermo Guard skirt). To clean your Thermo Guard skirt, simply wipe the cabinet with a clean towel and a mild soap. Note: The skirt will fade slightly under normal environmental exposure.
-
Page 45: Troubleshooting
11. TROUBLESHOOTING Heating System Symptom Problem Corrective action Does not heat 1. Temperature setting is too low. 1. Turn up the thermostat 2. Dirty filter 2. Clean filter 3. Air Lock 3. Prime pump Too hot 1. Temperature setting too high 1. -
Page 46: Winter And Summer Insulation
12. WINTER AND SUMMER INSULATION Spas are equipped with an insulation curtain on the pump area skirt that can remove and install it for usage in summer and winter time. DURING SUMMER TIME THE CURTAIN INSULATION MUST BE REMOVED FROM THE SKIRT Remarks: Outside temperature for summer time is from + 15 °... - Page 47 DURING WINTER TIME THE CURTAIN INSULATION SHOULD BE INSTALLED Remarks / Warning When using the curtain insulation during winter time it will save a lot on your energy cost. But be aware of to remove it during summer time. Failure in not remove it can seriously effect the installed equipment and warranty will be void if...
-
Page 48: Important Additional Information
13. IMPORTANT Additional installation information Due to vibrations during transportation the connections to pumps and heater must be checked during installation and water filling of the spa. Fill the spa with water then check each connection for all pumps and the spa pak and hand tighten them. - Page 49 After filling full water , start the spa , if the wrong message ―FL‖ OR ―DR‖ comes out ,should there is airlock in the circ pump and heater, To re-lease an air lock in the circulation system , Power off , use a screw driver to loose the downside plug on the circulation pump wet end, loosen the plug and let some water flow out of the pump then tighten the plug again.
- Page 50 Safety Valve: there is a safety valve behind the drainage valve, when a failure in the drainage valve happens. Can close the safety valve to stop the water to flow out to the floor. Model2310 Ver.14.0...
-
Page 51: Adjust The Drainage Valve For Blower
14. ADJUST THE DRAINAGE VALVE FOR THE BLOWER If there is some air comes out from the water lead pipe which connects with the drain valve when the blower work, there might been some debrises etc. cause the malfunction, this time you need to adjust the black valve in the drain valve as follows 1, Open the drain valve and take out the black valve and check for debrises. -
Page 52: How To Replace The Jets Pumps And Circulation Pump
15.HOW TO REPLACE THE JETS PUMPS AND CIRCULATION PUMP 1. For jets pump Just need to remove the two front side screws nuts, the back side is installed the aluminium sheet to secure the base of the pump. Model2310 Ver.14.0... - Page 53 After remove the front side fixing nut, put up the front side to loosen the pump base from the bolt, then can pull out the pump. Model2310 Ver.14.0...
- Page 54 2. For the circulation pump Remove the fixing nut on the bolt on the Right side, the left side is installed the aluminium sheet to secure the base of the pump. Model2310 Ver.14.0...
- Page 55 After remove the right side fixing nut, put up the right side to loosen the pump base from the bolt, then can pull out the pump. Model2310 Ver.14.0...
Need help?
Do you have a question about the Trinidad2200 and is the answer not in the manual?
Questions and answers