
Related Manuals for TDR Phoenix Mini

Summary of Contents for TDR Phoenix Mini
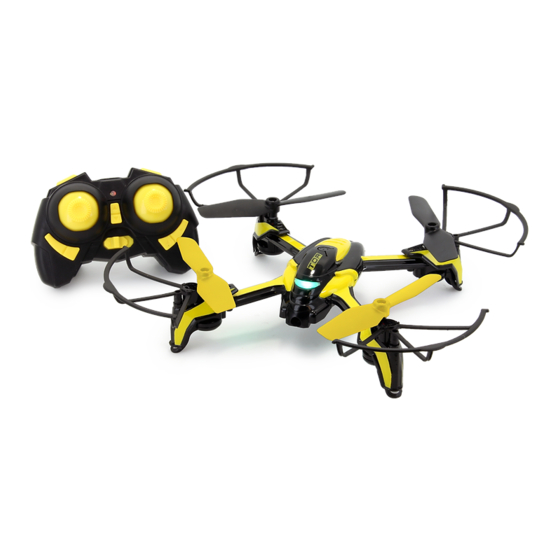
- Page 1 Ages: 14+ I N N O V A T I V E L E G A C Y Phoenix Mini USER MANUAL Package Content 1x Drone 4x Blade Guard 1x USB Charger 1x Screw Driver 1x Transmitter 4x Blade 1x Battery...
- Page 2 DISCLAIMER Read this disclaimer and instructions thoroughly before operating this device. THE USE OF THIS PRODUCT IS A SIGN OF YOUR COMPLIANCE WITH THIS DISCLAIMER. You are responsible for your own actions, behavior, and conduct while using this device. You agree to use this product in such a way that you will comply with all local and federal regulations, including, but not limited to, personal privacy laws.
- Page 3 ADULT SUPERVISION REQUIRED An adult should check the unit and LiPo battery for damages prior to each use. Drones have rotating blades that move at high speeds, posing a danger of damage and injury. Pilots are responsible for any action that results in damages or injury from improper operation of the drone.
- Page 4 Parts 1. Blade Guard 2. Blade 3. Power Button 4. Camera 5. Motor 6. Battery 7. Landing Gear...
- Page 5 Transmitter Forward / Backward Trimmer LED Indicator Photo / Video Start / Stop the motors Elevator / Throttle/Rudder Aileron Stick Stick (Press down (Press down to start 360° Flip) to switch speed) Headless Mode Left / Right Trimmer No Use Power ON/OFF Install battery for controller 2 x AAA Batteries...
- Page 6 Flight Preparation (Drone) Blade Guards Installation Charge The Battery 1. Remove the battery from drone. 2. Charge the battery using the USB charger. The LED indicator on the USB charger: Off - Charging Red - Charging Completed 3. Re-install charged battery back to the drone.
- Page 7 Flight Preparation (Binding) Binding drone to the controller 1. Place the drone on a 2. Turn on the drone. level and flat surface. 3. Turn on the transmitter 4. Pull the left stick Up and then Down 5. The LED on the drone will stop flashing when binding is completed.
- Page 8 Start / Stop The Motors To Start After binding, press the right button on top of the transmitter to start the motor. Push the left stick upward for drone to take off. To Stop To land and stop the motor, you can do one of the followings: 1) Press the right button on top of transmitter once - the drone will proceed to land slowly and stop the motor.
- Page 9 Basic Control Photo Taking Video Shooting Short press the Long press the button button to take a to start video shooting, photo press again to stop. Enter Headless Mode * Flying Speed Select Short press right stick to switch flying speed Press this button once to enter / exit 1 beep = low...
- Page 10 Special Operation / Control 360° Flip 1. Bring the drone to a 10ft mid-air hover, without flying towards any direction. Remove finger from both sticks once in hover. 2. While hovering, press down the left stick and push the right stick to any direction. 3.
- Page 11 Adjustment / Trimming Why do we need to adjust the trimming? Trimming is needed to adjust the differentials in real world applications. Numerous factors contribute to an unsuccessful hover and as a pilot, you will need to make manual adjustments to fix these issues. Recalibrate It is a good idea to recalibrate the gyro system of your drone before manually trimming it.
- Page 12 Adjustment / Trimming Bring the drone to hover a few feet above the ground. Observe for any drifting. Use the opposite direction trimmer button to correct the drifting. E.g.: If the drone drifts backwards repeatedly press the forward trimmer until the drifting stops or until satisfied with the hover. Backward Trimmer Forward Trimmer Left Side-Fly Trimmer...
- Page 13 Blade Installation Blades must be installed as shown below. The letters are printed on reverse side of blades. Camera TOP VIEW TOP VIEW TOP VIEW Battery Note: Debris could be found in the blades of the drone after multiple flights. It is advisable to clean the blades regularly when it is in its off-state to avoid poor flying performance.
- Page 14 Flying Tips When launching the drone make sure that you and the drone are facing the same direction. The camera should be looking in the same directional path as yourself. Practice launching, hovering, and landing before attempting to learn other moves.
- Page 15 Troubleshooting Problem/Issue Cause Solution a) Make sure the batteries in both drone and a) Battery Cannot bind drone to controller are fully charged b) Electromagnetic interference controller b) Clear out objects between drone and controller c) Out of range c) Put drone and controller closer to each other a) Battery too low a) Charge battery Drone does not turn on...
- Page 16 Thank You Happy Flying...
Need help?
Do you have a question about the Phoenix Mini and is the answer not in the manual?
Questions and answers