Advertisement
Quick Links
PRINTER'S INSTRUCTIONS:
GUIDE,QUICK START,NOVA - NORTEK P/N: 10016840C- INK: BLACK PLUS PMS 286C - MATERIAL: 105G COATED PAPER - SIZE: 127MM X 142.24MM -
SCALE: 1-1 - BINDING: TRIM, FOLD AND SADDLE STITCHED - PAGE 1 OF 30
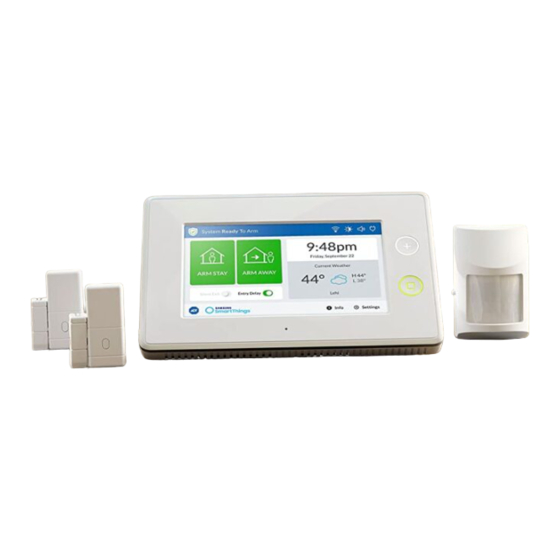
ADT Home Security
Starter Kit
Setup Guide
Advertisement

Related Manuals for SmartThings ADT Home Security Starter Kit

Summary of Contents for SmartThings ADT Home Security Starter Kit
- Page 1 PRINTER’S INSTRUCTIONS: GUIDE,QUICK START,NOVA - NORTEK P/N: 10016840C- INK: BLACK PLUS PMS 286C - MATERIAL: 105G COATED PAPER - SIZE: 127MM X 142.24MM - SCALE: 1-1 - BINDING: TRIM, FOLD AND SADDLE STITCHED - PAGE 1 OF 30 ADT Home Security Starter Kit Setup Guide...
- Page 2 Welcome to your ADT Home Security Starter Kit...
- Page 3 Setup your ADT Door and Window Detectors Setup your ADT Motion Detector Complete a Walk Test Troubleshooting Optional ADT professional monitoring services Learn more about Works with SmartThings If you have any difficulties setting up your ADT Home Security Starter Kit, please visit SmartThings.com/Support-ADT for assistance.
- Page 4 Setup your ADT Security Hub Place the ADT Security Hub in an area of your home that has good Wi-Fi and cellular coverage. Avoid placing it in direct sunlight, near heat sources, where it can be easily viewed from doors or windows, or where it can be reached by small children.
- Page 5 ADT Security Hub Connect the ADT Security Hub to a power outlet. Make sure the outlet is not controlled by a switch that could accidentally cut the power. Power Receptacle Power Connector Follow the on-screen instructions to connect the ADT Security Hub to your Wi-Fi network.
- Page 6 ADT Security Hub Download the SmartThings app for Android or iOS, create an account for your home, and then follow the on-screen instructions to complete setup. • An Activation Code will be displayed on the ADT Security Hub. Enter this code into the SmartThings app when prompted.
- Page 7 ADT Security Hub For compliance with ANSI/NFPA 70 National Electric Code, install the power plug retaining bracket. • Use the pre-applied adhesive tape to attach the retaining bracket to the wall outlet and then secure the bracket to the wall using the fastening screw. Adhesive Tape Fastening Screw Retaining Bracket...
- Page 8 ADT Security Hub • Spread the edges of the bracket apart and insert the power plug into the power outlet. Thread the zip ties through the slots and fasten them to secure the power plug. Zip Tie Slots...
- Page 9 ADT Security Hub Note: You can also mount the ADT Security Hub on a wall. Visit SmartThings.com/Support-ADT for more information.
- Page 10 • There are two ADT Door and Window Detectors in the ADT Home Security Starter Kit and each one consists of two parts. Setup the detectors one at a time and do not remove the tabs marked “Pull This Tab” until instructed below.
- Page 11 ADT Door and Window Detectors Use the SmartThings app to scan the QR code on the back of the detector and then follow the on-screen instructions to complete setup. • Remove the QR code from the back of the detector and attach it inside the ADT Security Hub User Guide for future reference.
- Page 12 ADT Door and Window Detectors Remove the tab on the detector marked “Pull This Tab”. Battery Tab...
- Page 13 ADT Door and Window Detectors Place both parts of the detector on your door or window as shown in the illustrations. For double doors, place the smaller part of the detector on the most-used door and the larger part on the least-used door. Placement on doors: Detector On Door Frame Door Frame...
- Page 14 ADT Door and Window Detectors Placement on windows: Single-Hung Windows Double-Hung Windows Detector On Window Sill...
- Page 15 ADT Door and Window Detectors • Make sure that the alignment marks on both parts of the detector are aligned and facing each other, and that both parts of the detector are less than 0.5 inches apart when the door or window is closed Alignment Marks Detector Magnet...
- Page 16 ADT Door and Window Detectors Use the pre-applied adhesive tape to attach both parts of the detector to your door or window. • Make sure that all surfaces are clean and dry. • Make sure to place both parts of the detector correctly as the adhesive tape will be difficult to remove.
- Page 17 ADT Door and Window Detectors • Slide the spacer forward to lock it onto the magnet. Magnet Spacer Repeat steps 2-8 to setup the second ADT Door and Window Detector.
- Page 18 Setup your ADT Motion Detector Use the ADT Motion Detector in a high-traffic area where an intruder would be likely to pass within a 30-foot range, e.g. living room or hallway. 30 Feet Range Coverage In Both Directions Take the ADT Motion Detector to the area where you intend to mount it.
- Page 19 Use the SmartThings app on your smartphone to select the “My Home” tab. Select "Things", and then “Add a Thing". Use the SmartThings app to scan the QR code on the front of the detector and then follow the on-screen instructions to complete setup.
- Page 20 ADT Motion Detector Remove the tab on the detector marked “Pull This Tab”. Battery Tab Walk Test Button...
- Page 21 ADT Motion Detector Pick a location 6.5 to 7.5 feet above the floor and mount the detector on a flat wall or in a corner. Corner Mount Wall Mount Bracket Flat Wall Mount Detector (Back) Detector (Front)
- Page 22 ADT Motion Detector • Make sure that there are no objects blocking the detector's view and that it's in a stable location. • Make sure that the detector is not aimed at stairs, furniture, or other surfaces where a pet might climb, or used in a room where large pets (over 55 lbs) may be present and could cause false alarms.
- Page 23 ADT Motion Detector Adjust With Screwdriver • You can use the supplied mounting tape on flat walls if you don’t want to use the wall bracket. Double Stick Tape Here For Flat Walls...
- Page 24 Select Sensors Test and follow the on-screen instructions. • If a detector fails the Sensors Test, check that it’s been installed correctly or visit SmartThings.com/ Support-ADT for assistance. Select Console Test and follow the on-screen instructions. or the Home button to exit Test Mode.
-
Page 25: Troubleshooting
Release the button and after 5 seconds the red LED will begin to blink slowly. Use the SmartThings app to complete setup.. If you’re still having trouble connecting the ADT Door and Window Detector, please visit SmartThings.com/Support-ADT for... - Page 26 Tamper Switch Release the Tamper Switch and after 5 seconds the red LED will begin to blink slowly. Use the SmartThings app to complete setup. If you’re still having trouble connecting the ADT Motion Detector, please visit SmartThings.com/Support-ADT for assistance.
- Page 27 With optional ADT professional monitoring services, you can enjoy 24/7 peace of mind whether your family is home or away. Choose from a range of intrusion detection and life safety services. Use the SmartThings app to activate ADT professional monitoring services, or visit SmartThings.com/ADT for more information.
- Page 28 Learn more about Works with SmartThings Your ADT Security Hub works as a SmartThings Hub, allowing it to connect wirelessly with a wide range of smart devices and make them work together. Look for the Works with SmartThings label next time you’re buying a connected device for your home, or visit SmartThings.com/ADT...
- Page 29 Congratulations! Your ADT Home Security Starter Kit is now setup and ready to use. Read the enclosed ADT Security Hub User Guide for important information on using your ADT home security system and make sure to keep it safe for future reference.
- Page 30 SmartThings, Inc., 665 Clyde Ave, Mountain View, CA 94043, USA. Information in this document is subject to change without notice. Copyright 2017 SmartThings, Inc. All rights reserved. ADT and the ADT logo are marks and/or registered marks of ADT. Unauthorized use is strictly prohibited. Revised 06/17.
Need help?
Do you have a question about the ADT Home Security Starter Kit and is the answer not in the manual?
Questions and answers