Sign In
Upload
Download
Table of Contents
Contents
Add to my manuals
Delete from my manuals
Share
URL of this page:
HTML Link:
Bookmark this page
Add
Manual will be automatically added to "My Manuals"
Print this page
×
Bookmark added
×
Added to my manuals
Manuals
Brands
Theben Manuals
Controller
PH-II Series
Hardware manual
Theben PH-II Series Hardware Manual
Simple application controller
Hide thumbs
1
2
3
4
5
6
Table Of Contents
7
8
9
10
11
12
13
14
15
16
17
18
19
20
21
22
23
24
25
26
27
28
29
30
31
32
33
34
35
36
37
38
39
40
41
42
43
44
45
46
47
48
49
50
51
52
53
54
55
56
57
58
59
60
61
62
63
64
page
of
64
Go
/
64
Contents
Table of Contents
Bookmarks
Table of Contents
Table of Contents
1 Introduction
Special Features of the PH-II Series System
Available Models
Eng
Dimensions and each Part Name
System Configuration
Applicable Programming Software
2 Specifications
Power Supply Specification
Input Specification
Output Specification
General Specification
3 Installation
Installation Mounting Notes
DIN RAIL Mounting of Main Unit
Installation 3
Remove
Direct Mounting of Main Unit
Install Extension Module
4 Wiring
Installation Wiring Notes
Wire Size
Power Supply
AC Power Supply and Input Wiring
PH-II 4ED Input Wiring
DC Power Supply and Input Wiring
DC Power Supply and Source ("+" Common) Input Wiring Diagram
PH-II 4EDA Source ("+" Common) Input Wiring Diagram
DC Power Supply and Sink ("-" Common) Input Wiring Diagram
PH-II 4EDA Sink ("-" Common) Input Wiring Diagram
Output Relay and Transistor Wiring
Relay Output Wiring Diagram Main Unit (AC And/Or DC)
Relay Output Wiring Diagram PH-II 4AR (AC And/Or DC)
Transistor Output (Source or "+" Common Only) Wiring Diagram
Ph-II 4At
5 Terminal Layout
6 Ph-II Eeprom
Installation
Introduction
7 PH-232 Kabel
Connected to PH-232 Kabel
8 PH-II GSM Kabel
Introduction
External Dimensions
System Configuration with Using PH-II GSM Kabel
Installation
Remote Maintenace with a Modem
Recommended Modems
PH Programmierkabel Straight Cable between Modem and PH-II GSM Kabel
Modem Setting
9 Key, System Bit and Function Block Lists
Key Lists
System Bit Lists
Control Bit Lists
Function Block Lists
10 Diagnostics
Input Status Error
Output Status Error
TOP MENU Is Not Displayed
Cannot Enter Run Mode
Incorrect Clock Data
The "?" Appears on the Display
Cannot Use an Operation Key
Incorrect LCD Display
Memory Cassette Is Not Working Correctly
Cannot Communicate with Pharao Software 2.0
Advertisement
Quick Links
1
System Configuration
2
Applicable Programming Software
3
Input Specification
4
Key Lists
Download this manual
SIMPLE APPLICATION CONTROLLER
PH-II Simple Application Controller
HARDWARE MANUAL
HARDWARE-HANDBUCH
MANUEL DU MATÉRIEL
MANUALE HARDWARE
MANUAL DE HARDWARE
MASKINVARUHANDBOK
ENG
GER
FRE
ITL
ESP
SWE
Table of
Contents
Previous
Page
Next
Page
1
2
3
4
5
Advertisement
Table of Contents
Need help?
Do you have a question about the PH-II Series and is the answer not in the manual?
Ask a question
Questions and answers
Related Manuals for Theben PH-II Series
Controller Theben Pharao-II 14 Hardware Manual
Simple application controller (64 pages)
Controller Theben TC 649 E Manual
(27 pages)
Controller Theben JMG 4 T KNX Manual
Mix2 series blinds actuator basic/extension module (3 pages)
Controller Theben FCA 2 Manual
Fan coil actuator (89 pages)
Controller Theben HMT 6 KNX Operating Instructions
Heating actuators (2 pages)
Controller Theben RMG 8 Manual
Switch actuator; switch actuator modules; blinds actuator (36 pages)
Controller Theben RM 4 H FIX1 Manual
High-performance switch actuators (41 pages)
Controller Theben RAMSES 856 top2 Installation And Operating Manual
Heating controller (20 pages)
Controller Theben MIX 2 Series Manual
(50 pages)
Controller Theben DU 1 Manual
1-channel flush-mounted dimming actuators (86 pages)
Controller theben HMG 8 Operating Instructions
Heating actuator (2 pages)
Controller Theben Mix Series Quick Start Manual
Heater actuators (2 pages)
This manual is also suitable for:
Pharao-ii 4ar
Pharao-ii 4at
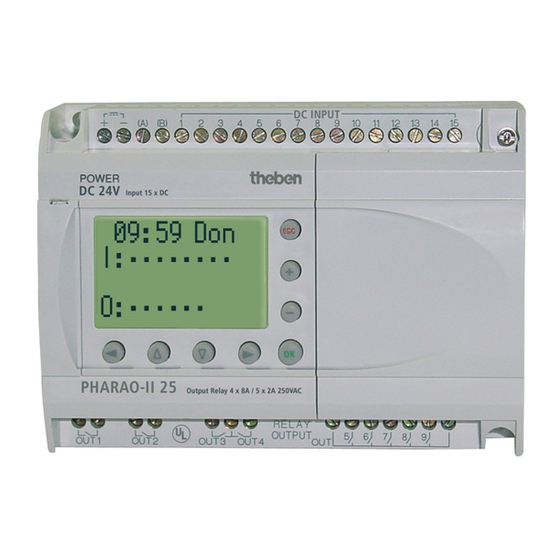
Pharao-ii 25
Pharao-ii 14
Pharao-ii 15
Pharao-ii 24
Table of Contents
Print
Rename the bookmark
Delete bookmark?
Delete from my manuals?
Login
Sign In
OR
Sign in with Facebook
Sign in with Google
Upload manual
Upload from disk
Upload from URL


Need help?
Do you have a question about the PH-II Series and is the answer not in the manual?
Questions and answers