Table of Contents
Advertisement
Advertisement
Table of Contents

Summary of Contents for Uctronics WIFI Smart Robot Car Kit
-
Page 2: Table Of Contents
2.6 WIFI Module Kit ..........................12 2.6.1 Specification:.......................... 12 2.7 Camera ..............................13 2.7.1 Specification:.......................... 13 3. Pin Definition ..............................14 4. Wiring ................................15 5. Installation ..............................16 5.1 Installation of the Car ........................17 5.2 Wire Connection ..........................34 www.uctronics.com... - Page 3 6. Start Programing ............................41 6.1 Install Arduino IDE ........................... 41 6.2 Add Libraries ............................45 7. RobotCar App for Android ........................49 7.1 Download and Install App ......................49 7.2 Connect to the Robot Car ......................49 7.3 Function introduction ........................50 www.uctronics.com...
-
Page 4: Introduction
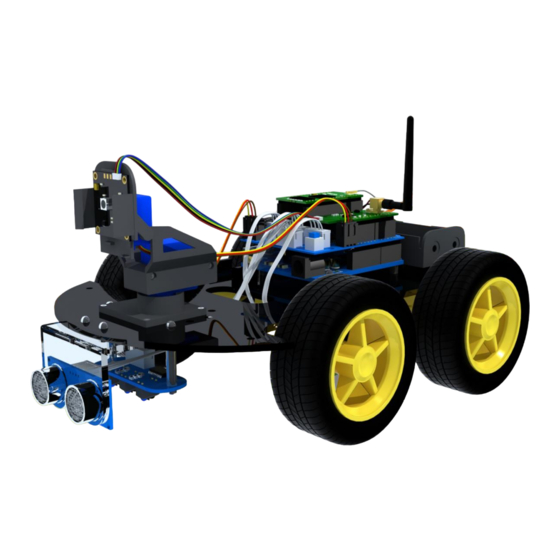
Smart WIFI Robot Car Kit for Arduino 1. Introduction The UCTRONICS WIFI Smart Robot Car Kit is a flexible vehicular kit particularly designed for education, competition and entertainment. With it, you can implement diverse interesting ideas, such as WIFI remote control, automatic avoidance of obstacles, line inspection, take pictures and record videos, etc. -
Page 5: The Uno R3 Board For Arduino
The UNO is the best board to get started with electronics and coding. If this is your first experience tinkering with the platform, the UNO is the most robust board you can start playing with. The UNO is the most used and documented board of the whole Arduino family. 1.1.1 Specification www.uctronics.com... -
Page 6: Functions Of Uno Board
Chassis kit: the frame of the car and drive the car to move Servo and Pan/Tilt/Zoom: enable the camera to rotate 5MP camera module: take a picture or record a video 2. Function Module Introduction 2.1 HC-SR04 Ultrasonic Sensor Module www.uctronics.com... -
Page 7: Working Principle
40 kHz sound wave and the detector detects 40 kHz sound wave and sends electrical signal back to the microcontroller. Ultrasonic working principle The ultrasonic sensor enables the robot to virtually see and recognize object, measure distance and avoid obstacles. The operating range of ultrasonic sensor is 2 cm to 450 cm. www.uctronics.com... -
Page 8: Specification
Echo signal: output TTL PWL signal High precision: Up to 0.3cm Input trigger signal: 10us TTL impulse Detection distance: 2-450cm Mode of connection: VCC, trig (T), echo, GND 2.1.3 Wiring diagram: HC-SR04 Ultrasonic Sensor Module Trig Echo 2.2 L293D Motor Drive Expansion Board www.uctronics.com... -
Page 9: Specification
PTZ (Pan/Tilt/Zoom) is a set of equipment used to install and fix the camera module. One set of PTZ contains a PTZ base, 3 pieces PTZ brackets and several accessory screws. Support full rotation. www.uctronics.com... -
Page 10: Specification
With the car platform, adding micro-controller (such as Arduino) and sensor modules, then program it, a robot car comes up. All the module interfaces have been modified with XH2.54 ports as to make it much easier and convenient to assemble the car. www.uctronics.com... -
Page 11: Contents
Working voltage: DC 5V Detecting range: 1~20mm Working temperature: 0°C ~ + 50°C Detector type: phototransistor Emitter wavelength: 950 nm PCB dimension: 20mm×54mm 3 output channel Output level: TTL level (black line of low effective, high efficient white line) www.uctronics.com... -
Page 12: Wifi Module Kit
System frequency: 400MHz RAM: 64MByte DDR2 RAM Wireless transmission distance: 80-100m Wireless working mode: Routing, AP, Relay, Bridging Item dimension: 39mm X 23mm The wifi adapter board: Support USB camera interface With system startup light www.uctronics.com... -
Page 13: Camera
9g micro servo motor, thus giving better shooting experience when you're using it on the smart car kit. 2.7.1 Specification: 5 megapixels image sensor OV5640 Support for JPEG output format Interface: usb2.0 Item size: 28mm X 28mm www.uctronics.com... -
Page 14: Pin Definition
Smart WIFI Robot Car Kit for Arduino 3. Pin Definition Arduino UNO R3 Board L293D Motor Drive Expansion Board www.uctronics.com... -
Page 15: Wiring
Smart WIFI Robot Car Kit for Arduino 4. Wiring www.uctronics.com... -
Page 16: Installation
For the above servo , you shoud set the center position in order that you can turn up 90 degrees and turn down 90 degrees. Below middle picture shows the center position. Up 90 ° Center Down 90 ° www.uctronics.com... -
Page 17: Installation Of The Car
Smart WIFI Robot Car Kit for Arduino 5.1 Installation of the Car Step 1: Install the deceleration DC motor www.uctronics.com... - Page 18 Smart WIFI Robot Car Kit for Arduino Step 2: Fix the wheel www.uctronics.com...
- Page 19 Smart WIFI Robot Car Kit for Arduino Step 3: Install the UNO board www.uctronics.com...
- Page 20 Smart WIFI Robot Car Kit for Arduino Step 4: Install the L293D motor drive board www.uctronics.com...
- Page 21 Smart WIFI Robot Car Kit for Arduino Step 5: Install the wifi adapter board www.uctronics.com...
- Page 22 Smart WIFI Robot Car Kit for Arduino Step 6: Install the wifi core board www.uctronics.com...
- Page 23 Smart WIFI Robot Car Kit for Arduino Step 7: Install the battery container www.uctronics.com...
- Page 24 Smart WIFI Robot Car Kit for Arduino Step 8: Install the servo motor to the PTZ base www.uctronics.com...
- Page 25 Smart WIFI Robot Car Kit for Arduino www.uctronics.com...
- Page 26 Smart WIFI Robot Car Kit for Arduino Step 9: Install the PTZ to the chassis www.uctronics.com...
- Page 27 Smart WIFI Robot Car Kit for Arduino Step 10: Install the PTZ brackets to the servo motor www.uctronics.com...
- Page 28 Smart WIFI Robot Car Kit for Arduino Step 11: Install the servo motor to the PTZ brackets www.uctronics.com...
- Page 29 Smart WIFI Robot Car Kit for Arduino Step 12: Install the PTZ bracket to the servo motor www.uctronics.com...
- Page 30 Smart WIFI Robot Car Kit for Arduino Step 13: Install the camera module to the PTZ brackets www.uctronics.com...
- Page 31 Smart WIFI Robot Car Kit for Arduino Step 14: Install the ultrasonic sensor to the ultrasonic holder www.uctronics.com...
- Page 32 Smart WIFI Robot Car Kit for Arduino Step 15: Install the ultrasonic module to the chassis www.uctronics.com...
- Page 33 Smart WIFI Robot Car Kit for Arduino Step 16: Install the line tracking module www.uctronics.com...
-
Page 34: Wire Connection
Smart WIFI Robot Car Kit for Arduino 5.2 Wire Connection Connect the micro servo motor to the L293D motor drive expansion board www.uctronics.com... - Page 35 Smart WIFI Robot Car Kit for Arduino Connect the camera module to the wifi adapter board www.uctronics.com...
- Page 36 Smart WIFI Robot Car Kit for Arduino Connect the ultrasonic sensor module to the L293D motor drive expansion board www.uctronics.com...
- Page 37 Smart WIFI Robot Car Kit for Arduino Connect the line tracking module to the L293D motor drive expansion board www.uctronics.com...
- Page 38 Smart WIFI Robot Car Kit for Arduino Connect the DC motor to the L293D motor drive expansion board www.uctronics.com...
- Page 39 Smart WIFI Robot Car Kit for Arduino Connect the battery container to the L293D motor drive expansion board www.uctronics.com...
- Page 40 Smart WIFI Robot Car Kit for Arduino Connect the wifi core board with the wifi adapter board www.uctronics.com...
-
Page 41: Start Programing
Find the one that suits your operation system and click to download. There are two versions of Arduino for Windows: Installer or ZIP file. You're recommended to download the former Step 2: Press the button ‚JUST DOWNLOAD‛ to download the software www.uctronics.com... - Page 42 Smart WIFI Robot Car Kit for Arduino Step 3: Double click the .exe file and the following window will show up. Click ‚I Agree‛ Next www.uctronics.com...
- Page 43 Step 4: Click ‚Browse‛ to choose the installation path or enter a directory at the Destination Folder. Click ‚Install‛ to initiate installation Step 5: After the installing progress bar goes to the end, the ‚Close button‛ may be enabled for some PC. Just click it to complete the installation www.uctronics.com...
- Page 44 Smart WIFI Robot Car Kit for Arduino Step 6: Then a prompt appears. Select Always trust software for "Adafruit Industries" and click ‚Install‛ Step 7: After the installation is done, click Close. Then an Arduino icon will appear on the desktop: www.uctronics.com...
-
Page 45: Add Libraries
Smart WIFI Robot Car Kit for Arduino 6.2 Add Libraries Step 1: Download and unzip the file https://github.com/UCTRONICS/WIFI_Camera_Smart_Robot_Car.git Step 2: Open the documents ‚WIFI_Camera_Smart_Robot_Car-master‛ www.uctronics.com... - Page 46 Smart WIFI Robot Car Kit for Arduino And then, Copy ‚RobotCar‛ to .. \ Arduino \ libraries (under the installation path of Arduino) Step 3: Open Arduino IDE, click ‚Tools‛ -> ‚ Board: Arduino/Genuino Uno‛ -> ‚Arduino/Genuino Uno‛ www.uctronics.com...
- Page 47 Smart WIFI Robot Car Kit for Arduino Step 4: Click ‚Tools‛ to select the serial port Step 5: Click ‚File‛ -> ‚Examples‛ -> ‚RobotCar‛ -> ‚WIFI_Camera_Robot_Car‛ to select the library www.uctronics.com...
- Page 48 Smart WIFI Robot Car Kit for Arduino Step 6: Compile and upload Note: Before you compile the code, please read the demo explanation first. Any questions, please refer to our trouble shooting link: https://github.com/UCTRONICS/WIFI_Camera_Smart_Robot_Car/blob/master/APP_Controll er/TroubleShooting.md www.uctronics.com...
-
Page 49: Robotcar App For Android
Smart WIFI Robot Car Kit for Arduino 7. RobotCar App for Android The app is specially designed for Uctronics wifi smart robot car. It can control the movement of the car, avoid the obstacles, start line tracking, adjust the camera direction, take photos and videos. -
Page 50: Function Introduction
Smart WIFI Robot Car Kit for Arduino As the picture shows the ‘UCTRONICS’ hotspot If connect successful, the app will remind you ‘Connect successfully!’ Now you will see the scene from the car’s camera. At the same time, you can operate the joystick on the screen to control the car. - Page 51 Video port Calibration and speed setting You can change the value of Froward to compensate for the speed difference of the motor. You can change the value of basic speed to control the motor speed. Exit the application www.uctronics.com...
- Page 52 ‘Setting’ and choose ‘DISPLAY_MODE’ to change the mode to 2. For examples and documentation, please visit: https://github.com/UCTRONICS/WIFI_Camera_Smart_Robot_Car.git If any problems or suggestions for the tutorial or the robot car please feel free to contact us by following ways: Website: www.uctronics.com...
Need help?
Do you have a question about the WIFI Smart Robot Car Kit and is the answer not in the manual?
Questions and answers