
Subscribe to Our Youtube Channel
Related Manuals for Brocade Communications Systems G620


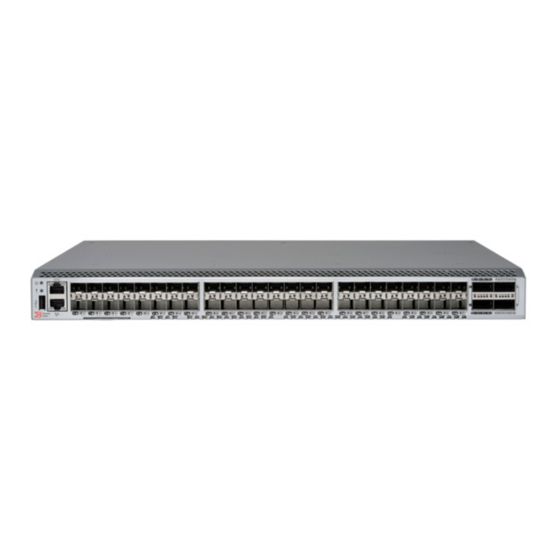
Summary of Contents for Brocade Communications Systems G620
- Page 1 HARDWARE INSTALLATION GUIDE Brocade G620 Switch Hardware Installation Guide 53-1003990-16 29 March 2019...
- Page 2 To find out which open source software is included in Broadcom products, view the licensing terms applicable to the open source software, and obtain a copy of the programming source code, please visit https://www.broadcom.com/. Brocade G620 Switch Hardware Installation Guide 53-1003990-16...
-
Page 3: Table Of Contents
Time and Items Required........................................... 36 Parts List................................................36 Flush-Front Mounting..........................................37 Mid-Mounting..............................................42 Initial Setup and Verification......................................47 Items Required................................................. 47 Providing Power to the Device.......................................... 47 Establishing a First-Time Serial Connection....................................48 Configuring the IP Address..........................................49 Brocade G620 Switch Hardware Installation Guide 53-1003990-16... - Page 4 Removing a Power Supply and Fan Assembly..................................73 Inserting a New Power Supply and Fan Assembly...................................73 Verifying the Operation of the Power Supply and Fan Assemblies...........................75 Brocade G620 Switch Technical Specifications............................... 76 System Specifications............................................76 Brocade G620 Switch Hardware Installation Guide...
- Page 5 Dangers Related to Equipment Weight....................................89 Laser Dangers..............................................90 Cautions..................................................90 General Cautions............................................90 Electrical Cautions............................................91 Revision History..........................................93 53-1003990-16; 29 March 2019......................................93 53-1003990-15; 13 February 2019......................................93 53-1003990-14; 4 December 2018......................................93 53-1003990-13; 20 September 2018....................................93 Brocade G620 Switch Hardware Installation Guide 53-1003990-16...
-
Page 6: Introduction
Incorporated more generic rack mount images. Supported Hardware and Software The Brocade G620 FC switch is introduced in the Fabric OS 8.0.0 software release. The following tables list the power supply assemblies, fan assemblies, and the rack mount kits supported on this device. -
Page 7: Notes, Cautions, And Danger Notices
Brocade Supplemental Support augments your existing OEM support contract, providing direct access to Brocade expertise. For more information on this option, contact Broadcom or your OEM. • For questions regarding service levels and response times, contact your OEM/solution provider. Brocade G620 Switch Hardware Installation Guide 53-1003990-16... -
Page 8: Document Feedback
Send your feedback to documentation.pdl@broadcom.com. Provide the publication title, publication number, topic heading, page number, and as much detail as possible. Brocade G620 Switch Hardware Installation Guide 53-1003990-16... -
Page 9: Device Overview
Up to 48 autosensing ports supporting high-performance 32Gb/s SFP+ ports technology in a single domain. • Up to four 128Gb/s (4 x 32Gb/s) QSFP ports to connect to the QSFP ports of another Brocade G620 device. • Dynamic Ports on Demand (Dynamic-POD) scaling from a base configuration of 24 ports to 64 ports (two 12-port SFP+ PODs and one 16-port QSFP POD). -
Page 10: License Options
Real-time clock (RTC) with battery. License Options The Brocade G620 uses a capacity-based Ports on Demand (POD) license method. An Integrated Routing (IR) license is required to enable EX_Ports on this device. Refer to the Brocade Fabric OS Software Licensing Guide for more details. -
Page 11: Nonport-Side View
NOTE All the ports are connected to a single ASIC. Nonport-Side View The following illustration shows the nonport-side view of the Brocade G620 FC switch. FIGURE 2 Nonport-Side View with AC Power Supply and Fan Assembly Units Ground Sticker Handle... -
Page 12: Device Management Options
Ethernet or serial connection Brocade Fabric OS Administration Guide Brocade Fabric OS Command Reference Manual Brocade Network Advisor Ethernet or serial connection Brocade Network Advisor documentation set Brocade Network Advisor must be purchased separately. Brocade G620 Switch Hardware Installation Guide 53-1003990-16... -
Page 13: Preparing For Installation
"E" or an orange arrow with an "I." CAUTION Never leave tools inside the chassis. CAUTION To protect the serial port from damage, keep the cover on the port when not in use. Brocade G620 Switch Hardware Installation Guide 53-1003990-16... -
Page 14: Esd Precautions
Remove both power cords before servicing. DANGER Disconnect the power cord from all power sources to completely remove power from the device. DANGER To avoid high voltage shock, do not open the device while the power is on. Brocade G620 Switch Hardware Installation Guide 53-1003990-16... -
Page 15: Lifting And Weight-Related Precautions
To prevent damage to the chassis and components, never attempt to lift the chassis using the fan or power supply handles. These handles were not designed to support the weight of the chassis. Brocade G620 Switch Hardware Installation Guide 53-1003990-16... -
Page 16: Laser Precautions
Preinstallation Tasks Review all installation requirements ahead of time as part of your site preparation. Careful planning and site preparation ensures seamless installation, especially when installing multiple devices. Brocade G620 Switch Hardware Installation Guide 53-1003990-16... -
Page 17: Installation And Initial Configuration
Use the ipaddrset command to configure a static device IP address, subnet mask, and default gateway IP address. gateway IP address, or you can use a DHCP server to obtain the information dynamically. Configuring the IP Address on page 49. Brocade G620 Switch Hardware Installation Guide 53-1003990-16... -
Page 18: Shipping Carton Contents
Two 1.82m (6 ft) power cords – Download Instructions for Fibre Channel Networking Software and Documents • Inner foam NOTE Transceivers may be shipped in the accessory tray instead of installed in switch ports. Brocade G620 Switch Hardware Installation Guide 53-1003990-16... -
Page 19: Mounting The Device
To prevent damage to the chassis and components, never attempt to lift the chassis using the fan or power supply handles. These handles were not designed to support the weight of the chassis. Brocade G620 Switch Hardware Installation Guide 53-1003990-16... -
Page 20: Stand-Alone Installation
Observe the following when mounting the device: • Two people are required to install the device in a rack. One person holds the device, while the other screws in the front and rear brackets. Brocade G620 Switch Hardware Installation Guide 53-1003990-16... -
Page 21: Time And Items Required
The following items are required to install the device using the Universal Four-Post Rack Kit: • No. 2 Phillips torque screwdriver • 1/4-in. slotted-blade torque screwdriver Parts List The following parts are provided with the 1U, 1.5U, and 2U Universal Four-Post Rack Kit (XBR-R000296). Brocade G620 Switch Hardware Installation Guide 53-1003990-16... - Page 22 10. Retainer Nut, 10-32 (8) Ensure that the items listed and illustrated are included in the kit. Note that not all parts may be used with certain installations depending on the device type. Brocade G620 Switch Hardware Installation Guide 53-1003990-16...
-
Page 23: Flush-Front Mounting
Use the upper and lower screw holes, leaving the center holes empty. Repeat Step 1 and Step 2 to attach the left front bracket to the left side of the device. Brocade G620 Switch Hardware Installation Guide 53-1003990-16... - Page 24 Use the upper and lower screw holes, leaving the center holes empty. Repeat Steps 2 and 3 to attach the left extension bracket to the left side of the device. Brocade G620 Switch Hardware Installation Guide 53-1003990-16...
- Page 25 Attach the right front bracket to the right front rack post using two 10-32 x 5/8-in. panhead screws and two retainer nuts. Use the upper and lower holes in the bracket. Brocade G620 Switch Hardware Installation Guide 53-1003990-16...
- Page 26 If possible, leave at least one empty vertical pair of holes between the screws for better support. Repeat Step 2 and 3 to attach the left rear bracket to the left extension bracket. Brocade G620 Switch Hardware Installation Guide 53-1003990-16...
- Page 27 8. Use the upper and lower holes in the bracket. Attach the left rear bracket to the left rear rack post using two 10-32 x 5/8-in. panhead screws and two retainer nuts. Use the upper and lower holes in the bracket. Brocade G620 Switch Hardware Installation Guide 53-1003990-16...
-
Page 28: Flush-Rear (Recessed) Mounting
The illustrations in the rack installation procedures show a 1U device, but the instructions are the same for a 2U device. The illustrations in the rack installation procedures are for reference only and may not show the actual device. Brocade G620 Switch Hardware Installation Guide 53-1003990-16... - Page 29 Use the upper and lower screw holes, leaving the center holes empty. Repeat Steps 1 and 2 to attach the left front bracket to the left side of the device. Brocade G620 Switch Hardware Installation Guide 53-1003990-16...
- Page 30 Use the upper and lower screw holes, leaving the center holes empty. Repeat Steps 2 and 3 to attach the left front extension bracket to the left side of the device. Brocade G620 Switch Hardware Installation Guide 53-1003990-16...
- Page 31 Attach the right front bracket to the right rear rack post using two 10-32 x 5/8-in. panhead screws and two retainer nuts. Use the upper and lower holes in the bracket. Brocade G620 Switch Hardware Installation Guide 53-1003990-16...
- Page 32 Attach the brackets using four 6-32 x 1/4-in. panhead screws. Repeat Steps 2 and 3 to attach the left rear bracket to the left extension. Brocade G620 Switch Hardware Installation Guide 53-1003990-16...
- Page 33 Adjust the brackets to the rack depth, and tighten all 6-32 x 1/4-in. screws to a torque of 10 cm-kg (9 in.-lb). FIGURE 12 Attaching the Rear Brackets to the Extensions at the Front of the Device Rear Brackets, Short Screws, 6-32 x 1/4-in. Panhead Phillips Brocade G620 Switch Hardware Installation Guide 53-1003990-16...
- Page 34 14. Use the upper and lower holes in the bracket. Attach the left rear bracket to the left front rack post using two 10-32 x 5/8-in. screws and two retainer nuts. Use the upper and lower holes in the bracket. Brocade G620 Switch Hardware Installation Guide 53-1003990-16...
-
Page 35: Installing The Universal Two-Post Rack Kit (Xbr-R000294)
You can mount the device in a two-post rack in two ways: • With the port side flush with the front posts • With the posts mounted to the mid-section of the device Brocade G620 Switch Hardware Installation Guide 53-1003990-16... -
Page 36: Time And Items Required
The following items are required to install the device using the Universal Two-Post Rack Kit: • No. 2 Phillips torque screwdriver • 1/4-in. slotted-blade torque screwdriver Parts List The following parts are provided with the Universal Two-Post Rack Kit (XBR-R000294). Brocade G620 Switch Hardware Installation Guide 53-1003990-16... -
Page 37: Flush-Front Mounting
Use the screws specified in the procedure. Using longer screws can damage the device. Complete the following tasks to install the device in the rack: Attaching the Front Brackets to the Device on page 38 Brocade G620 Switch Hardware Installation Guide 53-1003990-16... - Page 38 Use the upper and lower screw holes, leaving the center holes empty. Repeat Steps 1 and 2 to attach the left front bracket to the left side of the device. Brocade G620 Switch Hardware Installation Guide 53-1003990-16...
- Page 39 Attach the left front bracket to the left rack upright using two 10-32 x 5/8-in. panhead screws and two retainer nuts. Use the upper and lower holes in the bracket. Brocade G620 Switch Hardware Installation Guide 53-1003990-16...
- Page 40 Attach the bracket to the right rack upright using two 10-32 x 5/8-in. panhead screws and two retainer nuts. Use the upper and lower holes in the bracket. Repeat Steps 2 and 3 to attach the left rear bracket to the left rack upright. Brocade G620 Switch Hardware Installation Guide 53-1003990-16...
- Page 41 Align the left rear bracket to the left rear of the device and use four 8-32 x 5/16-in. panhead screws to attach the bracket to the device. Again, use the upper and lower slots in the bracket. Brocade G620 Switch Hardware Installation Guide 53-1003990-16...
-
Page 42: Mid-Mounting
The illustrations in the rack installation procedures are for reference only and may not show the actual device. Complete the following tasks to install the device in the rack: Attaching the Front Brackets to the Device on page 43 Attaching the Front Brackets to the Rack on page 44 Brocade G620 Switch Hardware Installation Guide 53-1003990-16... - Page 43 Tighten all 8-32 x 5/16-in. screws to a torque of 17 cm-kg (15 in.-lb). FIGURE 20 Attaching the Front Brackets Brocade Device Screws, 8-32 x 5/16-in. Flathead Phillips Front Brackets, Right and Left Brocade G620 Switch Hardware Installation Guide 53-1003990-16...
- Page 44 Tighten all 10-32 x 5/8-in. screws to a torque of 29 cm-kg (25 in.-lb). FIGURE 21 Attaching the Front Brackets to the Rack Screws, 10-32 x 5/8-in. Panhead Phillips Retainer Nuts, 10-32 Brocade G620 Switch Hardware Installation Guide 53-1003990-16...
- Page 45 Tighten all 10-32 x 5/8-in. screws to a torque of 29 cm-kg (25 in.-lb). FIGURE 22 Attaching the Rear Brackets to the Rack Retainer Nuts, 10-32 Screws, 10-32 x 5/8-in. Panhead Phillips Rear Brackets (Right and Left) Brocade G620 Switch Hardware Installation Guide 53-1003990-16...
- Page 46 Again, use the upper and lower slots in the bracket. Tighten all 8-32 x 5/16-in. screws to a torque of 17 cm-kg (15 in.-lb). FIGURE 23 Attaching the Rear Brackets to the Device Screws, 8-32 x 5/16-in. Panhead Phillips Brocade G620 Switch Hardware Installation Guide 53-1003990-16...
-
Page 47: Initial Setup And Verification
After the POST is complete, verify that the switch power and switch status LEDs are green. For more information about how to interpret the POST, boot, and diagnostics tests, see Monitoring the Device on page 64. Brocade G620 Switch Hardware Installation Guide 53-1003990-16... -
Page 48: Establishing A First-Time Serial Connection
Initial passwords can be 8 to 40 characters long. They must begin with an alphabetic character. They can include numeric characters, the period (.), and the underscore (_) only. Passwords are case-sensitive, and they are not displayed when you enter them on the command line. Brocade G620 Switch Hardware Installation Guide 53-1003990-16... -
Page 49: Configuring The Ip Address
You can synchronize the local time of the principal or primary fabric configuration server (FCS) device to that of an external Network Time Protocol (NTP) server. Perform the following steps to set the date and time. Log on to the device as admin. Brocade G620 Switch Hardware Installation Guide 53-1003990-16... -
Page 50: Setting The Time Zone
Eastern Standard -5,0 Eastern Daylight -4,0 Central Standard -6,0 Central Daylight -5,0 Mountain Standard -7,0 Mountain Daylight -6,0 Pacific Standard -8,0 Pacific Daylight -7,0 Alaskan Standard -9,0 Alaskan Daylight -8,0 Hawaiian Standard -10,0 Brocade G620 Switch Hardware Installation Guide 53-1003990-16... -
Page 51: Synchronizing The Local Time With An External Source
At this point, the device can be accessed remotely, using either the command line or Brocade Web Tools. Ensure that the device is not being modified from any other connections during the remaining tasks in this chapter. The Ethernet management port also supports Auto MDI/MDIX. Brocade G620 Switch Hardware Installation Guide 53-1003990-16... -
Page 52: Setting The Domain Id
Complete the remaining prompts or press Ctrl+D to accept the remaining settings without completing all the prompts. Re-enable the switch by entering the switchEnable command. Verifying Correct Operation Perform the following steps to verify correct operation of the device. Check the LEDs to verify that all components are functional. Brocade G620 Switch Hardware Installation Guide 53-1003990-16... -
Page 53: Backing Up The Configuration
Backing Up the Configuration Back up the configuration on a regular basis to ensure that a complete configuration is available for downloading to a replacement switch. Log on to the device as the admin user. Brocade G620 Switch Hardware Installation Guide 53-1003990-16... -
Page 54: Powering Down The Device
Power off both power supplies by setting each power switch to the “O” position. Unplug the power cables from the power source before servicing the device or FRUs. All devices are returned to their initial state the next time the switch is powered on. Brocade G620 Switch Hardware Installation Guide 53-1003990-16... -
Page 55: Installing Transceivers And Cables
If you did not receive this tool with your product, you can order it from Brocade using part number XBR-48000-R0129. Brocade G620 Switch Hardware Installation Guide 53-1003990-16... -
Page 56: Precautions Specific To Transceivers And Cables
The minimum bend radius for a 50-micron cable is 2 inches under a full tensile load and 1.2 inches with no tensile load. Cables can be organized and managed in a variety of ways, for example, using cable channels on the sides of the rack or patch panels to minimize cable management. Follow these recommendations: Brocade G620 Switch Hardware Installation Guide 53-1003990-16... -
Page 57: Installing An Sfp+ Transceiver
Brocade Transceiver Support Matrix and Brocade Transceiver Modules on www.broadcom.com. If you use an unqualified transceiver, the switchshow command output shows the port in a Mod_Inv state. The issue is also logged in the system error log. To insert an SFP+ transceiver, complete the following steps: Brocade G620 Switch Hardware Installation Guide 53-1003990-16... - Page 58 FIGURE 25 Installing a 32Gb/s SFP+ Transceiver into a Port Pull Tab Transceiver FIGURE 26 Closeup of Installing a 32Gb/s SFP+ Transceiver into an Upper Port Brocade G620 Switch Hardware Installation Guide 53-1003990-16...
-
Page 59: Replacing An Sfp+ Transceiver
16Gb/s and 32Gb/s SFP+ transceivers have pull tabs instead of bails. Always use the pull tab to insert or remove the SFP+ transceivers, since the SFP might be hot. Remove any cables that are inserted into the transceiver. Brocade G620 Switch Hardware Installation Guide 53-1003990-16... -
Page 60: Installing A Qsfp Transceiver
The device supports only transceivers that are qualified for Brocade products. If you use an unqualified transceiver, the switchshow command output shows the port in a Mod_Inv state. The issue is also logged in the system error log. Brocade G620 Switch Hardware Installation Guide 53-1003990-16... -
Page 61: Replacing A Qsfp Transceiver
The device supports only transceivers that are qualified for Brocade products. If you use an unqualified transceiver, the switchshow command output shows the port in a Mod_Inv state. The issue is also logged in the system error log. Brocade G620 Switch Hardware Installation Guide 53-1003990-16... - Page 62 NOTE Cables are keyed so that they can be inserted in only one way. If a cable does not slide in easily, ensure that it is correctly oriented. Brocade G620 Switch Hardware Installation Guide 53-1003990-16...
-
Page 63: Verifying The Operation Of New Transceivers
You can use the following commands to verify if the transceivers are working correctly: • errDump • fabricShow • sfpShow • switchShow Refer to the Brocade Fabric OS Command Reference Manual for output examples and descriptions. Brocade G620 Switch Hardware Installation Guide 53-1003990-16... -
Page 64: Monitoring The Device
LEDs may flash either of the colors during boot, POST, or other diagnostic tests. This is normal; it does not indicate a problem unless the LEDs do not indicate a healthy state after all boot processes and diagnostic tests are complete. FIGURE 30 Brocade G620 Port-Side LEDs System Status LED... -
Page 65: System Status Led
Link/Speed—Green LED is on 1000Mb/s link Link/Speed—Amber LED is on 10/100Mb/s link Activity—Green LED is blinking Presence of activity FC Port Status LEDs Use the following table to interpret the FC port status LEDs. Brocade G620 Switch Hardware Installation Guide 53-1003990-16... -
Page 66: Qsfp Port Status Leds
Port is online, and frames are flowing through No action is required. the port. Steady amber Port is receiving light or signal carrier, but it is not No action is required. online yet. Brocade G620 Switch Hardware Installation Guide 53-1003990-16... -
Page 67: Interpreting Nonport-Side Leds
POST can be monitored through LED activity, the error log, or the command line interface. During the POST, the LEDs flash different colors. The POST performs the following tasks: • Conducts preliminary POST diagnostics. Brocade G620 Switch Hardware Installation Guide 53-1003990-16... -
Page 68: Interpreting Boot Results
Diagnostic tests are run at supported link speeds depending on the speed of the link being tested and the type of port. NOTE Diagnostic tests may temporarily lock the transmit and receive speed of the links. NOTE Power-cycle the device after completing offline diagnostics tests. Brocade G620 Switch Hardware Installation Guide 53-1003990-16... -
Page 69: Power Supply And Fan Assembly
Verifying the Operation of the Power Supply and Fan Assemblies..................... 75 Power Supply and Fan Assembly Overview The power supply and fan assembly units in the Brocade G620 chassis can be removed and replaced without special tools. The device can continue operating during the replacement. -
Page 70: Precautions Specific To The Power Supply And Fan Assemblies
The power supply and fan assemblies are identified by the following airflow directions: • Intake power supply and fan assembly with an orange "I" label or without any label: Pulls air from the nonport side of the switch and exhausts it out the port side. Brocade G620 Switch Hardware Installation Guide 53-1003990-16... -
Page 71: Power Supply And Fan Assembly Fault Indicators
Remove the existing filler panel. Insert the new power supply and fan assembly. Power on the power supply and fan assembly. Verify the power supply and fan assembly status LED. Brocade G620 Switch Hardware Installation Guide 53-1003990-16... -
Page 72: Replacing A Power Supply And Fan Assembly (Hot-Swap)
Recording Critical Information about the Power Supply and Fan Assembly You can use the following commands to record the power supply and fan assembly configuration and operation information: • chassisshow • fanshow • historyshow Brocade G620 Switch Hardware Installation Guide 53-1003990-16... -
Page 73: Removing A Power Supply And Fan Assembly
Remove the power supply and fan assembly from the chassis by pulling the handle out and away from the chassis. Inserting a New Power Supply and Fan Assembly Complete the following steps to insert a new power supply and fan assembly into the chassis. Brocade G620 Switch Hardware Installation Guide 53-1003990-16... - Page 74 LED is not a steady green, ensure that the power supply is securely installed and seated properly. Optional: Enter psshow to display the PSU status. The power supply and fan assembly status can also be viewed using Web Tools. Brocade G620 Switch Hardware Installation Guide 53-1003990-16...
-
Page 75: Verifying The Operation Of The Power Supply And Fan Assemblies
You can use the following commands to verify that the power supply and fan assemblies are operational: • errDump • fanShow • psShow • switchShow Refer to the Brocade Fabric OS Command Reference Manual for output examples and descriptions. Brocade G620 Switch Hardware Installation Guide 53-1003990-16... -
Page 76: Brocade G620 Switch Technical Specifications
Brocade G620 Switch Technical Specifications The following tables highlight the features and specifications for the Brocade G620 switch. System Specifications System Component Description Enclosure 1U, port-side back-to-front exhaust airflow, power from back. Power inlet C14. Power supplies Dual, hot-swappable, redundant, AC input power supplies with integrated system cooling fans. -
Page 77: Other Ports
18.80 lb Environmental Requirements Condition Operational Nonoperational Ambient temperature 0°C to 40°C (32°F to 104°F) -25°C to 70°C (-13°F to 158°F) Relative humidity 10% to 85% at 40°C (104°F) 10% to 90% noncondensing (noncondensing) Brocade G620 Switch Hardware Installation Guide 53-1003990-16... -
Page 78: Power Supply Specifications (Per Psu)
Not supported 2 (Input current is for 1 All ports are fully configured with 100% Switch PSU. Watts and traffic rate, fans at high speed, and input 204W 202W power +/- 5% tolerance. Brocade G620 Switch Hardware Installation Guide 53-1003990-16... -
Page 79: Power Consumption (Idle Configuration)
190m (623 ft) (OM4) 62.5 21m (68 ft) 10 km (6.2 miles) 82m (269 ft) (OM2) 300m (984 ft) (OM3) 550m (1,804 ft) (OM4) 62.5 33m (108 ft) 10 km (6.2 miles) 35m (115 ft) (OM2) Brocade G620 Switch Hardware Installation Guide 53-1003990-16... -
Page 80: Serial Port Specifications (Pinout Rj-45)
None Stop bits Memory Specifications Memory Type Size Main memory DDR3L SDRAM with 8-bit ECC, SORDIMM package, operating at 2 GB, 64-bit 1200 MT/s Boot flash Parallel NOR flash embedded memory 16 MB Brocade G620 Switch Hardware Installation Guide 53-1003990-16... -
Page 81: Regulatory Compliance (Emc)
Authorisation, and Restriction of Chemicals (EU REACH). • Section 1502 of the Dodd-Frank Wall Street Reform and Consumer Protection Act of 2010 - U.S. Conflict Minerals. • 94/62/EC – Packaging and packaging waste (EU). Brocade G620 Switch Hardware Installation Guide 53-1003990-16... - Page 82 Regulatory Compliance (Environmental) • SJ/T 11364 – 2006 Marking for the Control of Pollution Caused by EIPs (China). • SJ/T 11363 – 2006 Requirements for Concentration Limits for Certain Hazardous Substances in EIPs (China). Brocade G620 Switch Hardware Installation Guide 53-1003990-16...
-
Page 83: Regulatory Statements
European Council directives, laws, and standards: • Electromagnetic Compatibility (EMC) Directive 2014/30/EU • Low Voltage Directive (LVD) 2014/35/EU • EN 55032/EN 55024 (European Immunity Requirements) – EN61000-3-2/JEIDA (European and Japanese Harmonics Spec) – EN61000-3-3 Brocade G620 Switch Hardware Installation Guide 53-1003990-16... -
Page 84: China Ccc Statement
This equipment has been tested and complies with the limits for a Class A computing device pursuant to Part 15 of the FCC rules. These limits are designed to provide reasonable protection against harmful interference when the equipment is operated in a commercial environment. Brocade G620 Switch Hardware Installation Guide 53-1003990-16... -
Page 85: Germany Statement
Class A device (Broadcasting Communication Device for Office Use): This device obtained EMC registration for office use (Class A), and may be used in places other than home. Sellers and/or users need to take note of this. Brocade G620 Switch Hardware Installation Guide 53-1003990-16... -
Page 86: Taiwan Rohs Certification
Taiwan ROHS Certification Taiwan ROHS Certification Brocade G620 Switch Hardware Installation Guide 53-1003990-16... -
Page 87: Vcci Statement
This is a Class A product based on the standard of the Voluntary Control Council for Interference by Information Technology Equipment (VCCI). If this equipment is used in a domestic environment, radio disturbance might arise. When such trouble occurs, the user might be required to take corrective actions. Brocade G620 Switch Hardware Installation Guide 53-1003990-16... -
Page 88: Cautions And Danger Notices
Stromkabel, um es an die Srromquelle anzuschließen. DANGER Vérifiez que les circuits de sources d'alimentation sont bien mis à la terre, puis utilisez lecordon d'alimentation fourni avec le dispositif pour le connecter à la source d'alimentation. Brocade G620 Switch Hardware Installation Guide 53-1003990-16... -
Page 89: Dangers Related To Equipment Weight
Vérifiez que le bâti abritant le dispositif est bien fixé afin qu'il ne devienne pas instable ou qu'il ne risque pas de tomber. PELIGRO Verifique que el bastidor que alberga el instrumento está asegurado correctamente para evitar que pueda hacerse inestable o que caiga. Brocade G620 Switch Hardware Installation Guide 53-1003990-16... -
Page 90: Laser Dangers
MISE EN GARDE Les éventuelles modifications apportées à cet équipement sans avoir été expressément approuvées par la partie responsable d'en évaluer la conformité sont susceptibles d'annuler le droit de l'utilisateur à utiliser cet équipement. Brocade G620 Switch Hardware Installation Guide 53-1003990-16... -
Page 91: Electrical Cautions
VORSICHT Falls kein Modul oder Netzteil im Steckplatz installiert wird, muss die Steckplatztafel angebracht werden. Wenn ein Steckplatz nicht abgedeckt wird, läuft das System heiß. Brocade G620 Switch Hardware Installation Guide 53-1003990-16... - Page 92 El interruptor de la fuente de alimentación debe estar en la posición de apagado en el momento de introducirla en el chasis. El conmutador puede resultar dañado si se instala una fuente de alimentación activa. Brocade G620 Switch Hardware Installation Guide 53-1003990-16...
-
Page 93: Revision History
Main memory size changed to 2 GB, 64-bit. • Flash memory size changed to 16 MB. 53-1003990-13; 20 September 2018 Made revisions throughout the document to provide only information on the supported AC power supplies. Brocade G620 Switch Hardware Installation Guide 53-1003990-16...
Need help?
Do you have a question about the G620 and is the answer not in the manual?
Questions and answers