Table of Contents
Advertisement
Advertisement
Table of Contents

Related Manuals for FLYGT P7030


Summary of Contents for FLYGT P7030
- Page 1 Installation, Operation and Maintenance Manual Flygt P7030, P7035, P7040...
-
Page 3: Table Of Contents
Cable entry parts..........................21 Connect the motor cable to the pump..................21 Connect the motor cable to the starter and monitoring equipment........22 Power cable phase sequence.......................23 Cable charts............................23 Cable bending radius, weight and diameter................30 Flygt P7030, P7035, P7040 Installation, Operation and Maintenance Manual... - Page 4 Product overview..........................54 Materials.............................54 Mounting-related data........................55 Operational data..........................56 Application limits..........................56 Motor Data............................56 The monitoring equipment......................56 P7030 Motor rating and performance, 50 Hz...................57 Low voltage............................57 P7030 Motor rating and performance, 60 Hz...................58 Low voltage............................58 Flygt P7030, P7035, P7040 Installation, Operation and Maintenance Manual...
-
Page 5: Introduction And Safety
It is extremely important that you read, understand, and follow the safety messages and regulations carefully before handling the product. They are published to help prevent these hazards: • Personal accidents and health problems • Damage to the product • Product malfunction Flygt P7030, P7035, P7040 Installation, Operation and Maintenance Manual... -
Page 6: Environmental Safety
• Handle and dispose of the processed liquid in compliance with applicable environmental regulations. • Clean up all spills in accordance with safety and environmental procedures. • Report all environmental emissions to the appropriate authorities. Flygt P7030, P7035, P7040 Installation, Operation and Maintenance Manual... -
Page 7: User Safety
• Make sure that all personnel who work with biologically hazardous liquids are vaccinated against diseases to which they may be exposed. • Observe strict personal cleanliness. Flygt P7030, P7035, P7040 Installation, Operation and Maintenance Manual... -
Page 8: Product Warranty
However, should the need arise for a warranty claim, then contact your Xylem representative. Spare parts Xylem guarantees that spare parts will be available for 15 years after the manufacture of this product has been discontinued. Flygt P7030, P7035, P7040 Installation, Operation and Maintenance Manual... -
Page 9: Transportation And Storage
• Always lift the unit by its lifting handle. Never lift the unit by the motor cable or by the hose. • Do not attach sling ropes to shaft ends. Flygt P7030, P7035, P7040 Installation, Operation and Maintenance Manual... -
Page 10: Temperature Ranges For Transportation, Handling And Storage
13°C (9°F), the viscosity increases such that the glycol mixture will lose its flow properties. However, the glycol-water mixture will not solidify completely and thus cannot harm the product. Follow these guidelines to avoid freezing damage: Flygt P7030, P7035, P7040 Installation, Operation and Maintenance Manual... -
Page 11: Storage Guidelines
• Before operating the unit after storage, it must be inspected with special attention to the seals and the cable entry. • The impeller/propeller must be rotated every other month to prevent the seals from sticking together. Flygt P7030, P7035, P7040 Installation, Operation and Maintenance Manual... -
Page 12: Product Description
Xylem representative before proceeding. WARNING: In explosive or flammable environments, only use Ex- or MSHA-approved pumps. NOTICE: Do NOT use the pump in highly corrosive liquids. Flygt P7030, P7035, P7040 Installation, Operation and Maintenance Manual... -
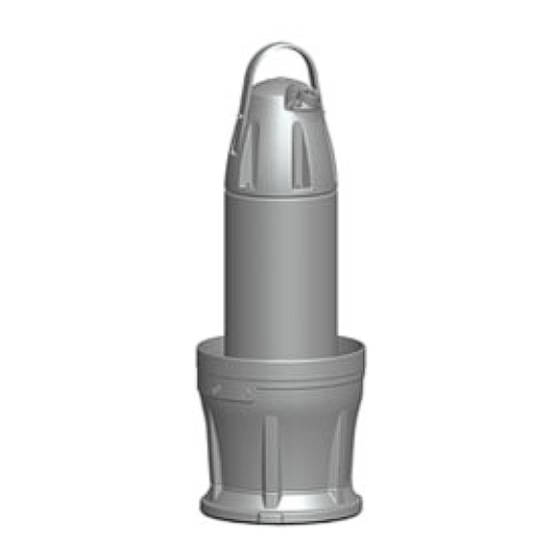
Page 13: Parts
Contains inner and outer mechanical seals. Includes a coolant that lubricates and cools the seals; the housing acts as a buffer between the pumped fluid and the electric motor Propeller Seal ring Bell mouth With integrated relief groove Flygt P7030, P7035, P7040 Installation, Operation and Maintenance Manual... -
Page 14: The Monitoring Equipment
The data plate is a metal label located on the main body of the products. The data plate lists key product specifications. Specially approved products also have an approval plate. Curve code/Propeller code Serial number, see Product denomination (page 14) Product number Country of origin Flygt P7030, P7035, P7040 Installation, Operation and Maintenance Manual... -
Page 15: Approvals
• Dust ignition proof for use in Class II. Div 1. Group E, F and G • Suitable for use in Class III. Div 1. Hazardous Locations EN approval plate This illustration describes the EN approval plate and the information contained in its fields. Flygt P7030, P7035, P7040 Installation, Operation and Maintenance Manual... -
Page 16: Iec Approval Plate
12. Max. ambient temperature 13. Serial number WS001279B FM approval plate This illustration describes the FM approval plate and the information contained in its fields. Temperature class Maximum ambient temperature WS003973A Product denomination Flygt P7030, P7035, P7040 Installation, Operation and Maintenance Manual... - Page 17 The serial number is used for identification of an individual product, and is divided into four parts. This is an example of a serial number, and an explanation of its parts. NP 3085.183 - 951 0163 Product code Production year Production cycle Running number Flygt P7030, P7035, P7040 Installation, Operation and Maintenance Manual...
-
Page 18: Installation
• Make sure that the unit cannot roll or fall over and injure people or damage property. NOTICE: • Do not run the pump dry. • Never force piping to make a connection with a pump. Flygt P7030, P7035, P7040 Installation, Operation and Maintenance Manual... - Page 19 1. After cable preparation, lower the pump into the pump column. Make sure that the pump does not tilt on the stop vanes, which are at the bottom of the column. Flygt P7030, P7035, P7040 Installation, Operation and Maintenance Manual...
- Page 20 Figure 4: Lowering pump while moving between anti-rotation gussets (generic propeller pump shown) 3. Lift the pump slightly again, approximately 2-3 cm (1 in.), and turn it counterclockwise until the anti-rotation device on the hydraulic end lands against the nearest adjacent vanes. Flygt P7030, P7035, P7040 Installation, Operation and Maintenance Manual...
- Page 21 Figure 6: Lowering pump to final bottom position (generic propeller pump shown) 5. If the recommended cable handling system is used, then follow the instructions for finishing the cable connection. See the document "Mounting Instructions, Flygt Cable Handling System." 6. If the recommended cable handling system is not used, then fasten the power cables on the cable holder, and run them to the electric junction box.
-
Page 22: Make The Electrical Connections
• The minimum bending radius must not be below the accepted value. • The voltage drop in long cables must be taken into account. The drive unit’s rated voltage is the voltage measured at the cable connection point in the pump. Flygt P7030, P7035, P7040 Installation, Operation and Maintenance Manual... -
Page 23: Earthing (Grounding)
Cable entry parts Position Part Entrance cover O-ring O-ring Washer Seal sleeve Spacer ring Entrance flange Cable Connect the motor cable to the pump Flygt P7030, P7035, P7040 Installation, Operation and Maintenance Manual... -
Page 24: Connect The Motor Cable To The Starter And Monitoring Equipment
4. Check the functionality of the monitoring equipment: a) Check that the signals and the tripping function work properly. b) Check that the relays, lamps, fuses, and connections are intact. Replace any defective equipment. Flygt P7030, P7035, P7040 Installation, Operation and Maintenance Manual... -
Page 25: Power Cable Phase Sequence
In cables with both power cores element) and control element. Power cable to pump Cable charts Connection locations The figures in this section illustrate how to interpret the connection strip symbols. Flygt P7030, P7035, P7040 Installation, Operation and Maintenance Manual... - Page 26 Starter equipment and mains leads (L1, L2, L3) Earth (ground) Functional ground Control leads (T1, T2, T3, T4) L1 L2 L3 T1 T2 T3 T4 Thermal contact FLS 10 Thermistor 10. Level sensor 11. Capacitor FLS 10 Flygt P7030, P7035, P7040 Installation, Operation and Maintenance Manual...
- Page 27 Screen (WH) Screen (WH) Screen (WH) GC=Ground check 773 29 00/1 Color code standard (page 25). Color code standard Code Description Brown Black White Orange Green GNYE Green-Yellow Grey Blue Yellow Flygt P7030, P7035, P7040 Installation, Operation and Maintenance Manual...
- Page 28 W1 V2 Figure 9: Y-connection One cable (left) and two cables (right) D-connection. One cable Two cables V1 U2 W1V2 U1W2 Figure 10: D-connection One cable (left) and two cables (right) Y/D-connection. Flygt P7030, P7035, P7040 Installation, Operation and Maintenance Manual...
- Page 29 One cable (left) and two cables (right) Y-serial connection. Two cables One cable Y-SER U2 V1 V5 V2 W1W5 W2 U2U5V2V5W2W5 U1U5 Figure 13: Y-serial connection Screened cables Cable without separate ground conductor. Screen as ground conductor. Flygt P7030, P7035, P7040 Installation, Operation and Maintenance Manual...
- Page 30 SUBCAB 4GX/7G and Control SUBCAB AWG Screened Screenflex WH T1 WH T1 WH T2 WH T2 WH T3 WH T4 Figure 16: Color and marking of control leads Color code standard (page 25). Flygt P7030, P7035, P7040 Installation, Operation and Maintenance Manual...
- Page 31 **Screened SUBCAB Figure 18: FLS and thermal detectors T=25°C (77°F) R ≤ 100 Ohm T=135°C (275°F) (T –5°C (23°F)) R ≤ 550 Ohm T=145°C (293°F) (T +5°C (41°F)) R ≤ 1330 Ohm Flygt P7030, P7035, P7040 Installation, Operation and Maintenance Manual...
-
Page 32: Cable Bending Radius, Weight And Diameter
Caution light (stator over-temperature) Pump main supply 12 VDC Reset switch FLS10 WS002623B Cable bending radius, weight and diameter Before cycle 20128 This section applies to cables delivered before 13 November 2012. Flygt P7030, P7035, P7040 Installation, Operation and Maintenance Manual... - Page 33 4G35 + S(2x0.5) 2.24 Ø 35–37 ® Table 4: SUBCAB screened cables Cable Minimum bending Weight in kg/m Outer diameter, radius in mm minimum-maximum in S3x6 + 3x6/3 + S(4x0.5) 0.55 Ø 20–22 Flygt P7030, P7035, P7040 Installation, Operation and Maintenance Manual...
-
Page 34: Check The Impeller Rotation
4. If the impeller/propeller rotates in the wrong direction, check that the phase leads are correctly connected. See Power cable phase sequence (page 23). After re-connecting phase leads, do this procedure again. Flygt P7030, P7035, P7040 Installation, Operation and Maintenance Manual... -
Page 35: Operation
1. Remove the fuses or open the circuit breaker, and check that the impeller can be rotated freely. 2. Conduct insulation test phase to ground. To pass, the value must exceed 5 megohms. Flygt P7030, P7035, P7040 Installation, Operation and Maintenance Manual... - Page 36 Operation 3. Check that the monitoring equipment works. 4. Start the pump. Flygt P7030, P7035, P7040 Installation, Operation and Maintenance Manual...
-
Page 37: Maintenance
(1630) Hexagon screws with countersunk heads For hexagon socket head screws with countersunk head, maximum torque for all property classes must be 80% of the values for property class 8.8 above. Flygt P7030, P7035, P7040 Installation, Operation and Maintenance Manual... -
Page 38: Changing The Coolant
The seal housing may be pressurized. Hold a rag over the inspection/ filling plugs to prevent splatter. 1. Remove the outer screw and the inner screw of both coolant plugs, and the inspection plug, on the hydraulic part. Outer screw Inner screw Flygt P7030, P7035, P7040 Installation, Operation and Maintenance Manual... -
Page 39: Fill With Coolant
1. Thread the hose of the hand-pump through both of the holes into the seal chamber. 2. Pump coolant into the seal chamber until it overflows through the opposite hole. Flygt P7030, P7035, P7040 Installation, Operation and Maintenance Manual... -
Page 40: Preparing For Work On The Hydraulic End
Remove the entrance cover 1. Remove the entrance cover screws. 2. Disconnect the motor cable leads. 3. Lift off the entrance cover. Flygt P7030, P7035, P7040 Installation, Operation and Maintenance Manual... -
Page 41: Attach The Assembly And Dismantling Stand
1. Bolt the assembly/dismantling stand (605 70 00) in position. Secure it using the screws for the entrance cover. 2. Attach lifting straps as shown in the following figure, and lift the pump. 3. Place the drive unit upside down on the stand. Flygt P7030, P7035, P7040 Installation, Operation and Maintenance Manual... -
Page 42: Replacing The Propeller
For instructions for attaching the stand, see Preparing for work on the hydraulic end (page 38). The propeller parts are shown in the following figure. Propeller screw Washer Propeller Adjustment screw Flygt P7030, P7035, P7040 Installation, Operation and Maintenance Manual... -
Page 43: Measure The Clearance
2. Measure the wear in the pump housing with a thickness gauge by placing the edge of a ruler across the surface of the housing. Flygt P7030, P7035, P7040 Installation, Operation and Maintenance Manual... -
Page 44: Remove The Propeller
1. Lock the propeller in place by inserting a rod or piece of wood through the pump housing outlet. 2. Loosen the propeller: a) Remove the propeller screw and washer. Flygt P7030, P7035, P7040 Installation, Operation and Maintenance Manual... -
Page 45: Install The Propeller
Turn the adjustment screw counterclockwise until the propeller breaks free from the shaft. Use the trim tool. 3. Remove the propeller and the propeller sleeve. Install the propeller 1. Mount the propeller: Flygt P7030, P7035, P7040 Installation, Operation and Maintenance Manual... - Page 46 Turn the adjustment screw 3/4 of a turn, so that it juts out from the sleeve 1.5 mm. Use the trim tool. 1.5 mm e) Fit the sleeve onto the shaft. f) Carefully fit the propeller to the shaft. Flygt P7030, P7035, P7040 Installation, Operation and Maintenance Manual...
-
Page 47: Replace The Bell Mouth
5. Check that the propeller can rotate freely. Replace the bell mouth 1. Remove the 3 hexagonal screws securing the bell mouth. If there are zinc anodes, then 6 hexagonal screws must be removed. Flygt P7030, P7035, P7040 Installation, Operation and Maintenance Manual... -
Page 48: Replace The Zinc Anodes
1. Loosen the hexagonal screws securing the zinc anodes at the inlet. 2. Replace the zinc anodes and fasten the screws. 3. Loosen the hexagonal screws securing the anodes at the outlet. Flygt P7030, P7035, P7040 Installation, Operation and Maintenance Manual... -
Page 49: Service The Pump
(liquid) temperatures <40°C. NOTICE: Shorter intervals may be required when the operating conditions are extreme, for example with very abrasive or corrosive applications or when the liquid temperatures exceed 40°C (104°F). Inspection Flygt P7030, P7035, P7040 Installation, Operation and Maintenance Manual... - Page 50 Thermal contacts Normally closed circuit; interval 0–1 ohm. Thermistor Check the resistance is between 20–250 ohms and the measured voltage is maximum 2 V DC. Voltage and amperage Check the running values. Flygt P7030, P7035, P7040 Installation, Operation and Maintenance Manual...
-
Page 51: Major Overhaul
Drain the fluid. Change the mechanical seal unit. Replace with new coolant. The thermistor/thermal contact Check the start and stop levels. The overload protection Check that the propeller can rotate freely. Flygt P7030, P7035, P7040 Installation, Operation and Maintenance Manual... -
Page 52: Troubleshooting
• All fuses have power and that they are securely fastened to the fuse holders. • The overload protection is not tripped. • The motor cable is not damaged. The impeller is stuck. Clean: Flygt P7030, P7035, P7040 Installation, Operation and Maintenance Manual... -
Page 53: The Pump Does Not Stop When A Level Sensor Is Used
• The sump in order to prevent the impeller from clogging again. If the problem persists, refer to the Flygt Service Guide on the web or contact the local Xylem service shop. Always state the serial number of your pump when you contact Xylem, Product Description (page 10). -
Page 54: The Pump Runs But The Motor Protection Trips
Troubleshooting If the problem persists, refer to the Flygt Service Guide on the web or contact the local Xylem service shop. Always state the serial number of your pump when you contact Xylem, Product Description (page 10). The pump runs but the motor protection trips WARNING: Always disconnect and lock out power before servicing to prevent unexpected startup. - Page 55 • Depending on the installation type, add a means for priming the pump, such as a foot valve. If the problem persists, refer to the Flygt Service Guide on the web or contact the local Xylem service shop. Always state the serial number of your pump when you contact Xylem, Product Description (page 10).
-
Page 56: Technical Reference
ASTM-A 532 High chromium cast No. 5.5610 – Alloy III A iron Mechanical face seals Seal Material, rotating ring Material, stationary ring Inner Wolfram Carbide Corrosion Resistant WCCR (WCCR) Outer WCCR WCCR Flygt P7030, P7035, P7040 Installation, Operation and Maintenance Manual... -
Page 57: Mounting-Related Data
Maximum voltage 600–1000 V, intended for drive units up to 1.1 kV. To be dimensioned by Xylem. Engineering data Performance curves, motor data and dimensional drawings are available from your Xylem representative. Pump (ball-) throughlet Table 7: P7030 Pump Throughlet P7030 2.52 Flygt P7030, P7035, P7040 Installation, Operation and Maintenance Manual... -
Page 58: Operational Data
• 3 thermal switches (standard), or • 3 PTC-thermistors (optional) Leakage in the inspection chamber Float Switch Leakage Sensor (FLS) Standard Leakage in the junction box Float Switch Leakage Sensor (FLS) Optional Flygt P7030, P7035, P7040 Installation, Operation and Maintenance Manual... -
Page 59: P7030 Motor Rating And Performance, 50 Hz
Table 9: P7030, 50 Hz Rotations per Motor Voltage, V Rated power, Rated current, Starting Power factor minute current, A cos φ 30–29–6A 0.85 0.84 30–23–6A 0.85 30–18–6A Figure 24: P7030, 50 Hz Flygt P7030, P7035, P7040 Installation, Operation and Maintenance Manual... -
Page 60: P7030 Motor Rating And Performance, 60 Hz
1170 30–29–6AA 1170 30–23–6AA 0.84 1170 30–18–6AA 0.84 24.0 20.0 16.0 12.0 250 300 350 400 450 500 550 600 650 700 5,000 9,000 11,000 7,000 Figure 25: P7030, 60 Hz Flygt P7030, P7035, P7040 Installation, Operation and Maintenance Manual... - Page 62 Xylem |’zīləm| 1) The tissue in plants that brings water upward from the roots 2) A leading global water technology company We're 12,500 people unified in a common purpose: creating innovative solutions to meet our world's water needs. Developing new technologies that will improve the way water is used, conserved, and re-used in the future is central to our work.
Need help?
Do you have a question about the P7030 and is the answer not in the manual?
Questions and answers