Table of Contents
Advertisement
Making cooking as much fun as eating
Please read this instruction manual. This will ensure that you
make full use of all the technical benefits your compact
microwave oven has to offer.
It will provide you with important safety information. You will
be familiarised with the individual components of your new
appliance. And we will show you how to make settings step
by step. It is quite simple.
The tables list the settings and shelf positions for numerous
well known dishes. All these dishes are tested in our cooking
studio.
In the unlikely event of a malfunction, look here for
information on how to rectify minor faults yourself.
A detailed table of contents will help you to find your way
around quickly.
Enjoy your meal!
Instructions for use
3HW469X
en
890325
All manuals and user guides at all-guides.com
9000 328 218
Advertisement
Table of Contents

Related Manuals for BALAY 3HW469X


Summary of Contents for BALAY 3HW469X
- Page 1 In the unlikely event of a malfunction, look here for information on how to rectify minor faults yourself. A detailed table of contents will help you to find your way around quickly. Enjoy your meal! Instructions for use 3HW469X 9000 328 218 890325...
-
Page 2: Table Of Contents
All manuals and user guides at all-guides.com Table of contents Safety information ......Before installation . - Page 3 All manuals and user guides at all-guides.com Table of contents Combination cooking ..... . . Setting a combination ......Automatic programmes .
- Page 4 All manuals and user guides at all-guides.com Table of contents Glass cover ....... . . Replacing the door seal .
-
Page 5: Safety Information
All manuals and user guides at all-guides.com d Safety information Read this instruction manual carefully. This will enable you to operate your appliance safely and correctly. Please keep the instruction and installation manual in a safe place. Please pass on these instruction manuals to the new owner if you sell the appliance. - Page 6 All manuals and user guides at all-guides.com Hot cooking compartment Risk of burning. Never touch the hot surfaces of heating and cooking appliances. Never touch the internal surfaces of the cooking compartment or the heating elements. Open the cooking compartment door carefully. Hot steam may escape.
- Page 7 All manuals and user guides at all-guides.com Casing open Danger of electric shock. Never remove the casing. The appliance is a high voltage appliance. Danger of serious damage to health Never remove the casing. It prevents microwave energy from escaping. Hot or humid environment Danger of short circuiting.
-
Page 8: Information On The Microwave
All manuals and user guides at all-guides.com Information on the microwave Preparing food Risk of fire. Only use the microwave to prepare food which is fit for consumption. Using the microwave for other purposes may be dangerous and may result in damage, e.g. - Page 9 All manuals and user guides at all-guides.com Drinks Risk of scalding. There is a possibility of delayed boiling when a liquid is heated. This means that the liquid reaches boiling temperature without the usual steam bubbles rising to the surface. The slightest vibration of the container can cause the hot liquid to suddenly boil over or spatter.
-
Page 10: Causes Of Damage
All manuals and user guides at all-guides.com Food with a low water Risk of fire. content Do not defrost or heat food at too high a power or for too long if the food has a low water content, e.g. bread. Cooking oil Risk of fire. - Page 11 All manuals and user guides at all-guides.com Cooling with the appliance Only leave the cooking compartment to cool with the door open door closed. Do not trap anything in the appliance door. Even if the door is only open a crack, the fronts of adjacent units may be damaged over time.
-
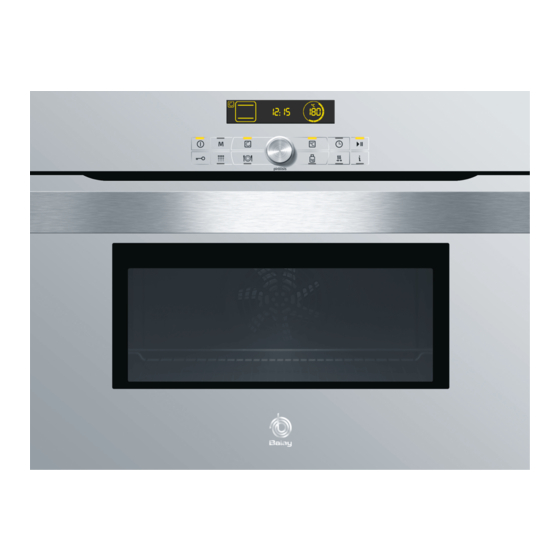
Page 12: Your New Appliance
All manuals and user guides at all-guides.com Your new appliance Use this section to familiarise yourself with your new appliance. The control panel and the individual controls are explained here. You will find information about the cooking compartment and the accessories. Control panel Here is an overview of the control panel. -
Page 13: Rotary Selector
All manuals and user guides at all-guides.com Symbol Button function Selects self cleaning Selects automatic programmes Selects the temperature or grill setting Selects the time settings Short press = starts/pauses operation Long press = cancels operation Selects the weight for the automatic programmes Switches on rapid heating ±... -
Page 14: Cooking Compartment
All manuals and user guides at all-guides.com All the bars appear straight away when grill settings or automatic programmes are selected. During microwave operation, the heating phases do not appear. When making settings, you can use the ± button to check the current temperature in the cooking compartment. -
Page 15: Accessories
All manuals and user guides at all-guides.com Accessories The accessories can be inserted into the oven at 3 different levels. The accessories can become deformed when they become hot. As soon as they have cooled down, the deformation disappears with no effect on the function. You can buy accessories from the after sales service, from specialist retailers or online. - Page 16 All manuals and user guides at all-guides.com Special accessories You can purchase special accessories from the after sales service or specialist shops. You will find a comprehensive range of products for your oven in our brochures and on the Internet. The availability of special accessories and whether it is possible to order them online may vary depending on your country.
-
Page 17: Before Using For The First Time
All manuals and user guides at all-guides.com Before using for the first time This section tells you everything you need to do before using the appliance for the first time. Set the clock Heat up the cooking compartment Clean the accessories Read the safety information at the start of the instructions for use. -
Page 18: Cleaning The Accessories Before Use
All manuals and user guides at all-guides.com 4. Press the [ button. The temperature is selected. The proposed temperature is shown in brackets. 5. Using the rotary selector, change the temperature to 240 ºC. 6. Press the @ button to start the appliance. 7. -
Page 19: The Microwave
All manuals and user guides at all-guides.com The microwave Microwaves are converted to heat in foodstuffs. The microwave can be used solo, i.e. on its own, or in combination with a different type of heating. You will find information about cookware and how to set the microwave. -
Page 20: Microwave Power Settings
All manuals and user guides at all-guides.com Perform the following test if you are unsure whether your ovenware is suitable for use in the microwave: Heat the empty ovenware at maximum power for between 30 and 60 seconds. Check the temperature of the ovenware during this period. - Page 21 All manuals and user guides at all-guides.com 3. Press the 0 button repeatedly until the arrow next to the duration is pointing to x O. 4. Turn the rotary selector to set the duration. 5. Press the @ button to start the appliance. Changing the duration After the microwave has started, you can change the cooking duration at any time, using the rotary selector.
-
Page 22: The Oven
All manuals and user guides at all-guides.com The oven In this section, you will read which types of heating are available for your oven how to set a type of heating and temperature how to set rapid heating. Types of heating Your oven offers you a wide variety of types of heating. -
Page 23: Setting The Type Of Heating And Temperature
All manuals and user guides at all-guides.com Type of heating and temperature Application range P Plate warming For plate warming, for instance for porcelain or glass. 30 70 ºC 1 Keep warm For keeping cooked dishes warm. 60 100 ºC ‚ß+"... -
Page 24: Microcombi, Gentle Microcombi, Intensive
All manuals and user guides at all-guides.com 5. Press the @ button to start the appliance. 6. Once the dish is ready, switch off the appliance by pressing the # button or set a new function. Changing the temperature After the microwave has started, you can change the or grill setting temperature or grill setting at any time. - Page 25 All manuals and user guides at all-guides.com Use the dark baking tins made of metal or plastic flexible baking dishes". For joints, a heat resistant glass dish with or without lid is suitable. MicroCombi, intensive This type of heating is suitable for poultry, e.g.
-
Page 26: Setting Rapid Heating
All manuals and user guides at all-guides.com Setting rapid heating The rapid heating function is only suitable for certain types of heating. To ensure an even cooking result, do not place your dish in the cooking compartment until rapid heating is complete. -
Page 27: Combination Cooking
All manuals and user guides at all-guides.com Combination cooking This involves the simultaneous operation of one type of heating with the microwave. Your dishes are ready more quickly due to the microwave and still nicely browned. You can set a duration of up to 1 hour and 30 minutes. - Page 28 All manuals and user guides at all-guides.com Setting the oven 4. Press the ‚ button and set the type of heating using the rotary selector. 5. Press the [ button and set the temperature using the rotary selector. 6. Press the @ button to start the appliance. You can also set the oven first, and then set the microwave using the ! button.
-
Page 29: Automatic Programmes
All manuals and user guides at all-guides.com Automatic programmes The automatic programmes enable you to prepare food very easily. You select the programme and enter the weight of your food. The automatic programme makes the optimum setting. You can select from 20 programmes. -
Page 30: Defrosting And Cooking With The Automatic Programs
All manuals and user guides at all-guides.com 5. Press the @ button to start the appliance. You will see the programme duration x O counting down in the display. When the duration has A signal sounds. Press the 0 button to cancel the elapsed signal before it sounds. - Page 31 All manuals and user guides at all-guides.com Cover thin and protruding parts with small pieces of aluminium foil. This prevents these parts from overcooking. Ensure that the aluminium foil does not touch the walls of the cooking compartment. After defrosting, allow the food to thaw for a further 10 to 90 minutes until it reaches room temperature.
- Page 32 All manuals and user guides at all-guides.com Cooking Vegetables Fresh vegetables: Cut into pieces of equal size. Add two tablespoons of water for every 100 g vegetables. Frozen vegetables: This programme is only suitable for blanched, not pre cooked vegetables. The programme is not suitable for frozen vegetables in cream sauce.
- Page 33 All manuals and user guides at all-guides.com Progr. no. Suitable foodstuffs Weight range Ovenware/accessories, in kg shelf height Rice, long grain rice* 0.10 0.50 Deep ovenware with lid wire rack, level 1 Steam fresh fish fillet Fillet of pike, cod, rosefish, 0.20 1.00 Ovenware with lid pollock, pike perch...
- Page 34 All manuals and user guides at all-guides.com Progr. no. Suitable foodstuffs Weight range Ovenware/accessories, in kg shelf height Combi cooking Pizza, frozen Pizza with thin base, prebaked 0.30 0.50 Universal pan level 1 Lasagne bolognese, 0.40 1.00 Open dishwire rack, level 1 frozen Chicken, fresh*** Whole chicken...
-
Page 35: Time Settings
All manuals and user guides at all-guides.com Time settings Call up the time settings using the 0 button. You have the following options: When the oven is switched off Q = Set timer 0 = Set clock When the oven is switched on Q = Set timer x = Set the duration, if necessary y = Set a later end time, if necessary... -
Page 36: Setting The Duration
All manuals and user guides at all-guides.com Setting tips: Calling up the time for the Press the 0 button. The time is displayed for a few timer seconds. Cancelling the timer time Press the 0 button and turn the time back to 00:00. The timer time is cancelled after a few seconds. -
Page 37: Setting A Later End Time
All manuals and user guides at all-guides.com 3. If operation has not already begun, press the @ button. The duration counts down on the display. The duration has elapsed A signal sounds. Heating does not continue. Press the 0 button to cancel the signal before it sounds. Open the appliance door and carefully remove the cookware with oven gloves. - Page 38 All manuals and user guides at all-guides.com Setting a later end time Prerequisites: The selected operation has not already begun. A duration has been set. 1. Press the 0 button repeatedly until the arrow is next to the symbol for the yO End time. The bars in the display show that the end time has not been delayed.
-
Page 39: Setting The Clock
All manuals and user guides at all-guides.com Setting the clock The oven must be switched off before you can set or change the clock. After a power failure, 4 zeros will flash in the clock Following a power failure display and you will hear a signal. 1. -
Page 40: Basic Settings
All manuals and user guides at all-guides.com Note Even if the childproof lock is active, you can still switch off the oven with #, set the timer and turn off the acoustic signal. Following a power cut, the childproof lock is no longer active. -
Page 41: Changing The Basic Settings
All manuals and user guides at all-guides.com Basic setting Function Options ’‹ˆ Default microwave Select default value for ‚ = 90 W power settings microwave power setting ƒ = 180 W „ = 360 W … = 600 W † = 900/1000 W ’‹‰... -
Page 42: Automatic Switch Off
All manuals and user guides at all-guides.com Automatic switch off Your oven has an automatic switch off function. It is only activated if the settings have not been changed for a long time. When the switch off function is activated depends on the temperature or grill setting which has been set. -
Page 43: Important Notes
All manuals and user guides at all-guides.com Risk of fire. Loose food residue, grease and meat juices are flammable. Wipe the oven floor, the inside of the oven door and the edges around the front of the oven with a damp cloth. -
Page 44: Setting The Self Cleaning
All manuals and user guides at all-guides.com There is a risk of fire. The outside of the appliance becomes very hot. Make sure that nothing is placed against the front of the appliance. Small children must be kept at a safe distance from the appliance. -
Page 45: Care And Cleaning
All manuals and user guides at all-guides.com Care and cleaning If carefully cleaned and taken care of, your microwave oven will remain fully functional and in a good condition for a long time to come. This section explains how to properly care for and clean your appliance. -
Page 46: Cleaning Agents
All manuals and user guides at all-guides.com Cleaning agents Damage to the various different surfaces caused by using the wrong cleaning agent can be avoided by observing the information in the table below. Do not use sharp or abrasive cleaning agents, metal or glass scrapers to clean the glass in the appliance door, metal or glass scrapers to clean the door seal,... -
Page 47: Cleaning The Glass Panels
All manuals and user guides at all-guides.com Area Cleaning agents Seal Hot soapy water: Clean with a dish cloth, do not scour. Do not use a metal or glass scraper to clean. Accessories Hot soapy water: Soak and clean with a dish cloth or a brush. Cleaning the glass panels The glass panel can be removed from the oven door... - Page 48 All manuals and user guides at all-guides.com 4. Hold the intermediate panel firmly and press the safety catch on the door upwards. Lift out the panel upwards. (Fig. C) Clean the glass panels using glass cleaner and a soft cloth. Do not use any sharp or abrasive agents.
- Page 49 All manuals and user guides at all-guides.com 3. Push the safety catches downwards. (Fig. C) 4. Insert the door panel into the guide with both hands. (Fig. D) 5. Push the door panel downwards, lift it slightly and hook it in at the top. (Fig. E) Ensure that the door panel is flush with the control panel.
-
Page 50: Troubleshooting
All manuals and user guides at all-guides.com 6. Fully open the door, while holding the panels firmly with one hand. (Fig. F) 7. Tighten the screws until hand tight using a slotted screwdriver (blade width 8 11 mm), then close the door. -
Page 51: Malfunction Table
All manuals and user guides at all-guides.com Malfunction table Problem Possible cause Remedial action/notes The appliance does not work. Blown fuse Look in the fuse box and check that the fuse is in working order. ‹‹:‹‹ flashes in the clock Power interruption Set the current time using the rotary display. -
Page 52: Replacing The Oven Light
All manuals and user guides at all-guides.com Error messages with E If an error message with E is shown in the display, turn the rotary selector. This clears the error message. It is possible that you may have to set the clock again. If the error is shown again, call the after sales service. -
Page 53: Glass Cover
All manuals and user guides at all-guides.com 3. Remove the glass cover. To do this open the glass cover downwards by hand. Should you experience difficulties removing the glass cover, use a spoon to help. (fig. A). 4. Remove the bulb and replace with the same bulb type. -
Page 54: Replacing The Door Seal
All manuals and user guides at all-guides.com Replacing the door seal If the door seal is defective, it must be replaced. Replacement seals for your appliance can be obtained from the after sales service. Please supply your appliance's E number and FD number. Danger of serious damage to health. -
Page 55: After Sales Service
All manuals and user guides at all-guides.com After sales service Our after sales service is there for you if your appliance should need to be repaired. You will find the address and telephone number of your nearest after sales service point in the phone book. The listed after sales service centres will also be pleased to give you the details of an after sales service point near you. -
Page 56: Energy And Environment Tips
All manuals and user guides at all-guides.com Energy and environment tips Here you can find tips on how to save energy when baking and roasting and how to dispose of your appliance properly. Saving energy Only preheat the oven if this is specified in the recipe or in the tables in the instruction manual. -
Page 57: Tested For You In Our Cooking Studio
All manuals and user guides at all-guides.com Tested for you in our cooking studio Here you will find a selection of dishes and the ideal settings for them. We will show you which type of heating and which temperature or microwave power setting are ideal for your dish. -
Page 58: Defrosting, Heating Up And Cooking With The Microwave
All manuals and user guides at all-guides.com Defrosting, heating up and cooking The following tables provide you with numerous options with the microwave and settings for the microwave. The times specified in the tables are only guidelines. They may vary according to the ovenware used, the quality, temperature and consistency of the food. - Page 59 All manuals and user guides at all-guides.com Defrosting Weight Microwave power setting Notes in watts, cooking time in minutes 800 g 180 W, 15 min. + Meat, whole pieces of beef, veal Turn several times 90 W, 10 15 min. or pork (on the bone or boned) 1 kg 180 W, 15 min.
- Page 60 All manuals and user guides at all-guides.com Defrosting Weight Microwave power setting Notes in watts, cooking time in minutes 300 g 180 W, 3 min. + Whole fish Turn during defrosting 90 W, 10 15 min. 600 g 180 W, 8 min. + 90 W, 10 15 min.
- Page 61 All manuals and user guides at all-guides.com Defrosting, heating up or Take ready meals out of the packaging. They will cooking frozen food heat up more quickly and evenly in microwaveable ovenware. The different components of the meal may not require the same amount of time to heat up.
- Page 62 All manuals and user guides at all-guides.com Defrosting, heating up or Weight Microwave power setting Notes cooking frozen food in watts, cooking time in minutes 250 g 600 W, 2 5 min. Side dishes, e.g. rice, pasta Ovenware with lid. Add li id liquid 500 g...
- Page 63 All manuals and user guides at all-guides.com Heating food Weight Microwave power setting Notes in watts, cooking time in minutes Menu, plated meal, 350 500 g 600 W, 4 8 min. Take meal out of packaging, ready meal cover food before heating 150 ml 1000 W, 1 3 min.
- Page 64 All manuals and user guides at all-guides.com Cooking food Food which lies flat will cook more quickly than food which is piled high. You should therefore distribute the food so that it is as flat as possible in the dish. Different foodstuffs should not be placed in layers on top of one another.
-
Page 65: Tips For Microwave Operation
All manuals and user guides at all-guides.com Cooking food Weight Microwave power setting Notes in watts, cooking time in minutes 125 g 600 W, 4 6 min. + Rice Add double the quantity of liquid. 180 W, 12 15 min. Use a deep casserole dish with lid 250 g 600 W, 7 9 min. -
Page 66: Cakes And Pastries
All manuals and user guides at all-guides.com Cakes and pastries About the tables The times given apply to dishes placed in a cold oven. The temperature and baking time depend on the consistency and amount of the mixture. This is why temperature ranges are given in the tables. - Page 67 All manuals and user guides at all-guides.com Cakes in tins Accessories Level Type of Tempera Microwave Duration heating ture in C power in watts minutes Fruit tart or cheesecake Dark " 160 170 180 W 30 40 on shortcrust pastry springform base* cake tin...
- Page 68 All manuals and user guides at all-guides.com Top/bottom heat 3D hot air = › Hot air = " Intensive heat = & Cakes on trays Accessories Level Type of Tempera Microwave Duration heating ture in C power in watts minutes Sponge with dry Universal pan 160 180...
- Page 69 All manuals and user guides at all-guides.com Cakes on trays Accessories Level Type of Tempera Microwave Duration heating ture in C power in watts minutes Strudel, sweet Universal pan " 190 210 180 W 30 40 Pizza Universal pan 210 230 25 35 Pizza Universal pan and...
-
Page 70: Baking Tips
All manuals and user guides at all-guides.com Top/bottom heat Hot air = " Preheat the cooking compartment. Bread and bread rolls Accessories Level Type of Temperature Duration heating in C in minutes Yeast bread with 1 kg flour Universal pan + 170 15 25 Sourdough bread with 1.2 kg... - Page 71 All manuals and user guides at all-guides.com The cake is too dry. Make small holes in the cake when it is done using a toothpick. Then drizzle fruit juice or an alcoholic drink over it. Next time, select a temperature 10 degrees higher and reduce the baking time.
-
Page 72: Roasting And Grilling
All manuals and user guides at all-guides.com Roasting and grilling About the tables The temperature and roasting time depend on the type and amount of food being cooked. This is why temperature ranges are given in the tables. Begin with the lower temperature and, if necessary, use a higher setting the next time. - Page 73 All manuals and user guides at all-guides.com Tips for grilling Always keep the oven door closed when grilling and do not preheat. The pieces of food you are grilling should be of equal thickness. Steaks should be at least 2 to 3 cm thick. This will allow them to grill evenly and prevent them from drying out.
- Page 74 All manuals and user guides at all-guides.com Top/bottom heat Grill, large area Accessories Level Type of Tempera Microwave Duration in heating ture in C, power in minutes grill setting watts Pot roasted beef, Ovenware with lid, 190 210 120 140 ca.
- Page 75 All manuals and user guides at all-guides.com Veal Turn joints of veal halfway through the cooking time. Leave to stand for approximately 10 minutes after cooking. Hot air = " Circulated air grilling = # Accessories Level Type of Tempera Microwave Duration heating...
- Page 76 All manuals and user guides at all-guides.com Circulated air grilling = # Grill, large area Accessories Level Type of Tempera Microwave Duration heating ture in C, power in grill setting watts minutes Joint with no rind Ovenware with 220 240 180 W 40 50 (e.g.
- Page 77 All manuals and user guides at all-guides.com Lamb and game Turn lamb and game halfway through the cooking time. Circulated air grilling = # Top/bottom heat Accessories Level Type of Tempera Microwave Duration heating ture in C, power in grill setting watts minutes Saddle of lamb on...
- Page 78 All manuals and user guides at all-guides.com Miscellaneous Allow meat loaf to stand for approximately 10 minutes after cooking. Turn the sausages after Z of the cooking time. Circulated air grilling = # Grill, large area Accessories Level Type of Tempera Microwave Duration in...
- Page 79 All manuals and user guides at all-guides.com Circulated air grilling = # Grill, large area Hot air = " Top/bottom heat Accessories Level Type of Temperature Microwave Duration heating in C, power in grill setting watts minutes Chicken, whole, Ovenware with 230 250 360 W 25 35...
- Page 80 All manuals and user guides at all-guides.com Accessories Level Type of Temperature Microwave Duration heating in C, power in grill setting watts minutes Rolled turkey joint, Ovenware with 190 200 180 W 60 70 ca. 1.5 kg lid, wire rack Turkey breast, Ovenware with 200 210...
-
Page 81: Tips For Roasting And Grilling
All manuals and user guides at all-guides.com Accessories Level Type of Tempera Microwave Duration in heating ture in C, power in minutes grill watts setting Whole fish, ca. Ovenware with lid, 600 W 10 15 1.5 kg, braised wire rack 360 W 5 10 Whole fish, ca. -
Page 82: Bakes, Gratins, Toast
All manuals and user guides at all-guides.com Bakes, gratins, toast The table applies to dishes placed in a cold oven. Use large flat ovenware for bakes and gratins. Food takes longer to cook in narrow, deep containers and browns more on top. Place the bake in microwaveable cookware on the wire rack. -
Page 83: Preprepared Products
All manuals and user guides at all-guides.com Accessories Level Type of Tempera Microwave Duration heating ture in C, power in grill setting watts minutes Lasagneca. 2 kg Ovenware 180 200 600 W 20 30 without lid, wire rack Potato gratin made Ovenware 170 190 600 W... - Page 84 All manuals and user guides at all-guides.com Top/bottom heat Hot air = " Circulated air grilling = # Accessories Level Type of Tempera Microwave Duration heating ture in C power in watts minutes Pizza with thin base Universal pan 210 230 20 25 Pizza with deep pan Universal pan...
-
Page 85: Acrylamide In Foodstuffs
All manuals and user guides at all-guides.com Acrylamide in foodstuffs Which foods are affected? Acrylamide is mainly produced in grain and potato products heated at high temperatures, such as potato crisps, chips, toast, rolls, bread, baked goods (biscuits, gingerbread, cookies). Tips for keeping acrylamide to a minimum when preparing food General... -
Page 86: Test Dishes
All manuals and user guides at all-guides.com Test dishes The quality and function of microwave combination appliances is tested by testing institutes using the following dishes. In accordance with EN 60705, IEC 60705 DIN 44547 and EN 60350 Defrosting with the microwave Meal Microwave power setting in Note... - Page 87 All manuals and user guides at all-guides.com Combined microwave and oven Circulated air grilling = # Top/bottom heat Meal Microwave power Type of Tempera Notes setting in watts, heating ture in ºC duration in minutes Potato gratin 600 W, 20 25 min. 170 190 Place the 22 cm dia.
- Page 88 All manuals and user guides at all-guides.com Ovenware and notes Level Type of Temperature Baking time heating in ºC in minutes Hot water sponge Springform cake tin on the 160 170 30 40 cake wire rack Universal pan 170 190 45 55 Yeast cakes on a b ki...
Need help?
Do you have a question about the 3HW469X and is the answer not in the manual?
Questions and answers