Table of Contents
Advertisement
Quick Links
Making cooking as much fun as eating
Please read this instruction manual. This will ensure that you
make full use of all the technical benefits the steamer oven
has to offer.
It will provide you with important safety information. You will
be familiarised with the individual components of your new
appliance. And we will show you how to make settings step
by step simple!
The tables list the setting values and shelf positions for
numerous well known dishes, all of which are tested in our
cooking studio.
In the unlikely event of a malfunction, this is where you will
find information on how to rectify minor faults yourself.
A detailed table of contents will help you to find your way
around quickly.
Enjoy your meal!
Instruction manual
3HV469X
en
900426
All manuals and user guides at all-guides.com
9000 397 075
Advertisement
Table of Contents

Related Manuals for BALAY 3HV469X


Summary of Contents for BALAY 3HV469X
- Page 1 In the unlikely event of a malfunction, this is where you will find information on how to rectify minor faults yourself. A detailed table of contents will help you to find your way around quickly. Enjoy your meal! Instruction manual 3HV469X 9000 397 075 900426...
-
Page 2: Table Of Contents
All manuals and user guides at all-guides.com Table of contents Safety information ......Causes of damage . - Page 3 All manuals and user guides at all-guides.com Table of contents Memory ........Storing settings in the Memory .
- Page 4 All manuals and user guides at all-guides.com Table of contents Bakes, soup ingredients......Desserts, compote ......Cakes and pastries .
-
Page 5: Safety Information
All manuals and user guides at all-guides.com d Safety information Please read this instruction manual carefully. This appliance is intended only for domestic use. This appliance must only be used for food preparation. Neither adults nor children should operate the appliance without supervision: if they are physically or mentally incapable of doing so or... -
Page 6: Causes Of Damage
All manuals and user guides at all-guides.com Hot water Risk of scalding. Do not clean the appliance immediately after switching it off. The water in the evaporator dish is still hot. Wait until the appliance has cooled down. Incorrect repairs Danger of electric shock. -
Page 7: Your New Appliance
All manuals and user guides at all-guides.com Very dirty door seal If the door seal is very dirty, the appliance door will no longer close properly. The fronts of adjacent units could be damaged. Always keep the door seal clean and replace when necessary. -
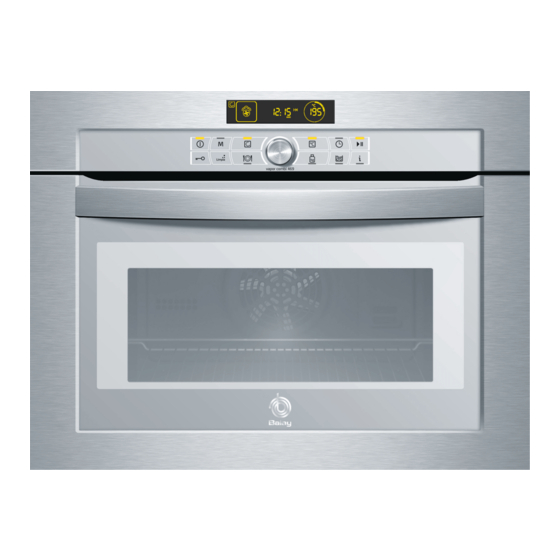
Page 8: Buttons
All manuals and user guides at all-guides.com Buttons Sensors are located under the individual buttons. They react to a light touch of the button with the finger. Symbol Button function Switches the appliance on and off Short press = selects the memory Long press = stores in memory ‚... -
Page 9: Operating Modes
All manuals and user guides at all-guides.com Operating modes The ‚ button is used to select the possible operating modes of your appliance. Operating mode Application Turbo function › For moist cakes, sponge, pot roasts. 30 230 ºC A fan in the back panel of the oven distributes the heat evenly inside the cooking compartment. -
Page 10: Cooking Compartment And Accessories
All manuals and user guides at all-guides.com Cooking The cooking compartment has four shelf positions. compartment and The shelf positions are counted from the bottom up. accessories Caution The evaporator dish must not be covered. Do not place any dishes on the cooking compartment floor. - Page 11 All manuals and user guides at all-guides.com Cooking container, solid, , 40 mm deep for cooking rice, pulses and cereals Coking container, perforated, , 40 mm deep for steaming vegetables, juicing berries and defrosting Wire rack for ovenware, cakes and ovenproof dishes and for roasting You can obtain further accessories from specialist...
-
Page 12: Water Tank
All manuals and user guides at all-guides.com Water tank When you open the appliance door, you will see the water tank on the right hand side. Only fill the water tank with fresh tap water or with still bottled water. If your water is very hard, we recommend that you use softened water. -
Page 13: Automatic Calibration
All manuals and user guides at all-guides.com symbol appears symbol appears if you set an operating mode and the water tank is only half full. If you think that the water in the water tank is sufficient for the cooking procedure, you can start the appliance. -
Page 14: Before Using For The First Time
All manuals and user guides at all-guides.com Before using for the first time In this section you will find out, how to set the clock after connecting up your appliance how to change the water hardness rangeif required how to clean your appliance before using it for the first time Setting the clock Once your new appliance has been connected,... -
Page 15: Cleaning
All manuals and user guides at all-guides.com 3. Press the ± button repeatedly until ’‹ˆ (water hardness) appears in the display. 4. Change the water hardness using the rotary selector. Possible values: softened ‚ 1 soft ƒ 2 medium „ 3 hard …... -
Page 16: Operating The Appliance
All manuals and user guides at all-guides.com Operating the appliance In this section you will find out, how to switch the appliance on and off what to note after each use Switching on the Example in fig.: appliance Set the Steam operating mode to 80 ºC. 1. -
Page 17: Switching Off The Appliance
All manuals and user guides at all-guides.com Switching off the appliance Risk of scalding Hot steam can escape when the appliance door is opened. Only open the appliance door carefully after cooking. The duration has elapsed Your appliance switches off automatically if you have set a duration. -
Page 18: After Each Use
All manuals and user guides at all-guides.com After each use Emptying the water tank Empty the water tank. Thoroughly dry the seal in the tank cover and the tank shaft in the appliance. Do not dry the water tank in the hot cooking compartment. -
Page 19: Time Settings
All manuals and user guides at all-guides.com Time settings Use the 0 button to check the Time settings. You have the following options: When the appliance is switched off Q = Set timer 0 = Set clock When the appliance is switched on Q = Set timer x = Set the duration, if necessary y = Set a later end time, if necessary... -
Page 20: Setting The Duration
All manuals and user guides at all-guides.com Cancelling the timer Press the 0 button and turn the timer duration back duration to 00:00. The timer duration is deleted after a few seconds. Once the timer duration A signal sounds. 00:00 WO appears in the display. has expired You can cancel the signal earlier by pressing the 0 button. -
Page 21: Setting A Later End Time
All manuals and user guides at all-guides.com 3. If the operation has not yet started, press the @ button. The duration counts down in the display. In the Steam operating mode, the duration does not start counting down until the heating up time has finished. - Page 22 All manuals and user guides at all-guides.com Setting a later end time Prerequisite: The selected operation has not already begun. a duration is set. 1. Press the 0 button repeatedly until the arrow is next to the symbol for the end time yO. The bars in the display show that the end time has not been delayed.
-
Page 23: Setting The Clock
All manuals and user guides at all-guides.com Setting the clock To set the clock or change the time, the appliance must be switched off. After a power cut, 4 zeros flash in the display. After a power cut 1. Set the current time using the rotary selector. 2. -
Page 24: Automatic Programmes
All manuals and user guides at all-guides.com Automatic programmes In this section, you will find out how to set one of the automatic programmes hints and tips on the programmes which programmes you can set The automatic programmes enable you to prepare food very easily. - Page 25 All manuals and user guides at all-guides.com 4. Press the A button and use the rotary selector to set the weight of the food. 5. Press the @ button to start the appliance. The duration of the programme x O counts down in the display.
-
Page 26: Notes About The Programmes
All manuals and user guides at all-guides.com Notes about the All programmes are designed for cooking on one programmes level. The cooking result can vary according to the size and quality of the food. Ovenware Use the suggested ovenware. All meals have been tested using this ovenware. - Page 27 All manuals and user guides at all-guides.com Programme Notes Ovenware/accessories Level Steam sliced carrots Slices, approx. Perforated cooking 3 mm thick container + baking tray Steam white asparagus Perforated cooking container + baking tray Steam green asparagus Perforated cooking container + baking tray Steam frozen mixed vegetables Perforated cooking...
- Page 28 All manuals and user guides at all-guides.com Poultry Do not place chicken breasts or chicken portions on top of each other in the ovenware. The chicken portions can be marinated beforehand. Programme Notes Ovenware/accessories Level Fresh chicken Total weight Wire rack + baking tray 0.7 1.5 kg Fresh chicken portions Weight per piece...
- Page 29 All manuals and user guides at all-guides.com Pork For a joint with crust, it is best to use a piece of shoulder. Score the rind in advance from the middle outwards. Programme Notes Ovenware/accessories Level P18* Fresh joint with crust 0.8 2 kg Wire rack + baking tray * You can delay the end time for this programme...
- Page 30 All manuals and user guides at all-guides.com Pastries, dessert Preparing fruit compote This programme is only suitable for fruits with stones or pips. Weigh the fruit and add approximately D of the amount of water and sugar and spices according to taste.
- Page 31 All manuals and user guides at all-guides.com Programme Notes Ovenware/accessories Level P29* Bake white bread 0.4 2 kg Baking tray + greaseproof paper Prove and bake white bread Note the message Baking tray + greaseproof paper Bake frozen bread rolls Total weight Baking tray + 0.2 1 kg...
- Page 32 All manuals and user guides at all-guides.com Health risk. When defrosting food from animal sources, you must remove liquid that escapes during defrosting. It must never come into contact with other food. Bacteria could be transferred. After defrosting, operate the combination steam oven with hot air for 15 minutes at 180 ºC.
- Page 33 All manuals and user guides at all-guides.com Special Sterilising bottles Always clean the bottles immediately after drinking with a bottle brush. Then clean them in the dish washer. Place the bottles in the perforated cooking container so that they do not touch one another. Dry the bottles with a clean cloth after sterilising.
-
Page 34: Memory
All manuals and user guides at all-guides.com Memory You can store 6 individual programmes in the memory and call them up at any time. The Memory function is particularly useful for dishes that you make on a regular basis. You can also store a meal from the automatic programmes. -
Page 35: Childproof Lock
All manuals and user guides at all-guides.com Childproof lock The appliance has a childproof lock to prevent children switching it on accidentally. Activation Switch off the appliance. Press and hold the @ button for approximately four seconds, until the @ symbol appears. The childproof lock is activated. Deactivation Press the @ button until the @ symbol goes out. - Page 36 All manuals and user guides at all-guides.com You can now select further basic settings with the ± button and change them using the rotary selector. 5. Press and hold the ± button for approximately 4 seconds. All changes are saved. Cancelling Press the @ button.
-
Page 37: Care And Cleaning
All manuals and user guides at all-guides.com Care and cleaning In this section, you will find information on Care and cleaning of your appliance Cleaning agents and aids Clean operating mode Descale operating mode Risk of short circuiting. Do not use high pressure cleaners or steam jet cleaners to clean your appliance. -
Page 38: Cleaning Agents
All manuals and user guides at all-guides.com Cleaning agents Appliance exterior Use soapy water and dry with a soft cloth. with aluminium front Mild window cleaning agent wipe the surfaces horizontally and without applying pressure using a soft window cloth or a lint free microfibre cloth. -
Page 39: Cleaning Aid
All manuals and user guides at all-guides.com Door panel Glass cleaner Accessories Soak in hot soapy water. Clean with a washing up brush or sponge or in the dishwasher. Clean stains caused by starchy food (e.g. rice) with a vinegar solution. -
Page 40: Descaling
All manuals and user guides at all-guides.com 3. If required, fill the water tank with water and reinsert it. 4. Press the @ button. The appliance starts rinsing. 2nd rinse After a short time, the < symbol appears again. 1. Thoroughly rinse out the cleaning sponge. 2. - Page 41 All manuals and user guides at all-guides.com Descaler Only use the liquid descaler recommended by the after sales service for descaling (part no. 311138, also available online from the eShop). Other descalers may damage the appliance. 1. Prepare descaling solution by mixing 300 ml water and 60 ml liquid descaler.
- Page 42 All manuals and user guides at all-guides.com 3. Press the @ button. The appliance starts rinsing. After descaling has finished, < appears. 4. Press and hold the # button. Removing the remaining Remove the remaining water from the evaporator dish water using the cleaning sponge.
-
Page 43: Removing And Fitting The Appliance Door
All manuals and user guides at all-guides.com Removing and You can remove the appliance door for easier fitting the appliance cleaning. door Risk of injury. The hinges of the appliance door may snap shut with a lot of force. Always turn the two locking levers for fitting and removing the appliance door to their limit stops. -
Page 44: Cleaning The Rails
All manuals and user guides at all-guides.com 1. Insert the door hinges straight into the openings on the left and right hand sides of the cooking compartment. The notch on the hinge must engage on both sides. 2. Open the appliance door fully and fold the locking lever upwards. -
Page 45: Cleaning The Door Panels
All manuals and user guides at all-guides.com Cleaning the door The inner glass panel on the appliance door can be panels removed for easier cleaning. Caution. The appliance must not be used again until the panels and appliance door have been correctly installed. 1. -
Page 46: Troubleshooting
All manuals and user guides at all-guides.com Troubleshooting Malfunctions often have simple explanations. Please read the following instructions before calling the after sales service. Repairs may only be carried out by fully trained after sales service technicians. Incorrect repairs may cause serious hazards for the user. - Page 47 All manuals and user guides at all-guides.com Problem Possible cause Notes/remedy The appliance does not heat up. A button combination was Switch off the fuse in the fuse The O symbol appears in the actuated. box and wait approximately display. 20 seconds and then switch it back on.
-
Page 48: Replacing The Cooking Compartment Bulb
All manuals and user guides at all-guides.com Problem Possible cause Notes/remedy When cooking with steam, there The appliance is unable to Reset the appliance to factory is again a lot of steam. calibrate itself automatically if settings (see Basic settings durations are too short. -
Page 49: Changing The Door Seal
All manuals and user guides at all-guides.com 5. Screw the glass cover with the seals back on again. 6. Connect the appliance to the mains and reset the clock. Never operate the appliance without the glass cover and seals. Replacing glass cover or Any damaged glass cover or lamp seals must be lamp seals replaced. -
Page 50: After Sales Service
All manuals and user guides at all-guides.com After sales service Our after sales service is there for you if your appliance should need to be repaired. You will find the address and telephone number of your nearest after sales service centre in the phone book. The after sales service centres listed will also be happy to advise you of a service point in your local area. -
Page 51: Energy And Environment Tips
All manuals and user guides at all-guides.com Energy and environment tips Here will be given tips on saving energy and disposing of your appliance properly. Saving energy Only preheat the appliance if this is specified in the recipe or in the operating instructions table. Open the appliance door as infrequently as possible while the food is cooking. -
Page 52: Tables And Tips
All manuals and user guides at all-guides.com Tables and tips The tables contain a selection of dishes which are particularly suitable for your combination steam oven. You can find out which operating mode, accessories and cooking time to select. Unless otherwise stated, the information given applies to inserting accessories when the appliance is cold. -
Page 53: Turbo Function
All manuals and user guides at all-guides.com Distribute food evenly Always distribute the food evenly in the ovenware. It will not cook evenly if the layers are of different depths. Pressure sensitive food When layering delicate foods in the cooking container, do not pile them too high. - Page 54 All manuals and user guides at all-guides.com Food Size Accessories Mode of Tempera Duration operation ture in ºC in min. Fennel Slices Perforated + Steam 10 14 baking tray Stuffed vegetables Do not precook Baking tray Combination 160 180 15 30 (courgettes, vegetables at level 2...
-
Page 55: Side Dishes And Pulses
All manuals and user guides at all-guides.com Food Size Accessories Mode of Tempera Duration operation ture in ºC in min. White cabbage Shredded Perforated + Steam 25 35 baking tray Courgettes Slices Perforated + Steam baking tray Mangetout Perforated + Steam 8 12 baking tray... -
Page 56: Meat, Poultry, Fish
All manuals and user guides at all-guides.com Food Ratio/ Accessories/level Operating Tempera Cooking information mode ture in ºC time in minutes Millet, whole 1 : 2.5 Solid Steam 25 35 Wheat, whole 1 : 1 Solid Steam 60 70 Dumplings Perforated (level 3) + Steam 20 25... - Page 57 All manuals and user guides at all-guides.com Food Amount/ Accessories Level Operating Tempera Cooking weight mode ture in ºC time in minutes Rolled turkey joint 1.5 kg Wire rack + Combination 150 160 70 90 baking tray Turkey breast 1 kg Wire rack + Combination 150 160...
- Page 58 All manuals and user guides at all-guides.com Pork Food Amount/ Accessories Level Operating Tempera Cooking weight mode ture in ºC time in min. Joint without rind 1.5 kg Wire rack + Combination 170 180 70 80 (e.g. neck) baking tray Steam 20 25 Joint with rind...
- Page 59 All manuals and user guides at all-guides.com Food Amount/ Accessories Level Operating Tempera Cooking weight mode ture in ºC time in minutes Rabbit pieces 1.5 kg Wire rack + Combination 150 160 40 60 baking tray Wiener sausages Perforated + Steam 80 85 12 18...
- Page 60 All manuals and user guides at all-guides.com Roasting tips Using the roasting set. Using the roasting set will give you optimum results and the cooking compartment will stay as clean as possible. You can obtain the roasting set as an accessory in specialist retailers (see section: Cooking compartment and accessories).
-
Page 61: Braising Meat
All manuals and user guides at all-guides.com Braising meat Braising is the ideal cooking method for all tender pieces of meat which are to be cooked medium rare or medium. The meat remains very juicy and turns out as soft as butter. Slide the baking tray into the comination steam oven and preheat with the Slow cook operating mode. -
Page 62: Desserts, Compote
All manuals and user guides at all-guides.com Desserts, compote Compote Weigh the fruit and add approximately D of the amount of water and sugar and spices according to taste. Rice pudding weigh the rice and add 2.5 times the amount of milk. Do not fill the rice and milk more than 2.5 cm high in the accessories. -
Page 63: Cakes And Pastries
All manuals and user guides at all-guides.com Cakes and pastries It is best to use dark coloured metal baking tins. The temperature and cooking time depend on the quantity and composition of the dough. For this reason, temperature ranges are quoted in the tables. First set the lower temperature. - Page 64 All manuals and user guides at all-guides.com Cakes on trays Food Accessories Level Operating Tempera Cooking mode ture in ºC time in min. Yeast cakewith dry topping Baking tray Combination 150 160 35 45 Yeast cakewith moist topping Baking tray Turbo 150 160 35 45...
- Page 65 All manuals and user guides at all-guides.com Food Accessories Level Operating mode Tempera Cooking ture in ºC time in min. Bread rolls (70 g each, Baking tray + Combination 190 200 25 30 unbaked) greaseproof paper Rolls made with sweet yeast Baking tray + Combination 170 180...
-
Page 66: Reheating Food
All manuals and user guides at all-guides.com The cake collapses. Next time, use less liquid or set the baking temperature 10 ºC lower. Observe the specified mixing times in the recipe. The cake has risen in the middle Do not grease the edge of the springform cake tin. After baking, but has sunk around the edge. -
Page 67: Defrosting
All manuals and user guides at all-guides.com Defrosting If possible, freeze the food flat and in portion sized pieces at 18 ºC. Do not freeze excessively large quantities. Once defrosted, food will not keep for as long and spoils more quickly than fresh food. Leave the food to defrost in the freezer bag, on a plate or in the perforated cooking container. -
Page 68: Proving Dough
All manuals and user guides at all-guides.com Food Amount/ Accessories Level Temperature Cooking weight in ºC time in minutes Block frozen vegetables 0.4 kg Perforated + 45 50 20 30 (e.g. spinach) baking tray Berries 0.3 kg Perforated + 45 50 baking tray Fish fillet 0.4 kg... -
Page 69: Juicing
All manuals and user guides at all-guides.com Juicing Before juicing, place the berries in a bowl and sprinkle with sugar. Leave to stand for at least one hour to draw out the juice. Pour the berries into the perforated cooking container and insert at level 3. -
Page 70: Frozen Products
All manuals and user guides at all-guides.com Frozen products Observe the manufacturer's instructions on the packaging. The cooking times indicated apply to dishes placed in a cold cooking compartment. Food Accessories Level Operating Tempera Cooking mode ture in ºC time in min. - Page 71 All manuals and user guides at all-guides.com Food Accessories Level Operating Tempera Cooking mode ture in ºC time in min. Strudel, frozen Baking tray + Combination 160 180 45 60 greaseproof paper Fish fingers Baking tray + Turbo function 195 205 20 24 greaseproof paper Trout...
-
Page 72: Test Dishes
All manuals and user guides at all-guides.com Test dishes In accordance with DIN 44547 and EN 60350. The values in the table apply to dishes placed in a cold cooking compartment. Food Tin/tray Level Operating Tempera Cooking mode ture in ºC time in min.
Need help?
Do you have a question about the 3HV469X and is the answer not in the manual?
Questions and answers