Table of Contents
Advertisement
Advertisement
Table of Contents

Related Manuals for Miele H 4700 B


Summary of Contents for Miele H 4700 B
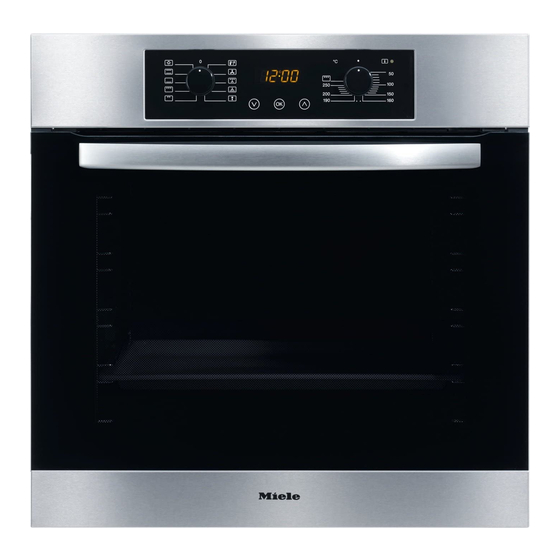
- Page 1 Operating and installation instructions Oven H 4700 B, H 4710 B H 4800 B, H 4810 B en - AU, NZ To avoid the risk of accidents or damage to the appliance, it is essential to read these instructions before it is installed and used for the first time.
-
Page 3: Table Of Contents
H 4700 B, H 4710 B, H 4800 B, H 4810 B ...... - Page 4 Contents Operation ............26 Using the oven .
- Page 5 Contents Cooking ready meals ..........47 Cleaning and care .
-
Page 6: Warning And Safety Instructions
To avoid burns, young children should be kept away. This oven is designed to bake, roast, grill, cook, defrost, dry fruit etc. Any other usage is at the owner's risk. Miele cannot be held liable for damage resulting from incorrect or improper use or operation. - Page 7 Warning and Safety instructions Technical safety Before connecting the appliance, make sure that the connection data on Installation, maintenance and the data plate (voltage and connected repairs may only be carried out by a load) match the mains electricity suitably qualified and competent supply.
- Page 8 "Grill Y", If the supply cord is damaged, it "Economy Grill Z" and "Fan Grill \" must be replaced by a Miele approved service technician to avoid a hazard. functions. Excessively long grilling times can lead to food drying out and...
- Page 9 Warning and Safety instructions If using alcohol in your recipes, high Never add cold water to food on a temperatures can cause the alcohol to hot universal tray or baking tray or vaporise and even to ignite on the hot directly onto food in a hot oven.
- Page 10 Due to the high temperatures radiated, objects near the appliance could catch fire. Accessories Only use genuine Miele spare parts and accessories with this appliance. If spare parts or accessories from other manufacturers are used, this will invalidate the warranty, and Miele...
-
Page 11: Caring For The Environment
Caring for the environment Disposal of the packing Disposal of your old appliance material or machine The transport and protective packing Electrical and electronic appliances / has been selected from materials which machines often contain materials are environmentally friendly for disposal which, if handled or disposed of and can normally be recycled. -
Page 12: Description Of The Appliance
Description of the appliance H 4700 B, H 4710 B, H 4800 B, H 4810 B a Function selector *, retractable when it is at "0" b Clock timer with sensors ?, OK, ; * c Temperature selector *, retractable when it is at "0"... -
Page 13: Features
Features Oven controls See "Cleaning and care" for more information. In addition to operating the various cooking programmes to bake, roast Energy-saving features and grill, the controls also offer the following: Rapid heat-up function – a time of day display, –... -
Page 14: Accessories
These and other accessories are also The trays and rack can then only be available to order from Miele, your taken out of the oven by raising them Chartered Agent or via the internet on upwards and then pulling them out. -
Page 15: Flexiclip Telescopic Runners
The FlexiClip telescopic runners can be The telescopic runner with the Miele clipped into any of the existing shelf logo is fitted on the right. runners and pulled out of the oven to their fullest extent. -
Page 16: Remove Flexiclip Telescopic Runners
Features Remove FlexiClip telescopic runners Danger of burning The oven interior needs to have cooled down before you start handling anything inside it. To remove a FlexiClip runner so that you can clip it into another shelf runner, for example, ^ lift it at the front and then pull it out along the rail of the oven shelf runner. -
Page 17: Oven Controls
Oven controls Function selector Temperature selector The left-hand control is used to select The right-hand control is used to select the function. the temperature. It can be turned clockwise or anti- It can be turned clockwise as far as it clockwise. -
Page 18: Functions
Functions Your oven has a range of oven functions for preparing a wide variety of recipes. The oven has the following functions: a Top heat/grill element (underneath the roof of the oven) b Bottom heat element (underneath the oven floor) c Ring heating element (behind the air inlet for the fan) d Fan (behind the air inlet for the fan) Depending on the function, these components will be combined differently, see... - Page 19 Functions Functions Notes S Rapid Heat- – For pre-heating the oven compartment. The oven function required must then be selected. [a + c + d] U Fan Plus – For baking and roasting. [c + d] – You can bake and roast on different levels at the same time.
-
Page 20: Before Using For The First Time
Before using for the first time Cleaning and heating up for Before the oven can be used, you the first time will need to – release the controls by pressing Before use, please remove them in if they are pushed in –... - Page 21 Before using for the first time The oven will start heating up as soon as this entry has been accepted. ^ Heat up the empty appliance for at least an hour. Please ensure the room is well ventilated during this operation. Close doors to other rooms to prevent the smell spreading throughout the house.
-
Page 22: Clock Timer
Clock timer Operation The clock timer (model dependent) – displays the time of day. ß – can be used as a minute minder. – can automatically switch the oven off or on/off. Operation of the clock timer is done via the OK, ;... -
Page 23: Time Displays
Clock timer Changing the time of day If you call up a function, the relevant symbol (l, T, S oder ß) will flash in The clock timer has a 24-hour clock. the display. The time of day can only be You can enter the time only as long changed if a cooking time (duration as the symbol flashes (approx. -
Page 24: To Change The Audible Tone
Clock timer Using the minute minder l To change the audible tone function You can choose between different tones. The minute minder can be used to time any activity in the kitchen, e.g. boiling ^ Press the ? sensor until S and a eggs. -
Page 25: To Set The Minute Minder
Clock timer To set the minute minder To change the time set for the minute minder ^ Press and hold in the OK sensor until the l symbol starts flashing in the ^ Press and hold in the OK sensor until the l symbol starts flashing in the display. -
Page 26: Operation
Operation Using the oven Pre-heating ^ Place the food in the oven. Most dishes can be placed in a cold oven. They will then make use of the ^ Use the function selector to select the heat produced during the heating required function. -
Page 27: Switching On And Off Automatically
Operation Switching on and off Entering a cooking duration automatically By selecting a duration, you can set a programme to switch off automatically. You can programme the oven to switch off automatically or on and off ^ Place the food in the oven. automatically. -
Page 28: To Enter The Duration And Finish Time
Operation To enter the duration and finish time Now delay the finish time: ^ Touch the OK sensor. To use the automatic switching on and off function on the oven, both the cooking duration and the finish time ß must be entered. For example: The time now is 10:45;... -
Page 29: At The End Of The Duration
Operation At the end of the duration To check and change the duration ^ Press and hold in the OK sensor until – the oven heating switches off the T symbol starts flashing in the automatically. display. – the cooling fan will continue to run for a while. -
Page 30: Baking Tips
Baking tips Baking paper Refer to the baking charts for Because of their PerfectClean anti-stick suggestions of temperatures, shelf surface, the baking tray and the levels and cooking durations. These universal tray do not need to be take into account a range of different greased or lined with baking paper for baking tins, quantities and cooking baking. -
Page 31: Notes About The Charts
Baking tips Notes about the charts If you are using the universal tray and baking trays for baking on more than Temperature, baking duration one shelf level at the same time, the universal tray should be placed below To achieve even results without over- the baking trays. -
Page 32: Baking Chart
Baking chart Fan Plus U Temperature Recommended Duration Cakes / biscuits in °C shelf level in min. Creamed mixture Sponge cake 150 – 170 60 – 70 Ring cake 150 – 170 65 – 80 Foam cake (tray) 150 – 170 25 –... -
Page 33: Conventional V
Baking chart Conventional V Temperature Recommended Duration Cakes / biscuits in °C shelf level in min. Creamed mixture Sponge cake 150 – 170 60 – 70 Ring cake 170 – 190 65 – 80 Foam cake (tray) 170 – 190 25 –... -
Page 34: Intensive Bake O
Baking chart Intensive Bake O Particularly suitable for – dishes that require a moist topping and crisp base like pizza and quiche lorraine. – cakes with a filling where the base has not been pre-baked, e.g. some cheesecakes. Temperature Recommended Duration Cakes / biscuits in °C... -
Page 35: Roasting Tips
You can also use Conventional V. Crockery Any heat-resistant The Miele Gourmet oven dish, roasting pans with a lid, containers ovenproof china or glass, roasting bags, the universal tray, the rack on top of the universal tray, the anti-splash insert in the universal tray. -
Page 36: Useful Tips
Roasting tips Useful tips Browning Browning only occurs towards the end of the roasting time. Remove the lid about halfway through the roasting time if a more intensive browning result is desired. Standing time At the end of the programme, take the roast out of the oven, wrap in aluminium foil and leave to stand for about 10 minutes. -
Page 37: Roasting Chart
Roasting chart Fan Plus U Conventional V Recom- mended Temperature Time Temperature Time Food shelf in °C in min. in °C in min. level Topside of beef, approx. 170 – 190 100 – 120 190 – 210 100 – 120 1 kg Beef fillet or roast beef, 190 –... -
Page 38: Notes On Low Temperature Cooking
Notes on low temperature cooking Procedure for low temperature Cooking at low temperatures is ideal for cooking beef, pork, veal or lamb when cooking a particularly tender result is required. Use a rack and the universal tray. First the meat needs to be seared all over briefly at a high temperature on ^ Place the rack and universal tray on the cooktop in order to seal it. -
Page 39: Cooking Times/Core Temperatures
Notes on low temperature cooking Cooking times/Core temperatures Food Time Core in min. tempera- ture in °C Roast beef – rare 60–90 55–60 – medium 120–150 65-70 – well done 180–240 70-75 Pork fillet 120–150 65-80 Gammon* 150–210 75-80 Saddle of 180–210 65-75 veal*... -
Page 40: Grilling Tips
Grilling tips Danger of burning! Grill with the oven door closed. If you grill with the door open, hot air will escape from the oven instead of being cooled by the cooling fan. The controls will get hot. Functions Notes Grill Y For grilling thin cuts in large quantities and for browning large baked dishes. - Page 41 Grilling tips Tips Notes Containers Rack on the universal Do not use the baking tray. tray Anti-splash insert in the universal tray Shelf level from the bottom – For thin cuts, use shelf level 4 or 5 Please refer to the –...
-
Page 42: Preparing Food For Grilling
Grilling tips Preparing food for grilling Useful tips Rinse the meat briefly under running To grill thicker pieces of food more cold water, pat dry. Do not season gradually after an initial high meat with salt before grilling as this temperature, continue grilling at a lower draws the juices out. -
Page 43: Fan Grilling Guide (Fan Grill \)
Grilling tips Fan Grilling guide (Fan Grill \) – Use the Fan Grill function for meat, fish, poultry and vegetables. – Always pre-heat for at least 5 minutes before Fan Grilling. – It is not necessary to turn food when Fan Grilling. –... -
Page 44: Grilling Guide (Grill Y / Economy Grill Z)
Grilling tips Grilling guide (Grill Y / Economy Grill Z) – Use for thick toasts, muffins, cheese on toast, foccacia, bruschetta and bacon. – Pre-heat grill for at least 5 minutes on 200 °C - 220 °C. – Select the appropriate shelf level for the thickness of the food. –... -
Page 45: Defrost
Defrost The Defrost P function uses the fan to Defrosting times circulate air at room temperature. The time needed for defrosting Please note: depends on the type and weight of the food, and at what temperature it was – Where possible, remove the deep frozen. -
Page 46: Bottling
Bottling We recommend using Fan Plus U. Containers for bottling – Jars for bottling – Jars with twist-off lids. Only use special jars for bottling. Do not use tins. 6 jars Temperature Time from Residual heat simmering time (1 l content) 2), 3) point in min. -
Page 47: Cooking Ready Meals
Cooking ready meals We recommend using Fan plus U. ^ Select the required function and set the temperature. ^ When the temperature indicator light Πgoes out, place the dish in the pre- heated oven. Cook frozen desserts and pizza on baking paper on the rack rather than on the baking tray or the universal tray. -
Page 48: Cleaning And Care
Cleaning and care Miele branded cleaning and The external surfaces of this conditioning products are available appliance are all susceptible to from Miele. scratching. Scratches on glass Do not use a steam cleaner to surfaces could even cause a clean the appliance. The steam breakage in certain circumstances. -
Page 49: Accessories
Cleaning and care Accessories FlexiClip telescopic runners (depending on model) Baking tray, universal tray, anti- splash insert Do not clean FlexiClip telescopic runners in a dishwasher. This would (depending on model) remove the special lubricant. The surface has been treated with PerfectClean. -
Page 50: Lubricating The Flexiclip Telescopic Runners
A special lubricant is available from cleaned. This will not affect the Miele. functioning of the runners in any way. Only use this special lubricant, as it is designed to withstand high temperatures in the oven. -
Page 51: Oven Interior
Cleaning and care Oven interior To make cleaning easier, – remove the oven door, Danger of burning. – dismantle the door, Allow the oven to cool down before – remove the FlexiClip runners (if cleaning by hand. available) – take out the side runners, It is best to clean the oven interior –... -
Page 52: Perfectclean
Cleaning and care PerfectClean Allow the oven to cool down PerfectClean treated surfaces before cleaning by hand. Danger of burning! – Oven interior – Baking tray (if available) For optimum performance of PerfectClean enamel, it is important to – Universal tray clean the oven and accessories after –... - Page 53 Apply a proprietary oven areas to appear. cleaning spray (such as the Original This discolouration is permanent but Miele oven cleaner) and leave to take will not affect the efficiency of the effect for approx. ten minutes. enamel. Clean these following the...
-
Page 54: Catalytic Enamel Surfaces
Remove the back panel from the soiling, a replacement can be oven to do this. obtained from your Miele Chartered Agent or Miele. Soiling caused by oil and grease splashes are removed from catalytic coated surfaces when the oven is heated to a high temperature. -
Page 55: To Remove The Oven Door
Cleaning and care ^ Then lift the door upwards as far as it To remove the oven door will go. The oven door is connected to the oven by hinges. Never attempt to pull the door off the hinge guides from a horizontal position. -
Page 56: To Dismantle The Oven Door
Cleaning and care To dismantle the oven door Always remove the oven door before The oven door is made up of two panes dismantling it. of glass and has vents at the top and bottom. ^ Place the door on a protective surface (e.g. - Page 57 ^ Clean the glass panes and other "Miele" must be visible at the top. parts with a damp microfibre cloth or a clean sponge and a solution of hot water with a little washing-up liquid.
-
Page 58: To Refit The Door
Cleaning and care ^ Open the door fully. To refit the door ^ Flip both locking clamps back up as far as they will go into a horizontal position. It is essential that the locking clamps are flipped down when the door is refitted after cleaning. -
Page 59: To Remove The Flexiclip Telescopic Runners
Cleaning and care To remove the FlexiClip To remove the shelf runners telescopic runners Danger of burning The oven interior needs to have Danger of burning cooled down before you start The oven interior needs to have handling anything inside it. cooled down before you start handling anything inside it. -
Page 60: To Remove The Back Panel
Cleaning and care To remove the back panel To lower the top heat/grill element Danger of burning The oven interior needs to have Danger of burning cooled down before you start The oven interior needs to have handling anything inside it. cooled down before you start handling anything inside it. -
Page 61: Problem Solving Guide
With the aid of the following guide, minor problems can be easily corrected without contacting Miele. If you can't remedy the problem yourself, please call Miele (see back cover for details). Please note that a call-out charge will be applied for unnecessary service visits where the problem could have been rectified as described in these Operating instructions. - Page 62 Problem solving guide Problem Possible cause and remedy ^ Disconnect the appliance from the electricity supply. The oven lighting doesn't work. Switch off and unplug at the socket, or remove the fuse, or switch off at the isolator as appropriate. ^ Unscrew the lamp cover with a quarter-turn to the left and then pull downward from the housing.
-
Page 63: After Sales Service And Warranty
– your Miele Chartered Agent For further information, please refer to your warranty booklet. – Miele. You will find the contact details for Miele on the back cover of this manual. When contacting Miele, please quote the model and serial number of your appliance. -
Page 64: Optional Accessories
Optional accessories The following accessories may come as standard with some models. They are also available to order from Miele or your Miele Chartered Agent. FlexiClip telescopic runners Pizza stone The pizza stone is ideal for items which need a well-baked base such as pizza,... - Page 65 When ordering, please quote the model It is available in two sizes: number of your oven. – HUB 5000-M (internal dimensions 38 x 22 x 8 cm) Original Miele all-purpose microfibre cloth Light soiling and fingerprints can be easily removed with the microfibre cloth.
-
Page 66: Electrical Connection
H 05 VV-F or H 05 RR-F with a and the on/off switch should be easily suitable cross-sectional area (CSA) accessible after the appliance has may be used (available from Miele). been built in. If the switch is not accessible after installation (depending on country) an additional means of disconnection must Test marks . -
Page 67: Building-In Diagrams
Building-in diagrams Dimensions are given in "mm". Appliance dimensions and unit cut-out Installation in a base unit Installation in a tall unit * Appliances with glass front ** Appliances with metal front... -
Page 68: Front Dimensions
Building-in diagrams Front dimensions A H 4700, H 4710: 53.2 H 4800, H 4810: 47.5 B Appliances with glass front: 2.2 Appliances with metal front: 1.2... -
Page 69: Installing The Oven
Installing the oven The appliance must not be Turn off the mains electricity supply operated until it has been correctly to the isolator. installed in its housing unit. ^ Connect the mains cable from the Otherwise it poses an electric shock oven to the isolator. - Page 72 Alteration rights reserved / 22 / 4111 M.-Nr. 07 856 420 / 05 (H 4700 B; H 4710 B; H 4800 B; H 4810 B)
Need help?
Do you have a question about the H 4700 B and is the answer not in the manual?
Questions and answers