Table of Contents
Advertisement
Quick Links
Advertisement
Table of Contents

Summary of Contents for ReDeTec ProtoCycler
- Page 1 User M User Manual RELEASE 1.0...
-
Page 2: Table Of Contents
TABLE OF CONTENTS INTRODUCTION ......................................3 PROTOCYCLER LAYOUT ..................................... 3 IMPORTANT LIMITATIONS ..................................2 3.1................................2 ULLER HEELS QUISHING 3.2. VS T ..............................2 OLORED RANSPARENT LASTIC 3.3. VS W ..................................3 LASTIC 3.4. & E ............................. 4 EGRIND... -
Page 3: Introduction
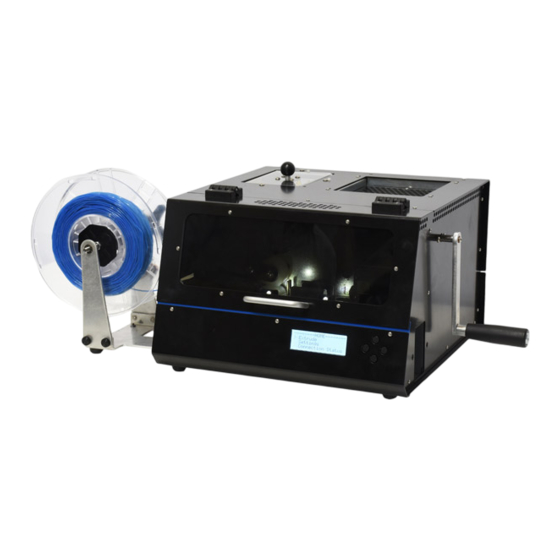
This user manual details basic setup and operation of ProtoCycler, including key limitations such as constraints on the size of ground particles for extrusion, and safety warnings. To avoid bodily harm or damage to your machine, it is recommended that you read this entire document before proceeding with operation. - Page 4 Grinder Drawer Spreader Waste Chute Figure 1.2 ProtoCycler Sides Layouts. (Left) Left Side View, (Right) Right Side View Figure 1.3 Control Area Layout...
-
Page 5: Important Limitations
It has recently come to our attention that leaving the spring engaged for extended periods of time while ProtoCycler is not operating can lead to the silicone tires compressing, resulting in a flat spot on the tire that can effect extrusion consistency. -
Page 6: Dry Vs Wet Plastic
All pellets purchased from ReDeTec inc. come pre-dried with desiccants in a sealed bag. This ensures that the plastic is dry and ready to extrude right away, but do not forget that while exposed to air the plastic will be absorbing moisture, and if left out for too long will need to be re-dried. -
Page 7: Regrind Size & Extruding Recycled Plastic
The appropriate pellet size that can be used in your ProtoCycler’s Extruder is 0.125" to 0.2" in diameter. Pellets that do not fit in this size range will not pass through the Extruder Hopper Filter. -
Page 8: Extrusion
4.1. Safety Overview Please thoroughly review the safety precautions before proceeding with extruder operation. Failure to do so may result in serious injury or irreparable damage to your device! Figure 4.1 ProtoCycler General Safety Practices Figure 4.2 Extrusion Safety Practices... -
Page 9: Spooler Setup
11. Ensure the thumb screws in the Spooler Base are as loose as possible, then place the assembly into the base as shown. Tighten the screws so they are nice and snug. 12. Insert the Spooler Base back into the side of the ProtoCycler and plug the stepper motor into its receptacle, also located on the left side of the unit. - Page 10 Figure 4 Figure 4.4 Spooler Assembly Block Diagram...
-
Page 11: Automatic Extrusion
ProtoCycler will enter cool down mode for safety purposes. ProtoCycler will take care of extrusion from here. Always keep an eye on the extruder hopper to ensure it does not run out of pellets - ProtoCycler has not yet been programmed to automatically detect this, and prolonged dry-... - Page 12 10. When you are done extrusion, select "Shut Down" to begin the shut down routine. 11. As your ProtoCycler shuts down it will continue to extrude filament. This is to allow the Extruder to cool down without negatively affecting the plastic inside of it.
-
Page 13: Spooler Clutch Tension Adjustment
Figure 4.5 ProtoCycler Command Center Layout WARNING: Manual extrusion is just what the title implies; fully manual. ProtoCycler will not do anything that it is not told to do. This means that it will not know what plastic you are extruding and will not set the correct control... - Page 14 All operating parameters used in manual mode are specific to each plastic grade and should be entered carefully. Parameters for ReDeTec supported plastics are shown in Table 2 below. Be sure that you are entering the correct value for the plastic you are extruding at all following steps!
- Page 15 Set Fan Level: ExtFan ProtoCycler should now be running independently, and con be monitored and adjusted for further improvements to the particular plastic in question. This can include: Adjusting fan speed to get optimal cooling before the spooler ...
- Page 16 As with Automatic mode, it is also very important to properly shut down the extruder. Failure to do so may result in burning your plastic, or excessive heat in your drive section. This can complicate startup and even damage your machine! Shutdown: Set Melt Temp to 0C and keep everything else running while the temperature drops.
-
Page 17: Extruder Nozzle Removal / Replacement
Connect your ProtoCycler to a computer and begin manual extrusion. Refer to Section 4.5 on how to do this. Set the temperature slider to the pre-heat temperature for the plastic in your extruder. For pre-heat... -
Page 18: Grinder Operation
5. GRINDER OPERATION ProtoCycler must be powered on to operate the Grinder! The grinder relies on an electromagnet to power the interlock so it can be turned forward. If the unit is off, the electromagnet will not get power. This electromagnet is also calibrated to disengage the interlock at the design torque to prevent damage to the gear train. -
Page 19: Sorting Ground Material
6. TROUBLESHOOTING Although ProtoCycler is designed to provide a seamless, easy to use experience, there are many systems and several things that can go wrong if improperly setup. We do our best to make sure all systems are running smoothly before shipping, but things may shift in transport which may effect extrusion and require troubleshooting.

Need help?
Do you have a question about the ProtoCycler and is the answer not in the manual?
Questions and answers