Table of Contents
Advertisement
Quick Links
Owner's Manual
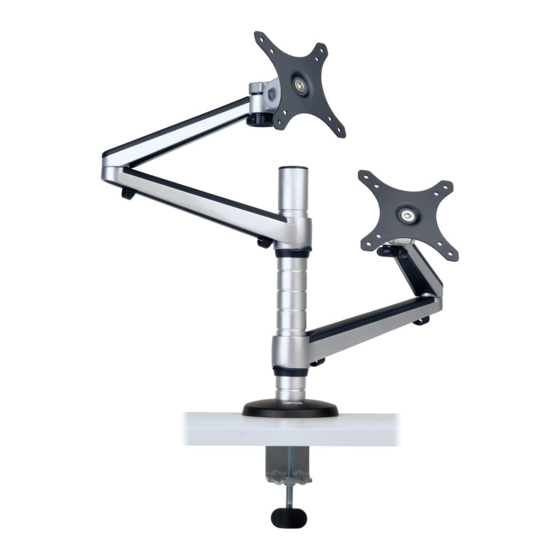
Dual Flat Screen Desk Clamp
MODEL: DDR1327DCS
CAUTION: DO NOT EXCEED MAXIMUM LISTED WEIGHT CAPACITY. SERIOUS INJURY OR
PROPERTY DAMAGE MAY OCCUR!
27"
75x75/100x100
10kgx2
MAX
(22lbs)x2
MAX
Este manual esta disponible en español en la página de Tripp Lite: www.tripplite.com
Ce manuel est disponible en français sur le site Web de Tripp Lite : www.tripplite.com
Русскоязычная версия настоящего руководства представлена на веб-сайте компании
Tripp Lite по адресу: www.tripplite.com
Dieses Handbuch ist in deutscher Sprache auf der Tripp Lite-Website verfügbar: www.tripplite.com
PROTECT YOUR INVESTMENT!
Register your product for quicker service
and ultimate peace of mind.
You could also win an ISOBAR6ULTRA
surge protector—a $50 value!
www.tripplite.com/warranty
1111 W. 35th Street, Chicago, IL 60609 USA • www.tripplite.com/support
Copyright © 2014 Tripp Lite. All rights reserved.
1
14-12-023-9333DB.indd 1
12/18/2014 1:24:04 PM
Advertisement
Table of Contents

Related Manuals for Tripp Lite DDR1327DCS


Summary of Contents for Tripp Lite DDR1327DCS
- Page 1 Owner’s Manual Dual Flat Screen Desk Clamp MODEL: DDR1327DCS CAUTION: DO NOT EXCEED MAXIMUM LISTED WEIGHT CAPACITY. SERIOUS INJURY OR PROPERTY DAMAGE MAY OCCUR! 27” 75x75/100x100 10kgx2 (22lbs)x2 Este manual esta disponible en español en la página de Tripp Lite: www.tripplite.com Ce manuel est disponible en français sur le site Web de Tripp Lite : www.tripplite.com...
- Page 2 NOTE: Read the entire instruction manual before you start installation and assembly. WARNING • Do not begin the installation until you have read and understood the instructions and warnings contained in this manual. If you have any questions regarding any of the instructions or warnings, please visit www.tripplite.com/support.
- Page 3 Component Checklist IMPORTANT: Ensure that you have received all parts according to the component checklist prior to installing. If any parts are missing or faulty, visit www.tripplite.com/support for service. End Cap (x1) Arm (x2) Desk Mount Assembly (x1) Mounting Assembly (x2) Collar (x3) Sleeve (x2) Knob (x2)
- Page 4 1. Install Desk Mount Assembly Note: min. desktop thickness=10mm (.4”) max. desktop thickness=60mm (2.4”) • Determine approximate location for mount, keeping in mind display size, height adjustment and pitch/roll requirements. • Slip the desk mount assembly over the edge of desk so that clamp fully contacts desk edge. •...
- Page 5 3. Install Displays 3-1 Attach Displays to Mounting Assemblies Washer M4X8 M5X8 4mm Hex Key Attach the display to the mounting assembly with the appropriate included screws. Do not over-tighten screws. 14-12-023-9333DB.indd 5 12/18/2014 1:24:04 PM...
- Page 6 3. Install Displays 3-2 Attach Displays to Arms Sleeve Knob Sleeve Always use an assistant or mechanical lifting equipment to safely lift and position displays. Make sure the display is safely secured before releasing. Tighten knobs firmly, but do not over-tighten. 14-12-023-9333DB.indd 6 12/18/2014 1:24:04 PM...
- Page 7 4. Route Cabling Use clips for routing the cables. Note: Leave slack in the cable for arm movement. 14-12-023-9333DB.indd 7 12/18/2014 1:24:04 PM...
- Page 8 5. Adjustment 360° 180° +90° – 80° Tighten 6mm Hex Key 4mm Hex Key Once the displays are adjusted to their final desired position, tighten the bolts using the included hex keys. Do not over-tighten bolts. Maintenance • Check that the bracket is secure and safe to use at regular intervals (at least every three months). •...
Need help?
Do you have a question about the DDR1327DCS and is the answer not in the manual?
Questions and answers