Quickie R-Net Instructions For Use Manual
Hide thumbs
Also See for R-Net:
- User manual (56 pages) ,
- User manual (72 pages) ,
- Instructions for use manual (96 pages)
Table of Contents
Advertisement
Quick Links
Advertisement
Table of Contents

Related Manuals for Quickie R-Net


Summary of Contents for Quickie R-Net
- Page 1 R-Net Controls Instructions for Use R-Net Control System P/N 249044 Rev. A...
- Page 2 IF YOU ARE VISUALLY IMPAIRED, THIS DOCUMENT CAN BE VIEWED IN PDF FORMAT AT WWW.SUNRISEMEDICAL.COM Thank you for choosing a Quickie R-Net System. We want to hear your questions or comments about this manual, the safety and reliability of your system, and the service you receive from your authorized dealer.
- Page 3 This Owner’s Manual will familiarize you with the Attention R-Net system users, do not operate this device R-Net controls and its features. It contains hints on everyday without first reading this owner’s manual. If you do not usage and general care in addition to information on the high understand the instructions and warnings of this owner’s...
-
Page 4: Table Of Contents
3.4 Joystick Module With LED Buttons 14.9 Speed Adjust Mode 3.5 Locking the Joystick Module 14.10 Lighting Control Mode 4.0 The R-Net LCD Screen Joystick Module 14.11 Latched Operation 4.1 LCD Screen 15.0 Omni2 LCD Screen 4.2 Main Screen Area: The Drive Screen 15.1 LCD Screen Details... - Page 5 Contents (continued) 21.0 R-Net CJSM2 Control System 21.1 Introduction 21.2 Controls 21.3 Buttons 21.4 LCD Screen Detail 21.5 Programming 22.0 CJSM2 IR Setup and Operation 22.1 Introduction 22.2 CJSM2 Used With An Omni2-IR 22.3 IR Code User Menu 22.4 IR Set Up Menu 22.5 Learning an IR Code...
-
Page 6: Intended Use
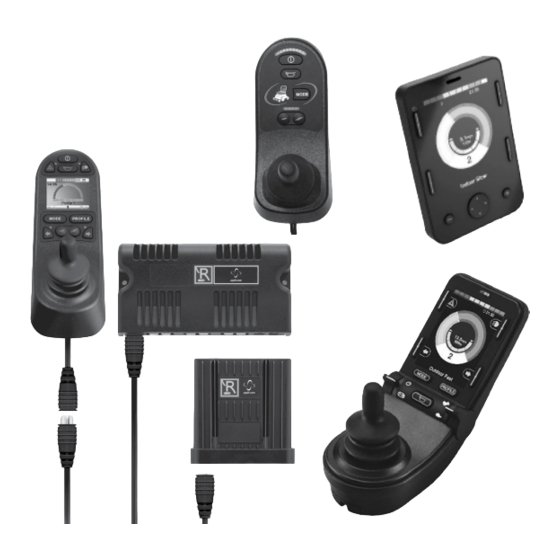
1.0 Intended Use 2.3 Review this manual often Quickie® and Zippie® power wheelchairs are battery- Before using the chair you, and each person who may operated devices with wheels that are intended for assist, should read this entire Manual and make sure to medical purposes to provide mobility to persons follow all instructions. - Page 7 LED and CJSM1 249044 Rev. A R-Net Control System w/Omni2...
-
Page 8: The R-Net Control System
Your control system uses industrial-grade components throughout, ensuring reliable operation in a wide range of The operation of the R-Net wheelchair control system is simple conditions. However, you will improve the reliability of the and easy to understand. The control system incorporates state-... -
Page 9: R-Net Joystick Modules
3.2 R-Net Joystick Modules This button activates and de-activates the wheelchair’s right The R-Net control system has two versions of Joystick Module indicator. Depress the button to turn the indicator on and with LCD Screen, (Fig 3.3), and with LED buttons, (Fig 3.5). - Page 10 Profile Button* MODE PROFILE Left Indicator Button* Right Indicator Button* and LED and LED Speed Decrease Button* Speed Increase Button* *Assignable buttons External ON/OFF Switch Jack External Profile Switch Jack* *Assignable stereo jack Fig.3.4 249044 Rev. A R-Net Control System w/Omni2...
-
Page 11: Joystick Module With Led Buttons
Speed / Profile Increase Button Pressing this button increases the maximum speed setting or, if the control system is programmed for drive profile operation, selects a higher drive profile. 249044 Rev. A R-Net Control System w/Omni2... - Page 12 Mode Button* Chair Icon, Actuators MODE Maximum Speed / Profile Indicator Left Indicator Button* and LED Right Indicator Button* and LED Speed Decrease Button* Speed Increase Button* *Assignable buttons Charger Socket, (underneath) Fig.3.6 249044 Rev. A R-Net Control System w/Omni2...
-
Page 13: The R-Net Lcd Screen Joystick Module
• Deflect the joystick in reverse until the control system beeps. • Release the joystick. There will be a long beep and the screen will illuminate (Fig 3.10). • The wheelchair is now unlocked. Fig.3.8 Fig.3.9 Indoor-Drive Fig.3.10 249044 Rev. A R-Net Control System w/Omni2... -
Page 14: Locking The Joystick Module
4.0 The R-Net LCD Screen Joystick Module 4.1 LCD Screen (Fig 4.0) The status of the control system can be understood by observing the LCD screen. The color LCD screen is split into three areas of information. The Top Bar, the Base Bar and the Main Screen Area. -
Page 15: Main Screen Area: The Drive Screen
If the speed of the wheelchair is being limited, for example, by a raised seat, then this orange symbol will be displayed. If the wheelchair is being inhibited from driving, then this red symbol will be flashing. Fig.4.13 Fig.4.14 249044 Rev. A R-Net Control System w/Omni2... -
Page 16: Main Screen Area: Mode Screens
When Bluetooth Mode is entered, the following screen will be displayed. Fig.4.16 Message Window (Fig 4.17) The R-Net displays warning icons and informational messages in a dedicated message window. Fig.4.17 Restart (Fig 4.18) When the control system requires a reboot, (e.g., after a module re-configuration), this symbol will be flashed. - Page 17 Sleep (Fig 4.20) This symbol will be displayed for a short time before the R-Net enters into a sleep state. Fig.4.20 Cross and Check (Fig 4.21) These symbols will be displayed during configuration procedures. 1. Process completed correctly. 2. Process not completed correctly.
-
Page 18: Lcd Joystick Diagnostic Guide
This indicates a system trip e.g., the R-Net has detected a problem somewhere in the wheelchair’s electrical system. If the error is in a non-active module (e.g., in the Intelligent... -
Page 19: Actuator Selection Screen
4. To drive again, depress the Mode button until the Fig.4.27 Drive screen is reached or, in the case of the LED joystick module, until the Speed Indicator returns to its normal state. Fig.4.28 Seat Fig.4.29 249044 Rev. A R-Net Control System w/Omni2... -
Page 20: The R-Net Led Joystick Module
The control system safety circuits have operated and the control system has been prevented from moving the wheelchair. This indicates a system trip, (e.g., the R-Net has detected a problem somewhere in the wheelchair’s electrical system). Fig.5.2 Please follow this procedure: •... -
Page 21: Led Joystick Diagnostic Guide
A joystick fault is indicated. Make sure that the joystick is in the center position before switching on the control system. Fig.5.9 8 LED (Fig 5.13) A possible Control System fault is indicated. Make sure that all connections are secure. Fig.5.10 Fig.5.11 249044 Rev. A R-Net Control System w/Omni2... - Page 22 4 is selected, then only the fourth LED from the left will be illuminated. Maximum Speed / Profile Indicator Ripples Up and Down Fig.5.15 This indicates the control system is locked; refer to section 15.15 for details. Fig.5.16 Fig.5.17 249044 Rev. A R-Net Control System w/Omni2...
-
Page 23: Getting Ready To Drive
Fig.6.0 Focus Indicator Battery Indicator Clock Odometer Speed Arc Maximum Speed Indicator Speed Display Indoor-Drive Current Profile Profile Name MODE PROFILE 249044 Rev. A R-Net Control System w/Omni2... -
Page 24: Using Your Control System
• If you are in any doubt, please consult your healthcare professional who can provide you with further information and advice. For comprehensive instructions and advice on driving techniques for your wheelchair and more, please consult your wheelchair Owner's Manual. Fig.6.4 249044 Rev. A R-Net Control System w/Omni2... -
Page 25: Settings Menu
• When the date/time is set, a final deflection to the right to select Exit, then forwards or backwards, exits the clock Exit > adjustment screen. Fig.7.2 Set Time 2009 Wed 16 : 43 Exit 249044 Rev. A R-Net Control System w/Omni2... -
Page 26: Display Time
• Deflect the joystick to the right to exit back to Drive Screen. Fig.7.4 Set Time > Display Time <12hr> Distance > Backlight <100%> Background <Blue> Exit > Fig.7.5 Set Time > Display Time e <12hr> Distance > Backlight <100%> Background <Blue> Exit > 249044 Rev. A R-Net Control System w/Omni2... -
Page 27: Distance
Move the joystick backwards until “Exit” is highlighted. A right joystick deflection will return to the Settings Menu (Fig 7.8). Fig.7.8 Set Time > Display Time > Distance > Backlight <100%> Background <Blue> Exit > 249044 Rev. A R-Net Control System w/Omni2... -
Page 28: Display Settings
• Move the joystick backwards until “Exit” is highlighted. • A right joystick deflection will return to the Settings Menu (Fig 7.8). Fig.7.11 Set Time > Display Time <12hr> Distance > Backlight <100%> Background <White> Exit > 249044 Rev. A R-Net Control System w/Omni2... -
Page 29: The Battery Gauge
For comprehensive instructions and advice on Batteries and Battery Charging, please consult your wheelchair Owner’s Manual and the Fig.8.4 Owner’s Manual supplied with the Battery Charger. 249044 Rev. A R-Net Control System w/Omni2... -
Page 30: The Charger Socket
R-Net in a horizontal orientation. • The molded guide on the R-Net will help you to locate the • Sunrise Medical accepts no liability for losses of any kind if the charger used is incompatible with the control system or any plug. -
Page 31: Dual Attendant Control Module
There are five speed settings – step 1, (1 LED), is the lowest speed and step 5, (5 LED’s), is the highest speed. 10.6 Control Switch This transfers drive control of the wheelchair between the User Input Device and the Attendant Module. 249044 Rev. A R-Net Control System w/Omni2... -
Page 32: Care
Do not drive the wheelchair if you know that the control system or other crucial components require repair. 10.9 Weekly Checks • Although the R-Net control system is designed to be extremely reliable and each unit is rigorously tested during manufacture, Electrical Brakes: the possibility of a system malfunction always exists (however small the probability). -
Page 33: Safety Checks
Check visually only, do not handle the gaiter. Mounting: Make sure that all the components of the control system are securely mounted. Do not overtighten any securing screws. AUTHORIZED DEALER DETAILS and CONTACT PHONE NUMBERS 249044 Rev. A R-Net Control System w/Omni2... - Page 34 Omni2 249044 Rev. A R-Net Control System w/Omni2...
-
Page 35: R-Net Omni2 Introduction
12.1 Introduction Programming and diagnostics should only be conducted by The Omni2 is a universal specialty controls interface healthcare professionals with in-depth knowledge of R-net that accepts signals from many different types of electronic control systems. Incorrect programing could result Speciality Input Devices (SIDs) and translates them in non optimized driving. - Page 36 This ‘Type A’ USB socket can be used to charge devices such as mobile phones. Communications Connector (Fig 12.1). This connector links the Omni2 to the R-Net system. 9-way D-type Specialty Input Device (SID) Connectors, (Fig 12.1). These provide connections to analogue or digital SIDs. There is a facility to detect if a mating connector is in place;...
-
Page 37: Specialty Input Devices (Sids)
Fig.13.1 13.4 Sip and Puff Input Ensure the tube from the Sip and Puff Device is of the correct diameter and that it is securely routed. SID Port 1 9-Way D-Type Fig.13.0 249044 Rev. A R-Net Control System w/Omni2... -
Page 38: Examples Of Types Of Sids Used With Omni2
A typical example would be a PG Drives Technology inductive joystick e.g. D50064, connected to the Omni2 via the 9-way D- type connector. In addition, a User Switch is required and connects to the Omni2 via the 1/8" (3.5mm) mono jack. Fig.13.2 249044 Rev. A R-Net Control System w/Omni2... -
Page 39: Three Axis Switch And User Switch
+ / - buttons on the front of the Omni2. Once a suitable threshold is set, use the right navigate button on the front of the Omni2 to highlight Soft Puff. 249044 Rev. A R-Net Control System w/Omni2... -
Page 40: Single Switch Scanner
Because the User Switch provides a method of emergency stopping, then a method of emergency stopping will not exist. The decision not to utilize the User Switch lies with the healthcare professional who is commissioning the powerchair. 249044 Rev. A R-Net Control System w/Omni2... -
Page 41: Omni2 Operating Principles
The wheelchair can now be driven with the SID. While driving, the speed of the wheelchair will be indicated by the numeric display and the graphical display. 249044 Rev. A R-Net Control System w/Omni2... -
Page 42: Operation With Joystick Type Sids
Allows access to user settings such as backlight and clock adjustment Settings * The text will reflect the setting of the standard R-net parameter Mode Name. ** The text will reflect the setting of the standard R-net parameter Profile Name. -
Page 43: Operation With 3-Axis Proportional And Switch Type Sids (Head Arrays)
Reverse command will result in drive in the newly selected 14.6.5 Associated Programming direction. There are several standard R-Net programing features that may be useful when using this SID type. These include joystick This sequence must be completed within a given time period, throw, joystick orientation, and joystick deadband. -
Page 44: Operation With Sip And Puff Type Sids
Fig.14.3 Driving is via a tube connected to the Omni2’s pneumatic The standard R-Net programing parameter Joystick input and the User Switch is used to enter the User Menu or Orientation may also be useful when using this type of SID. -
Page 45: Operation With Single Switch Scanner Type Sids
Drive Backwards Drive Left MODE (User Menu) Drive Forward The method of driving is dependent on whether the R-Net system is configured for ‘momentary’ or ‘latched’ operation. 14.8.2 Momentary Operation In momentary operation, continuously depressing the User Switch while one of the ‘arrow’ icons is shown will cause the power chair to drive in that direction until the switch is released. -
Page 46: Speed Adjust Mode
Refer to your healthcare professional or authorized dealer. WARNING! It is not advisable to program the Switch to Standby parameter in the R-Net power module when using Single Switch Scanner Type SIDs. Refer to your healthcare professional or authorized dealer. -
Page 47: Lighting Control Mode
Fig.14.7 14.11 Latched Operation The latched operation parameters are now contained within the standard R-net programming, rather than in the Omni2. Within the standard R-net programming, the relevant parameters are: Latched Drive, Latched Actuators, Latched Timeout and Latched Timeout Beep. -
Page 48: Omni2 Lcd Screen
- Visibility, whether the clock is displayed on screen. - The display format, 12 or 24 hour. These adjustments are made within the Settings Menu. Refer to the Settings Menu section for further details. 249044 Rev. A R-Net Control System w/Omni2... -
Page 49: Text Bar
This displays the actual speed of the wheelchair in digital Fig.15.15 form. The display can be set to mph or km/h, or can be turned off. These options are set by the programmable parameter, Display Speed. 249044 Rev. A R-Net Control System w/Omni2... - Page 50 Forward drive Right drive If the Omni2 is programmed to operate with a Single Switch Scanner Type SID, these symbols will be displayed to indicate symbols shown. Reverse drive Left drive Mode Select Fig.15.22 249044 Rev. A R-Net Control System w/Omni2...
-
Page 51: Seating Mode Screen
The SID should then be used to navigate the menu and Fig.15.25 select the device to control. Forward and reverse deflections navigate the menu, while a right deflection selects the highlighted device. Refer to your healthcare professional or authorized dealer. Fig.15.26 Fig.15.27 249044 Rev. A R-Net Control System w/Omni2... - Page 52 249044 Rev. A R-Net Control System w/Omni2...
- Page 53 This indicates a system trip, i.e. the R-net has detected a problem somewhere in the wheelchair’s electrical system. If the error is in a non-active module, for example in the ISM but Drive Mode is selected, then drive will still be possible, however, the diagnostic screen will appear intermittently.
-
Page 54: Settings Menu
SID, adjustable between 0 and 240 seconds. 16.4 Bluetooth A right SID deflection will enter a sub-menu to configure the Bluetooth Mode screen. Refer to your healthcare professional or authorized dealer. 249044 Rev. A R-Net Control System w/Omni2... -
Page 55: Ir Set-Up
A right SID deflection will enter a sub-menu displaying System information. Allows the user to read diagnostic information from the control system. 16.7 Exit Fig.16.3 A right SID deflection will exit the Settings Menu and return to the User Menu. Fig.16.4 249044 Rev. A R-Net Control System w/Omni2... -
Page 56: Omni2 Infra Red Control(Ir)
Satellite or environmental controls such as automatic door openers. Once an Omni2 with IR Control is connected to an R-net system, then IR Control can be from a conventional Joystick Module (or other Input Device) or from a Specialty Input Device that is connected to the Omni2. -
Page 57: Accessing The Ir Set-Up Menu
Enter the IR Set-Up Menu and then select an Appliance, e.g. TV. The Commands for the Appliance will appear on the screen, Fig 17.6. Select the command to be learned. In this example, TV > Channel Up. Fig.17.4 Fig.17.5 Fig.17.6 249044 Rev. A R-Net Control System w/Omni2... - Page 58 Section of the Omni2. Disabled IR Codes appear with an ‘X’ against the highlighted Command. To enable an IR Code, select the ‘+’ key on the Display Section of the Omni2. An enabled Code appears with a Fig.17.10 check against the highlighted Command. 249044 Rev. A R-Net Control System w/Omni2...
- Page 59 To delete all IR Codes stored in the Omni2, select Delete All Codes within the IR Set Up menu. If the Delete All Codes command is selected, the Rnet must be power cycled to actually delete the codes. Fig.17.12 Fig.17.13 Fig.17.14 249044 Rev. A R-Net Control System w/Omni2...
-
Page 60: Pairing With A Bluetooth Device
1234). After a short time, a screen such as shown in Fig 18.4 should appear. The blue icon on the Omni2 should have stopped flashing. If the process fails, click on ‘Tom’s PC’, then ‘Disconnect’ and repeat the process. Fig.18.2 Fig. 18.4 Fig. 18.3 249044 Rev. A R-Net Control System w/Omni2... -
Page 61: Pairing With An Android Device
18.5 Operating a Windows PC - Open the R-net for Android App and select ‘Connect’. This will The default programming relates to the operations shown at present a list of available Bluetooth devices. -
Page 62: Operating An Idevice
Various commands are then used to navigate the sections and to select individual applications (Fig 18.6). iDevice command Next Item selects another highlighted area (Fig 18.7). Fig.18.7 iDevice command Select Item enters the highlighted area (Fig 18.8). Fig.18.8 249044 Rev. A R-Net Control System w/Omni2... - Page 63 Depending on the nature of the application, areas of the screen will be highlighted and similar commands to the above can be used to navigate it (Fig 18.10). iDevice command Home returns to the Home screen (Fig 18.11). Fig.18.10 Fig.18.11 249044 Rev. A R-Net Control System w/Omni2...
- Page 64 The same iDevice commands also navigate the rows. Opening items and returning to the Home screen are effected in the same way as Switch Control (Fig 18.14 - 18.15). Fig.18.13 Fig.18.14 Fig.18.15 249044 Rev. A R-Net Control System w/Omni2 R-Net Control System...
- Page 65 Right Long The timings associated with the nudges are programable. Refer to the Bluetooth Programing chapter for more information. Set the R-Net programable parameter Mode to Switch Control. Refer to the Bluetooth Programing chapter for more information. Note: Within Accessibility there are Auto Scanning and Auto Hide options.
- Page 66 Fig.18.20 Fig.18.24 Fig.18.21 Fig.18.25 Fig.18.22 Fig.18.23 249044 Rev. A R-Net Control System w/Omni2...
- Page 67 • From the iDevice Settings menu, select General Accessibility and set oice Over to On (Fig 18.26). NOTE: The remainder of Voice Over set up is via the R-Net PC programmer, contact your authorized dealer for more information. WARNING! PC Programming must be done by trained and qualified personnel only.
-
Page 68: Precautions For Use
Although the R-Net control system is designed to be extremely reliable and each unit is rigorously tested during manufacture, 3. Push the SID joystick slowly forwards or press the SID the possibility of a system malfunction always exists (however forwards button until you hear the parking brakes operate. -
Page 69: Connectors
1 year from commencement of service. Contact your authorized dealer for details when the inspection is CONTACT PHONE NUMBERS due. 249044 Rev. A R-Net Control System w/Omni2... -
Page 70: R-Net Mouse Module
• The Mouse Module can retain ID’s for up to 4 PC’s. mouse through the R-Net Control System, either through a • The Mouse Module and target PC will remain paired unless Joystick or via an Input device connected to the R-Net they are disconnected on the PC. Omni2. -
Page 71: Pairing
Pairing is the term used to describe the initial set up of the Mouse Module and a particular PC. Pairing involves carrying out a sequence of steps on the R-Net Control System and the PC to be used. Please see the following sections. WARNING! -
Page 72: Pc Pairing
7. The PC will search for local Bluetooth Devices, (Fig 20.7). 8. The following screen will appear and display the locally connectable Bluetooth devices (Fig 20.8). 9. Click on “R-Net Bluetooth Mouse Module” and then click on “Next” (Fig 20.8). Remove Properties Add... - Page 73 Fig.20.7 Add Bluetooth Device Wizard Select the Bluetooth device that you want to add. R-net Bluetooth Mouse Module New Device If you don’t see the device that you want to add, make sure that it is turned on. Follow the setup instructions that came with the device, Search Again and then click Search Again.
- Page 74 For more information about using a passkey, see the documentation that came with your device Connecting... Please enter the passkey on your Bluetooth device now. Passkey 0000 Installing Bluetooth device..Cancel < Back Next > Fig.20.10 249044 Rev. A R-Net Control System w/Omni2...
-
Page 75: Pairing Multiple Pc's
Apply Cancel Fig.20.12 The R-Net Mouse Module should only be paired with one PC stationed within a 82' (25m) range. Where multiple pairings take place within a 82' (25m) range, Sunrise Medical accepts no liability for any losses of any kind due to the effectiveness of the R-Net Mouse Module. - Page 76 CJSM2 249044 Rev. A R-Net Control System w/Omni2...
-
Page 77: R-Net Cjsm2 Control System
21.0 R-Net CJSM2 Control System 21.1 Introduction The operation of the R-Net wheelchair control system is simple and easy to understand. The control system incorporates state-of-the-art electronics, the result of many years of research, to provide you with ease of use and a very high level of safety. As with other electronic equipment, correct handling and operation of the unit will ensure maximum reliability. -
Page 78: Controls
If you do not push the joystick as you switch the the event of an LCD screen failure. wheelchair on and the diagnostic screen is displayed (Fig.21.35, pg 77) then the R-Net has detected a LCD SCREEN problem somewhere in the wheelchair’s electrical... - Page 79 Switch pad to control multiple seat • Switch pad to control Bluetooth functions. • To set the operation of the control system in the event of a failure in the connected switch or its wiring to this input. 249044 Rev. A R-Net Control System w/Omni2...
-
Page 80: Buttons
The status of the control system can be understood by observing the LCD screen. The screen for the R-Net CJSM2 has common components, which will always appear, and components that will only appear under certain conditions. Opposite is a view of a typical Drive screen, with and without lights. - Page 81 This area of the screen displays text relevant to the operating condition of the control system. Example text strings would be Profile Name, Mode Name or Axis Name. These text strings are programmable. 249044 Rev. A R-Net Control System w/Omni2...
- Page 82 The display can be set to mph or km/h, or can be turned off. These options are set by the same programmable parameter that affects the digital speed display, i.e. Display Speed. Fig.21.17 Fig.21.18 660ft 249044 Rev. A R-Net Control System w/Omni2...
- Page 83 • Move the joystick forwards or backwards to move the seat. LATCHED SEATING CONTROL (Fig 21.24) This symbol will be displayed if the control system is set for latched seating control operation. Fig.21.23 Fig.21.24 249044 Rev. A R-Net Control System w/Omni2...
- Page 84 TIMER (Fig 21.28) Fig.21.28 This symbol is displayed when the control system is changing between different states. An example would be entering into module reconfiguration. 249044 Rev. A R-Net Control System w/Omni2...
- Page 85 Emergency Stop Switch to be connected into the External Profile/Mode Switch Jack. If the Emergency Stop Switch is operated or disconnected, this symbol will be displayed. Fig.21.30 Fig.21.31 249044 Rev. A R-Net Control System w/Omni2...
- Page 86 This indicates a system trip, i.e. the R-Net has detected a problem somewhere in the wheelchair’s electrical system. If the error is in a non-active module, for example in the ISM but Drive Mode is selected, then drive will still be possible, however, the diagnostic screen will appear intermittently.
- Page 87 Refer to chapter Bluetooth Set-up and Operation for more details. IR SETUP A right deflection of the joystick will enter a sub-menu for learning and deleting IR codes. Refer to chapter IR Set-up and Operation for more details. 249044 Rev. A R-Net Control System w/Omni2...
-
Page 88: Programming
Enables the user to view how many hours the chair has been driven. EXIT A right deflection of the joystick will exit the settings menu. Fig 21.36 1. Module 2. Software Version 3. Trip Text 4. Occurences Fig.21.36 249044 Rev. A R-Net Control System w/Omni2... -
Page 89: Cjsm2 Ir Setup And Operation
IR codes between the devices, (contact your Sunrise Medical authorized dealer). IR Control Mode is accessed in the normal way of Mode selection, i.e. operation of the R-Net system’s Mode button or Command. IR Control Mode will only be available if IR Codes have been stored in the CJSM2. -
Page 90: Ir Code User Menu
22.3 IR Code User Menu Fig.22.2 IR Control Mode is accessed through Mode selection, i.e. operation of the R-Net system’s Mode button or Command. IR Control Mode will only be available if IR Codes have been stored in the CJSM2. -
Page 91: Learning An Ir Code
The first time an IR Code has been learned, it is necessary to cycle the power to the CJSM2, (turn OFF and ON). If other IR Codes are already learned, then this is not necessary. Fig.22.6 Fig.22.10 Fig.22.7 Fig.22.11 249044 Rev. A R-Net Control System w/Omni2... -
Page 92: Learning Sequential Ir Codes
Command (Fig 22.13). • To enable an IR Code, deflect the speed paddles on the CJSM2 up or down. An enabled Code appears with a check against the highlighted Command. 249044 Rev. A R-Net Control System w/Omni2... -
Page 93: Deleting Ir Codes
To delete all IR Codes for an appliance select Delete All Codes within that appliance’s sub-menu (Fig 22.15). To delete all IR Codes stored in the CJSM2, select Delete All Codes within the IR Set-up Menu (Fig 22.16). Fig.22.15 Fig.22.16 249044 Rev. A R-Net Control System w/Omni2... -
Page 94: Default Ir Menu
Information CD Changer Command 8 Command 8 Down Page Up Left Page Down Right Search Select/OK Green Preset Record Yellow Timer Record Blue Record Mode Input (Up, Down, Left, Right) Select / OK 249044 Rev. A R-Net Control System w/Omni2... -
Page 95: Cjsm2 Bluetooth Setup And Operation
• Enter the Settings Menu and select Bluetooth. • The Bluetooth Devices screen is displayed. • Set one or more of the devices to On. • Switch the R-Net system off and on again (Refer to Fig 23.1). 249044 Rev. A R-Net Control System w/Omni2... -
Page 96: Pairing With A Bluetooth Device
• The PC will now search for local Bluetooth devices. • The available Bluetooth devices are shown on the screen (Fig 23.5). • Click on the New Device name e.g. 'Tom's PC' and then click on ‘Next’ (Fig 23.5). Fig.23.5 249044 Rev. A R-Net Control System w/Omni2... - Page 97 • The screen will show connected devices (Fig 23.9). NOTE: If the process fails, click on New Device name e.g. ‘Tom’s PC’, then select ‘Remove’ and repeat the process (Fig 23.9). Fig.23.7 Fig.23.8 Fig.23.9 249044 Rev. A R-Net Control System w/Omni2...
-
Page 98: Pairing With An Android Device
Bluetooth devices. When the device is unpaired a new device can be added. • The R-net for Android App is available from the Play Store, simply search for “PGDT”, “R-net” or “R-net for Android” and 23.8 Operating a Windows PC download the App to the Smart device. -
Page 99: Operating An Idevice
Various commands are then used to navigate the sections and to select individual applications (Fig 23.11). iDevice command Next Item selects another highlighted area (Fig 23.12). Fig.23.12 iDevice command Select Item enters the highlighted area (Fig 23.13). Fig.23.13 249044 Rev. A R-Net Control System w/Omni2... - Page 100 Depending on the nature of the application, areas of the screen will be highlighted and similar commands to the above can be used to navigate it (Fig 21.15). iDevice command Home returns to the Home screen (Fig 23.16). Fig.23.15 Fig.23.16 249044 Rev. A R-Net Control System w/Omni2...
- Page 101 The same iDevice commands also navigate the rows. Opening items and returning to the Home screen are effected in the same way as Switch Control (Fig 23.19 - 23.20). Fig.23.18 Fig.23.19 Fig.23.20 249044 Rev. A R-Net Control System w/Omni2 R-Net Control System...
- Page 102 Right Long The timings associated with the nudges are programable. Refer to the Bluetooth Programing chapter for more information. Set the R-Net programable parameter Mode to Switch Control. Refer to the Bluetooth Programing chapter for more information. NOTE: Within Accessibility there are Auto Scanning and Auto Hide options.
- Page 103 Fig.23.25 Fig.23.29 Fig.23.26 Fig.23.30 Fig.23.27 Fig.23.28 249044 Rev. A R-Net Control System w/Omni2...
- Page 104 • From the iDevice Settings menu, select General Accessibility and set oice Over to On (Fig 23.31). NOTE: The remainder of Voice Over set up is via the R-Net PC programmer, contact your authorized dealer for more information. WARNING! PC Programming must be done by trained and qualified personnel only.
- Page 105 249044 Rev. A R-Net Control System w/Omni2...
-
Page 106: Guarantee / Warranty
The benefits to you given by this warranty are in addition to your other rights and remedies under a law in relation to the goods to which the warranty relates. Record your serial number here for future reference: _______________________________________ 249044 Rev. A R-Net Control System w/Omni2... - Page 107 249044 Rev. A R-Net Control System w/Omni2...
- Page 108 Website Addresses: = www.SunriseMedical.com = www.SunriseMedical.fr = www.SunriseMedical.es Customer Service 800.333.4000 In Canada 800.263.3390 Sunrise Medical 2842 N. Business Park Ave. Fresno, CA 93727 • USA ©2018 Sunrise Medical (US) LLC 11.18 249044 Rev. A...
Need help?
Do you have a question about the R-Net and is the answer not in the manual?
Questions and answers