
Related Manuals for A.O. Smith Pro AOW-S400


Summary of Contents for A.O. Smith Pro AOW-S400
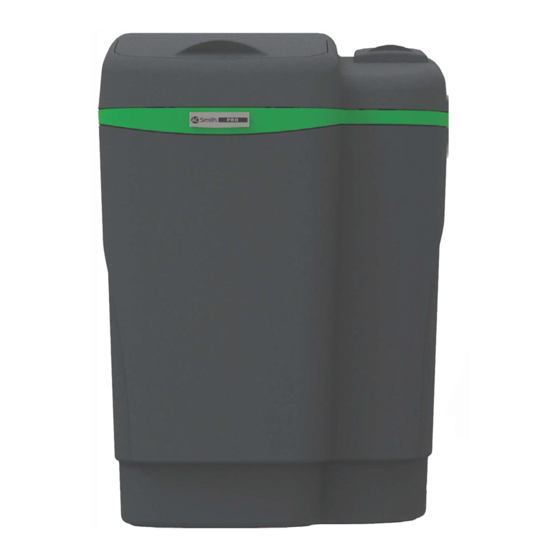
- Page 1 WHOLE HOUSE SOFTENERS AOW-S400 / 34,800 Grain Unit AOW-S500 / 49,800 Grain Unit Owner’s Manual / El manual del proprietario...
-
Page 2: Table Of Contents
A. O. Smith has obsessively engineered this water softener for you. It features a built-in dirt and sediment filter and fine mesh resin that reduces scale buildup on internal pipes and plumbing. Keep this owner’s manual to reference installation, troubleshooting and replacement information. -
Page 3: Box Contents
BOX CONTENTS OVERFLOW ELBOW 12V TRANSFORMER V-185 NOZZLE DRAIN LINE WARNING: indicates a CONTROLLER potentially hazardous situation which, if not avoided, could result in death or injury. Please read entire manual to ensure all parts listed are present before installation. If any part is missing or damaged let us know by calling 833.232.9712 Do not attempt to install the softener. -
Page 4: Before You Begin
BEFORE YOU BEGIN Test Your Water The first step in setting up your appliance is determining what elements are contained in your water supply. Use one of the options below to determine characteristics of your water. • Call Your Water Provider- For municipal •... -
Page 5: Ferrous Iron And Compensated Hardness
INSTALLATION GUIDE FERROUS IRON AND COMPENSATED HARDNESS Ferrous Iron NOTICE: If the water supply contains ferrous iron, a commercially available resin bed cleaner should be used every six months. Follow the instructions on the container. You should increase your water hardness setting by 5 grains per gallon (86 mg/L) for every 1 ppm (1mg/L) of ferrous iron. -
Page 6: Getting Maximum Efficiency From The Appliance
GETTING MAXIMUM EFFICIENCY FROM THE APPLIANCE To achieve the maximum benefit and performance from your water softener, familiarize yourself with this manual. If this device is not maintained and operated as specified in the owner’s manual, there is a risk of exposure to contaminants. •... -
Page 7: Precautions
INSTALLATION GUIDE PRECAUTIONS Do Not • Comply with all state, local, building, • Install if checklist items are not compliant. plumbing, and electrical codes. (see Checklist Before Installation) • Test your water quality with strips • Install if incoming or outlet piping water provided. -
Page 8: Getting To Know Your New Softener
GETTING TO KNOW YOUR NEW SOFTENER Part Bypass Valve Gravity Flow Connection Brine Cabinet Drain Line Fitting Controller Housing Part Brine Cabinet Media Tank Drain Line Bypass Valve Service Position Bypass Knob Bypass Position Safety Shutoff Controller Brine Line NEED HELP? GIVE US A CALL 833.232.9712... -
Page 9: Valve Overview
VALVE OVERVIEW INSTALLATION GUIDE The Bypass Valve can isolate the appliance Bypass Position should appliance malfunction or leak. It can also permit the use of untreated water for watering plants, shrubs, or lawns. The Bypass Valve is attached to the main control valve. -
Page 10: System Configuration
SYSTEM CONFIGURATION Ground Wire and Clamps Hard Water (Copper Pipe Only) To Outside Well Water Faucets Cold Soft Water Shut Off Hot Soft Valve Water City Water Inlet Outlet Meter Electrical Outlet Water Heater Drain and Overflow Lines 2” Air Gap NOTICE: Failure to comply with these specifications may decrease the effectiveness of the backwash and cause control valve malfunction. -
Page 11: Installation
INSTALLATION INSTALLATION GUIDE Prepare the Appliance Remove all packaging or installation Place water softener in desired location materials from brine cabinet. using the system configuration diagram as a guide. The diagram applies to a Prepare the Placement Area basement, slab, crawl space, and outside installations. - Page 12 INSTALLATION Connect Gravity Overflow Gravity Overflow Elbow Connection The overflow line drains away excess water should the cabinet overfill or the water softener malfunction. (see Gravity Overflow Elbow) Ensure the overflow elbow is in the down position. Connect 1/2" (1.27 cm) I.D. tubing (size cannot be reduced) between the overflow fitting and a floor drain, laundry tub, or other suitable waste receptacle.
- Page 13 INSTALLATION GUIDE Flush Lines Bypass Position 1 Place water softener in Bypass position. Turn on main water supply. 2 Turn on nearest cold water faucet to flush plumbing of any excess soldering flux, air, or any other foreign material. Return water softener to Service position.
- Page 14 Setting the Controller 1 On the home screen, press the “MENU” button. 2 On the Main Menu screen, press the button for “Hardness”. 3 On the Water Hardness screen, press the “+” button to increase hardness or “-“ button to decrease hardness.
- Page 15 INSTALLATION GUIDE Add Water to the Brine Cabinet Service Position For AOW-S400 For AOW-S500 Add 2 gallons (8L) of Add 5 gallons (19L) of water to brine cabinet water to brine cabinet After first regeneration, appliance will automatically refill the correct amount of water into brine cabinet.
-
Page 16: Troubleshooting
TROUBLESHOOTING Problem Possible Cause Solution No salt in brine cabinet. Add salt. Remove the brine line and flush clean. Remove the air check/draw tube and Sediment in brine cabinet has plugged flush with clean water. Clean injector the brine line and air check/draw tube. assembly. - Page 17 INSTALLATION GUIDE Problem Possible Cause Solution Make sure the controller is pushed all Controller not attached properly. the way onto the cover plate. Defective magnet disk. Replace magnet disk. Appliance Stays In Regeneration Remove foreign object(s) from the Foreign object in main control valve. main control valve.
-
Page 18: Efficiency Statements
EFFICIENCY STATEMENTS This product is efficiency rated according to NSF/ANSI 44. The stated efficiencies are valid only at the specified salt dosage and 7.0 gpm (26.5 L/min): Capacity at That Model Rated Efficiency Salt Dosage Dosage AOW-S400 5,210 grains/lb (742 grams/kg) 1 lb (0.45 kg) 5,210 grains (338 grams) AOW-S500... -
Page 19: Specifications
INSTALLATION GUIDE SPECIFICATIONS AOW-S400 AOW-S500 34,800 Grain 49,800 Grain Capacity Capacity Specification Water Water Softener Softener Maximum Capacity - 34,800 49,800 grains Maximum Compen- sated Hardness - gpg (mg/L) Maximum Ferrous Iron Reduction - ppm* Minimum pH - standard units Maximum Chlorine - ppm Water &... - Page 20 SPECIFICATIONS AOW-S400 AOW-S500 High Capacity Salt Setting - Total Length 33/25 (33/95) 48/34 (48/129) of Regeneration - min/gal (min/L) Total Length of Regeneration 27.5/21 42.5/30 (Factory Setting) - (27.5/80) (42.5/114) min/gal (min/L) 2.7” 2.7” Controller Type monochrome monochrome touch screen touch screen Electrical Rating 115V, 60 Hz...
- Page 21 INSTALLATION GUIDE NEED HELP? GIVE US A CALL 833.232.9712...
-
Page 22: Warranty
LIMITED WARRANTY Y E A R What is covered: This Warranty covers What A. O. Smith will do: We will replace defects in materials or workmanship in the defective part of the covered product, manufacturing of your A. O. Smith system, or if necessary, the product and send it to excluding media, and except as you with installation instructions for use by... - Page 23 INSTALLATION GUIDE NEED HELP? GIVE US A CALL 833.232.9712...
-
Page 24: Spanish/Español
A. O. Smith diseñó este ablandador de agua minuciosamente para usted. Cuenta con un filtro incorporado de sedimentos y suciedad y resina de malla fina que reducen la acumulación de sarro en las tuberías y plomería interna. Conserve este manual del propietario como referencia para la instalación, resolución de problemas e información de cambio. -
Page 25: Contenido De La Caja
CONTENIDO DE LA CAJA INSTALLATION GUIDE CODO DE REBOSE TRANSFORMADOR DE 12 V BOQUILLA V-185 TUBERÍA DE DRENAJE ADVERTENCIA Advertencia CONTROLADOR indica una situación peligrosa que, si no se evita, puede provocar la muerte o lesiones graves. Lea todo el manual antes de la instalación para asegurarse de que todas las piezas indicadas estén presentes. -
Page 26: Antes De Comenzar
ANTES DE COMENZAR Pruebe su agua El primer paso para configurar su artefacto es determinar qué elementos contiene su suministro de agua. Use una de las siguientes opciones para determinar las características de su agua. • Llame a su proveedor de agua: En caso de •... -
Page 27: Hierro Ferroso Y Dureza Compensada
INSTALLATION GUIDE HIERRO FERROSO Y DUREZA COMPENSADA Hierro ferroso NOTA: Si el suministro de agua contiene hierro ferroso, se debe usar un limpiador de lecho de resina disponible en el comercio cada seis meses. Siga las instrucciones del recipiente. Debe aumentar el ajuste de dureza del agua en 86 mg/L (5 granos por galón) por cada 1 mg/L (1 ppm) de hierro ferroso. -
Page 28: Cómo Obtener La Máxima Eficacia Del Artefacto
CÓMO OBTENER LA MÁXIMA EFICACIA DEL ARTEFACTO Para aprovechar al máximo y obtener el mejor rendimiento de su ablandador de agua, familiarícese con el manual. Si este dispositivo no se mantiene y opera como se especifica en el manual del propietario, existe riesgo de exposición a contaminantes. •... -
Page 29: Precauciones
INSTALLATION GUIDE PRECAUCIONES Haga lo siguiente No haga lo siguiente • Cumpla con todos los códigos • Instale si no se cumplen los puntos de eléctricos, de plomería y de la lista de verificación. (consulte Lista de construcción estatales y locales. verificación previa a la instalación) •... -
Page 30: Conociendo Su Nuevo Ablandador
CONOCIENDO SU NUEVO ABLANDADOR Pieza Válvula de derivación Conexión de flujo por gravedad Gabinete de agua salada Tapa Conector de tubería de drenaje Carcasa del controlador Pieza Gabinete de agua salada Tanque de material Tubería de drenaje Válvula de derivación Posición de servicio Perilla de... -
Page 31: Información General De La Válvula
INFORMACIÓN GENERAL DE LA VÁLVULA INSTALLATION GUIDE La válvula de derivación puede aislar el Posición de derivación artefacto si funciona mal o tiene fugas. También puede permitir el uso de agua no tratada para regar plantas, arbustos o céspedes. La válvula de derivación está acoplada a la válvula de control principal. -
Page 32: Configuración Del Sistema
CONFIGURACIÓN DEL SISTEMA Cable de conexión a Agua dura tierra y abrazaderas hacia las llaves Agua de (Solo tubería de cobre) exteriores pozo Agua blanda fría Válvula Agua blanda de cierre caliente Medidor de Entrada Salida agua de la ciudad Tomacorriente Calentador de agua... -
Page 33: Instalación
INSTALACIÓN INSTALLATION GUIDE Prepare el artefacto Retire todos los materiales de empaque o Coloque el ablandador de agua en la instalación del gabinete de agua salada. ubicación deseada con el diagrama de configuración del sistema como guía. El diagrama se aplica a instalaciones en Prepare el área de instalación sótano, losa, semisótano y en exteriores. - Page 34 INSTALACIÓN Realice la conexión de Codo de rebose por gravedad rebose por gravedad La tubería de rebose drena el exceso de agua, en caso de que el gabinete se llene en exceso o el ablandador de agua funcione indebidamente. (consulte Codo de rebose por gravedad) Asegúrese de que el codo de rebose esté...
- Page 35 INSTALLATION GUIDE Purgue las tuberías Posición de derivación 1 Coloque el ablandador de agua en posición de derivación. Abra el suministro principal de agua. 2 Abra la llave de agua fría más cercana para purgar todo el exceso de fundente para soldar, aire u otros materiales extraños de las tuberías.
- Page 36 Configuración del controlador 1 En la pantalla de inicio, presione el botón “MENU” (Menú). 2 En la pantalla Main Menu (Menú principal), presione el botón de “Hardness” (Dureza). 3 En la pantalla Water Hardness (Dureza del agua), presione el botón “+” para aumentar la dureza, o el botón “-”...
- Page 37 INSTALLATION GUIDE Agregue agua al gabinete de Posición de servicio agua salada Para AOW-S400 Para AOW-S400 Agregue 8 L (2 galones) Agregue 19 L (5 galones) de agua al gabinete de de agua al gabinete de agua salada agua salada Después de la primera regeneración, el artefacto rellenará...
-
Page 38: Resolución De Problemas
RESOLUCIÓN DE PROBLEMAS Problema Causa posible Solución No hay sal en el gabinete de agua salada. Agregue sal. Retire la tubería de agua salada y Los sedimentos en el gabinete de agua enjuáguela. Retire el tubo de revisión y salada han obstruido la tubería de agua extracción de aire y enjuáguelo con agua salada y el tubo de revisión y extracción limpia. - Page 39 INSTALLATION GUIDE Problema Causa posible Solución Asegúrese de que el controlador esté El controlador no está instalado completamente instalado en la placa de adecuadamente. cubierta. El artefacto se Disco magnético defectuoso. Reemplace el disco magnético. mantiene en Objeto extraño en la válvula de control Retire los objetos extraños de la válvula de regeneración principal.
-
Page 40: Declaraciones De Eficacia
DECLARACIONES DE EFICACIA La eficacia de este producto está clasificada según la norma NSF/ANSI 44. Las eficacias declaradas son válidas solo con la dosis de sal especificada 26.5 L/min (7.0 gpm): Capacidad con esa Modelo Eficacia nominal Dosis de sal dosis AOW-S400 5,210 grains/lb (742 grams/kg) 1 lb (0.45 kg) 5,210 grains (338 grams) -
Page 41: Especificaciones
INSTALLATION GUIDE ESPECIFICACIONES Número de pieza AOW-S400 AOW-S500 de la unidad Ablandador de agua con Ablandador capacidad de de agua con Especificación 34,800 granos capacidad de para agua de 49,800 granos ciudad Capacidad 34,800 49,800 máxima: granos Dureza compensada 1540 (90) 1883 (110) máxima: mg/L (gpg) Reducción máxima... - Page 42 ESPECIFICACIONES Número de pieza AOW-S400 AOW-S500 de la unidad Ajuste de sal de alta capacidad: kg/ 3.2/1700 4.5/2560 gramos eliminados (7/26,300) (10/39,500) (lb/granos eliminados) Ajuste de sal de alta capacidad: 33/95 48/129 Duración total de (33/25) (48/34) la regeneración: min/L (min/gal) Duración total de la regeneración 42.5/114...
-
Page 43: Garantía
INSTALLATION GUIDE GARANTÍA LIMITADA 3/10 AÑOS Y E A R Lo que está cubierto: Esta garantía cubre Lo que A. O. Smith hará: Reemplazaremos defectos en materiales o en la mano de la pieza defectuosa del producto cubierto obra de la fabricación de su sistema de o, de ser necesario, el producto y se A. - Page 44 Get the most out of your water softener by using only genuine A. O. Smith replacements. Visit www.aosmith.com/wholesale to find replacements or call 833.232.9712 to speak to a Wholesale Representative. Aproveche al máximo su ablandador de agua con los repuestos originales de A. O. Smith. System Tested and Certified by NSF International according to NSF/ANSI Standard 44 for the reduction of Barium, Radium 226/228 and Hardness Reduction.
Need help?
Do you have a question about the Pro AOW-S400 and is the answer not in the manual?
Questions and answers