iSmartAlarm CubeOne Owner's Manual
Hide thumbs
Also See for CubeOne:
- Owner's manual (15 pages) ,
- Quick installation manual (4 pages) ,
- Quick installation manual (2 pages)

Related Manuals for iSmartAlarm CubeOne


Summary of Contents for iSmartAlarm CubeOne
- Page 1 Home Security System OWNER’S MANUAL Système de sécurité domestique iSmartAlarm MANUEL DUPROPRIÉTAIRE...
-
Page 2: Table Of Contents
Home Security System OWNER’S MANUAL Table of Contents INTRODUCTION PACKAGE CONTENTS INTENDED USE IMPORTANT NOTES FOR USERS CONTRAINDICATION PARTS, BATTERY AND LED INDICATOR SOUND CONFIRMATIONS BASIC FUNCTIONALITY SETUP REQUIREMENTS SETUP PROCEDURES OPERATING SETUP INSTRUCTIONS ADDING ADDITIONAL SENSORS AFTER THE INSTALLATION... -
Page 3: Owner's Manual
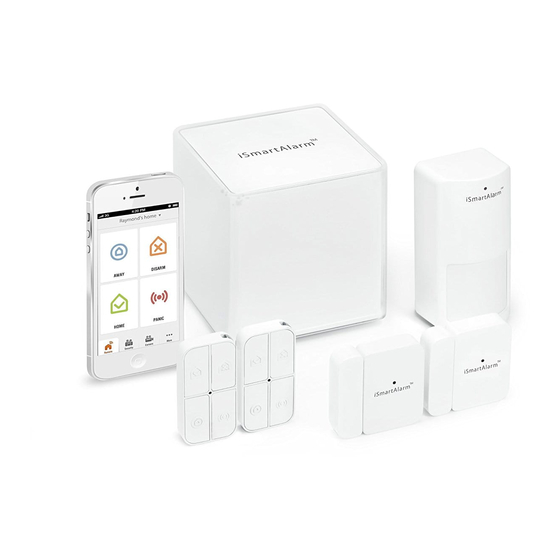
Note: please refer to the packing list for exact content in each specific package. INTENDED USE With the CubeOne™ managing your motion detectors, door and window protection, remote control and panic features, as well as the optional iCamera™ and additional home security and home automation devices, you can monitor, manage, and secure your home, property, and family from your smartphone with the iSmartAlarm. -
Page 4: Contraindication
• Intruder may have the technical sophistication to bypass a sensor or whole system. • Signals sent by CubeOne or devices may be blocked or reflected before being received, and block can occur if metal objects are moved into the path of the signal. -
Page 5: Parts, Battery And Led Indicator
1. 10/100 BASE-T Ethernet: for connecting to router 2. USB: a port for future function expansion (not for connecting to computer directly) 3. Power: for connecting to power adaptor LED statuses of CubeOne ™ 1. Booting: LED stays solid red. - Page 6 2. Normal working status: LED flashes white, “breathing” when siren is off; LED flashes red when siren is on. 3. Disarming: LED light changes from red flashing to white “breathing” when disarming. 4. CubeOne registration: LED alternates between red and white during registration. 5. Sensors registration: LED flashes white "breathing".
- Page 7 3. LED flashes red once when batteries are installed. Note: Whenever removing and/or replacing batteries, you should wait at least ten seconds before placing new batteries in the sensor and powering on the device. This will allow the sensor's residual power charge to cycle through. Remote tag: How to change battery: 1.
- Page 8 Contact sensor: How to change battery: 1. Take off the battery compartment. 2. Replace the button battery with same type - CR2032. 3. LED flashes red once when the battery is installed. Note: Whenever removing and/or replacing batteries, you should wait at least ten seconds before placing new batteries in the sensor and powering on the device.
-
Page 9: Sound Confirmations
BASIC FUNCTIONALITY Legend: Arm: All devices are armed by either Remote Tag or through the App. After the “Arm” is pushed, it takes 90 seconds to allow user(s) to walk out of the premises before the iSmartAlarm system takes effect. - Page 10 Home: The contact sensors are armed, and the motion detector is disarmed. After the “Home” is enabled (turned on), it takes 90 seconds to allow user to walk out of the premise before the iSmartAlarm system takes effect.
- Page 11 Panic: A siren is sounded (located in the CubeOne™) at 100dB. Remote Tag • Remote Tag can be used for arm and disarm of the system and set off the siren manually. The Remote Tag can also activate the “Home” setting •...
- Page 12 • The user can designate varying degrees of notification for different activities, even when the system is disarmed. Including, but not limited to, siren sounding, push notifications, and iCamera snapshot (if part of system) The Panic is set off: • Siren, located in CubeOne™, is set off. Volume can be 100 dB...
-
Page 13: Setup Requirements
• All members of the home security network can receive notification of an emergency at the home SETUP REQUIREMENTS The iSmartAlarm Home Security System is designed to be used with the following iPhone models: iPhone 5 iPhone 4S iPhone 4 iPhone 3GS The iOS version of these devices should be 5.0 or higher. -
Page 14: Operating Setup Instructions
• Download the “iSmartAlarm Home Security System” application from your phone’s App store. • Connect the CubeOne™ to your router and into your wall outlet according to the picture provided below. • Power on the CubeOne™ and wait for the booting process to finish (it will automatically boot, and should take 1-2 minutes). - Page 15 • Ensure you have received the phone call notification test (automatically sent by iSmartAlarm during the setup process, and if applicable in your area). • Ensure all devices are registered and appear in the App’s Device Settings. STEP 3: • Place each of the devices in the appropriate locations (see examples below).
-
Page 16: Adding Additional Sensors After The Installation
APP – BASIC WALKTHROUGH Upon download and installation of App on your phone, you will be required to complete some basic necessary steps to begin using your iSmartAlarm. The basic overview of steps are as follow: 1. Sign up, following prompts, with accurate information. - Page 17 2. Login to the iSmartAlarm App using the credentials you established during the sign up process. 3. Follow the prompts to scan for devices. This will complete registration of the devices to your CubeOne...
-
Page 18: App Screen Legend
APP SCREEN LEGEND 1. This is your primary page for control of your iSmartAlarm. You can arm or disarm the system, set the system to “Home” setting (all devices on except motion detector),... - Page 19 2. Here, you can view all members added to your network along with their status (home or away). 3. You can view the status of all devices.
- Page 20 4. View streaming video through your optional iCamera – pan, tilt, and take snapshots and automatically upload to the cloud. 5. View and make changes to your profile, your family settings, device settings, add or remove additional devices, and learn more about your iSmartAlarm through the Help Center.
-
Page 21: Specifications
For more detailed operating instructions, please visit www.iSmartAlarm.com or the FAQ section of the iSmartAlarm Home Security System App on your iOS device. SPECIFICATIONS CubeOne ™ 1. Model: iPU3A 2. Classification: External power 3. Device dimensions: 100mm*100mm*105mm 4. Weight: 370g 5. - Page 22 9. Operating humidity: 30℃±2 ≤85%±5 10. Storage and transport temperature: -40℃~55℃ (-40°F~131°F) 11. Storage and transport humidity: 40℃≤90% 12. PIR detection angle: 90° 10M mounted @ Approximately 6 1/2' from the floor Remote Tag 1. Model: RC3A 2. Classification: Internally-powered 3.
-
Page 23: General Safety And Precautions
7. Do not run Adapter cable through wall. It may not be safe for people with pacemakers to use the security system. Contact sensors include parts with strong magnetic force. 9. Avoid using the iSmartAlarm near strong magnetic fields, such as microwave ovens, etc. -
Page 24: Troubleshooting
(e.i.r.p.) is not more than that necessary for successful communication. 16. NOTE: “This device” includes “CubeOne”, “Contact Sensor”, “Motion Sensor”, “Remote tag”. TROUBLESHOOTING 1. - Page 25 App 5. Failed to register all devices including CubeOne, sensors and remote tag • Ensure that CubeOne, sensors or remote tag are properly powered and well connected • Register all devices after resetting the power of all devices, ensure to wait at least 10 seconds before turning the power back on.
-
Page 26: Care And Maintenance
Our goods come with a 1-year warrantee that cannot be excluded under your local Consumer Law. Warranty void if CubeOne and iCamera are open. You are entitled to a replacement or refund for a major failure of product. You are also entitled to have the goods repaired or replaced if the goods fail to be of acceptable quality and the failure does not amount to major failure. - Page 27 Manufactured for iSmart Alarm, Inc. Sunnyvale , CA 94086,USA 1-888-638-1799 www.ismartalarm.com iSmartAlarm , CubeOne , iCamera are trademarks of iSmart Alarm, Inc. iPhone is a trademark of Apple Inc, Registered in the U.S. and other countries. ©2013 iSmart Alarm, Inc. All rights reserved.
Need help?
Do you have a question about the CubeOne and is the answer not in the manual?
Questions and answers