
Related Manuals for IDEAL H2O Classic Series

Summary of Contents for IDEAL H2O Classic Series
- Page 1 SETUP AND MAINTENANCE GUIDE Premium Water Filtration Systems Classic RO System Classic RO System 150 GPD 300 GPD Product # 738366 Product # 738368...
-
Page 2: What's In The Box
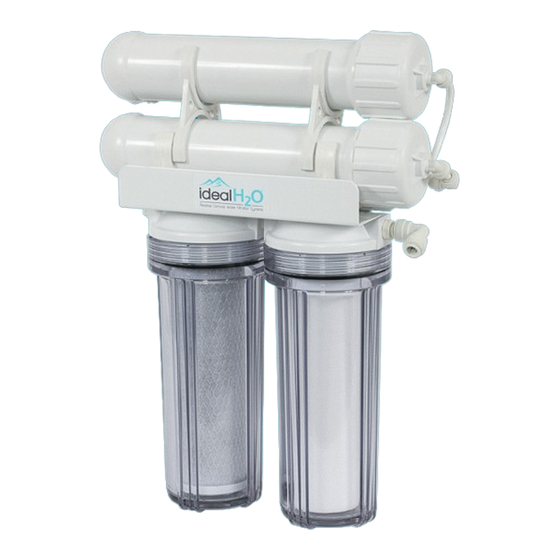
WHAT’S IN THE BOX? Premium Water Filtration Systems... - Page 3 IDEAL H REVERSE OSMOSIS 150 GPD PART LIST: ® Three Stage Reverse Osmosis - 150 GPD unit includes: 1. Polyspun Sediment Pre-filter - Removes sediment, particulates, dirt and rust. 2. Coconut Carbon Filter - Removes chlorine, odor and other chemicals. 3.
- Page 4 Premium Water Filtration Systems...
- Page 5 IDEAL H REVERSE OSMOSIS 300 GPD PART LIST: ® Three Stage Reverse Osmosis - 300 GPD unit includes: 1. Polyspun Sediment Filter - Removes sediment, particulates, dirt and rust. 2. Coconut Carbon Filter - Removes chlorine, odor and other chemicals. 3.
- Page 6 QUICK OPERATION GUIDE The following steps will get you set up in just a few minutes. Please read each step carefully. If you have any questions, please refer to our website at www.IdealH2O.net for information and videos on setup & maintenance. Step 1 –...
- Page 7 Step 2 – Starting up your RO System Connect the white inlet tube to your water supply and slowly turn on the water source. Once the sediment and carbon filter housings have water in them, turn the water supply fully on. Allow water to run 30 to 40 minutes to flush the system before use, especially after changing the filters and membranes.
- Page 8 MAINTENANCE AND FILTER CHANGES The Ideal H2O Reverse Osmosis Systems have pre-filters that will ® need to be replaced after a certain time period of use. By keeping up with the replacement of your filters, you can double, or even triple, the life of your RO membrane.
-
Page 9: Replacing The Ro Membrane
REPLACING THE RO MEMBRANE Step 1 – Unscrew the cap from the membrane housing. Be cautious of both (2) o-rings Step 2 – Remove the membrane from the housing with a pair of needle nose pliers. Hold onto the membrane housing while you are pulling the membrane out. -
Page 10: Replacing The Filters
REPLACING THE FILTERS Step 1 – Unscrew the filter housing from the RO System using the filter wrench included with your system. Step 2 – Replace sediment and/or carbon filters. Step 3 – Screw the filter housing back onto the RO system, firmly hand tightening these. - Page 11 REPLACEMENT FILTER INFORMATION REPLACEMENT FILTER PART FILTER REPLACEMENT INFO NUMBER TIMELINE A RO Membrane 738340 6 months to 2.5 years B Sediment Filter - 2x10” 738335 6 to 12 months C Coconut Carbon Filter - 2x10” 738330 6 to 12 months...
- Page 12 For all warranty inquiries, please contact Ideal H at (888) 582-2762. ® Scan this QR code or visit our website for how-to videos and other product information. Exclusively distributed by: www.sunlightsupply.com #111106 REV D • 02022017LS...
Need help?
Do you have a question about the Classic Series and is the answer not in the manual?
Questions and answers