Table of Contents
Advertisement
USER'S GUIDE
Table of Contents:
Introduction. . ......................................................2
Precautions. . .......................................................3
Box.Contents.....................................................3
Overview........................................................4-9
Getting.Started.........................................10-12
Basic.Operation........................................ 13-18
Setting.Input.Levels......................................19
Setting.Output.Levels..........................20-24
Advanced.Functions. . ........................... 25-29
Common.Advanced.Functions.........30-32
Frequency.Chart. . .......................................... 33
Troubleshooting. . .................................... 33-34
Specifications................................................. 35
Warranty. . .........................................................36
AWS-2000
Advertisement
Table of Contents

Related Manuals for Senal AWS-2000

Summary of Contents for Senal AWS-2000
-
Page 1: Table Of Contents
USER’S GUIDE Table of Contents: Introduction............2 Precautions............3 Box.Contents.............3 Overview............4-9 Getting.Started.........10-12 Basic.Operation........13-18 Setting.Input.Levels........19 Setting.Output.Levels......20-24 Advanced.Functions......25-29 Common.Advanced.Functions..30-32 Frequency.Chart..........33 Troubleshooting........33-34 Specifications..........35 Warranty............36 AWS-2000... -
Page 2: Introduction
Thank you for choosing Senal. The.Senal.AWS-2000.is.a.versatile,.lightweight,.yet.rugged. wireless.system.that.is.ideal.for.a.wide.variety.of.professional. uses.such.as.ENG,.interviews,.conferences,.lectures,.and. live.theater.production..The.included.AWS-2000T.beltpack. transmitter,.AWS-2000R.camera.mount.receiver,.and. optional.AWS-2000P.plug-on.transmitter.have.an.operating. range.of.up.to.500.feet..Each.component.is.packed.with. features.that.will.enable.production.sound.mixers.and.ENG. camera.operators.to.capture.broadcast-quality.audio..The. intuitive.design.and.an.uncomplicated.menu.structure.make. the.AWS-2000.system.easy.to.set.up.and.effortless.to.use. The.portable.receiver.features.a.one-touch.frequency.scan. and.infrared.sync.that.allows.you.to.effortlessly.find.a.clear. channel.for.your.devices..This.true-diversity.receiver.uses. dual.antennas.and.reception.circuits.that.eliminate.audio. dropouts.and.RF.interference..To.further.protect.audio.from. unwanted.interference,.the.AWS-2000.system.includes. 3-level.squelch.and.pilot.tone..Other.features.such.as. selectable.mic/line.input.and.variable.RF.power.output.give. this.wireless.system.the.ability.to.deliver.clean,.accurate,.and. pristine.audio. Each.component.is.powered.by.two.AA.batteries... An.integrated.Micro-USB.port.can.be.used.to.charge. NiMH.batteries.without.removing.them.from.the.battery. compartments..Advanced.OLED.display.technology.provides. easy-to-see.screens,.even.in.dim.lighting.conditions..Top. display.orientation.assures.that.the.displays.are.easy.to.read. regardless.of.where.they’re.mounted.or.carried..Removable. antennas.make.this.wireless.system.compact.and.easy.to. transport,.and.allows.you.to.easily.change.an.antenna.if. it’s.damaged..Rugged.metal.housing.on.each.component. makes.the.AWS-2000.system.ideal.for.travel.or.location.use. and.able.to.withstand.the.rigors.of.the.most.demanding. environments. Introduction ▪... -
Page 3: Precautions
Precautions •. Please.read.and.follow.these.instructions,.and.keep.this. manual.in.a.safe.place. •. Keep.this.unit.away.from.water.and.any.flammable. gases.or.liquids. •. Use.only.the.correct,.recommended.voltage. •. Do.not.attempt.to.disassemble.or.repair.the. equipment—doing.so.will.void.the.warranty,.and.Senal. will.not.be.responsible.for.any.damage. •. Clean.the.units.with.only.a.soft,.dry.cloth. •. Use.only.parts,.accessories,.and.attachments.provided. by.the.manufacturer. •. Make.sure.that.this.product.is.intact.and.that.there.are. no.missing.parts. •. To.avoid.damage.to.this.product,.be.careful.not.to. overtighten.or.improperly.thread.any.of.the.. threaded.fittings. •. Exposure.to.high.sound.levels.can.cause.permanent. hearing.loss..Avoid.listening.at.high.volumes.for. extended.periods.of.time. •. All.images.are.for.illustrative.purposes.only. Box Contents •. AWS-2000T.Beltpack.transmitter •. AWS-2000R.Portable.true-diversity.receiver •. Balanced.locking.Mini-to-XLR.output.cable •. Locking.Mini–to-Mini.output.cable •. -
Page 4: Overview
Overview AWS-2000T Body-Pack Transmitter Microphone input Antenna Mute switch OLED display Power button IR port button Up/Down Belt clip buttons Micro-B USB port Battery compartment Overview ▪ ▪ ▪ ▪ ▪ ▪ ▪ ▪ ▪ ▪ ▪ ▪ ▪ ▪ ▪... - Page 5 GR.06-CH.08 AWS-2000 1. Group.number 2..Channel.number 3.. Transmission.power.indicator 4..Device.name 5..Low.cut.filter 6..Input.level.indicator 7.. Pilot.tone.indicator 8..Lock.indicator 9..Battery.level.indicator 10..Audio.input.level.meter Overview ▪ ▪ ▪ ▪ ▪ ▪ ▪ ▪ ▪ ▪ ▪ ▪ ▪ ▪ ▪ ▪ ▪ ▪ ▪ ▪ ▪ ▪ ▪ ▪...
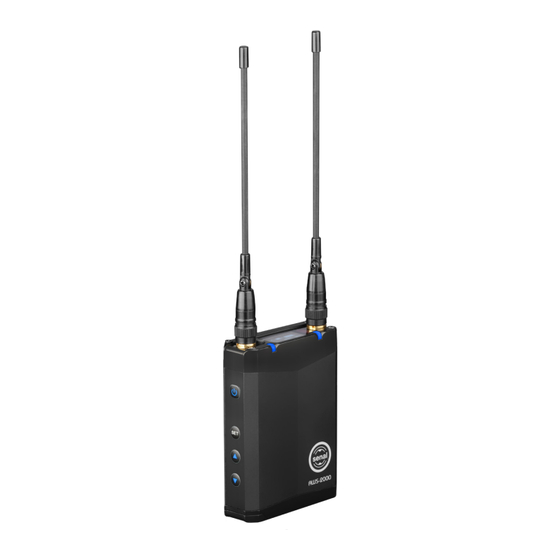
- Page 6 Overview AWS-2000R True Diversity Receiver OLED display Antenna A Antenna B indicator AFS button Peak IR port indicator Power button button Up/Down Headphone buttons jack Balanced 3.5 mm Micro-B Battery output jack USB port compartment Overview ▪ ▪ ▪ ▪ ▪...
- Page 7 GR.06-CH.08 AWS-2000 1. Group.number 2..Channel.number 3.. Antenna.reception.level.indicator •. Icons.for.left.and.right.antenna.reception. level.should.appear.as.pictured..If.they. don’t,.refer.to.the.Troubleshooting. section.at.the.end.of.this.manual. 4..Device.name 5..Transmitter.battery.level.indicator •. The.transmitter’s.battery.level.indicator. will.not.appear.on.the.receiver.screen. unless.pilot.tone.is.turned.on.(see.Pilot Tone.on.page.25). 6..Receiver.battery.level.indicator 7.. Audio.input.level.meter Overview ▪ ▪ ▪ ▪ ▪ ▪ ▪ ▪ ▪ ▪ ▪ ▪ ▪ ▪ ▪ ▪ ▪...
- Page 8 Overview AWS-2000P Plug-On Transmitter XLR connector Locking ring OLED IR port display Power Set button button Up/Down buttons Micro-B USB port Battery compartment Overview ▪ ▪ ▪ ▪ ▪ ▪ ▪ ▪ ▪ ▪ ▪ ▪ ▪ ▪ ▪ ▪ ▪...
- Page 9 GR.06-CH.08 AWS-2000 1. Group.number 2..Channel.number 3.. Transmission.power.indicator 4..Device.name 5..Low.cut.filter 6..Input.level.indicator 7. Phantom.power.indicator 8..Pilot.tone.indicator 9..Lock.indicator 10..Battery.level.indicator 11...Audio.input.level.meter Overview ▪ ▪ ▪ ▪ ▪ ▪ ▪ ▪ ▪ ▪ ▪ ▪ ▪ ▪ ▪ ▪ ▪ ▪ ▪ ▪ ▪ ▪ ▪...
-
Page 10: Getting.started
Getting Started Installing the Batteries 1.. Open.the.battery.compartment.by. sliding.the.battery.compartment. door.in.the.directions.indicated.by. the.arrow. 2..Install.the.batteries.into.the. battery.compartment...Make.sure. to.match.the.polarity.indicated. on.the.inside.of.the.battery. compartment.door. 3.. Press.the.battery.compartment. door.down,.and.slide.it.back.into. place.until.it.locks.shut.. Selecting the Battery Type The.first.time.the.batteries.are.installed,.the.battery. selection.window.will.appear. Select.the.setting.that.matches.the.type.of.battery.you’re. using.(Alkaline,.Lithium,.or.rechargeable.NiMH).by.following. these.steps: 1.. Use.the.Up/Down.buttons.to.scroll.to.the.appropriate. battery.type..[ BATTERY ALKALINE 2..Press.the.Set.button.. Note:.If.you.select.the.wrong.battery.type,.the.unit.will.still. function,.but.the.battery.meter.will.be.inaccurate.. To.change.the.battery.type.from.the.main.menu.during.use,. see.the.Battery.section.under.Common Advanced Functions. on.page.31. - Page 11 The.battery.icon.indicates.the.battery. level..The.icon.blinks.to.indicate.a. critically.low.battery.level.. Attaching the Antennas Screw.the.antennas.clockwise.into.the. threaded.antenna.sockets..Make.sure. they.are.tightly.attached. Connecting the Receiver The.AWS-2000.microphone.system.includes.two.output. cables.for.devices.with.an.XLR.input.or.a.3.5.mm.TRS.input. The.output.cables.feature.right-angled.locking.3.5mm. connectors.to.allow.for.flexible.positioning,.whether.the. receiver.is.mounted.on.a.camera.or.used.in.a.bag..Choose.the. appropriate.cable.for.your.device,.and.follow.these.steps: 1.. Plug.the.right-angle.male.3.5. mm.plug.into.the.output.jack.on. the.bottom.of.the.AWS-2000R. receiver,.and.turn.the.locking.sleeve. clockwise.until.tight. 2..Connect.the.other.end.of.the.cable.. to.your.device. Connecting the Microphone 1.. Plug.the.microphone’s.male.3.5.mm.plug. into.the.input.jack.on.the.top.of.the.. AWS-2000T.transmitter. 2..Secure.the.cable.by.turning.the.locking. sleeve.clockwise.until.tight. Getting Started ▪ ▪ ▪...
-
Page 12: Getting.started
Mounting the Receiver To.use.the.AWS-2000.as.a.shoe- mounted.wireless.system.mounted. on.a.camera,.follow.these.steps: Camera Mount (for Use with One Receiver) 1.. Align.the.camera.mount.with. the.back.of.the.AWS-2000R. receiver..Press.it.onto.the. receiver.until.it.snaps.into.place. 2..Loosen.the.locking.ring.by.turning.it.counterclockwise,. and.slide.the.mounting.foot.into.your.camera’s.shoe. mount. 3. Tighten.the.locking.ring.by.turning.it.clockwise.until.. it’s.secure. Dual Mount (for Use with Two Receivers) 1. Align.the.dual.mount.with. the.back.of.both.. AWS-2000R.receivers.. Press.the.receivers.onto.the. mount.until.they.snap.. into.place. 2. Place.the.camera.mount. -
Page 13: Basic.operation
•. Press.to.select.a.menu.item.in.order.to.change.its.value. •. Press.to.select.and.save.a.new.value.of.a.menu.item. Up/Down Buttons Use.the.Up/Down.buttons.to •. Adjust.output.level. Note:.The.AWS-2000R.receiver’s.Up/Down.buttons.are. preset.to.adjust.the.main.output.level..The.buttons.can.be. changed.to.control.the.headphone.output.level.(see Setting Output Levels.on.page.20). •. Navigate.through.menus. •. Change.the.values.of.menu.items.. Frequency Scanning and Syncing Devices Important!.You.should.always.scan.for.a.clear.frequency.and. sync.your.devices.before.each.use. The.AWS-2000.offers.an.innovative.one-touch.scanning. process.to.get.you.up.and.running.in.seconds. Basic Operation ▪ ▪ ▪ ▪ ▪ ▪ ▪ ▪ ▪ ▪ ▪... - Page 14 Auto Frequency Scanning (AFS) 1.. Power.on.the.receiver.and.transmitter. 2..Press.and.hold.the.AFS.button. on.the.receiver.to.initiate.a. frequency.scan..The.receiver.will. scan.all.available.frequencies. and.select.one.that.is.free.of. interference,.[ ].will.appear.on.the.screen..Once. SCANNING the.scan.is.complete,.. ].will.appear.on.the.screen,.and.the.receiver.will. SYNC >>> automatically.send.out.a.sync.signal.from.its.IR.port. 3.. Position.the.transmitter.and.receiver.so.their.IR.ports.face. each.other..[ ].will.appear.on.the.receiver’s.screen. SYNC when.the.devices.have.been.successfully.synced. If.[ ].appears.on.the.screen,.rescan.by.pressing. SYNC ERROR! and.holding.the.AFS.button.again..Make.sure.the.transmitter. is.turned.on.and.that.the.IR.ports.are.facing.each.other. Note:.The.receiver.sends.an.IR.sync.signal.for.approximately. 10.seconds..If.syncing.is.not.accomplished.in.that.time,.you. can.restart.the.process.by.pressing.and.holding.the.AFS. button.again. Manual Sync To.manually.sync.the.receiver.and.transmitter.to.the.same. frequencies,.follow.these.steps: 1..
- Page 15 ].will.appear.on.the.receiver’s. SYNC screen.when.the.devices.have.been.successfully.synced. 6..When.syncing.is.complete,.confirm.that.the.receiver.and. transmitter.are.tuned.to.the.same.channel. If.[ ].appears.on.the.screen,.repeat.the.previous. SYNC ERROR! steps..Make.sure.the.transmitter.is.turned.on.and.that.the.IR. ports.are.facing.each.other. Manual Channel or Frequency Selection The.frequency.or.channel.selection.can.be.initiated.on.either. device..To.manually.select.the.operating.frequency,.follow. these.steps: By Channel The.AWS-2000.operating.frequency.can.be.adjusted.with. preset.channels.that.are.programmed.to.be.intermodulation. free..If.two.AWS-2000.systems.are.operating.in.the.same. space,.selecting.different.channels.will.assure.that.the.two. systems.will.not.cause.any.disruptive.intermodulation.with. each.other. 1.. On.the.receiver,.press.and.hold.the.Set.button.to.enter. the.menu.. 2..Use.the.Up/Down.buttons.to.scroll.to.[ ],.and.press. TUNE the.Set.button. 3.. Use.the.Up/Down.buttons.to.scroll.to.the.[ CHANNEL prompt,.and.press.the.Set.button..The.group.number.. will.flash.
- Page 16 4..Use.the.Up/Down.buttons.to.select.the.group.number,. and.press.the.Set.button.to.store.it..The.channel.number. will.flash. 5..Scroll.to.the.desired.channel.number,.and.press.Set.to. store.it..The.receiver.will.automatically.prompt.you.to. sync.the.system. 6..With.[ ].on.the.screen,.press.the.Set.button..The.. SYNC Yes/No.prompt.will.flash.on.the.screen. 7.. Press.the.Up/Down.buttons.until.[ ].flashes.on.the. screen,.and.press.the.Set.button..The.sync.indicator.arrow. will.show.on.the.screen. 8..Make.sure.the.Transmitter.and.the.Receiver.IR.ports.are. facing.each.other.until.[ ].appears.on.the.screen.of. SYNC the.device.that’s.initiating.the.sync. 9..When.syncing.is.complete,.confirm.that.the.receiver.and. transmitter.are.tuned.to.the.same.channel. By Frequency 1.. Press.and.hold.the.Set.button.to.enter.menu.mode.. 2..Use.the.Up/Down.buttons.to.scroll.to.[ ],.and.press. TUNE the.Set.button. 3.. Use.the.Up/Down.buttons.to.scroll.to.the.[ FREQUENCY prompt,.and.press.the.Set.button. 4..Use.the.Up/Down.buttons.to.manually.tune.the.frequency. in.0.025.MHz.increments.. Press.and.hold.to.scroll.rapidly.through.the.. available.frequencies. 5..Once.you.have.selected.the.desired.frequency,.press.Set. to.store.it..The.receiver.will.automatically.prompt.you.to.
- Page 17 6..With.[ ].on.the.screen,.press.the.Set.button... SYNC The.Yes/No.prompt.will.flash.on.the.screen..Use.the.Up/ Down.buttons.until.[ ].flashes.on.the.screen,.and.press. the.Set.button..The.sync.indicator.arrow.will.show.on.. the.screen. 7.. Make.sure.the.Transmitter’s.and.the.Receiver’s.IR.ports. are.facing.each.other.until.[ ].appears.on.the. SYNC screen.of.the.device.that’s.initiating.the.sync. 8..When.syncing.is.complete,.confirm.that.the.receiver.and. transmitter.are.tuned.to.the.same.channel. If.[ ].appears.on.the.screen,.repeat.steps.1. SYNC ERROR! through.7.above..Make.sure.the.transmitter.is.turned.on.and. that.the.IR.ports.are.facing.each.other. RF Indicator The.RF.indicator.will.display.the. status.of.the.connection.between.the. transmitter.and.receiver. Solid red: The.receiver.does.not.detect.an.RF. signal..If.the.transmitter.and.receiver. are.synced.and.set.to.the.same.channel,.a.solid.red.LED. indicates.that.the.transmitter.is.out.of.range. Solid blue: The.receiver.detects.a.strong.RF.signal. Intermittent.red.and.blue:. If.the.transmitter.is.synced.with.the.receiver,.this.indicates. that.the.transmitter.is.nit.receiving.a.strong.signal.and.the. transmitter.is.almost.out.of.range..Move.the.transmitter.
- Page 18 Lock •. Locked.disables.all.of.the.buttons.to.prevent.accidental. changes.to.the.settings. •. On w/Level.locks.all.functions.except.the.output.level. control.(Up/Down.buttons)..Use.this.setting.for.quick. access.to.output.level.changes.without.changing.any.of. the.other.settings. •. Unlock.restores.the.functions.of.all.the.buttons. To.change.the.lock.setting,.follow.these.steps: 1.. Press.and.hold.the.Set.button.to.enter.menu.mode. 2..Scroll.to.the.[ ].menu,.and.press.the.Set.button..The. LOCK menu.selection.will.blink. 3..Select.[ ],.[ ],.or.[ ],.and.press.the. LOCKED ONW/LEVEL UNLOCK Set.button.to.store.the.change. Note:.Even.when.the.transmitter.or.receiver.is.locked,.you. can.still.access.menu.mode.by.pressing.and.holding.the.. Set.button. Basic Operation ▪ ▪ ▪ ▪ ▪ ▪ ▪ ▪ ▪...
-
Page 19: Setting.input.levels
Setting Input Levels AWS-2000T Transmitter and AWS-2000P Plug-On Transmitter The.transmitter.and.plug-on.transmitter.can.be.set.to.MIC.or. LINE.input. •. Select.[ ].when.sending.a.line-level.signal.from. LINE devices.such.as.a.mixer.or.playback.device..Selecting.. ].sets.the.input.level.to.a.fixed.line.level.. LINE •. Select.[ ].when.connecting.a.microphone.to.the. transmitter..Selecting.[ ].allows.you.to.adjust.the. input.level.from.-15.to.0.dB.on.the.transmitter,.or.. -30.to.0.dB.on.the.plug-on.transmitter.. To.set.the.input.level,.follow.these.steps: 1.. Press.and.hold.the.Set.button.to.activate.menu.mode. 2..Use.the.Up/Down.buttons.to.scroll.to.the.[ ].menu,. INPUT and.press.the.Set.button.to.enter.the.input.preferences.. The.current.input.selection.will.blink. 3.. Use.the.Up/Down.buttons.to.select.[ ].or.[ LINE •. If.you.choose.[ ],.press.the.Set.button.to.store.. LINE the.selection. -
Page 20: Setting.output.levels
Setting Output Levels AWS-2000R Receiver Main Output The.main.output.controls.the.signal.level.that.is.sent.to.the. input.device.(camera.or.recorder).via.the.3.5.mm.jack.on.the. bottom.of.the.AWS-2000R.receiver. 1.. Use.the.Up/Down.buttons.to.adjust.the.output..The. Screen.will.read.[ ].along.with.the.output.level.. MAIN OUT ].to.[ -29 db 8 dB 2..Press.the.Set.button.to.save.the.change... Set.the.output.level.so.the.input.device.receives.a.high. signal.level.without.distorting.. Peak Indicator The.peak.indicator.lets.you.know.if.the. output.signal.to.the.recording.device.is. too.strong.and.distorting. Solid blue .The.output.level.is.normal.and.is.. not.distorting. Occasional red flashes The.output.signal.is.peaking.and. possibly.causing.distortion..Adjust.the.levels.of.the. transmitter.and.receiver.down.to.avoid.these.signal.peaks. Toggling the Output Control The.AWS-2000R.receiver.features.a.toggle.function.that. - Page 21 2..Use.the.Up/Down.buttons.to.adjust.the.headphone. output..The.screen.will.read.[ ].along.with.the. PHONE OUT output.level.[ ].to.[ -29 db 8 dB 3.. Press.the.Set.button.to.save.the.change. After.approximately.7.seconds,.the.Up/Down.buttons.will. return.to.control.the.main.output. Note:.Double-pressing.the.power.button.will.toggle.to. control.the.main.output.level.if.the.Up/Down.buttons.are. preset.to.control.the.headphone.output.(see.Headphone Output.below). Headphone Output To.preset.the.Up/Down.buttons.to.control.the.headphone. output,.follow.these.steps: 1.. Press.and.hold.the.Set.button.to.enter.menu.mode. 2..Scroll.to.[ ],.and.press.the.Set.button. ADVANCED MENU 3.. In.the.advanced.menu,.scroll.to.[ ],.and.press.the. OUTPUT Set.button..The.menu.selection.will.blink. 4..Use.the.Up/Down.buttons.to.scroll.to.[ ],.and.press. PHONE the.Set.button.to.save.the.selection. The.Up/Down.buttons.will.now.control.over.the.. headphone.volume. Double-press.the.power.button.for.temporary.control.of.the.
- Page 22 3.. In.the.advanced.menu,.scroll.to.[ ],.and.press.the. OUTPUT Set.button..The.menu.selection.will.blink. 4..Use.the.Up/Down.buttons.to.scroll.to.[ ],.and. TOG LOCK press.the.Set.button. 5.. When.you.have.returned.to.the.main.screen,.double-press. the.power.button.to.open.the.output.menu..Use.the.Up/ Down.buttons.to.select.[ ].or.[ ],.and.press.the. MAIN PHONE Set.button..The.Up/Down.buttons.are.now.permanently. set.to.control.the.output.of.the.desired.selection..To. change.the.function.of.the.Up/Down.buttons,.repeat. these.steps,.and.change.the.selection.. Transmitter & Plug-On Transmitter Power Output Level The.AWS-2000T.and.AWS-2000P.Transmitters.feature.two. output.level.settings: •. Lo (5 mW).is.ideal.when.the.transmitter.is.relatively. close.(150.feet.or.less).to.the.receiver..It.also.provides. the.transmitter.with.approximately.20%.more.. battery.runtime. •. Hi (30 MW).allows.the.microphone.to.cover.a.wider.area. and.more.range..This.setting.is.recommended.if.your.
- Page 23 Input Level The.Up/Down.buttons.control.the.input.level.from.. ].to.[ ].on.the.transmitter.or.[ ].to.[ -15 db 0 dB -30 db 0 dB on.the.plug-on.transmitter. Lock To.lock.the.transmitter.to.prevent.accidental.changes.to.the. output.level,.follow.these.steps: 1.. Press.and.hold.the.Set.button.to.enter.menu.mode. 2..Scroll.to.[ ],.and.press.the.Set.button..The.menu. LOCK selection.will.blink. 3.. Use.the.Up/Down.buttons.to.select.[ ],.and.press. LOCKED the.Set.button.to.save.your.selection. Mute (AWS-2000T Transmitter) The.mute.button.can.be.set.for.three.different.modes: •. Latch:.Pressing.the.mute.button.mutes.the.transmitter.. Pressing.the.mute.button.again.resumes.transmission. •. Momentary:.The.transmitter.will.be.muted.as.long.as.the. mute.button.is.pressed.down..Releasing.the.mute.button. resumes.transmission. •.
- Page 24 4..Use.the.Up/Down.buttons.to.select.between.[ ],.. LATCH ],.or.[ ],.and.press.the.Set.button.to.save. MOMENTARY your.selection. 5..When.muted,.[ ].will.appear.in.place.of.the.audio. MUTE input.level.meter. Mute (AWS-2000P Plug-On Transmitter) Double-press.the.power.button.to. GR.06-CH.08 automatically.mute.the.transmitter. AWS-2000 in.latch.mode.. Double-press.again.to.resume. transmission. Phantom Power (Plug-On Transmitter Only) Phantom.power.is.necessary.if.you.are.using.a.condenser. microphone..To.activate.phantom.power,.follow.these.steps: 1.. Press.and.hold.the.Set.button.to.enter.menu.mode. 2..Scroll.to.[ ],.and.press.the.Set.button..The.menu. PHANTOM selection.will.blink. 3.. Use.the.Up/Down.buttons.to.scroll.to.[ ],.and.press.the. Set.button.to.save.your.selection. To.deactivate.phantom.power,.return.to.the.[ ].menu,.
-
Page 25: Advanced.functions
Advanced Functions Receiver Squelch The.squelch.circuit.prevents.unwanted.interference.from. compromising.your.audio..If.the.signal.falls.below.a.certain. level,.the.output.of.the.receiver.is.muted. Squelch.should.be.set.at.a.level.that.is.slightly.above.the. level.of.audible.interference. Note:.A.high.squelch.setting.requires.a.strong.signal. from.the.transmitter..Since.the.transmitter.signal.strength. decreases.with.distance,.a.high.squelch.setting.will.decrease. the.range.of.your.wireless.system. To.activate.squelch.and.set.the.level,.follow.these.steps: 1.. Press.and.hold.the.Set.button.to.enter.menu.mode. 2..Scroll.to.[ ],.and.press.the.Set.button. ADVANCED MENU 3.. In.the.advanced.menu,.scroll.to.[ ],.and.press.the. SQUELCH Set.button..The.menu.selection.will.blink. 4..Use.the.Up/Down.buttons.to.select.[ ],.[ ],.. HIGH MEDIUM ],.or.[ ]..Press.the.Set.button.to.save.the.setting. Important!.If.you.are.experiencing.a.great.deal.of. interference.even.when.squelch.is.activated,.scan.for.a.clear. frequency.or.channel.(see.Auto Frequency Scanning.on. page.14). Pilot Tone Pilot.tone.is.an.additional.dimension.of.protection.against. - Page 26 Important!.In.order.for.pilot.tone.to.protect.against. interference,.the.pilot.tone.option.must.be.activated.on.both. the.transmitter.and.the.receiver. To.activate.pilot.tone,.follow.these.steps: 1.. Press.and.hold.the.Set.button.to.enter.menu.mode. 2..Scroll.to.[ ],.and.press.the.Set.button. ADVANCED MENU 3.. In.the.advanced.menu,.scroll.to.[ ],.and.press.the.Set. PILOT button..The.menu.selection.will.blink. 4..Use.the.Up/Down.buttons.to.select.[ ]..Press.the.Set. button.to.save.the.setting.and.activate.the.pilot.tone. When.the.pilot.tone.is.active,.[ ].is.displayed.on.the. transmitter.screen,.and.the.transmitter’s.battery.level. indicator.illuminates.on.the.receiver. To.turn.the.pilot.tone.off,.select.[ ].in.the.[ ].menu. PILOT Display Orientation The.orientation.of.the.display.can.be.changed.so.the. display.will.always.appear.right.side.up..This.provides.extra. flexibility.for.use,.can.be.especially.helpful.when.using.the. receiver.in.a.bag.as.part.of.a.larger.setup. To.reverse.the.display,.follow.these.steps: 1.. Press.and.hold.the.Set.button.to.enter.menu.mode. 2..Scroll.to.[ ],.and.press.the.Set.button. ADVANCED MENU 3.. In.the.advanced.menu,.scroll.to.[ ],.and.press.the.
- Page 27 Main Output The.receiver.is.capable.of.sending.a.balanced.mic-.or.line- level.output.signal.to.devices.with.XLR.inputs.or.3.5.mm. mini-plug.inputs. To.set.the.output.signal: 1.. Press.and.hold.the.Set.button.to.enter.menu.mode. 2..In.menu.mode,.scroll.to.[ ],.and.press.the.Set. MAIN OUT button..The.menu.selection.will.blink. 3.. Use.the.Up/Down.buttons.to.set.the.output.level.for.your. input.device.[ ].to.[ -29 db 8 dB 4..Press.the.Set.button.to.confirm.the.setting. Headphone Output Volume The.headphone.output.signal.can.be.preset.to.a.preferred. volume..Before.you.begin,.make.sure.to.determine.a. listening.level.that.is.comfortable.for.you.. 1.. Press.and.hold.the.Set.button.to.enter.menu.mode. 2..In.menu.mode,.scroll.to.[ ],.and.press.the.Set. PHONEOUT button..The.menu.selection.will.blink. 3.. Preset.the.headphone.level.to.any.value.between. ].and.[ -29 db 8 dB 4..Press.the.Set.button.to.save.the.change.
- Page 28 AWS-2000T Transmitter and AWS-2000P Plug-On Transmitter Pilot Tone For.a.description.of.pilot.tone,.see.page.25. Important!.In.order.for.pilot.tone.to.protect.against. interference,.the.pilot.tone.option.must.be.activated.on.the. transmitter.AND.the.receiver. To.activate.pilot.tone,.follow.these.steps: 1.. Press.and.hold.the.Set.button.to.enter.menu.mode. 2..Scroll.to.[ ],.and.press.the.Set.button. ADVANCED MENU 3.. In.the.advanced.menu,.scroll.to.[ ],.and.press.the.Set. PILOT button..The.menu.selection.will.blink. 4..Use.the.Up/Down.buttons.to.select.[ ]..Press.the.Set. button.to.save.the.setting.and.activate.the.pilot.tone. When.the.pilot.tone.is.active,.[ ].is.displayed.on.the. screen,.and.the.transmitter’s.battery.meter.illuminates.on. the.receiver. To.turn.off.the.pilot.tone,.select.[ ].in.the.. ].menu. PILOT Low Cut Filter The.low-cut.filter.minimizes.low-frequency.noise.that.can. come.from.fans,.air.conditioners,.or.ambient.room.noise..The. filter.rolls.off.at.100.Hz.to.prevent.unwanted.rumble.from.
- Page 29 4..Use.the.Up/Down.buttons.to.select.[ ]..Press.the.Set. button.to.save.the.setting.and.activate.the.low-cut.filter. When.[ ].is.active,.[ ].is.displayed.on.the. LO CUT transmitter’s.screen. To.turn.off.the.low-cut.filter,.select.[ ].in.the.. ].menu. LO CUT Mute For.instructions.on.setting.the.mute.button.function,.. see.Mute (Transmitter) on.page.23.and Mute (Plug-On Transmitter) on.page.24. Advanced Functions ▪ ▪ ▪ ▪ ▪ ▪ ▪ ▪ ▪ ▪ ▪ ▪ ▪ ▪ ▪ ▪...
-
Page 30: Common.advanced.functions
Common Advanced Functions (AWS-2000R Receiver, AWS-2000T Transmitter, and AWS-2000R Plug-On Transmitter) Name Naming.the.units.makes.them.easy.to.identify..This.is. useful.when.working.with.several.pairs.of.transmitters.and. receivers.on.a.production.or.shoot..To.change.the.name.of. the.unit,.follow.these.steps: Note:.Changing.the.name.can.be.done.on.either.the. transmitter.or.receiver. 1.. Press.and.hold.the.Set.button.to.enter.menu.mode. 2..Scroll.to.[ ],.and.press.the.Set.button. ADVANCED MENU 3.. In.the.advanced.menu,.scroll.to.[ NAME 4..Press.the.Set.button.to.enter.the.name.menu..The.first. character.of.the.name.will.blink. 5..Select.a.character.by.using.the.Up/Down.buttons. 6..Press.the.Set.button.to.move.to.the.next.character..Press. the.Power.button.to.return.to.the.previous.character.. 7. Repeat.steps.3.and.4.until.you.have.completed.the.name. 8..Continue.to.press.the.Set.button.until.the.cursor.reaches. the.end.of.the.line. 9..Pressing.the.Set.button.automatically.opens.the.[ SYNC menu..Press.the.Set.button. 10..[ ].will.blink.on.the.screen..Press.the.Set.button.to. - Page 31 If.[ ].appears.on.the.screen,.the.name.selection. SYNC ERROR! will.be.saved.on.the.renamed.device..To.sync.the.name.with. the.other.device,.follow.the.steps.for.performing.a.manual. sync.on.page.15. Brightness This.menu.selection.controls.the.brightness.of.the. characters.on.the.screen. 1.. Press.and.hold.the.Set.button.to.enter.menu.mode. 2..In.the.menu.mode,.scroll.to.[ ]..Press.Set.to. BRIGHTNESS enter.the.menu..The.brightness.level.will.blink. 3.. Use.the.Up/Down.buttons.to.select.the.level..The. characters’.brightness.level.will.change.as.you.scroll. through.the.menu. 4..Press.the.Set.button.to.save.the.change. Battery The.correct.battery.type.selection.ensures.that.the.meter. gives.an.accurate.readout.of.your.battery.level..If.you.select. the.wrong.battery.type,.the.unit.will.still.function,.but.the. battery.level.indicator.might.not.be.accurate.. To.change.the.battery.type.selection: 1.. Press.and.hold.the.Set.button.to.enter.menu.mode. 2..Scroll.to.[ ],.and.press.the.Set.button. ADVANCED MENU 3.. In.the.advanced.menu,.scroll.to.[ ]..Press.the.Set. BATTERY button.to.enter.the.menu. 4..Use.the.Up/Down.buttons.to.scroll.to.your.battery.type.. 5..Press.the.Set.button.to.accept.the.battery.type. Common Advanced Functions ▪...
-
Page 32: Common.advanced.functions
Restoring the Factory Presets To.restore.all.factory.presets,.follow.these.steps: 1.. Press.and.hold.the.Set.button.to.enter.menu.mode. 2..Scroll.to.[ ],.and.press.the.Set.button. ADVANCED MENU 3.. In.the.advanced.menu,.scroll.to.[ RESET 4..Press.the.Set.button..[ ].will.appear.on.. RESET??? the.screen. 5..Press.Set,.and.the.menu.selection.will.blink. 6..Use.the.Up/Down.buttons.to.choose.[ ],.and.press.the. Set.button.to.reset.the.factory.defaults. Common Advanced Functions ▪ ▪ ▪ ▪ ▪ ▪ ▪ ▪ ▪ ▪ ▪ ▪ ▪ ▪ ▪ ▪... -
Page 33: Frequency.chart
Frequency Chart AWS-2000A (522 to 554 MHz) Gr. 1 Gr. 2 Gr. 3 Gr. 4 Gr. 5 Gr. 6 Gr. 7 Gr. 8 Gr. 9 Gr. 10 Ch. 1 523.025. 522.725. 522.800. 522.925. 522.650. 523.550. 523.750. 523.850. 523.950. 523.000. Ch. 2 525.475. -
Page 34: Troubleshooting
Problem Solution One.of.the.antenna. This.indicates.that.one.of.the.antennas.is.not.operating. reception.indicators.is. correctly..Replace.the.antenna.on.the.side.of.the. always.off. missing.level.indicator. Note:.The.receiver.will.operate.with.only.one.antenna,. but.it.will.no.longer.operate.as.a.true-diversity.receiver.. You.will.run.a.greater.risk.of.interference.or.dropouts. The.receiver.or.the. Unlock.either.device.by.pressing.and.holding.the.Set. transmitter.won’t.operate.. button.to.access.the.menu.mode..Scroll.to.the.LOCK. LOCKED.appears.on.the. menu,.and.press.the.Set.button.to.make.the.menu. screen. selection.blink..Use.the.Up/Down.buttons.to.select. UNLOCK.or.ON.W/LEVEL,.and.press.the.Set.button. (see.page.18). Pilot.tone.is.on,.squelch. Rescan.to.find.a.frequency.that.is.free.of.interference,. is.on,.but.there.is.still.too. and.sync.your.devices. much.interference. The.receiver.input.signal. •. Make.sure.you.have.selected.the.correct.input.level. is.too.high/too.low. on.the.transmitter.(line/mic).(see.page.19). •. Use.the.Up/Down.buttons.to.adjust.the.transmitter. output.level. Everything.is.set.properly,. •. If.you’re.using.a.condenser.microphone,.make.sure. but.there.is.no.signal.from. phantom.power.is.turned.on. the.microphone. •. -
Page 35: Specifications
Specifications AWS-2000T Transmitter Reference input level -26.dBV Frequency response 80.Hz.to.15.kHz Signal-to-noise ratio <100.dB Pilot tone frequency 32.768.kHz Power requirement 2.0.to.3.6.V Operating temperature 32°F.to.131°F.(0°C.to.55°C) Dimensions without antenna 2.8.×.2.3.×.0.8.in..(7.×.5.08.×.2.cm) (H × W × D) Weight 3.oz..(84.g) AWS-2000R Receiver Frequency response 80.Hz.to.15.kHz Total harmonic distortion <0.9% Pilot tone frequency 32.768.kHz... -
Page 36: Warranty
One-Year Limited Warranty This.Senal.product.is.warranted.to.the.original.purchaser.to.be.free. from.defects.in.materials.and.workmanship.under.normal.consumer. use. for. a. period. of. one. (1). year. from. the. original. purchase. date. or. thirty. (30). days. after. replacement,. whichever. occurs. later.. The. warranty. provider’s. responsibility. with. respect. to. this. limited. warranty. shall. be. limited. solely. to. repair. or. replacement,. at. the.
Need help?
Do you have a question about the AWS-2000 and is the answer not in the manual?
Questions and answers