Table of Contents
Advertisement
Advertisement
Table of Contents

Related Manuals for MED-EL RONDO 2


Summary of Contents for MED-EL RONDO 2
- Page 1 RONDO 2 Single-Unit Audio Processor Quick Guide AW35356_1.0 (English)
-
Page 2: Table Of Contents
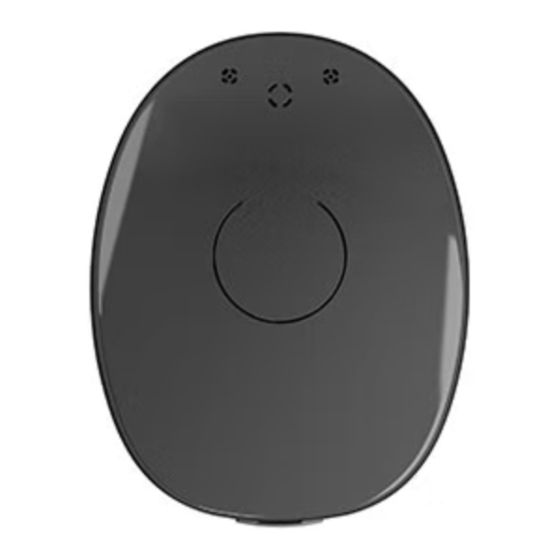
RONDO 2 user manual. Charging RONDO 2 ......2 Switching On RONDO 2 . - Page 3 RONDO 2 Single-Unit Audio Processor On/Off Button Cover Microphone Processing Unit Indicator Lights...
-
Page 4: Charging Rondo 2
RONDO 2 Charging RONDO 2 Plug the USB Cable into Plug the other end into the wall the charging pad. plug adapter, or the USB port of your computer, TV, tablet etc. Charging pad not manufactured by MED-EL. - Page 5 Switch off RONDO 2 and place it in The orange indicator light shows the exact centre of the charging pad, that RONDO 2 is charging. with the MED-EL logo facing upwards. When the light goes off, RONDO 2 is charged. This should take around 4 hours.
-
Page 6: Switching On Rondo 2
RONDO 2 Switching On RONDO 2 Amber Blue Indicator Light Indicator Light On/Off Button Press the round button on the top The blue indicator light will blink of RONDO 2 to switch it on. If the to show which program is RONDO 2 is already on, the amber activated. - Page 7 Indicator Light If the link-check function is RONDO 2 should be placed over activated, the red indicator light your implant, with the MED-EL will blink. The green indicator light logo against your head and the will blink once RONDO 2 is microphone facing upwards.
-
Page 8: Changing The Cover
RONDO 2 Changing the Cover Groove Insert your fingernail into the Position the new cover over groove above the socket, the processor and push down between the processor and until it snaps into place. the cover. Gently lift up to... - Page 9 There is a range of Design Covers available, to make RONDO 2 blend in or stand out as you wish. View all designs at medel.com/rondo2 The cover should be changed every three months to maintain best possible hearing with RONDO 2.
-
Page 10: Changing The Magnet
RONDO 2 Changing the Magnet Place the magnet exchange Turn the tool to point to the tool over the magnet, with the unlocked symbol . Lift the arrow on the tool pointing to magnet out of RONDO 2. the locked symbol... - Page 11 MED-EL strongly recommends that you don’t change the magnet yourself. Contact your clinician to have the magnet changed or if you experience any skin irritation. Pick up the new magnet with Place the magnet into the the tool, making sure the...
-
Page 12: Attaching Waterwear
RONDO 2 Attaching WaterWear Check that WaterWear Hold RONDO 2 with the and your hands are MED-EL logo facing clean and dry. upwards. Insert it microphone Take the flap at the first into the cover, so bottom and pull the that the flap at the top... - Page 13 Place the round adhesive strip over the flat side of the processor, starting at the bottom. There should be no gaps between the strip and the cover. Check that the processor is sealed on all sides by WaterWear, and that there are no wrinkles or air bubbles.
-
Page 14: Using Attachment Clips
RONDO 2 Using Attachment Clips Attachment Clips There are two types of clip: the Hair Attachment Clip and Clothes Attachment Clip. Both are attached to RONDO 2 in the same way. Remove the cover from the audio processor. - Page 15 Push the circular end of the leash into the matching groove at the bottom of the processor. Replace the cover, securing the cable in place. Clip to hair or clothes as appropriate.
-
Page 16: Connecting Rondo 2
RONDO 2 Connecting RONDO 2 Sync your Bluetooth phone or Place the neckloop around other device with your Bluetooth your neck. neckloop, using the manufacturer’s instructions. - Page 17 FineTuner Input Selection Keys Telecoil Only Microphone with Telecoil Microphone Only Press the MT or T button on Many public venues, such as your FineTuner to start theatres or museums, have hearing streaming. induction loops installed. To connect to the loop, stand within range of it and repeat step 3.
-
Page 18: Using The Mini Battery Pack
RONDO 2 Using the Mini Battery Pack (MBP) RONDO 2 Connector On/Off Switch and Battery Compartment Lock 3-Pin Port Battery Compartment for DaCapo PowerPack or AAA Battery Slide off the battery compartment cover and insert a AAA battery or DaCapo PowerPack into the MBP. - Page 19 Pull gently on the rubber Plug in the MBP cable by socket cover at the bottom simultaneously pressing of the processor to open the release levers. the MBP port. For more connectivity options, a wireless receiver, such as the Roger™ X from Phonak, can be plugged into the MBP’s 3-pin port.
-
Page 20: Indicator Lights
RONDO 2 Indicator Lights Confirmation Status FineTuner command has been successfully received. Program Change Program 1 is selected. Program 2 is selected. Program 3 is selected. Program 4 is selected. Status If the optional status light has been activated, RONDO 2 is initialised and working. - Page 21 Warning Patterns Problem Solution RONDO 2 battery empty. Charge audio processor. Either minimum or maximum Don’t make further volume or audio sensitivity adjustments with has been reached. FineTuner. Error Patterns Problem Solution Temporary error or 1. Turn processor off. electronic problem.
-
Page 22: Link-Check Function
RONDO 2 Link-Check Function Confirmation Audio processor and implant are successfully connected (applicable to SYNCHRONY, CONCERTO, SONATA and PULSAR implants). Audio processor is working correctly (applicable to C40+ and C40 implants). No Light Signal Problem Solution Your audio processor Fully charge audio processor. If that doesn’t solve isn’t working. - Page 23 Warning Problem Solution Audio processor is not connected Position audio processor to the implant. correctly over the implant. Make sure to use the correct magnet. Audio processor is positioned Position audio processor over the incorrect implant. over the correct implant. Audio processor has Switch audio processor powered off.
-
Page 24: Finetuner
RONDO 2 FineTuner Indicator Lights Volume Increase or decrease the volume Program Selection Choose a program Default Volume Default Volume and Sensitivity and Sensitivity Volume Set volume and audio sensitivity to default setting as determined by your audiologist Sensitivity Increase or decrease the audio... - Page 25 FineTuner Keypad Lock Activating the Keypad Lock To prevent accidental setting changes, you can activate the automatic keypad 1. Press and hold the ( ) key for lock. If any key is pressed while the 5 seconds, or until the red and keypad is locked, the red LED light on amber lights blink alternately.
-
Page 26: Troubleshooting
RONDO 2 Troubleshooting In case you encounter any minor technical problems, such as an interruption in sound, carefully follow these steps to identify possible causes and solutions: 1. Remove your RONDO 2 and make sure it is fully charged. 2. Detach the cover and check all parts for dirt or signs of damage. Gently clean any processor parts that are dirty and wipe dry any parts that are wet. - Page 27 If the indicator light doesn’t flicker, go to 5. 5. Completely charge your processor, switch it on, then speak into the microphone. If the indicator light doesn’t flicker, contact your CI centre. For complete troubleshooting instructions, read your RONDO 2 user manual or visit medel.com.
-
Page 28: Basic Care And Maintenance
To clean it, use a cotton swab and a small amount of rubbing alcohol. Gently wipe it dry. Replacing Cover RONDO 2’s cover should be changed every three months. This ensures you hear your best at all times with RONDO 2. - Page 29 Drying Unlike other audio processors, do not place RONDO 2 in a drying kit as this will cause harm to the audio processor. Moisture Protect RONDO 2 from exposure to water. If your audio processor gets wet, gently wipe it dry with a soft absorbent cloth. Sunlight Don’t leave RONDO 2 in direct sunlight, especially inside of a vehicle.
-
Page 30: Safety Features
RONDO 2 Safety Features FineTuner Key Deactivation Your audiologist can deactivate certain FineTuner keys or programs to prevent accidental changes to settings. For more information about this feature or for instructions for FineTuner deactivation, please contact your CI centre. Link-Check Function RONDO 2 has a built-in link-check function. - Page 31 Notes...
- Page 32 MED-EL Elektromedizinische Geräte GmbH Fürstenweg 77a | 6020 Innsbruck, Austria office@medel.com medel.com...
Need help?
Do you have a question about the RONDO 2 and is the answer not in the manual?
Questions and answers