Table of Contents
Advertisement
Quick Links
Advertisement
Table of Contents

Related Manuals for Incom ICW-1000G Global

Summary of Contents for Incom ICW-1000G Global
- Page 1 ICW-1000G Global User’s Manual INCOM Co., Ltd. www.incominc.com Rev;171130...
-
Page 2: Copyright Notice
INCOM is registered trademarks of INCOM Co., Ltd. Other referenced trademarks are trademarks (registered or otherwise) of the respective trademark owners. This document is confidential and proprietary to INCOM Co., Ltd. No part of this document may be reproduced, stored, or transmitted in any form by any means without the prior written permission of INCOM Co., Ltd. -
Page 3: Manual Introduction
Manual Introduction This user's manual contains items that you should follow in order to prevent any harm to yourself and others, or damage to equipment, and to enable you to use this product safely. An explanation of the markings and symbols used in this manual is provided below. - Page 4 ■ Compliance Statement for FCC THIS DEVICE COMPLIES WITH PART 15 OF THE FCC RULES. Operation is subject to the following two conditions; (1) this device may not cause harmful interference, and (2) this device must accept any interference received, including interference that may cause undesired operation.
- Page 5 ■ Caution concerning interference with 2.4GHz/5GHz wireless LAN When communicating with a 2.4GHz/5GHz LAN, be careful about the following. Microwave ovens and other industrial, scientific, and medical equipment, as well as indoor wireless stations (wireless stations requiring permits) and special low-power wireless stations (wireless stations not requiring permits) used for identifying mobile units used in plant manufacturing line etc., as well as amateur wireless stations (wireless stations requiring permits) operate in the frequency band used by this product.
- Page 6 5.15 – 5.35 GHz is restricted to indoor use only.
-
Page 7: Safety Precautions
Safety Precautions Since this is provided to make safe and right use of ICW-1000G to prevent any accidents or risks, be sure to carefully read it, follow instructions, and keep it where it is easily noticed. Warning This mark is intended to warn users of the risk of a serious injury or death when they violate instructions. - Page 8 It can cause the leak of battery contents, or explosions. Use standard chargers that obtained INCOM authentication for batteries. Otherwise, batteries will have their life reduced, face explosions, or damage ICW-1000G. In this case, free services shall not be provided.
- Page 9 Precautions This mark is intended to caution users against violating instructions since it can cause a slight physical injury or product damage. Correctly install ICW-1000G in compliance with instructions. Otherwise, it can cause an abnormal operation of ICW-1000G, or reduce their life. Be aware of radio interference.
- Page 10 This product is intended to be supplied by a Lsted Power Supply Unit marked "Class 2" and rated input 100-240 Vac (50/60 Hz), 0.3 A and rated output 5.0 Vdc, 2.0. Since the important information stored in ICW-1000G can be removed due to unavoidable circumstances such as users’...
-
Page 11: Table Of Contents
Contents Table Copyright Notice ..................1 Manual Introduction .................. 2 Safety Precautions ..................6 Contents ....................10 Basics....................... 13 ICW-1000G at a Glance ....................13 Basic Key Function....................... 14 Display indicators ......................15 Basic Components ....................... 16 Battery Replacement ....................16 Battery Charging Signal .................... - Page 12 Saving New Number ....................25 Speed Dial ........................25 Group settings ......................26 Call History ........................26 Web Phone Book ......................27 Call Time ........................29 Message ....................30 Writing Text Message ....................30 Inbox ........................... 31 Outbox ........................31 Draft ..........................
- Page 13 Button lighting ..................... 39 Ringtone/Vibrate ......................39 Ringers ........................40 Sound Effects ......................40 System Alerts ......................41 Volumes ........................42 Phone Setting ..................43 Language ........................43 Other Functions ......................43 Feature ........................45 Call Block Mode ....................45 Call Forwarding ....................
-
Page 14: Basics
Basics ICW-1000G at a Glance... -
Page 15: Basic Key Function
Basic Key Function Key Name Icon Basic functions Navigation Key – In the idle state, this button opens each Navigation key function. Within a menu or a list, you can use this as direction keys. Soft keys(Selection) – the function of an individual button Left selection key is depicted in the display depending on status. -
Page 16: Display Indicators
Display indicators Avoid direct sunlight to prevent a poor view of WiFi phone screen. The screen fades out automatically to reduce battery consumption. Signal strength Out of call coverage Call trial or connection Call not available Ringer enabled, Buzzer disabled Buzzer enabled, the phone does not ring for an incoming calls An alarm is set Remaining battery life, sufficient:... -
Page 17: Basic Components
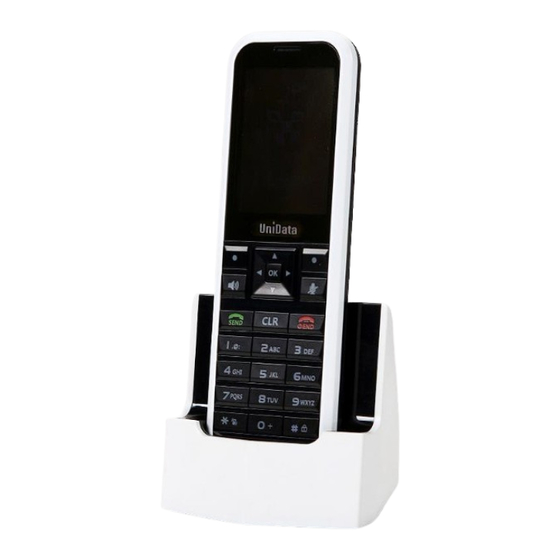
For safety in use, please purchase authentic products. If you want to purchase additional batteries or chargers, contact your dealer. Cradle Battery ICW-1000G Phone Power Cord (CE/US/UK) AC Adapter Battery Replacement Always use original INCOM batteries for your safety when you replace batteries, following the figure below. Battery insertion Battery removal... -
Page 18: Battery Charging Signal
Please turn off the power before removing battery from the phone (a sudden power off can cause troubles). If battery is inserted upside down, the phone will not work. Time Taking to Charge Classification Standard model (1,100mAh) Time Approximately 300 minutes Battery Life Successive Talk Time Approximately 14 hours... -
Page 19: Basic Function
Basic Function How to Turn On / Off If you want to turn on the power, keep pressing for about 3 seconds or until turn on the display. If you want to turn off the power, keep pressing for about 3 seconds or until turn off the display If abnormal works take place, or the power button does not work while using WiFi phone, start the phone after removing and inserting the battery. -
Page 20: How To Enter Special Text
How to Enter Special Text Entering English Alphabets two times press two times press Ex) If you want to enter “UNI”: press three times. How to Enter Special Text If you want to create messages, press Menu 1 to select sign entering mode. Making a Call Press after entering area code and phone number. -
Page 21: Making A Call The Received Number
Making a Call the Received Number Press button, select your desired phone number using , and press again. A maximum of 100 phone numbers incoming and outgoing can be stored in the call list. Making Calls using Speed Dial You can create shortcuts by assigning phone numbers to the number key 1-99. Make a long press of the Speed Dial desired to call. -
Page 22: Function On The Call
Function on the call How to Mute You can make mute of transmission voice by selecting 1. Mute on after pressing Menu (Left Selection Key during calls. The screen shows icon if the function of Mute on works. If you want to cancel, press 1. Mute off after pressing Menu (Left Selection Key again. -
Page 23: Memo
Memo You can note something during call (Numbers Only). Press the buttons that you want to note and you can store the memos by pressing . The memos stored can be found in the call list. Volume Control You can adjust receiver volume by side bar key during calls. Some of the bell sounds downloaded can be harshly heard since they do not match the sound source in WiFi phones. -
Page 24: Phone Book
Phone Book Search You can search for phone numbers just by pressing Search (Right Selection Key in standby mode. If you want to call at the phone number selected, press . To see details, select your desired numbers by pressing . -
Page 25: Adding Phone Book
Adding Phone Book A maximum of 500 phone numbers can be stored in the phone book. Enter the Menu (Left Selection Key L ) Contacts 2. New Contacts You can select the types of phone numbers for each, and if the numbers to be stored are 2 or more, a representative number should be designated. -
Page 26: Saving New Number
Saving New Number You can store phone numbers in the Contacts by pressing Save (Right Selection Key after entering them in standby mode. Speed Dial This is a function that enters the most frequently used ones of those phone numbers stored in Contacts in Speed dials, and easily get them later when users want to call at those phone numbers (numbers from 1 to 99 are provided). -
Page 27: Group Settings
Group settings You can add or edit groups to store phone numbers. Select Menu (Left Selection Key → 4. Group settings in turn. Name: Enter names of groups. You can enter a maximum of 24 characters for the English Alphabet. •... -
Page 28: Web Phone Book
: Display missed calls : Display memos during calls : Display refused calls : Display call forwarding numbers For more details, select in relevant Call history. You can send messages, set incoming call interception, and delete all phone numbers in the list by pressing Menu. - Page 29 Type your Phone IP address on the internet browser with 8080 port (for instance, if your phone’s IP address is 192.168.0.100, type IP address on web browser like http://192.168.0.100:8080) If you want to know your phone IP address, please select the Menu Settings 6. My phone info ...
-
Page 30: Call Time
Name Group Number Number1 Number2 Number3 Number4 Key Number Number Type Email Email1 Messenger Contents If the Wi-Fi phone is power off during the file transfer, data could be lost. Call Time You can check call time and the number of messages sent. Select “1. Status” at Phone Settings →... -
Page 31: Message
Message Writing Text Message Select Menu → Message → 1. Write Msg in turn. You can get the latest phone numbers by entering phone number yourself or pressing Menu. Otherwise, you can enter phone numbers, pressing Search and finding the numbers stored in Contacts. -
Page 32: Inbox
Inbox If new messages have arrived, Wireless phones let you know their arrival on new message notification screen, and you can check those messages, . You can store maximum of 100 messages received. If the received messages are over 100 in number, they are deleted one by one starting with the oldest ones. -
Page 33: Stored Message Box
Stored Message Box This is a function that separately preserves the messages received. A maximum of 100 messages can be stored, and if the messages in store reach 100 in number, you should delete the existing messages to store new ones. Press →... -
Page 34: Spam Setting
Spam Setting You can set or cancel spam interception using this function. Message Settings . Press on navigation, short cut for Message Menu7 → Settings in turn Select your desired item using MyPhrase You can enter your own expressions. A maximum of 10 expressions can be stored. Display Type This is a function that sets message reception indication. -
Page 35: Facility
Facility Alarm/Wake-up Call Press key on navigation, short cut for Facility menu → 1. Alarm/Wakeup Call in turn. Select Add for setting Alarm/Wakeup Call. : Display the current time. : Set alarm/wake-up calls. You can select one of Set Time, Every 10 min, Every 20 min, Every 30 min, Every 1 hour, and Clear using : Display set alarm/wake-up call time. -
Page 36: Display Of Selected Menu Screen
: Enter information on alarm/wake-up calls. It allows a maximum of 20 characters for the Korean Alphabet, and a maximum of 40 characters for the English Alphabet. A maximum of 10 alarm/wake-up calls can be set. Display of Selected Menu Screen Display the current setting status. -
Page 37: Schedule
Schedule You can select your desired date to see holiday/day and lunar date. It provides a solar calendar between January 1970 and December 2020. Press key on navigation, short cut for Facility menu → 2. Schedule. If you select Today, the calendar will lead you to today’s date. Calculator You can do simple figures using this function. -
Page 38: World Time
World Time You can read date and time around the world using this function. Press key on navigation, short cut for Facility menu → 4. World Time. You can set a country and a city using or List, and Set/Clear DST with Menu. If you set DST, is displayed on the cities, and set at 1 hour faster than standard time. -
Page 39: Screen & Sound
Screen & Sound Banner Select the expressions to be displayed on standby screen. You can set users’ own expressions or Wireless phone number to be displayed, or cancel them. Press key for Phone Settings → 2. Preference → 1. Banner •... -
Page 40: Lcd Backlight
LCD backlight LCD lighting is on for the time set, and then goes out. You can select one of 5 seconds, 10 seconds, 20 seconds, 30 seconds, 1 minute, and 3 minutes, and Always. LCD brightness You can set LCD screen brightness to 40 %, 60 %, 80 %, or 100 %, and it has been basically set to 80 %. -
Page 41: Ringers
Ringers This is a function that sets bell sound types and volume. Press key → 4. Sound → 2. Ringers • Type: Press and Select ringer type. • Level: Press and adjust volume. Sound Effects You can set various Sound effects using this function. Press key for Phone Settings →... -
Page 42: System Alerts
Power off Sound Set Sound effects that are Press or Type to select Key tone sound produced when turning off the power Press or Level to set Key tone volume Power off volume Set power-off sound volume System Alerts This is a function that sets or cancels battery warning sound, alarm sound, and call area change alarm sounds Press key for Phone Settings →... -
Page 43: Volumes
Volumes You can set the volume of sounds heard during calls, and control the volume of receivers using this function. Press key → 4. Sound → 5. Volumes. Or volume can be controlled by side bar key. Below references are volume is controlled at Phone Settings. Press or Level to set volumes. -
Page 44: Phone Setting
Phone Setting Language You can set Language Press key for Phone Settings → 2. Preference → 3. Language Multi-language Support: There are seven (7) languages you can choose to set: English, French, Italian, German, Greek, Dutch, Polish, Portuguese, Russian, Spanish and Turkish. Other Functions Lock PC Sync... - Page 45 Lock phone If you set to Main Lock, all information of Wireless phone is locked. Main Cancel is available only in Menu. Emergency Numbers You can register emergency phone numbers at which you can call during main lock. The upper pictures of below are registration of emergency number as Press key for Phone Settings →...
-
Page 46: Feature
If you select SOS, you can get phone numbers at which you can call on emergency. If you press # button on standby screen, the phone enters main lock mode. Feature Press key for Phone Settings → 3. Feature Call Block Mode If you select Call block mode, password entry field appears. -
Page 47: Call Forwarding
Call Forwarding Wireless phones provide a function of forwarding calls from the phone numbers hoped to be connected in users’ absence or during calls. • No answer: Incoming calls are forwarded to the preset number when there has been no answer during your set time. -
Page 48: Call Transfer
Call Transfer You can transfer your calling to another user with below method. During calling with one user. You can see the display as left capture. Please press Left Selection Key L and press 3. Hold or press send key. If the calling is held, display is become blank as left capture. -
Page 49: Auto Answer / Intercom
Auto Answer / Intercom Set Auto-Answer feature A. You can enable the auto answer feature for a call. You can use the auto answer feature to allow the phone to automatically answer an incoming call. B. Select Menu → Feature → Auto Answer C. - Page 50 If you set PTT configuration properly, you can see the PTT icon on idle window, and you can switch to PTT window through Options soft menu(PTT is only enabled with PTT enable set) or if someone broadcast PTT with your setting the window change to PTT mode automatically.
-
Page 51: My Phone Information
My Phone Information You can see the setting information of Wireless phones. Press key for Phone Settings → 1. Status → 1. My phone info.. You can enjoy various information Phone info. You can get phone numbers, software versions, and product MAC address. Network info. -
Page 52: Time
Time You can set the date and time automatically and manually. Press key for Phone Settings → 5. Time Start timer server and if you want to set current time manually select time server Stop. To set Time server, select 2. Time server and input the NTP Server IP address. To define your time zone select 3. - Page 53 To change the Time format, select 4. Time format then you can change type of date and time To define the Daylight Saving Time, select 5. DST and choose Disable or Enable. After set Start time, the End time should be settled by time which is applied DST time. After set DST time will be displayed on the screen.
-
Page 54: Wlan Search
WLAN Search Search wireless LAN services around Wireless phones. Press key for Phone Settings → 6. WLAN Search Have no encryption set in Wireless network Have encryption set in Wireless network Verify and add WLAN Profile. Press key for Phone Settings → 1. Status → 2. WLAN Profile For adding or deleting the profile, please press pressing Menu (Left Selection Key... -
Page 55: Connect To New Temporary Profile
Connect to new Temporary profile It is only for the temporarily connected profile. The existing temporary profile will be disappeared if you select another temporary profile. The profile will not be remained if you are rebooting the phone. Press the AP search key to search available Wireless Access Points in Standby mode Select... -
Page 56: Reset To Default
Reset to Default Press key for Phone Settings → 7. Reset to default → Enter Password → For Resetting, press “Yes” If default is selected, password entry field appears. Be careful since all user information including phone numbers and call information can be deleted. Deleted... - Page 57 INCOM Co., Ltd. offer Wi-Fi phone and application based on stable VoIP solution technology. INCOM which advantage of optimal customization for various customer’s demands is to enjoy the better convenience communication technology in both enterprise and home by the field-proven quality with a history for 10 years.
Need help?
Do you have a question about the ICW-1000G Global and is the answer not in the manual?
Questions and answers