
Related Manuals for Circassia NIOX VERO

Summary of Contents for Circassia NIOX VERO
- Page 1 NIOX VERO Airway Inflammation Monitor ® User Manual NIOX VERO User Manual Chinese (English) ® 000925-03 (EPM-000187) October 2017...
- Page 2 Remember WARNING! It is important to adhere to the following specified conditions: ® Use of substances containing alcohol close to the NIOX VERO instrument may cause erroneous measurement results. • Ambient temperature: +10°C to +35°C DO NOT clean the instrument or handle with alcohol or any • Humidity: 20% to 80% RH (non-condensing) spray or wipe containing alcohol! •...
-
Page 3: Table Of Contents
Table of contents 7.1 1Important information ...............3 Alert codes and actions ............21 1.1 8Preventive care ............... 26 ® Before using NIOX VERO Airway Inflammation Monitor ..3 1.2 About this manual ..............3 8.1 General care ................26 1.3 Compliance ................3 8.2 ... - Page 4 Rechargeable battery capacity .......... 37 11.16 Instructions for transport and storage ........ 37 12NIOX VERO ® parts and accessories ........38 12.1 ® Parts included in NIOX VERO package (Article No. 12-1100) ..............38 12.2 Accessories................38 13Vigilance ................39 NIOX VERO ®...
-
Page 5: Important Information
Chapter 1 Important information Important information Information in this document is subject to change. Amendments will be made by Circassia AB as they occur. The User Manual provides instructions on how to operate Before using NIOX VERO ® Airway Inflammation NIOX VERO . It contains numbered step-by-step instructions with ®... -
Page 6: Warnings
Chapter 1 Important information www.circassia.com • Do not drop the instrument or subject it to strong impact. www.niox.com • Do not use a damaged NIOX VERO instrument or damaged ® components. Warnings • Keep the instrument and Sensor out of water. Ensure that no liquid is spilled or dropped on the instrument or Sensor. • Donotusesubstancescontainingalcoholonorclosetothe NIOX VERO instrument.Thisincludesanycleaningagents ® • Do not heat or dispose of the instrument or Sensor in fire. Refer usedtocleanthefacility,orotherequipmentinthearea,as to "Disposal of instrument and accessories" on page 29. wellasalcoholwipesorspraysusedonpatients. • NIOX VERO and the NO scrubber in the breathing handle ® • NIOX VERO should only be operated by healthcare ® contains potassium permanganate. Used or expired professionals. instruments and breathing handles should be disposed of as hazardous waste in accordance with local waste disposal ... -
Page 7: Intended Use
• NIOX VERO can be operated with two different exhalation times, Fractional exhaled Nitric Oxide (FeNO) is increased in some airway 10 seconds and 6 seconds. The 10 second test is the preferred inflammatory processes such as asthma and decreases in response mode. For children who are not able to perform the 10 second to anti-inflammatory treatment. FeNO measurements with test, the 6 second test is an alternative. NIOX VERO are quantitative, non-invasive, simple and safe and ® • The 6 second test should be used with caution in patients over should be used as part of regular assessment and monitoring of the age of 10 years. It should not be used in adult patients. patients with these conditions. Incorrect use of the 6s exhalation mode may result in falsely low ... -
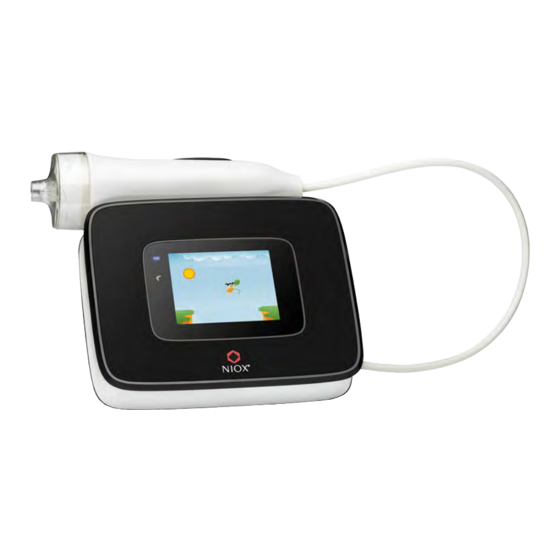
Page 8: Product Description
Chapter 2 Product description Product description Instrument NIOX VERO ® accessories and parts H) ON/OFF button, (I) Power adapter port, (J) USB port (A) Breathing handle and handle cap, (B) Sensor (supplied separately), (C) Instrument (including stand), (D) Rechargeable battery (Type No BJ-G510039AA), (E) Patient filter (supplied separately), (F) USB cable, (G) Power adapter and power cord Note: Only accessories and parts supplied by Circassia may be used. -
Page 9: Installation And Set Up
Chapter 3 Installation and set up Installation and set up Open the package with care. Prior to installation, check that the package contains all the parts (see page 6). A screwdriver is required for opening the compartment lid and installation of Sensor and battery. Remove the plastic film from the display. 1. Carefully place the instrument with the display facing down on a flat and clean surface, then unscrew and remove the compartment lid. There is a taper on the side of the lid for better grip when opening. 2. Open the Sensor can. (N) Breathing handle holder, (O) Breathing handle port 000925-03 NIOX VERO User Manual Chinese (English) ®... - Page 10 Chapter 3 Installation and set up WARNING!OpentheSensorcanwithcare.Theinsideofthe 5. Open the battery package. openingmayhavesharpedges. Note: Only use the correct rechargeable battery supplied by Circassia. (Type No BJ-G510039AA, Article No 12-1150) 3. Open the Sensor package. 6. Insert the rechargeable battery and replace the lid. Tighten the WARNING! Do not touch or clean the white Sensor membrane. screw by using a screwdriver. CAUTION! The Sensor should only be stored in its original unopened package or installed in a NIOX VERO instrument. ® 4. Insert the Sensor and turn the swivel clockwise until locked. 7. Take the breathing handle tube and push the end of the tube into the breathing handle port slowly until the triangle is no longer visible. The breathing handle and the patient filter are Applied parts Type B. 000925-03 NIOX VERO User Manual Chinese (English) ®...
- Page 11 Chapter 3 Installation and set up Note: Only attach the breathing handle supplied by Circassia. Article No 12-1010 8. Attach the power adapter to the instrument and then to the power outlet. When installing the unit, either use a socket outlet Note: Use care not to bend the handle tube. with a readily accessible power switch, or connect the AC cord plug to an easily accessible socket outlet near the equipment. If a fault should occur during operation of the unit, use the power switch to cut the power supply, or remove the AC cord plug. Note: Only use the power adapter supplied by Circassia with the instrument. Article No 12-1120. 9. Position the instrument with the stand folded out. Note: The triangle should not be visible when assembled correctly. 10. Start the instrument by sliding the ON/OFF button to ONand allow the instrument to start up and perform the internal check and measurement procedures. 000925-03 NIOX VERO User Manual Chinese (English) ®...
- Page 12 Chapter 3 Installation and set up This opens the Time and date setting view. 14. Select between 12h US and 24h ISO time and date format. CAUTION! After inserting a new Sensor it is recommended to wait 15. Set time by pressing the button for hour. It for three hours with the instrument switched on before changes color to blue. Change the value to performing a measurement. the current hour by pressing the increase or decrease buttons. Repeat this procedure for 11. When the internal check is completed, the main menu appears. minute, year, month and day. 16. Select OK to accept the changes and return to the main menu. The Undo button closes the view without saving any changes. 17. Select the Settings button on the main menu. 18. Select the Breathinghandle button. This opens the Breathing handle view. 19. Select the ResetBreathinghandle button. The breathing handle information view opens to confirm insertion of the breathing handle. 12. Select the Settings button on the main menu. 20. Select the OK button to confirm insertion of a new 13.
-
Page 13: User Interface
Chapter 4 User interface User interface 4.2.1 Main menu Main and settings view This section describes the main view, settings view, menus and (a) Measurement mode 10s/6s (only shown when 6s is an option, symbols. Buttons and symbols are further described on page 33. for more information see “Enable/disable 6s measurement mode” on page 20, (b) Demo, (c) Patient ID entry, (d) Settings Main View 4.2.2 Status bar (e) Battery status, (f) Bluetooth enabled (in this position a USB connection may be indicated instead ), (g) Breathing handle has expired or is about to expire - blinking symbol, (h) Instrument has expired or is about to expire - blinking symbol, (i) Sound disabled, ( j) Sensor status and number of remaining measurements, (k) Temperature outside of specification, (l) Humidity outside of specification, (m) Time (A) Status bar, (B) Instructive demonstration, (C) Patient ID, (D) Main ... -
Page 14: Settings View
Chapter 5 Using NIOX VERO ® Settings view Using NIOX VERO ® Start the instrument from power save mode If NIOX VERO is in standby or sleep mode simply touch the ® display to activate it. (A) Modes configuration - see page 20, (B) Volume settings - see Register patient ID (optional) page 18, (C) Alert log - see page 19, (D) Instrument & Sensor info ... -
Page 15: Measure Feno
Chapter 5 Using NIOX VERO ® 1. Select the RegisterpatientID button from the main 2. Obtain a new patient filter. Attach the patient filter to the breathing handle. Make sure to twist the patient filter in place menu. until it clicks into place. Note: Store the patient filters in the original box prior to use. Note: Do NOT use sharp objects to open the patient filter packaging. Do not touch the filter membrane. 2. Enter up to 12 characters (alpha or numeric). Note: Patient filters should be 3. Select the ABC-button to activate a keyboard with the alphabet. used immediately after The 123-button changes view back to the numerical keyboard. opening. 4. Select OK button to confirm the registration. Note: There is a risk of leakage if the filter is not correctly attached Use the Erase button to erase. to the breathing handle and this may result in incorrect Use the Undo button to undo a registration. measurement values. Note: Do not switch OFF the instrument during measurement ... - Page 16 Chapter 5 Using NIOX VERO ® 3. Give the breathing handle to the patient and guide the patient 2. Close the lips around the mouthpiece on the patient filter so to provide a breath sample as described in the next section. that no air leakage occurs. 3. Inhale deeply through the patient filter to total lung capacity. During inhalation, the cloud on the display moves upwards. Note: The procedure is activated by inhaling air from the handle or by pressing the start measurement button. 5.3.2 Measurement 1. Empty the lungs by breathing out thoroughly. 000925-03 NIOX VERO User Manual Chinese (English) ®...
- Page 17 Chapter 5 Using NIOX VERO ® 4. Exhale slowly through the filter while keeping the cloud within 6. Exhale until the cloud has passed the flag. the limits as indicated on the display (the white lines). 7. The instrument will analyze the sample and generate a result in approximately one minute. Note: Do not exhale or inhale through the patient filter during the analysis process. 5. The instrument display and audio signals guide the user to the correct exhalation pressure. A continuous sound indicates correct pressure with a frequency proportional to the pressure. An intermittent high frequency sound - too strong pressure An intermittent low frequency sound - too weak pressure Exhalation with: Pressurecorrect Pressuretoostrong Pressuretooweak 8. The result is then displayed: (A) Patient ID - if applicable, (B) FeNO value in ppb (parts per billion), (C) Measurement mode 10s/6s, 000925-03 NIOX VERO User Manual Chinese (English) ®...
-
Page 18: Demonstration Mode
Chapter 5 Using NIOX VERO ® (D) Measurement sequence number, (E) OK - returns to main 3. The 6s measurement mode is illustrated with an orange view. start button. 4. Perform measurement as instructed in the “5.3.2 Measurement” section. 5. Wait for the result. 6. The result screen displays the icon for 6s measurement. Note: The device will always return to the default 10s mode after a 6s measurement. 5.3.3 Perform 6s NO measurement Demonstration mode CAUTION! To help professionals in guiding patients, the instrument contains three animated demonstrations with visual and audio guides of the • NIOX VERO can be operated with two different exhalation different stages of a measurement procedure. times, 10 seconds and 6 seconds. The 10 second test is the 1. Select the Animation button on the main menu. preferred mode. For children who are not able to perform the 10 second test, the 6 second test is an alternative. 2. Select which animation to use (Cloud, Dora or Meter) •... -
Page 19: Measure Ambient No
Chapter 5 Using NIOX VERO ® 6. Select OK button to confirm the changes Measure ambient NO Note: 7. The undo button returns to the main menu without saving An ambient measurement may be requested by technical support changes. during troubleshooting. a. Inhalation Note: An ambient measurement is counted as one measurement through the on NIOX VERO Sensor and the instrument. ® breathing handle. 1. Attach a patient filter to the breathing handle until it clicks into place. b. Exhalation ... -
Page 20: Change Settings
Chapter 5 Using NIOX VERO ® 5. The progress bar is visible until the measurement is finished 3. The settings for sound and volume opens. and the result is displayed: Ambient measurement value (in ppb), measurement mode and measurement sequence number. 4. Select decrease/increase to adjust volume. 5. The volume bar indicates the set volume. 6. Select the OK button to save settings and return to the Settings view. Change settings The Undo button closes the view without saving changes. 5.6.1 Change time and date 7. The status bar indicates mute status when the sound 1. Select the Settings button on the main menu. volume is set to zero. 2. Select the TimeandDate button. For more details refer to page 10. 5.6.3 View measurement logs All measurement results are stored in the instrument and can be... - Page 21 Chapter 5 Using NIOX VERO ® (A) Alert code (for technical support purpose only), (B) Date and time of alert, (C) Scroll list (blue) (D) Return - returns to previous (A) Patient ID - if defined, (B) FeNO value, (C) Measurement date view, (E) Backward (F) Forward and time, (D) Measurement mode 10s/6s, (E) Measurement sequence number, (F) Return to settings (G) Backward, (H) Forward 3. Select the Return button to return to settings. 4. Browse through the measurement logs using the backward and forward buttons. 5.6.5 View instrument information Detailed information about the instrument and Sensor can be viewed. 5. Select the Return button to return to settings. 1. Select the Settings button on the main menu. 5.6.4 View alert logs 2. Select the Instrumentbutton. Alerts are stored in the instrument and can be viewed at any time.
-
Page 22: Turn Off The Instrument
Chapter 5 Using NIOX VERO ® 3. This opens the Instrument information view displaying the 5.6.7 Enable/disable 6s measurement mode following: 1. Select Settingsin the main menu. 2. Select Modesconfiguration. 3. Check the 10s/6sicon to enable using the 6s mode. Uncheck to disable. 4. Press OK. Turn off the instrument 1. To turn off the instrument, slide the ON/OFF button to OFF. (A) Numbers of remaining measurements on the instrument, (B) Instrument serial number, (C) Software version number (D) Instrument expiration date, (E) Return to settings, (F) Numbers of remaining measurements on the Sensor, (G) Sensor serial number, (H) Sensor expiration date, (I) Enter configuration code (only used on request from Circassia) 5.6.6 Turn QC functionality on or off Note: An optional External Quality Control (QC) procedure is ... -
Page 23: Using Niox Vero ® With Niox ® Panel
Alert messages and other information are shown as a code on the For instructions on how to install and use the program refer to the instrument display. The tables below provide the alert codes and NIOX Panel User Manual. recommended actions to be taken for an alert code. If the alert persists, contact your local Circassia representative or Circassia Technical Support. Useralerts Screen Action Exhalationtoostrong Press Return and repeat the ... - Page 24 Chapter 7 Troubleshooting Useralerts Screen Action Instrument Screen Action alerts Analysis interrupted Sensorstabilization Repeat the measurement and do not breathe through the handle during Remove any sources of disturbances analysis. (such as cordless phones, mobile phones or gas emitting appliances). Wait for the Sensor to stabilize. Measurementfailed Unstablesystem Remove any sources of disturbance (such as cordless phones/mobile Remove any sources of disturbances phones or gas emitting appliances). (such as cordless phones, mobile Then press Return. When the phones or gas emitting appliances). instrument is ready for use repeat the Wait for the System to stabilize. measurement. If the alert persists, restart the Countdowntime instrument. The remaining time until the instrument is ready to use. Instrument Screen Action alerts LockMMI When the instrument is connected ...
- Page 25 Chapter 7 Troubleshooting Instrument Screen Action Instrument Screen Action alerts alerts Configurationcodeerror Condensationalert Only provided by Circassia upon Reduce frequency of request. measurements. Continue measuring at this frequency causes The configuration code entered is condensation in the instrument and incorrect. Enter correct will make the instrument unusable configuration code. for 30 minutes. If this error continues to be shown, contact Circassia Technical support. Memoryaccessfailure Contact Circassia Technical support. Lidopenwarning Check if the battery or sensor lid is open and close if needed. Click the OK button when finished. Temperatureorbaselinefailedto stabilizewithin30minutes Batteryproblem Check that the ambient temperature Low power in battery or other and relative humidity is within failure. specification. If necessary, move the Change the battery and click the OK instrument to another location and ...
- Page 26 Chapter 7 Troubleshooting Instrument Screen Action Instrument Screen Action alerts alerts Internalhardwareerror NoSensorinserted unrecoverable Insert Sensor. See page 28 Contact Circassia Technical support. (replacement of sensor) or page 7 (initial placement of sensor). Internalhardwareerrorrecoverable Sensorerror Check that the Sensor, battery and lid Remove any sources of disturbance is in its correct position, also make (such as cordless/mobile sure that the tube is not folded. When telephones or gas emitting finished restart the instrument. appliances). When the instrument is ready for measurement try to repeat the measurement. If alert Analysisfailure persists, power off the instrument, Ambient measurement failure. remove and insert the Sensor and restart the instrument. Click the OK button and obtain a new measurement. Sensorwarning Contact Circassia Technical support This warning indicates that the ...
- Page 27 Chapter 7 Troubleshooting Instrument Screen Action Instrument Screen Action alerts alerts TheSensorisabouttoexpire Instrumentexpirationdatehas passed Order a new Sensor. This alert is visible when less than 10% of the It is still possible to view measurements remain or less than 2 measurements stored in the weeks until expiry date. instrument memory. Press OK to acknowledge. Sensorexpirationdatehaspassed. Thebreathinghandleisaboutto Replace the sensor, see page 28. expire This alert is visible when less than 100 measurements remain or less than 2 weeks until expiry date. Press OK. Prepare to change Thebreathing handlehasexpired breathing handle. Press OK. Change breathing handle. Allmeasurementsonthe See page 26. instrumenthavebeenused CAUTION!The breathing handle’s It is still possible to view NO scrubber contains potassium measurements stored in the permanganate and should be ...
-
Page 28: Preventive Care
31). WARNING! DO NOT clean area immediately surrounding the If any item is missing or damaged, contact your local Circassia representa- NIOX VERO ® with products containing alcohol. This includes tive or Circassia Technical support. - Page 29 Chapter 8 Preventive care 2. Remove the used handle from the instrument by pushing the socket into the device and gently pull out the tube. 3. Discard the breathing handle. CAUTION! The breathing handle contains potassium permanganate and should be disposed of as hazardous waste in accordance with local waste disposal regulations. Do not re-use an expired breathing handle. 4. Attach a new breathing handle (A) Breathing handle symbol, (B) Remaining number of to the instrument by pushing the measurements, (C) Expiration date, (D) Breathing handle reset tube into the socket until the button, (E) Return button triangle is no longer visible. Note: The breathing handle status icon appears blinking in the status bar two weeks prior to expiration or when 10% of its 5. Select the Settings button in the main menu. capacity is left. Perform the following steps to change the breathing handle: 6. Select Breathinghandle button. 1. Place the device on its side on a level secure surface. 7. Select the ResetBreathing handle button. ...
-
Page 30: Operational Life-Time
Chapter 8 Preventive care Note: The Return button returns to settings view without Sensor compartment before closing it. registering change. 8.2.3 Change battery 8.2.2 Exchange of NIOX VERO Sensor ® If the rechargeable battery is no longer charging properly, malfunctioning, or requires charging more frequently than normal, 1. Turn off the instrument. then it needs to be replaced. 2. Open the compartment on the back of the instrument using a screwdriver. Turn the swivel to release the Sensor. Note: Only rechargeable batteries supplied by Circassia may be used. (Type No BJ-G510039AA, Article No 12-1150) The battery is placed in the compartment on the back of the... -
Page 31: Disposal Of Instrument And Accessories
Used batteries should be recycled according to the local recycling is not possible to perform further measurements after expiry, program for rechargeable batteries. although stored measurement data can still be retrieved. Used patient filters should be recycled according to the local recycling pro- gram for biohazard waste. 8.3.2 NIOX VERO Sensor ® Note: There is a Lithium Manganese Dioxide (LiMnO ) backup Operational life-time is maximum 12 months after opening package battery inside the instrument in addition to the replaceable and installation in NIOX VERO or until expiration date as stated on... -
Page 32: Safety Information
The instrument might produce some heat during normal required. Refer to the recommended transportation conditions operation. The temperature could increase up to 5°C above the in the “Transport and Storage” section on page 37. Always ambient temperature. Make sure that the ventilation slots are use a bag for transportation. not blocked. Do not place the instrument on a bed, sofa, carpet • Make sure that the gas outlet (four parallel slots to the left of or other soft surface. the lid) on the rear side of the device is not covered. • Exhaledbreathcontainswatervaporwhichcancondense • The device contains a Lithium-ion Battery which may cause an insidetheinstrument.Whenexcessivelyusedinashort increased risk of heat, smoke or fire if handled incorrectly; do period,thereisariskforcondensationofwaterinside not open, crush, heat above 60°C or incinerate. NIOX VERO ® Normally a maximum of 10 exhalations/hour can be performed • Be careful when opening the Sensor can. The inside of the with NIOX VERO during continuous use. However, it is opening has sharp edges. ® possible to perform 20 exhalations in one hour if the • Keep the Sensor out of reach of children. instrument is paused for a minimum of 30 minutes prior to the • Any person who connects external equipment to signal input next session of exhalations. Exhalations include failed and and signal output ports of this device has formed a Medical successful measurements. Electric System and is therefore responsible for the system to ... -
Page 33: Substances Disturbing Feno Measurement
General requirements for basic safety and essential performance- Ensure stable operating conditions by avoiding placement of the Collateral standard: Electromagnetic compatibility- Requirements instrument in direct sunlight, near sources radiating heat, or and tests. ventilation. NIOX VERO operates within specification at the ® CAUTION! The test limits are designed to provide protection ... - Page 34 Do NOT try to repair the instrument. Any attempt will make the warranty invalid and performance according to the specifications cannot be guaranteed. 9.6.2 Support Contact your local Circassia representative or Circassia Technical Support if you encounter problems which you cannot solve with the information in this manual. For contact details, see back cover, and provide the following information: •...
-
Page 35: 10 Reference Information
Chapter 10 Reference information 10 Reference information Settings 10.1 Buttons and descriptions 10.1.3 Settings view buttons Configuration Patient measurements 10.1.1 Control buttons Volume Ambient measurements OK - accept changes/ Delete Alert logs Breathing handle status verify result Undo - closes view Edit Instrument status Enable Bluetooth without saving changes Time and date Return Set configuration Erase button Demo 10.2 Symbols and descriptions Skip Reset handle 10.2.1... -
Page 36: Symbol Explanation
Chapter 10 Reference information Bluetooth enabled Warning - humidity is not The product meets the requirements of applicable European within operating conditions directive range Electrical safety Type B applied parts: Instrument connected Time Breathing handle and patient filter via USB The product should be recycled according to the local Audio - mute program for electronic equipment. Consult instructions for use 10.2.2 Display Expiration date Analysis progress bar Transport and storage temperature limitation Volume bar General warning For single use only Screen code - correct In Vitro Diagnostic Device Transport and storage relative humidity limitation Screen code - incorrect Transport and storage atmospheric pressure limitation Result screen - Ambient measurement Equipment protected throughout by DOUBLE INSULATION Cloud - pressure within limits or REINFORCED INSULATION Cloud - goal reached The Device includes a Radio Frequency (RF) transmitter (Bluetooth) Cloud - warning pressure too high or too low NRTL-listed 10.3 Symbol explanation Prescription use only Responsible manufacturer... -
Page 37: 11 Technical Data
Chapter 11 Technical data 11 Technical data 11.4 Exhaled NO - performance data The instrument is verified to fulfill the specified performance under a temperature range of +10 to +35 °C, relative humidity range of 11.1 Dimensions and weight 20-80% and pressure range of 700-1060 hPa. Height: 145 mm Measurement range: Width: 185 mm FeNO: 5 to 300 ppb Depth: 41 mm Lowest Detection Limit: 5 ppb Weight of instrument including Sensor: 1kg Determination by analyzing gas concentrations around and below the detection limit. 5 ppb was the lowest detectable level. 11.2 Electrical data Electrical safety The equipment complies with the 11.5 Linearity classification: requirements according to IEC Squared correlation coefficient r ... -
Page 38: Method Comparison
• Power class 2 breath 11.14.1 R&TTE Directive 2. The control of exhaled breath for Asthma management according to ATS/ERS Hereby, Circassia AB, declares that this NIOX VERO is in compliance with the essential requirements and other relevant NIOX VERO contains internal monitoring functionality for safety provisions of Directive 1999/5/EC. and essential performance parameters. Recurrent testing is not necessary to maintain essential performance or basic safety. -
Page 39: Rechargeable Battery Capacity
Chapter 11 Technical data 11.15 Rechargeable battery capacity 11.16.1 NIOX VERO , including sensor (transportation and stor- ® age) Only use the power adapter or USB cable supplied by Circassia to • Relative humidity range: 20% to 80%, non condensing. charge the battery. Capacity: Approx. 30 measurements per day or 36 hours stand-by in • Temperature range: +10 to +35 °C 25°C environment condition. • Atmospheric pressure range: 700 to 1060 hPa Lifetime: At least one year with normal use. When transporting the instrument from one location to another Charging time: <8 hours under normal conditions. with different ambient conditions, a prolonged stabilization period Lowered capacity, and/or when 8 hours of charging time does not might be required before measurements can be performed. -
Page 40: Niox Vero ® Parts And Accessories
Contains: 1 Sensor* for 500 tests and 500 NIOX VERO Filters** ® no responsibility for health and safety problems or other problems caused by the use of accessories not approved by Circassia. NIOX VERO Test Kit 1000 (12-1900) ® Contains: 1 Sensor* for 1000 tests and 1000 NIOX VERO Filters** ® 12.1 Parts included in NIOX VERO ® package * NIOX VERO Sensor ® (Article No. 12-1100) Pre-calibrated disposable sensor for 100, 300, 500 or 1000 NIOX VERO Instrument (12-1000) ® measurements. Operational life-time: Maximum 12 months when installed in NIOX VERO... -
Page 41: 13 Vigilance
Manufacturers of medical devices are obliged to report adverse incidents to national health authorities within 10 or 30 days, dependent on the severity of the incident. Any user of Circassia's products, who experience an adverse incident related to the product, must therefore immediately report this to Circassia or Circassia's local market representative. The report can be made by e-mail, fax, or telephone. The report should contain the following information:... - Page 43 Information in this document is subject to change. Amendments will be made available by Circassia AB as they occur. Based on the company’s intellectual property, Circassia develops and commercializes products for the monitoring of nitric oxide (NO) as a marker of inflammation, to improve the management and care of patients with inflammatory disease in the airways. Patents: Circassia’s NIOX products are protected by a number of patents in the US, Europe and a range of other countries. Circassia AB, an ISO 13485 certified company Circassia AB, Hansellisgatan 13, SE-754 50 Uppsala, Sweden Phone: +46 8 629 07 80, Fax: +46 8 629 07 81, E-mail: nioxtechsupport@circassia.com www.niox.com Copyright 2017 Circassia AB, Uppsala, Sweden. © Circassia is a registered trademark of Circassia Limited, NIOX , NIOX MINO and NIOX VERO are registered trademarks of Circassia AB. ® ® ®...
Need help?
Do you have a question about the NIOX VERO and is the answer not in the manual?
Questions and answers