
Summary of Contents for Mag International T-MAG XC Series
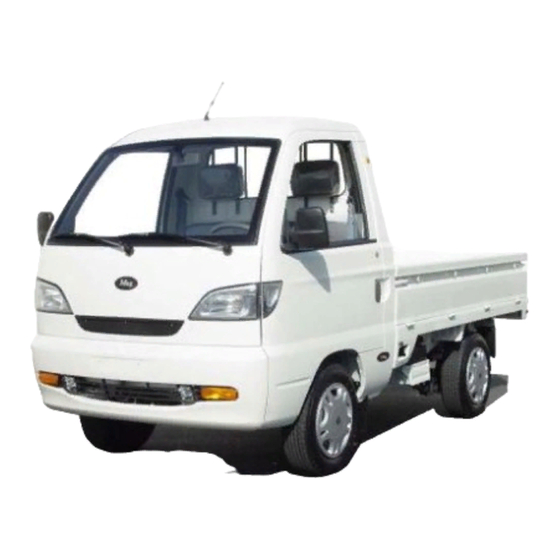
- Page 1 Mag International Inc. Owner’s Manual T-MAG XC Mini Truck Series With 4WD Operating Instructions...
- Page 2 FORWARD Congratulations on your selection of the T-MAG XC series of Off-Road Mini Utility Trucks. This Owners Manual is a component of your vehicle and it provides useful information on operation, maintenance and safety applications. The manual is to be kept inside your vehicle for easy reference. Read it carefully and make sure you fully understand the contents of the manual, especially the safety information.
-
Page 3: Table Of Contents
TABLE OF CONTENTS 1) SPECIFICATIONS • 1.1 Performance • 1.2 Mass Data • 1.3 Dimensions • 1.4 Engine Data • 1.5 Name Plate • 1.6 Engine Number • 1.7 Vehicle Identification Number (VIN) 2) VEHICLE LAYOUTS • 2.1 Outside • 2.2 Instruments and Controls •... - Page 4 TABLE OF CONTENTS 3) OPERATIONS (Including 4WD Option) • 3.1 Opening the Doors • 3.2 Windows, Rear-View Mirror and Sun Visor • 3.3 Seats and Headrests Regulation • 3.4 Seat Belts • 3.5 Switches • 3.6 Indication Lights and Dome Lights •...
- Page 5 TABLE OF CONTENTS 4) DRIVING • 4.1 Exhaust Emissions and Restraining Devices • 4.2 Inspecting Items Before Daily Use • 4.3 Vehicle Driving Notice • 4.4 Engine Starting • 4.5 Operation of Transmission • 4.6 Braking • 4.7 Clutch, Brake and Accelerator •...
- Page 6 TABLE OF CONTENTS 6) DO IT YOURSELF • 6.1 Tools Included with Vehicles • 6.2 Use of the Jack • 6.3 Changing the Tire • 6.4 Spark Plug • 6.5 Fuses • 6.6 Replacement of Light Bulbs 7) INSPECTION AND MAINTENANCE •...
-
Page 7: Performance
1) SPECIFICATIONS 1.1 Performance Data Item T-MAG XC Maximum speed (km/h) Maximum grade ability (%) ≥20 Fuel consumption of 100km at constant speed (L/100km) ≤5.5 Minimum turning diameter (m) ≤9.5 Minimum ground clearance (mm) ≥155 Wheel camber 1°30′±30′ Wheel kingpin inclination 9°30′±30′... -
Page 8: Mass Data
1.2 Mass Data Data Item T-MAG XC Curb mass (kg) 1050 1000 Maximum gross vehicle mass (kg) 1610 1560 Seating capacity (persons) 1.3 Dimensions Data Item T-MAG XC Overall length (mm) 3745 (3760#) Overall width (mm) 1505 Overall height (mm) 1925 Wheel base (mm) 2370... -
Page 9: Engine Data
1.4 Engine Data Data Item DA465Q Engine model Four-in-line four-stroke water-cooled multi-point Engine type Electrically -controlled fuel injection Cylinder bore (mm) 65.5 Stroke (mm) Total displacement (ml) Compression ratio Rated output (kW/r/min) 35.5/5000 74/3000~3500 Maximum torque (Nm/r/min) Minimum fuel consumption (g/kWh) Fuel Unleaded gasoline Item... -
Page 10: Name Plate
1.5 Name Plate The name plate is fixed on the bracket of wiper. 1.6 Engine Number The engine number is stamped on the engine cylinder of the inlet manifold side. 1.7 Vehicle Identification Number (VIN) The Vehicle Identification Number (VIN) is stamped on the upper surface of the right plate in the engine cabin. -
Page 11: Outside
2) VEHICLE LAYOUTS 2.1 Outside • Hood • Front windshield wiper • Outside rear-view mirrors • Side windows • Antenna • Front fog lights* • Headlights/Position lights • Turn-signal lights • Reversing lights • Stop lights/Position lights • Turn-signal lights (Hazard lights) •... -
Page 12: Instruments And Controls
2.2 Instruments and Controls 1) Lighting switch/ 7) Mode selection 16) Hood release lever Note: The equipment may vary Turn-signal dials 17) Horn with each vehicle switch 8) Temperature 18) Shift knob 2) Combination control dials 19) Cigarette lighter meter 9) N/A 20) Parking brake lever 3) Cluster... -
Page 13: Interior
2.3 Interior 2.4 Engine 1) Inside rear-view 1) Oil Filter mirror 2) Engine 2) Steering wheel 3) Ignition coil 3) Sun visors 4) Battery 4) Driver’s seat... -
Page 14: Opening The Doors
3) OPERATIONS 3.1 Opening the Doors 1. Key Key provided is applicable to all doors, ignition switch and fuel filler cap locks. 2. Door locks a) Operation from outside the vehicle There are two methods to lock the front doors; they are as follows: I. - Page 15 3. Fuel cap The fuel cap is located on the on rear passenger side of the vehicle. WARNING!!! NEVER ALLOW SPARKS OR OPEN FLAMES NEAR THE VEHICLE WHEN REFUELING. 4. Hood latch 1) To open a) Put down the wiper if it is up. b) Pull up the control handle of the hood latch located on the lower left of the instrument panel.
- Page 16 WARNING!!! THE SUPPORT BAR MAY DISENGAGE THE HOOD IF IT IS LIFTED BY A STRONG WIND. (Always insert the support bar into the hole provided specifically for this purpose) SUPPORTING THE HOOD AT ANY OTHER LOCATION COULD RESULT IN THE SUPPORT BAR SLIPPING OUT AND LEAD TO AN ACCIDENT. 2) To Close a) Support the hood, release the support bar.
-
Page 17: Windows, Rearview Mirror And Sun Visor
3.2 Windows, Rearview Mirror and Sun Visor 1. Window options a) Manual windows Turn the window crank clockwise to roll window down; turn counter-clockwise to roll window up. 2. Rearview mirror a) Outside rearview mirror The outside rearview mirror can be turned upward, downward, left and right to adjust to a suitable position. - Page 18 b) Inside rearview mirror The inside mirror is located in the front upper to the driver’s seat. It can be turned upward, downward, left and right to a suitable position. Please adjust the knob under the mirror to prevent the light of the rear vehicle from blinding the driver eyes while driving at night.
- Page 19 b) The clip to hold the visor is located on the reverse side of the sun visor on driver’s side. c) A mirror dressing is located at the back of the sun visor on the passenger side.
-
Page 20: Seats And Headrests Regulation
3.3 Seats and Headrests Regulation 1. Front seat adjustment • Seat should be adjusted prior to operation of vehicle. • Elbows should be slightly bent at steering wheel. • Knees should be slightly bent while applying brakes or accelerator. • Proper use of seat belt should be adhered to at all times. - Page 21 a) Adjusting seat forward and backward Lift the lever to regulate the seat. After regulating make sure that the seat is fixed firmly by shaking the seat gently in moving direction. b) Adjust the angle of seatback Lift the handle to regulate angle of seatback.
- Page 22 WARNING!!! LIFT LEVER AND PUSH THE SEATBACK TO APPROPRIATE ANGLE BY GUIDING SEAT WITH HAND; ASSURING THE SEATBACK WILL NOT RESULT IN INJURY TO PASSENGER AS IT RETURNS TO THE ORIGINAL POSITION. c) Adjustment of headrest Adjust the middle of headrest assuring it is level with driver eyes.
-
Page 23: Seat Belts
WARNING!!! THE MIDDLE OF THE HEADREST MUST BE ADJUSTED TO THE HEIGHTAT DRIVER’S EYE LEVEL. TO ENSURE DRIVER’S SAFETY, DO NOT EXCEED THE HEIGHT AND DO NOT ADD CUSHION ETC. BETWEEN THE DRIVER’S BACK AND THE SEATBACK. TO ENSURE THE DRIVERS SAFETY DO NOT OPERATE VEHICLE IF HEADREST HAS BEEN REMOVE. -
Page 24: Switches
WARNING!!! ALWAYS REMAIN RESTRAINED WITH SEAT BELT WHILE DRIVING VEHICLE. REPLACE THE BELT WHEN WORN, DIRTY OR DAMAGED. THE SEAT BELT FOR EACH SEAT IS DESIGNED ONLY FOR ONE PASSENGER. MODIFICATIONS ARE PROHIBITED BY LAW. 3.5 Switches 1. Ignition switch – The four locations of the ignition switch WARNING!!! DO NOT PLACE HANDS THROUGH STEERING WHEEL WHILE OPERATING THE IGNITION. - Page 25 LOCK While vehicle is parked, the key can be pulled out from Ignition switch. You can only rotate key to the LOCK position while key is inserted in ignition. After the key is pulled out, the ignition switch and the steering column will be locked. To turn steering wheel, you should insert the key and rotate it to another position clockwise.
- Page 26 WARNING!!! PULLING THE KEY OUT OF IGNITION IS PROHIBITED DURING OPERATION OF VEHICLE. PULL OUT THE KEY FROM IGNITION SWITCH AFTER PARKING. NEVER LEAVE VEHICLE UNATTENDED WITH KEY IN IGNITION. WARNING!!! IF ENGINE CAN’T BE STARTED WITHIN 5 SECONDS EACH TIME, THEN START IT FOR SECOND TIME AFTER 10 SECONDS, OTHERWISE STARTER WILL BE DAMAGED.
- Page 27 a) Rotate the end of control lever to control the lighting system. The lighting switch has three positions. When the switch is set to OFF lights are off. When the switch is set to the middle position, the running lights, tail lights, license lights, lighting lights for the combination meter turn on but headlight still off.
- Page 28 4. Wiper/Washer switch • The wiper/washer control lever is on the right side of the steering wheel. By placing the wiper’s control lever return to one of the three positions, the wiper will begin. • The INT (intermittent) position is used for mist or slightly rainy weather. •...
- Page 29 WARNING!!! TO AVOID THE WINDSHIELD FREEZING, YOU CAN TURN ON THE DEFOGGER TO HEAT UP THE WINDSHIELD BEFORE CLEANING. WARNING!!! TO AVOID DAMAGING THE WIPER AND WASHER SYSTEM, PAY ATTENTION TO THE FOLLOWING: NEVER PUT UP THE LEVER WHEN EMPTY. THIS MAY RESULT DAMAGE TO THE WASHER MOTOR. NEVER WIPE THE DRY WINDSHIELD.
- Page 30 5. Hazard switch Press this switch to turn on hazard lights. The six turn signal lights and the two turning indicator lights shall flash. Press this switch again, the warning light signal stops. WARNING!!! IN CASE OF EMERGENCY, PRESS THE SWITCH, THE VEHICLE LIGHT WILL BE ACTIVATED TO ALERT OTHER DRIVERS ON THE ROAD.
- Page 31 7. Rear fog light switch When the switch of lighting is set to the third position, press this rear fog light switch, the rear fog lights turn on. 8. Rear wiper switch When the ignition switch is set to the position of “ON”, press this switch, the rear wiper begins to work.
- Page 32 10. Rear Defogger switch When the ignition switch is set to the position of “ON”, press this switch, the defogger begins to work. 11. Electric window wiper switch Refer to item 4 for detailed contents. 12. Horn Pressing the mark horn button on the steering wheel will result in the horn sounding.
-
Page 33: Indication Lights And Dome Lights
3.6 Indication Lights and Dome Lights 1. Brake warning light When the ignition switch is ON, the light shall be activated immediately. After starting the engine, if the fluid level in the reservoir tank is at normal position, the light shall be off while the brake level is depressed. - Page 34 2. Electronic brake distribution (EBD) warning light The EBD warning light should illuminate when the ignition switch is turned “ON” and should go off after a few seconds. WARNING!!! IF THE WARNING LIGHT STAYS ON OR DOES NOT ILLUMINATE WHEN THE IGNITION SWITCH IS TURNED “ON”...
- Page 35 4. Charge warning light When the ignition switch is ON, the light will be illuminated, and the light shall be off after starting the engine. If the battery system is not fully operational, the light shall continue to be illuminated. 5.
- Page 36 6. Check engine indication light After turning the ignition switch on, the light shall be illuminated, and the light shall be off after starting the engine. If the light is on while the engine is running it indicates system failure. 7.
- Page 37 9. Dome lights 1) Dome light (front Dome light and rear dome light) 2) OFF position; the light goes out. 3) The dome light goes on when a door (except the tailgate) is opened. When all doors and the tailgate are closed, the dome light goes Front Dome Light out.
-
Page 38: Instruments
3.7 Instruments 1. Combination meter ① Tachometer; ② Speedometer(km); ③ Fuel gauge; ④ Water temperature gauge; ⑤ Odometer /Trip meter; ⑥ Warning and indication lights; ⑦ Trip meter reset button... - Page 39 ① Tachometer The tachometer indicates the rotate speed of the engine in rpm. During normal travel, the pointer does not rise to the red zone, otherwise it is indicated that the engine RPMs are too high. ② Speedometer • The speedometer indicates the vehicle’s speed in km/h; •...
- Page 40 ③ Fuel gauge When the ignition switch is “ON”, the fuel gauge shall indicate the fuel level in the fuel tank. “F” stands for full, “E” stands for empty. When the indication is on “E” or in the red area, it means that the fuel is not sufficient in the tank and the fuel must be filled as soon as possible.
- Page 41 ④ Water temperature gauge When the ignition switch is “ON”, the gauge shall indicate the temperature of cooling water in engine. During normal driving, the temperature of cooling water must be maintained in the normal range i.e. the range between “C” and “H” marks. When the indication is in the red area, it indicates that the engine is over-heated, immediately stop the vehicle and not to start engine until the engine cool.
-
Page 42: Cigarette Lighter And Ashtray
⑦ Trip meter reset button Every time the reset button is pressed for less than two seconds, indications between odometer and trip meter are changed; to turn the indication of trip meter to zero, press the reset button for more than two seconds. 3.9 Cigarette Lighter and Ashtray Cigarette lighter Set the ignition switch to ACC or ON, Press in on lighter. -
Page 43: Air Conditioner
3.10 Air Conditioning The air conditioner equipped in the vehicle has many functions such as cooling, heating, ventilation and defrosting. a-From center defogger; b-From side defogger; c-From side ventilator; d-From center ventilator; e-From under the instrument panel... - Page 44 1) Mode selection dial is used for choosing one of the following functions: (Face position) Air blows from center and side vent outlet. (Face/foot position) Heater air blows from foot vent outlet, colder air blows from center and side vent outlet. When the position of the temperature control dial is on “full hot” or “full cold”, the temperature of air is same on all vent outlets.
- Page 45 2) Blower speed selection dial is used to start the fan and adjust the fan speed. It has four shifting positions: off, low, moderate and high. a. 1-Mode selection dial; 2-Face position; 3-Front/face position; 4-Foot position; 5-Foot/defogger position; 6-Defogger position; 7-Air inlet mode selector; 8-Temperature control dial;...
- Page 46 1. Air conditioning operational indication a) Fresh air ventilation. b) Rotate mode selection dial to ventilation area and turn air inlet mode selector to outside air introduction, then turn blower speed selection dial to OFF, the fresh air enter the cab when driving.
- Page 47 ii. Face cooling/foot warm mode Rotate the mode selection dial to face/foot position and dial the air inlet mode selector to “Fresh” position, then turn the temperature control dial and blower speed selection dial to your desire. Except for turning the temperature control dial to the “the full hot ventilator” or “the full cold ventilator”, the air blowing from the central vent and side vent will be colder than from the foot vent.
- Page 48 v. If your vehicle is equipped with air conditioner, then there is an A/C button at the left side of blower speed selection dial, air conditioning system provides the following functions such as cooling and dehumidify. To turn on the air conditioning system, press the A/C button and turn the blower speed selector dial to the position except “OFF”.
- Page 49 2. Air conditioning cooling system The cooling system in your vehicle is of center air conditioning system consists of one condenser and two evaporators. The cool air blows from ventilators of the instrument panel inlet and the upper air conditioning ventilators, there are two blower speed switches: One is the blower speed selection dial fixed on the heater air blower controls panel, which control the air conditioning start and air blows from the front evaporator;...
- Page 50 5. Rapid cooling (using the recycle air) Besides dialing the air inlet mode selector to the “Recycle” turn other dials to the normal, if you have used this mode for a long time, the air in cabin can be polluted, so you should dial the air inlet mode selector to “Fresh”.
-
Page 51: Glove Box
5) When you have used air conditioning for a long time in the sun and the water temperature indicator shows water in the engine is over-heated, turn off the air conditioning for a while. 6) If the air conditioning has not been operated for a long time in the winter, you should operate it for 5 minutes every two weeks. -
Page 52: Radio And Tape Player
3.12 Radio and Tape Player The vehicle is equipped with AM/FM electronic tune tape radio player. The radio can be operated when the ignition switch is at “ON” or “ACC” position. 3.13 Parking brake lever The parking brake lever is located in the middle of the front seats. -
Page 53: 4Wd Operating Instructions
3.14 4WD Operating Instructions 1) Engage the High-Low gear application: • Ensure that the vehicle is not moving before engaging the Hi or Low application. • The Hi-Low Lever is located below the gear shift. 2) High Gear: • Ensure that the vehicle is at a complete stand still. •... - Page 54 3) Low Gear: • Ensure that the vehicle is at a complete stand still. • Shift the lever to the right or toward the passenger’s side until you feel a click. • Hi gear is now engaged and ready to use. 4) 4WD or 2WD Switch: •...
- Page 55 5) Operating in 4WD or 2WD: • The button will be set in the “OUT” position when 4WD mode is engaged and in the “IN” position when 2WD mode is engaged. • To switch to 4WD, the vehicle can be in motion, but at a speed of no more than 10 miles per hour.
-
Page 56: Exhaust Emissions And Restraining Devices
4) DRIVING ***FOR AUTOMATIC TRANSMISSION, SEE ADDITIONAL DOCUMENTATION PROVIDED WITH THE VEHICLE.*** 4.1 Exhaust Emissions and Restraining Devices The vehicle equipped with engine management system has exhaust purifying system, harmful emission CO, HC and NO produced by engine work will be oxidized and reduced in efficiently. Operation of this system can make harmful gas emissions we meet the requirements of state environment protection and emission regulations. -
Page 57: Inspecting Items Before Daily Use
c) Frequent starting of vehicle by pushing and towing the vehicle should be avoided, and an auxiliary battery should be used for starting. d) It is prohibited to idle the engine at removing spark plug connection, when checking the engine. e) Avoid excessive idling of the engine. -
Page 58: Vehicle Driving Notice
4.3 Vehicle Driving Notice WARNING!!! DO NOT DRIVE THE VEHICLE IN EXCESS OF 40KM/H ON UNEVEN SURFACE ROADS. DO NOT DRIVE THE VEHICLE FOR EXCESS OF TIME CONTINUOUSLY ON UNEVEN SURFACE ROADS. THIS MAY RESULT IN DAMAGE OF TRANSMISSION SYSTEM AND TIRES. -
Page 59: Operation Of Transmission
4.5 Operation of Transmission 1. Gear shifting Calcium lubricant is recommended for use of shift lever assembly. a) To start vehicle for manually shifted transmission: • Depress clutch pedal, shift the knob in first position, release the parking brake lever, and release the clutch slowly, depress accelerator pedal slowly, at the same time, releasing clutch. -
Page 60: Braking
4.6 Braking Brake is the device to make the vehicle slow down and stop; the brake distance will be long if the speed of the vehicle is high. For example, the brake distance in 60km/h is fourfold of that in 20km/h. -
Page 61: Clutch, Brake And Accelerator
4.7 Clutch, Brake and Accelerator 1. Clutch Depress clutch pedal as the No. 1 in the figure, can depart the output engine power from the tires, depress the clutch pedal when start up engine and change into other gear. WARNING!!! EXTENDED USE OF CLUTCH CAN RESULT IN A PREMATURE WEARING OF CLUTCH ASSEMBLY. - Page 62 2. Brake a) The vehicle is equipped with front disc brakes and rear drum brakes. Depress the braking pedal (marker 2); all the brakes will work. Free stroke of braking pedal is 3-8mm. b) If shrill noise is heard while depressing on the braking pedal, maybe it is normal because of environment like coldness, dampness, or snow weather.
-
Page 63: New Vehicle Driving
4.8 New Vehicle Driving Speed should be controlled within initial 2500km driving mileage; to make all movable parts and components of the vehicle fully run-in, performance and reliability of the vehicle can be given play to most extend in future. Therefore the following principle should be abided: Gear position First gear 10km/h... -
Page 64: High Speed Driving
4.9 High Speed Driving WARNING!!! DRIVER AND PASSENGER MUST USE SEAT BELT AT ALL TIMES. FOR CORRECT APPLICATION REFER TO SAFETY BELT CHAPTER. 1) When braking at high speed, the distance to stop will increase with speed, in order to assure safety, it is necessary to brake ahead of time. - Page 65 WARNING!!! WHEN DRIVING VEHICLE DOWN STEEP GRADE, AVOID BRAKING REPEATEDLY. FAILURE TO DO SO CAN RESULT IN OVERHEATING OF BRAKE. REDUCE SPEED AND SHIFT TO LOWER GEAR. ALLOW ENGINE TO IDLE AFTER YOU DRIVE YOUR VEHICLE UP A STEEP GRADE. NEVER SHUT ENGINE DOWN IMMEDIATELY AFTER STEEP GRADE CLIMB.
-
Page 66: Cargo And Towing
4.11 Cargo and towing/passenger The weight of cargo and the number of crew must not exceed the permissible limit. WARNING!!! TO AVOID INJURY TO THE PASSENGER AND DAMAGING THE VEHICLE, ANY CARGO SHOULD BE LAID SYMMETRICALLY AND TIED SAFELY. PREVENT CARGO FROM MOVING DURING VEHICLE OPERATION. CARGO HEIGHT MUST NOT EXCEED SEAT LEVEL. -
Page 67: Engine Overheat
5) EMERGENCY CONDITIONS 5.1 Engine Overheat a) High temperature gauge will illuminate if vehicle is overheating. b) Turn off air conditioning. c) The vehicle must be parked. d) Let the engine race in normal speed for several minutes, the water temperature meter will fluctuate between “H”and“C”. - Page 68 5.2 Vehicle Towing If you want to tow the vehicle please use a professional towing service. WARNING!!! TO AVOID DAMAGE TO THE VEHICLE WHEN TOWING, PLEASE USE WING EQUIPMENT AND TOW WITH CORRECT METHOD. ON MANUAL TRANSMISSION VEHICLE, DO NOT ALLOW THE WHEELS TO COME IN CONTACT WITH ROAD WHILE TOWING AS THIS WILL RESULT IN DAMAGE TO VEHICLE.
-
Page 69: Tools Included With Vehicles
6) DO IT YOURSELF 6.1 Tools Included with Vehicles Tools along with the vehicle include wheel spanner, two spanners of sizes 8×10mm and 12×14mm, dual screwdriver, spark plug spanner and rocking arm. These tools are located in the workbasket which can be used during maintenance and inspection of the vehicle. The manual jack can be raised by using the rocking arm and wheel spanner. - Page 70 WARNING!!! THE JACK CAN BE ONLY USED TO REPLACE WHEELS. AVOID USING JACK ON STEEP GRADES OR DOWNWARD GRADES. ENSURE THE JACK IS LIFTED TO 51 MM SO THE JACK IS IN CONTACT WITH FRAME CONVEX PLATFORM. DO NOT WORK UNDER THE VEHICLE WHILE IT IS RAISED BY THE JACK. DO NOT START THE ENGINE WHEN THE VEHICLE IS RAISED BY THE JACK.
- Page 71 2. Changing the Tire Replace the wheels as follows: a) Take out the jack, tools and spare tire from the vehicle. b) Loosen the nuts but not removed. c) Jack the vehicle. d) Remove the wheel nuts and tire. e) Install the new tire and wheel nuts which are faced with conical side to the wheel, tighten wheel nuts by hand, and then fasten the wheel to hub.
-
Page 72: Spark Plug
The tire should be checked with tire pressure gauge as follows: 165/70R13 (155R13LT、 165/70R13(155R13LT、 Item 155R13C) unloaded 155R13C) loaded Front wheel 210(200)±10kPa 230(220)±10kPa Rear wheel 210(200)±10 kPa 300(350)±10kPa 6.4 Spark Plug Spark plugs should be changed every 10000km. Replacement type is DK7RTC (DA465Q-16MC engine) F6TC (other engines), and screw is M14×1.25. -
Page 73: Fuses
6.5 Fuses When lights and electrical equipments fail, replace the fuse • Three fuse housings are installed on your vehicle. • The first is identified as the class fuse housing. • There are two fuses in it, one is to protect the positive (+) terminal of the battery from short circuit, and the other is to prevent the output terminal of the generator from short circuit. - Page 74 The second class fuse housing: There are some fuses which are intermediate between the first class and the third class fuses, and some fuses to protect some lights, and some fuses to protect the electrical equipments of large power consumption in it. The fuse housing is located in the left-upper area of the front compartment.
- Page 75 Ignition system 1) Ignition system 8) Rear window defogger 14) Position lights and tail lights, 2) ECM canister cleaning valve 9) Heater LH/background light 3) Oxygen sensor 10) Electric regulator 15) Position lights and tail lights, RH 4) Alternator/guage/ABS-ECU 11) ECM diagnosis connector 16) Front fog lights, rear fog lights 5) Reversing lights/turn-signal lights 12) Horn...
- Page 76 WARNING!!! THE FUSE MUST HAVE THE SAME CAPABILITY AS THE REPLACED ONE. NEVER USE METAL WIRE TO REPLACE THE FUSE.
-
Page 77: Replacement Of Light Bulbs
6.6 Replacement of Light Bulbs WARNING!!! THE BULBS REMAIN HOT AFTER LIGHTS ARE OFF, SPECIFICALLY HALOGEN BULBS. COMPRESSED HALOGEN GAS IS IN THE HEAD LIGHT’S BULBS. IF THE BULBS FALL DOWN OR BREAK BY KNOCKING, THEY MAY BURST CAUSING SERIOUS INJURY. DO NOT TOUCH BULBS SURFACE WHEN REPLACING. - Page 78 2. Head lights Open the hood, press the lock handle release connector, rotate the light base counter-clockwise. After installation of new light, reinstall the light base, and connect the connector. 3. Tail lights (reversing lights/stop lights/position lights/turn-signal lights) a) Driver dome lights: Press the reeds according to the arrow shown in figure. b) The bulbs in these lights are circular shape or egg shape.
- Page 79 4. Specifications of bulbs Item Parameters (W) Head light (halogen bulb) 60/55 Running lights (in the head light) Stop light /running light(in the tail light) 21/5 Reversing light (in the tail light) Front turn signal light(in the head light) Outside Side turn signal light Rear turn signal light(in the tail light) License light...
-
Page 80: Safety Notes About Inspection And Maintenance
7) INSPECTION AND MAINTENANCE 7.1 Safety Note About Inspection and Maintenance a) To insure the normal use of vehicle, periodic maintenance is necessary. b) It is hazardous to your health, life and safety to allow the vehicle run at idle speed in an enclosed area. - Page 81 1. Instrument and indication lights • Turn the ignition switch to “ON” position, check if each indication light illuminates and if fuel gauge works normally. Inspect each indication light and water temperature gauge. 2. Lighting system • Turn the ignition switch to “ON” position, check if headlights, position lights and other lights turn on.
- Page 82 6. Suspension system a) Inspect suspension spring for abrasion, breaks or damage. Replace if necessary. Check fastener for tightening to specified torque if necessary. Check the damper for leaks and the damper tube for damage. b) Inspect the color of exhaust. If the color of exhaust is too white or too black, there is engine failure.
-
Page 83: Daily Check And Maintenance
n) Inspect steering system. o) Inspect door hinge. 7.2 Daily Check and Maintenance 1) The work state of steering gear. 10) Work condition of illuminated device. 2) The work state of brake. 11) Work condition of indication lights and instrument. 3) Tire condition. -
Page 84: Periodic Inspection And Maintenance Schedule
7.3 Periodic Inspection and Maintenance Schedule Inspection and maintenance schedule km×1000 Maintenance schedule should be determined as per speed mileage Month meter reading or month numbers numbers whichever is first reached Engine — — — — Water pump belt (tension and wearing) Synchronous indented belt (damage —... - Page 85 Fuel hoses and connectors (rubber hoses ageing, connectors crack, damage or loose) Rubber hoses and connectors of engine — — — — — — cooling system (water leakage and damage) High pressure harness (aging and — — — — — —...
- Page 86 Check wiring harness for damage, connecting and grounding for security — — — — — — — 18 Engine coolant — — — — — — — — 19 TWC Rocker arm cover venting hoses and — — — — —...
- Page 87 Braking hose and braking pipe (leakage — and damage and shriveled) 28 Braking fluid (level and leakage) Brake pedal (distance between the pedal and the front floor) Parking control lever and cable (stroke and damage) 31 Tire (abnormal wearing, pressure) —...
- Page 88 This table is applied for the model installed with the electric fuel injection engine DA465Q-1A supplied by UAES. Note: Symbols in table above: A – Check or adjustment R—Replace I – Inspection, adjustment or change should be conducted if necessary T –...
- Page 89 Rigorous road driving periodic maintenance table Maintenance item Rigorous road code Maintenance schedule Engine oil and oil filter A, C, D, E, F Replace: every 5,000km or 3 months Clean: every 2,500km Air filter Replace: every 30,000km or 24 months Fuel filter B, C Replace: every 20,000km or 12 months...
-
Page 90: Simple Inspection And Maintenance Items
7.4 Simple Inspection and Maintenance Items 1) Lubrication system • Engine oil and oil filter 2) Oil quantity check • Park the vehicle on horizontal ground, check the oil quantity before starting the engine or 2-3 minutes after engine is stopped. When checking, pull out oil gauge in crankcase, clean it using a cloth. - Page 91 b) Replace oil and oil filter • Stop the engine, take down the drain bolt on the engine bottom, drain the oil when the engine body is warm, and fill about 2.8 liters of new oil. • Start engine and make it run 5 minutes, check oil level after engine has stopped running for at least 3 minutes.
- Page 92 Remove drain plug before replacing gear oil. Drain out the original oil and add new oil after installing the drain plug. The adding capacity of transmission gear oil is as follows: Item Capacity gear 1.0 Liters gear 1.3 Liters WARNING!!! WHEN TIGHTENING OIL FILTER, IT IS IMPORTANT TO IDENTIFY THE CONTACT POSITION EXACTLY BETWEEN THE WASHER AND MOUNTING SURFACE.
- Page 93 d) Replace oil filter • Unscrew oil filer plug. • Unscrew oil drain plug. Drain gear oil in rear-axle housing (put oil in container so as not to pollute the ground.) • Tighten oil drain plug – tighten torque is 50-70N°m.
- Page 94 3) Other liquids a) Brake fluid This vehicle uses the 9208 synthetic brake liquid; the level of the fluid in the reservoir should be between the “MIN” mark and “MAX” mark. Fill the same type of braking fluid into the braking system to the “MAX”...
- Page 95 b) Engine coolant The engine coolant for this vehicle is the FD40 solution. If there is no coolant, DO NOT use hard water due to high acid concentration. Distilled water is recommended. When used in winter, the garage should be heated; otherwise coolant should be drained immediately after shutdown to avoid damaging the radiator and engine.
- Page 96 Check the coolant quantity in the tank. It is normal if quantity is between full and low. When it is below “LOW”, the coolant should be filled in using the following steps: a) Remove heater relief hose. b) Screw out the radiator cover and remove the coolant pot cap. c) Fill in the coolant to radiator until it reaches concave position.
- Page 97 WARNING!!! DO NOT OPEN RADIATOR COVER WHEN THE ENGINE IS HOT. When replacing coolant for long term usage, you must abide by the following: a) Remove radiator cover and open water drain valve on the bottom of radiator to drain the coolant under cooling condition of engine.
- Page 98 WARNING!!! THE VEHICLE MUST BE PARKED ON LEVEL ROAD SURFACE WHEN COOLANT IS REPLACED. WHEN FILLING OR REPLACING THE COOLANT, IT IS SUGGESTED THAT FD40 TYPE VEHICLE ENGINE COOLANT OR GLYCOL AQUEOUS SOLUTION WHICH PH VALUE IS BETWEEN 7.0 AND 8.5 IS ADOPTED. DIFFERENT BRANDS OF COOLANT SHOULD NOT BE MIXED.
- Page 99 Check the washer regularly to insure the washer fluid is filled to adequate level. The washer fluid level must be between the specified limit marks stamped on the container. Applied area (season) Diluting proportion Frozen Temperature Normal 1 portion (fluid) and 2 portions(water) 10 Degrees Cold areas (winter) 1 portion (fluid) and 1 portion (water)
- Page 100 5) Tire Front and rear tire pressure of this vehicle is recorded in pressure label. Always inspect tires for damage, abnormal wear, cracks and impaled objects as well as tire pressure (using pressure gauge) make adjustments if necessary. WARNING!!! IT IS RECOMMENDED TO CHECK TIRES IN COLD VS. WARM CONDITIONS FOR ACTUAL RESULTS.
- Page 101 WARNING!!! WHEN REPLACING TIRES, USE EXACT SIZE AND DIMENSION WHICH IS IMPERITIVE FOR USE OF THE VEHICLE FOR STEERING WHEEL AND VEHICLE CONTROL CHARACTERISTICS. INSTALLING A DIFFERENT TYPE OF TIRE CAN AFFECT THE READING OF SPEEDOMETER AND ODOMETER. 6) Water pump belt WARNING!!! AVOID DIRECT CONTACT THE BELT WHEN THE ENGINE IS RUNNING.
- Page 102 7) Steering wheel There is natural resistance felt while steering vehicle. To determine natural resistance (which is between 0-30MM), turn the steering wheel left and right slowly. Inspect for smoothness of the operation. 8) Checking clutch pedal Move clutch pedal with hand and measure the moving gap before you feel light resistance. The gap, which is the clutch pedal free stroke, should be within 20-30MM.
- Page 103 9) Battery The battery installed in your vehicle only needs simple maintenance. Inspect he battery terminals and the battery bracket for corrosion. To remove the corrosion as necessary, use hard steel brush and ammonia or use the mixture of sodium bicarbonate and water. After removing, rinse with the clear fresh water.
-
Page 104: Maintenance Of Interior
8) LUBRICATION AND ANTI-CORROSION 8.1 Maintenance of Interior 1) Plastic, artificial leather, textile material, fuzzy interiors Wipe it with soft cloth such as gauze dipped in 3% neutral detergent aqueous solution. Remove the detergent with a soft cloth soaked in clear fresh water. 2) Carpet material Use of vacuum cleaner is recommended. -
Page 105: Maintenance Of Exterior
8.2 Maintenance of Exterior Foreign matter deposited on paint coat surface such as substance containing salt, chemical preparation, greasy dirt, bird droppings and industrial waste will damage paint coat. 1) Cleaning the vehicle body a) Water the upper parts of the vehicle. b) If water can not remove the dirt, you can use the neutral detergent. - Page 106 2) Method of waxing To protect auto-body further, wax after wash. a) It is recommended to wax vehicle only 1 or 2 times per month. b) Avoid direct sunlight while waxing vehicle. 3) Maintenance of windshields and windows Always use proper windscreen detergent (glass detergent etc.) to clean windows. WARNING!!! AVOID DAMAGE TO THE ELECTRIC FUSE WHILE WASHING INSIDE.
-
Page 107: Anti-Corrosion Of Vehicle
WARNING!!! DO NOT USE HARD TOOL SUCH AS BRUSH WHILE CLEANING THE SURFACE. DO NOT USE WAX WITH ABRASIVE. IF THE VEHICLE HAS BEEN STAINED WITH GASOLINE, LIGHT OIL, BRAKE FLUID, OIL, GREASE, SULFURIC OR BATTERY LIQUID, USE A SOFT CLOTH WITH NEUTRAL DETERGENT TO CLEAN IT AT ONCE. 8.3 Anti-corrosion of Vehicle A vehicle’s lifetime can be extended by noting erosion, environmental conditions and maintaining vehicle properly.
Need help?
Do you have a question about the T-MAG XC Series and is the answer not in the manual?
Questions and answers