Advertisement
Table of Contents
- 1 Table of Contents
- 2 Safety
- 3 Introduction
- 4 Operating Your PROHEAT
- 5 Optional Sleeper Fan Operation
- 6 Toggle Switch - Timer - PFC
- 7 Timer Instructions
- 8 PFC Instructions
- 9 Caring for Your PROHEAT
- 10 Troubleshooting
- 11 Troubleshooting Operation Indicators/Diagnostic Codes
- 12 Troubleshooting Function Diagnostics
- 13 Warranty
- 14 Owner's Responsibility
- Download this manual
Advertisement
Table of Contents
Troubleshooting

Related Manuals for Proheat X30


Summary of Contents for Proheat X30
- Page 1 OWNER’S HANDBOOK...
-
Page 2: Table Of Contents
Toggle Switch – Timer – PFC ................... Timer Instructions ......................PFC Instructions ......................Caring for your PROHEAT ....................Troubleshooting ....................... Troubleshooting – Operation Indicators/Diagnostic Codes ..........Troubleshooting – Function Diagnostics ................. Warranty .......................... Owner’s responsibility ...................... X30 Owner’s Handbook Page 1... -
Page 3: Safety
Electrical components in this product may contain lead, a chemical known to the State of California to cause cancer and birth defects and other reproductive harm. Page 2 X30 Owner’s Handbook... - Page 4 FIRE HAZARD – Do not place any flammable items around the heater and exhaust pipe. WARNING BATTERIES – Wear hand and eye protection when working near batteries. Do not smoke or use WARNING open flames near batteries. X30 Owner’s Handbook Page 3...
-
Page 5: Introduction
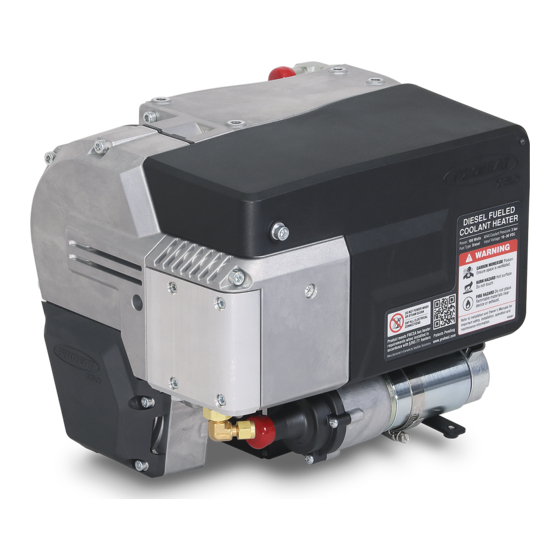
Introduction Congratulations on your purchase of a PROHEAT X30 diesel-fired heater. This handbook is provided to summarize the operation and maintenance of the PROHEAT X30 for the Owner/Operator. For complete information, please refer to the Installation and Service manual SL9211 at www.proheat.com... -
Page 6: Operating Your Proheat
Your PROHEAT X30 is controlled by either an ON/OFF manual toggle switch or by an optional PROHEAT 7-day timer. The timer can be controlled manually, or it can be set to start at a predetermined time. Both devices have a light that indicates when the heater is operational as well as flashing to indicate an error state. - Page 7 PROHEAT will continue to repeat steps 2 to 5 until it is switched “off.” 8. SWITCH OFF – If PROHEAT is in Full Output, it will Cool Down (Purge) first, then shut “OFF”. If PROHEAT is in Standby, it will shut “OFF” immediately.
-
Page 8: Optional Sleeper Fan Operation
• Sleeper curtains are closed: The PROHEAT is designed to heat the sleeper and engine as efficiently as possible – heating the cab, fuel tanks and batteries means longer run time which will require more battery power X30 Owner’s Handbook Page 7... -
Page 9: Toggle Switch - Timer - Pfc
106F Timer Mode Down Arrow Solid Green Led = Timer Active 11:52AM T1 T2 T3 00:59 STANDARD Select Soft Key Back Soft Key Select (Default), Set, Back (Default) Or No On, Off, Edit Or Yes Page 8 X30 Owner’s Handbook... -
Page 10: Timer Instructions
Instructions 958829 at www.proheat.com aNual operatioN imed peratioN MANUAL button is used to turn the PROHEAT STEP 1 Press and Hold “TIMER” (green light On and Off when desired. will turn on and “T1” will flash). STEP 1 Press “MANUAL” to turn on the STEP 2 Press “... -
Page 11: Pfc Instructions
Red otice Manual Button LED will go out. For complete PFC information, please refer to the PFC Installation and Operating Instructions 949900 at www.proheat.com Page 10 X30 Owner’s Handbook... -
Page 12: Caring For Your Proheat
Visually inspect the Proheat, mounting brackets, fuel line, harnesses, coolant lines and exhaust system for damage, loose parts and leakage. Run the Proheat a minimum of once a week to keep new fuel in the heater’s critical components. PROHEAT annual maintenance:... - Page 13 • Ensure exhaust pipe clamps are tight. • Remove and inspect fuel filter. heck ilter Clean or replace as necessary. Fuel Filter Apply Diesel to O-Rings Torque to 150±10 In/Lbs (17±1.1 Nm) Page 12 X30 Owner’s Handbook...
- Page 14 Crimp Clamp x2 • Check the condition of batteries and the power connections. heck atterieS The heater will not function properly with weak batteries or corroded connections. • Note For best results load test each battery individually. X30 Owner’s Handbook Page 13...
- Page 15 • Use a wire brush to loosen the deposits and a vacuum to remove debris. • Torque securing screws to 12 ± 3 in/lbs (1.4 ± 0.3Nm). Heat Exchanger Fins Securing Screws Exhaust Pipe Combustion Tube Page 14 X30 Owner’s Handbook...
- Page 16 Do not ASSEMBLE press together. Outer Barrel Nozzle Stem Holes & Grooves Must be Clear Tor que to 30 ±3 In/Lbs Distributor (3.4 ±0.3 Nm) Counter Bore No Nicks in O-Ring No Nicks in O-ring X30 Owner’s Handbook Page 15...
- Page 17 • Check to see that both operate as described in imer oggle witch the Operation Manual. • Correct air pressure is important – refer to the X30 Installation and Service manual SL9211 for reSSure heck further information. • Run the system for at least 15 minutes...
-
Page 18: Troubleshooting
The PCM (PROHEAT Control Module) has self diagnostics for reliable operation, safety and protection of the PROHEAT. If a problem is detected it shuts the PROHEAT OFF and will start blinking the diagnostic indicator light on the PCM cover, toggle switch, timer red manual light or OEM indicator light (installation options). -
Page 19: Troubleshooting Operation Indicators/Diagnostic Codes
LOCKOUT MODE – After 6 consecutive start 12-3 Open circuit. faults (Code 01) or on the first occurrence of 12-4 Speed. Overheat (Code 04) the X30 PCM will go into 12-5 PCM damage. Lockout mode, Power to the X30 PCM must be System 16-1 Short circuit. - Page 20 PCM’s 7 segment display located under the PCM cover. The diagnostic indicator light may also be located: • In the toggle of the ON/OFF switch provided by PROHEAT (standard installation kit). • In the PROHEAT T-II Timer manual ON light (red).
- Page 21 The operation indicators signal normal functioning of the PROHEAT. These three states do not indicate a fault. Power Up The power up indicator communicates that the PROHEAT power has been supplied. All segments of the LED momentarily flash “ ” twice, followed by a 2 second display of the configuration code number (if configuration is set) or “...
- Page 22 Troubleshooting Operation Indicators/Diagnostic Codes The PROHEAT will be in the Cool Down (Purge) state as defined in Modes of Operation when Cool Cool Down Down LED is displayed. Refer to Installation and Service manual SL9211 at www.proheat.com COMPONENT DIAGNOSTIC CODES: This section covers individual electrical components.
-
Page 23: Troubleshooting Function Diagnostics
START (01) & FLAME OUT (02) Diagnostic Code PROHEAT is designed to burn Diesel (ULSD #1, #2 and Arctic Blend), Kerosene (K-1), Jet (A, A-1 and JP8), Bio fuels (up to B20* ). During cold weather, the correct grade of fuel or fuel blend MUST be used to prevent gelling and to ensure fuel flow. - Page 24 Problems with the vehicle and PROHEAT coolant system are indicated by the above diagnostic codes. The OVERHEAT Code 04 will cause the X30 PCM to go into Lockout mode. Lockout mode protects the heater from damage and the coolant system must be checked thoroughly before clearing the OVERHEAT Code 04.
- Page 25 VOLTAGE (05) DIAGNOSTIC CODE: PROHEAT constantly monitors voltage at the heater. The range for a 12-volt heater is 9.5 to 32 volts and for a 24-volt heater, 19.5 to 32 volts. Should the voltage go out of this range for longer than 10 seconds, the PROHEAT will shut down and the above code will be indicated.
-
Page 26: Warranty
SeaStar Solutions. Accessories In addition each marine installation must be inspected and approved by an Authorized PROHEAT Dealer. supplied, but not manufactured by SeaStar Only those installations which are approved, and so registered, will be eligible for warranty coverage Solutions, shall be covered by the manufacturer’s... -
Page 27: Owner's Responsibility
SEASTAR SOLUTIONS IS NOT 4. Any progressive damage to the engine or vehicle arising out of failure of the PROHEAT. RESPONSIBLE FOR INCIDENTAL OR 5. PROHEATs which have been modified or use of non-standard parts not approved by SeaStar Solutions. - Page 28 Notes X30 Owner’s Handbook Page 27...
- Page 29 Notes Page 28 X30 Owner’s Handbook...
- Page 30 Tel: 604-270-6899 Fax: 604-270-7172 www.proheat.com Designed and Manufactured in North America ©2017 Marine Canada Acquisition Inc. (DBA SEASTAR SOLUTIONS) Proheat is a registered trademark of Marine Canada Acquisition Inc. and its subsidiary companies. Printed in Canada 06/17 PID# SL9210 REV. A...
Need help?
Do you have a question about the X30 and is the answer not in the manual?
Questions and answers