Table of Contents
Advertisement
Mounting instructions
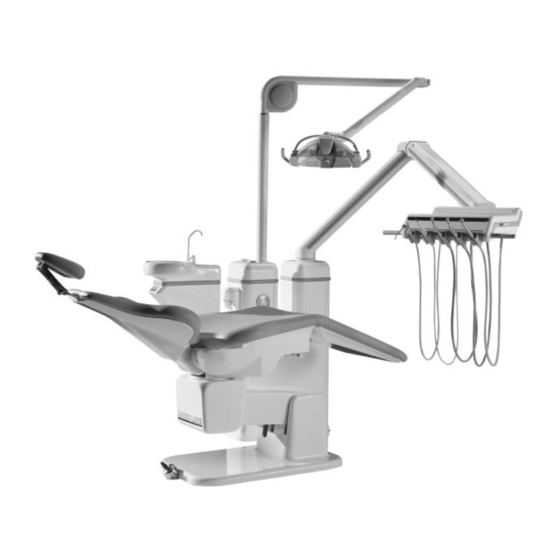
UnicLine 5D
UnicLine patient chair
Dental light
KEEP THIS MANUAL WITH UNIT AT ALL TIMES
Manuals for OEM equipment are included in the shipping boxes.
Installation, Service, and Maintenance by authorized Heka Dental dealers only.
Heka Dental A/S
Catalogue no.: KA-0003-EN
Version 3.3
Advertisement
Table of Contents

Related Manuals for Heka Dental UnicLine 5D

Summary of Contents for Heka Dental UnicLine 5D
- Page 1 UnicLine patient chair Dental light KEEP THIS MANUAL WITH UNIT AT ALL TIMES Manuals for OEM equipment are included in the shipping boxes. Installation, Service, and Maintenance by authorized Heka Dental dealers only. Heka Dental A/S Catalogue no.: KA-0003-EN Version 3.3...
-
Page 2: Table Of Contents
Contents 1. Unpacking ....................3 2. Installation ....................4 Static electricity ................... 4 Installation requirements ..............4 Console ....................4 Instrumentarm and instrument table ........... 6 Foot control ..................8 Operating lamp ..................8 X-ray machine ..................8 Call system ..................8 Patient chair .................. -
Page 3: Unpacking
Unpacking The equipment is packed in three separate packages as follows: Dental unit with armset, accessories, and a box containing the mounting parts UnicLine patient chair Dental light Unpack the unit and chair with caution. Remove the bubble plastic around the unit console and demount the sides of the console by turning the 2 large screws with the UnicLine logo on them (1). -
Page 4: Installation
Installation Static electricity Avoid electrostatic discharge! Before touching any of the electronics, make sure the equipment is switched off and the unit is connected with the equipment’s ground. In an emergency, hold on to the console during the mounting. Installation requirements For installation placement, see Chapter 5 –... - Page 5 Take the nuts off each mounting bolt and place the unit console over the 6 bolts in the floor. Place a level on the arm’s contact face on the console, where the arm set is to be mounted and adjust the balance screws with the enclosed tool, until the console is levelled.
-
Page 6: Instrumentarm And Instrument Table
Instrumentarm and instrument table With the instrument arm wrapped up in plastic film, carefully pull wires and tubes free. Place a metal washer (1) on the top of the console as indicated. Next, place the ball bearing (2) and then a metal washer (3). Lastly, place the Teflon washer (4) as shown in the diagram below. -
Page 8: Foot Control
Foot control Mount the foot control through the socket (1), and tighten with your fingers. Operating lamp Mount the adaptor tube with the plastic bracket in the hole (2) and gently push the tube down, until it is mounted tightly. Lead the lamp cable through the adapter tube and feather until it reaches the power distribution board. -
Page 9: Patient Chair
Patient chair Unwrap the chair. Gently place the chair on the side, leaning against the floor. Mount the foot control. Connect the socket to the distribution board. Gently place the chair in its normal position again. Mount the chair on the floor as shown in the installation plan. -
Page 10: Connections
2.10 Connections Rinse the water supply and ventilate the air supply completely, before connecting the unit (for at least for 5 min.). Connect the green tube (water) to the tap. Use the supplied fittings and the water filter input slot. Open the water supply. Make sure you tighten and inspect all connections for any leaks. -
Page 11: Adjustment
2.13 Adjustment Turn the unit on. Pull knob (1) on water filter up and adjust the water pressure to 0.5 Bar. Activate the syringe with water until all air has left the system. Adjust the water pressure to 2 Bar and push button (1) down again. Pull bottom (2) on the air filter up and adjust air pressure to 4.5 Bar. - Page 12 Mount the two suction hoses ensuring the larger hose is placed away from the chair. If the unit is provided with an automatic suction pipe cleaning system, fill the container with cleaning fluid. Mount all instruments on the instrument bridge. Test each instrument function.
-
Page 13: Final Test
Final Test To be completed by authorized technician. -
Page 14: Installation/Service Card
Attention The installation card must be completed and returned to Heka Dental A/S by an authorized service engineer. The two annual service cards must be completed by an authorized service engineer and returned to Heka Dental A/S immediately after each service visit in order for the 3-year warranty to remain in effect. - Page 15 To be completed by authorized technician and the Dentist.
-
Page 16: Installation Plan And Floor Design
Installation plan and floor design min. 440... - Page 17 3/8"R 3/8"R ø32 ø32 Monteringshuller i gulvet - Ø10 mm. Klokkekald - 2x1.5 Trous de montage - Ø10 mm. Ligne de sonnerie - 2x1.5 Montierungsslöcher - Ø10 mm. Klingelleitung - 8x0.5 Mounting holes - Ø10 mm. Bell lead - 2x1.5 Styreledning til sug - 2x1.5 Koldt vand - R 3/8"...
-
Page 18: Drilling Diagram
Drilling diagram Please use the enclosed diagram when placing the unit in the clinic. - Page 19 Baldershøj 38 * DK-2635 Ishøj * Denmark Tel. +45 4332 0990 * Fax +45 4332 0980 www.heka-dental.dk...
Need help?
Do you have a question about the UnicLine 5D and is the answer not in the manual?
Questions and answers