Table of Contents
Advertisement
Quick Links
Pmod ESP32 Reference Manual
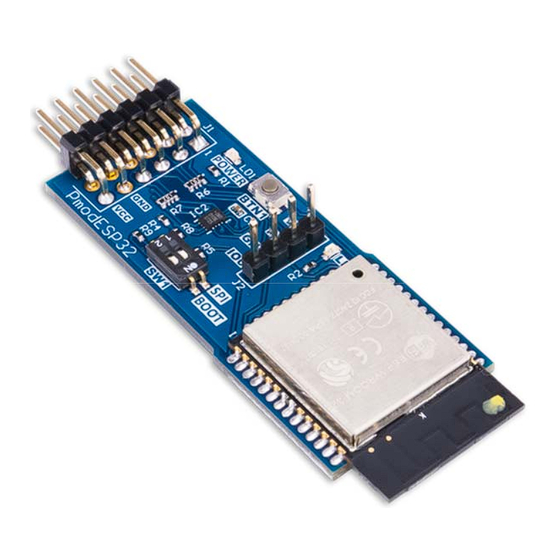
The Digilent Pmod ESP32 features a radio with support for 802.11 b/g/n Wifi and dual-
mode Bluetooth. This module is perfect for connecting your FPGA or microcontroller
projects to your home network, the internet, or any bluetooth hardware. The Pmod
ESP32 contains a Tensilica Xtensa microprocessor, which can be operated in slave
mode with AT commands over a UART interface. Additionally, the Pmod ESP32 can be
operated in standalone mode and run custom applications. In slave mode, the module
can be configured as an access point to host a Wifi network, or a station to connect to
an existing network. Slave mode functionality over UART is made easy through the use
of a well documented AT command set. An additional UART port is provided on the top
of the module for system debugging and firmware flashing. Standalone mode gives the
user access to the full API and SDK provided by Espressif for operation through the use
of the Xtensa tool-chain. The Pmod ESP32 is a great and cost-effective way to add WiFi
and Bluetooth to any project.
Advertisement
Table of Contents

Subscribe to Our Youtube Channel
Related Manuals for Digilent Pmod ESP32


Summary of Contents for Digilent Pmod ESP32
- Page 1 Standalone mode gives the user access to the full API and SDK provided by Espressif for operation through the use of the Xtensa tool-chain. The Pmod ESP32 is a great and cost-effective way to add WiFi and Bluetooth to any project.
-
Page 2: Specifications
Features Full 801.22 b/g WiFi stack with support for TCP, UDP, and SSL connections Connect to WiFi networks or broadcast your own. Act as a server or a client Bluetooth v4.2 BR/EDR and BLE compatibility One UART port for system debugging and application flashing ... - Page 3 Width: 0.80 in. (2.03 cm) Functional Description The Pmod ESP32 integrates WiFi and Bluetooth 4.2 solutions on a single chip along with dual high performance cores and several peripherals. The ESP32 possesses the ability to connect to an existing WiFi network or broadcast its own as an access point.
- Page 4 The Pmod ESP32 has the ability to operate in slave mode using the UART interface on the top row of pins. In slave mode, the device responds to a specific set of AT commands. More information about the AT command firmware can be found here: ESP 32 AT Source.
- Page 5 AT Command (Slave) Mode The Pmod ESP32 is delivered to users in slave mode. In slave mode, the top row of pins are mapped to their UART functionality. It is important that switches SW1.1 and SW1.2 are both in the “off” position when power is applied to the device. Once power has been applied, the value of SW1.2 is arbitrary.
- Page 6 Standalone Mode The Pmod ESP32 features an Xtensa dual-core 32-bit LX5 microprocessor. The Pmod is delivered to customers with the AT Instruction firmware pre-loaded onto it. However, the user can write and put custom applications on the Pmod and operate the device outside of slave mode.
-
Page 7: Quick Start
A USB-UART bridge device such as the Pmod USB UART To get started with setting up the tools for building projects for the Pmod ESP32, please reference the guide given by Espressif. When connecting to the Pmod to flash a custom application to it, utilize the UART port on top of the Pmod (J2), rather than the UART port broken out on the top row of pins. - Page 8 6. In your terminal, you should see the Pmod echo back your “AT” command to you and also respond with “OK” 7. You are now set to send AT commands to your Pmod ESP32. Try to connect it to your local wireless network by sending the command AT+CWJAP=“your network name”,“your network password”.
Need help?
Do you have a question about the Pmod ESP32 and is the answer not in the manual?
Questions and answers