
Related Manuals for Makita XCV10


Summary of Contents for Makita XCV10
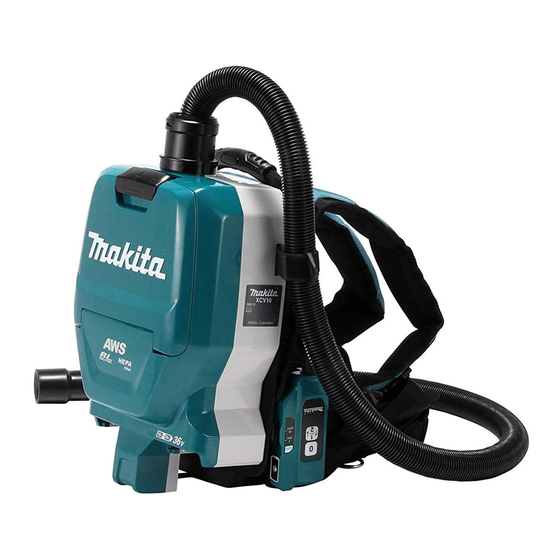
- Page 1 INSTRUCTION MANUAL MANUAL DE INSTRUCCIONES Cordless Backpack Vacuum Cleaner Aspiradora de mochila a batería XCV10 IMPORTANT: Read Before Using. IMPORTANTE: Lea antes de usar.
-
Page 2: Specifications
ENGLISH (Original instructions) SPECIFICATIONS Model: XCV10 Capacity Filter bag 2.0 L (0.53 gal.) Dust bag 1.5 L (0.40 gal.) Maximum air volume 1.8 m /min (64 cu.ft/min) Vacuum 110 hPa Dimensions (L x W x H) 230 mm x 152 mm x 373 mm (excluding the harness) (9″... -
Page 3: Additional Safety Rules
Do not put any object into openings. Under abusive conditions, liquid Do not use with any opening blocked; may be ejected from the battery; keep free of dust, lint, hair, and any- avoid contact. If contact acciden- thing that may reduce air flow. tally occurs, flush with water. - Page 4 Hot substances that are burn- If you drop or strike the cleaner, • ing or smoking (cigarettes, check it carefully for cracks or dam- matches, incense sticks, can- age before operation. dles, hot ashes), sparks and Do not bring close to stoves or other metal dust generated by cutting heat sources.
- Page 5 It will 17. Do not remove the wireless unit from the slot also void the Makita warranty for the Makita tool and while the power is being supplied to the tool. charger. Doing so may cause a malfunction of the wireless unit.
-
Page 6: Overload Protection
If not, 26. Do not insert any devices other than Makita it may accidentally fall out of the tool, causing injury to wireless unit into the slot on the tool. -
Page 7: Adjusting Belts
Adjusting belts Indicator lamps Remaining capacity The tightness of the shoulder belts, upper and lower Lighted Blinking belts can be adjusted. Put your arms through the shoul- der belts first then fasten the lower and upper belts. 75% to 100% To tighten, pull the end of the strap as illustrated. -
Page 8: Stand-By Switch
Carrying hook Switch action Always grab the carrying hook when handling the vac- To start vacuuming, press button once. The vacuum uum cleaner body. cleaner will start in the same suction power when you turned it off previously. When you press button while the vacuum cleaner is running, the suction power switches between normal (1) and higher (2) suction... -
Page 9: Connecting The Tool
Connect the front cuff to the tool's extraction ASSEMBLY outlet. CAUTION: Always be sure that the tool is switched off and the battery cartridge is removed before carrying out any work on the tool. Assembling hose Insert the hose cuff into the vacuum cleaner body and turn it clockwise. - Page 10 Fasten the sleeve of bent pipe assembly onto the For the slide-type extension wand hose. Shoulder the vacuum cleaner body then insert the extension wand into the bent pipe assembly until it clicks. To disconnect, extract the extension wand with pressing the button.
- Page 11 Hose hook For the ring-type extension wand Shoulder the vacuum cleaner body then twist and insert When you suspend the operation, the hook on the bent the extension wand into the bent pipe assembly. To pipe assembly can be used for hanging the wand on the disconnect, twist and extract it.
-
Page 12: Operation
Insert the filter bag into the slit on the upper side of Align the hole of the filter bag with the hose cuff the room as illustrated. and push the cardboard portion to the end. Make sure that the rubber ring on the filter bag goes over the rim on the hose cuff. - Page 13 Shoulder the vacuum cleaner body and fas- Replace the filter bag when it becomes full. Open ten lower and upper belts. Adjust the tightness as the lid and take out the filter bag. Pull the strip on the necessary. side of the opening to shut the filter bag and dispose of the filter bag in whole.
- Page 14 Do not press the wireless activation button too hard and/or press the button with an object with a sharp edge. NOTE: Wireless activation needs Makita tools equipped with the wireless unit. NOTE: Prior to the initial use of the wireless activation function with each tool, the tool registration is required.
- Page 15 Tool registration for the cleaner NOTE: A Makita tool supporting the wireless activa- tion function is required for the tool registration. NOTE: Finish installing the wireless unit to the tool before starting the tool registration.
- Page 16 Push the wireless activation button on the tool Starting the wireless activation briefly. The wireless activation lamp will blink in blue. function NOTE: Finish the tool registration for the cleaner for wireless activation. NOTE: Always place the cleaner so that you can see the status of the wireless activation lamp.
- Page 17 Set the stand-by switch on the cleaner to " I (ON)". Erasing all tool registrations You can erase all tool registrations from the cleaner as follows. ► 1. Stand-by switch Press the wireless activation button on the cleaner for 6 seconds. The wireless activation lamp blinks in green and then become red.
- Page 18 Description of the wireless activation lamp status ► 1. Wireless activation button 2. Wireless activation lamp The wireless activation lamp shows the status of the wireless activation function. Refer to the below table for the meaning of the lamp status. Status Wireless activation lamp Description...
- Page 19 Before asking for repairs, conduct your own inspection first. If you find a problem that is not explained in the manual, do not attempt to dismantle the tool. Instead, ask Makita Authorized Service Centers, always using Makita replace- ment parts for repairs.
-
Page 20: Maintenance
Discoloration, deformation or cracks may result. To maintain product SAFETY and RELIABILITY, repairs, any other maintenance or adjustment should be performed by Makita Authorized or Factory Service Centers, always using Makita replacement parts. Cleaning the HEPA filter CAUTION: Do not use the vacuum cleaner without a filter or continue to use dirty or damaged filter. -
Page 21: Cleaning The Dust Bag
OPTIONAL ACCESSORIES CAUTION: These accessories or attachments are recommended for use with your Makita tool specified in this manual. The use of any other accessories or attachments might present a risk of injury to persons. Only use accessory or attachment for its stated purpose. -
Page 22: Instrucciones Importantes De Seguridad
ESPAÑOL (Instrucciones originales) ESPECIFICACIONES Modelo: XCV10 Capacidad Bolsa del filtro 2,0 L (0,53 gal.) Bolsa recolectora de polvo 1,5 L (0,40 gal.) Volumen de aire máximo 1,8 m /min (64 cu.ft/min) Aspiradora 110 hPa Dimensiones (La x An x Al) 230 mm x 152 mm x 373 mm (sin incluir el arnés) - Page 23 No manipule el aparato con las Cuando no se esté usando el paquete de manos mojadas. baterías, guárdelo lejos de otros objetos metálicos tales como sujetapapeles No introduzca ningún objeto en las aber- (clips), monedas, llaves, clavos, torni- turas. No lo utilice con ninguna abertura llos u otros objetos metálicos pequeños bloqueada;...
-
Page 24: Reglas De Seguridad Adicionales
REGLAS DE Tal acción podría ocasionar un incendio, lesiones y/o daños materiales. SEGURIDAD Para reducir la exposición a estas sustancias químicas, utilice un ADICIONALES equipo de protección respiratoria aprobado, tal como las máscaras Lea cuidadosamente este manual contra polvo que están especial- de instrucciones y el manual de mente diseñadas para filtrar partí- instrucciones del cargador antes de... - Page 25 Un cortocircuito en la batería lesiones personales y daños. Asimismo, esto inva- puede causar un flujo grande de lidará la garantía de Makita para la herramienta y el cargador Makita. corriente, sobrecalentamiento, posibles quemaduras e incluso una Consejos para alargar al máximo...
-
Page 26: Descripción Del Funcionamiento
26. No inserte ningún otro dispositivo que no sea inmediato. la unidad inalámbrica de Makita en la ranura de Utilice la unidad inalámbrica solamente con la herramienta. herramientas de Makita. -
Page 27: Protección Contra Sobrecarga
Para quitar el cartucho de batería, deslícelo de la herra- Indicación de la capacidad restante mienta mientras desliza el botón sobre la parte delan- de la batería tera del cartucho. Para colocar el cartucho de batería, alinee la lengüeta Únicamente para cartuchos de batería con el sobre el cartucho de batería con la ranura en la carcasa indicador y deslice en su lugar. - Page 28 Correas para hombro Posición de la caja del interruptor La caja del interruptor puede engancharse en ambos lados de la correa inferior. Coloque el cable de manera que la caja del interruptor quede del lado que desee. Para evitar daños al cable, haga que éste pase a través del gancho tal como se muestra en la ilustración.
-
Page 29: Montaje
Interruptor de modo en espera Abrazadera de la manguera El interruptor de modo en espera es el que sirve para encender/ La abrazadera de la manguera puede utilizarse para apagar la función de activación inalámbrica. La aspiradora está sujetar la manguera o la boquilla amplia. en el estado de modo de espera con independencia de la posi- Para fijar la manguera al cuerpo de la aspiradora, pase la abrazadera de la manguera a través de la ranura en... -
Page 30: Conexión De La Herramienta
Conexión de la herramienta Si el conjunto de tubo curvo está acoplado a la man- guera, afloje el manguito del conjunto de tubo curvo y retírelo. ► 1. Boca delantera 22 2. Boca delantera 24 Uso como aspiradora Si desea usar este producto como aspiradora, siga los procedimientos a continuación. - Page 31 Inserte la boquilla girándola en el tubo de La longitud del tubo puede ser ajustada. extensión. Ajuste la longitud del tubo mientras presiona el botón deslizable. La longitud se bloquea cuando se suelta el botón deslizable. ► 1. Botón deslizable ►...
- Page 32 La longitud del tubo puede ser ajustada. Desbloquee la aldabilla levantando la parte infe- Afloje el anillo en el tubo y ajuste la longitud del tubo. rior. Presione el área ranurada para levantar la parte Apriete el anillo en la longitud deseada. delantera de la aldabilla.
-
Page 33: Operación
Cuando utilice la bolsa recolectora de polvo, inserte su PRECAUCIÓN: Esta aspiradora está dise- reborde en la hendidura. ñada exclusivamente para el uso en seco. PRECAUCIÓN: Esta aspiradora debe utili- zarse en interiores únicamente. PRECAUCIÓN: Siempre inserte completa- mente el cartucho de batería hasta que quede asegurado en su lugar. - Page 34 Durante la operación, enganche la caja del interruptor FUNCIÓN DE en la correa inferior o el anillo en D. ACTIVACIÓN INALÁMBRICA Lo que puede hacer con la función de activación inalámbrica La función de activación inalámbrica permite una ope- ración limpia y cómoda. Si conecta a la aspiradora una herramienta compatible, podrá...
- Page 35 Cuando inserte la unidad inalámbrica, alinee las partes Makita. salientes con las partes cóncavas en la ranura. NOTA: Antes de usar por primera vez la función de activación inalámbrica con cada herramienta, es necesario registrar la herramienta.
- Page 36 NOTA: Para el registro de la herramienta, se requiere una herramienta Makita compatible con la función de activación inalámbrica. NOTA: Termine de instalar la unidad inalámbrica en la herramienta antes de comenzar con el registro de la herramienta.
- Page 37 Después de registrar una herramienta en la aspiradora, Jale el gatillo interruptor de la herramienta. esta última se activará automáticamente junto con el Verifique que la aspiradora funcione mientras jala el interruptor de activación de la herramienta. gatillo interruptor en la herramienta. Instale las unidades inalámbricas en la aspiradora PRECAUCIÓN: Verifique siempre que fun-...
- Page 38 Oprima el botón de activación inalámbrica en la Borrado de todos los registros de aspiradora durante 6 segundos. La luz indicadora de herramientas activación inalámbrica parpadeará en verde y luego se pondrá en rojo. Después de eso, oprima el botón de activación inalámbrica en la herramienta de la misma Usted puede borrar todos los registros de herramientas de la aspiradora como se indica a continuación.
- Page 39 Descripción del estado de la luz indicadora de activación inalámbrica ► 1. Botón de activación inalámbrica 2. Luz indica- dora de activación inalámbrica La luz indicadora de activación inalámbrica muestra el estado de la función de activación inalámbrica. Consulte la tabla a continuación para ver qué...
- Page 40 Antes de solicitar alguna reparación, primero realice una inspección por su cuenta. Si detecta algún problema que no esté explicado en el manual, no intente desensamblar la herramienta. En vez de esto, solicite la reparación a un centro de servicio autorizado de Makita, usando siempre piezas de repuesto Makita. Estado de la anomalía Causa probable (avería)
-
Page 41: Mantenimiento
Para mantener la SEGURIDAD y FIABILIDAD del pro- MANTENIMIENTO ducto, las reparaciones, y cualquier otra tarea de man- tenimiento o ajuste deberán ser realizadas en centros de servicio autorizados o de fábrica Makita, empleando PRECAUCIÓN: Asegúrese siempre de que la siempre repuestos Makita. - Page 42 Para instalar el filtro, inserte el lado sin la lengüeta herramienta Makita especificada en este manual. en el soporte y luego empuje el filtro hacia abajo hasta El empleo de cualquier otro accesorio o aditamento que la lengüeta quede asegurada por la varilla.
- Page 43 GARANTÍA LIMITADA DE MAKITA Ésta Garantía no aplica para México Consulte la hoja de la garantía anexa para ver los términos más vigentes de la garantía aplicable a este producto. En caso de no disponer de esta hoja de garantía anexa, consulte los detalles sobre la garantía descritos en el sitio web de su país respectivo indicado...
- Page 44 Para reducir la exposición a estos productos químicos: trabaje en un área bien ventilada y póngase el equipo de seguridad indicado, tal como las máscaras contra polvo que están especialmente diseñadas para filtrar partículas microscópicas. Makita Corporation 3-11-8, Sumiyoshi-cho, Anjo, Aichi 446-8502 Japan 885662-940...
Need help?
Do you have a question about the XCV10 and is the answer not in the manual?
Questions and answers