Advertisement
Quick Links
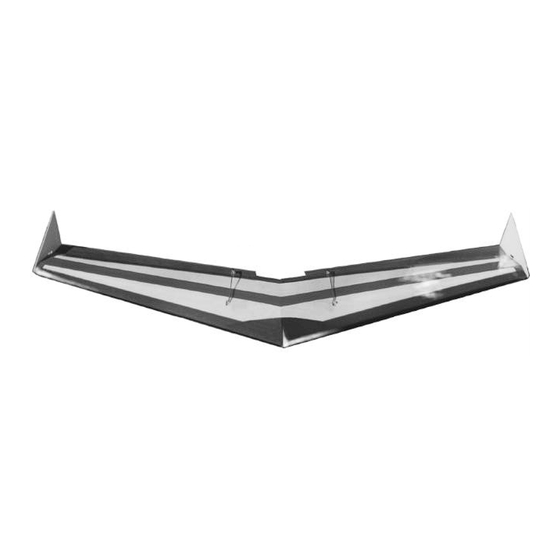
New 2000 upgrade... Lighter Thinner Stronger Faster !
Features a 3 Carbon Fiber Spar Matrix
TRICK R/C Products LLC 938 Victoria Avenue Venice, California 90291 (310) 301-1614 V oice
(310) 827-2288 Tech Support (310) 822-7695 Fax Visit http://www.Zagi.com
Z
AGI-
Wing span
48"
Wing area
3.33 sq. ft.
Airfoil
ZAGI 2000
Weight
17-19 oz.
Speed range 6 to 45+ mph
Radio
2 channels w/mixing
3C
Email: Zod@Zagi.com
Advertisement

Related Manuals for ZAGI ZAGI-3C


Summary of Contents for ZAGI ZAGI-3C
- Page 1 ZAGI 2000 Weight 17-19 oz. Speed range 6 to 45+ mph Radio 2 channels w/mixing TRICK R/C Products LLC 938 Victoria Avenue Venice, California 90291 (310) 301-1614 V oice (310) 827-2288 Tech Support (310) 822-7695 Fax Visit http://www.Zagi.com Email: Zod@Zagi.com...
- Page 2 3C. Shoe Goo, Goop, or any of the other Goo or goop adhesives can be used with a weight penalty of one to three ounces. The Zagi-3C can be built for various conditions - light weight or rough duty. There are references to these different functions in the appro- priate place in the text following.
- Page 3 The Zagi-3C Kit Contents: Expanded polypropylene (EPP) wing panels and beds Pre-cut balsa elevons Roll 2.2 mil color poly tape Control horns with 2 screw plates and 4 screws Threaded 2-56 control rods Threaded 2-56 clevises Die-cut clear plastic winglets 1 1/2”...
- Page 4 Assemble Wings There are three parts to each wing panel. The wing core is shipped between the top and bottom beds. The beds are used as construction jigs. Always use the beds as a base when working on the wings. They will be useful for storage and for tune-ups and repairs, so save them.
- Page 5 Put the wing panels in the top bed bottom side up. Use weights to hold the panels in place. The weights are very important to maintain alignment and wing geometry. Hold the spray head 1 inch from the middle of the spar slot. Spray one long puddle of 3M Super 77 spray adhesive the length of the two long spar slots.
- Page 6 The control rods may not fit in the servo control arm. The end of the control rod can be filed to fit in the servo control arm or the top hole in the servo control arms can be reamed by spinning an X-acto #11 blade in the hole or drilling with a #48 drill (.076”). The wing thickness will accommodate standard servos.
- Page 7 Drill a hole between the battery bay and the receiver bay big enough to push the connec- tors through. Use a 3/8” brass tube with one edge filed sharp. Twist the tube while push- ing to make a clean cut through the foam. Do the same between the servo bays and re- ceiver bay.
- Page 8 Taping Wings For Strength Vacuum the dust from the cores, beds and the work bench. Make sure that all of the radio parts are covered before spraying. Lay the wing in the bottom bed top-side up. Apply a coat of 3M Super 77 spray adhesive to cover the top of the entire wing.
- Page 9 Optional Taping Scheme if Weight is Not a Factor The Zagi-3C can be built for rough conditions. The construction you choose will deter- mine the final weight of the airplane. It roughly translates to the light weight at about 17 oz., rough duty about 19 oz.
- Page 10 Cover with Colored Tape Having the top and bottom of the wing in sharply contrast- ing colors makes the plane much easier to fly, typically with the darker color on the bot- tom surface. An optional roll of color tape will be required to do this. Spray the fiber tape with 3M Super 77 adhesive and let it dry for about 30 minutes Start the color tape covering at the trailing edge (TE) of the wing by wrapping a strip of tape around the TE being careful to follow the shape.
- Page 11 Prepare and Attach Elevons Hold the elevons together and sand them until they are identical. Trim the end to match the angle of the wing tip. Sand a 45 degree angle into the front of the elevon then completely cover the elevons with the color tape, making sure the edges are wrapped.
- Page 12 Attach Elevons to Servos Attach control rods to the servo control arms with a Z- bend. (NOTE: Z-bend pliers may be purchased from your local hobby store to make this operation easier.) (See Figure 19) Position the control horns on the elevon directly behind the servo control arm close to the hinged edge but be sure the control horn and screw plate do not interfere with the movement of the elevons.
- Page 13 Attach Winglets Punch-out and separate the two nested clear plastic winglets. Punch- out the 1 1/4" x 1/4" slot in the winglet. (See Figure 20 ) Put a piece of filament fiber tape through the slot to the top of the wing and wrap it around to the bottom of the wing.
- Page 14 Locating the CG within a flyable range is a matter of experience and personal prefer- ence. The Zagi-3C performs well with the CG between 7 and 8 inches back from the nose. A 7 1/2 ” setting is a good place to start. Moving the CG back 1/2” forward or back will yield some different flight characteristics.
- Page 15 CAUTION: While the Zagi-3C is made of foam, traveling at a high rate of speed can cause considerable damage to someone or something if a collision occurs. Please exer- cise caution while flying.
Need help?
Do you have a question about the ZAGI-3C and is the answer not in the manual?
Questions and answers