
Related Manuals for GRASS VALLEY XCU


Summary of Contents for GRASS VALLEY XCU
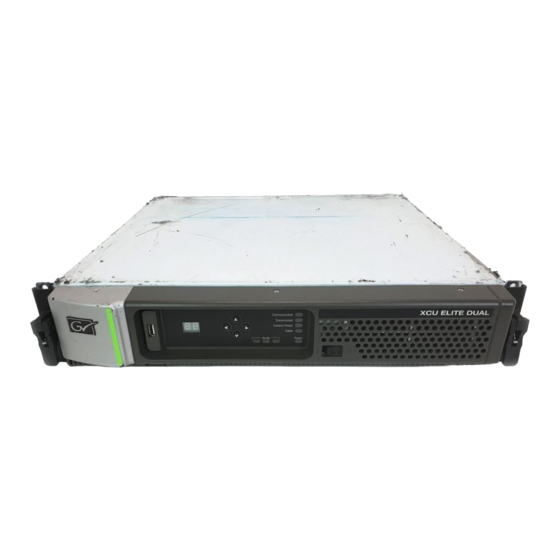
- Page 1 User’s Guide 3922 496 32111 February 2018 v1.6 XCU WorldCam Triax Communication Transmission Camera Power Cable On Air Power eXchangeable Control Unit...
- Page 2 Liable to technical alterations in the course of further development. Website Visit the Grass Valley public website to download the latest user’s guide updates and additional information about your broadcast product: www.grassvalley.com...
-
Page 3: Table Of Contents
3.3.1 Using the XCU front navigation panel ....... . 27 3.3.2... - Page 4 XCU back panel ........
- Page 5 Visit www.grassvalley.com for recycling information. Packing for return If a unit is being returned to Grass Valley for servicing, try to use the containers and materials of the original packaging. Attach a tag indicating the type of service required, return address, model number, full serial number and the return number which will be supplied by your Grass Valley service centre.
- Page 6 Connect the unit only to a power source with the specified voltage rating. To prevent risk of overheating, ventilate the unit correctly. For safety reasons the unit must be mounted in a 19-inch rack which has safety covers according to IEC65. XCU eXchangeable Control Unit User’s Guide (v1.6)
- Page 7 – Insert connectors straight and fully into their corresponding sockets. – In fiber-optic cable systems always put the dust caps on cable and panel connectors immediately after disconnecting a cable. Keep the dust caps clean. XCU eXchangeable Control Unit User’s Guide (v1.6)
- Page 8 • Air can be used to remove lint or loose dust from the port of a transmitter or receiver to be mated with the connector. Never insert any liquid into the ports. XCU eXchangeable Control Unit User’s Guide (v1.6)
- Page 9 The wire colored BLUE must be connected to the terminal marked with the letter N or colored BLACK. Ensure that your equipment is connected correctly - if you are in any doubt consult a qualified electrician. XCU eXchangeable Control Unit User’s Guide (v1.6)
- Page 10 XCU eXchangeable Control Unit User’s Guide (v1.6)
-
Page 11: Chapter 1 - Introduction
1.1.1 About this manual The purpose of this manual is to present a detailed description of how to install and operate the XCU . It provides the information necessary to install, set up and operate the unit in different configurations. -
Page 12: Technology
19-inch rack, making a secure mechanical and electrical connection, permitting the XCU box to easily slide in and out whenever needed. Each XCU comes with one cradle, but additional cradles may be acquired to extend usability across different environments, allowing you to quickly and easily transfer XCUs between OB vans, studios, or anyplace. -
Page 13: Transmission
Chapter 1 - Introduction 1.2.2 3G Transmission Grass Valley’s latest XCU is based on full digital transmission and a proven and robust power system. The 3G transmission system consists of a dockable camera adapter that fits on Grass Valley HD camera heads and an XCU that takes care of power, signal transport and conversion and connection to the studio or OB van. -
Page 14: Camera Control And Monitoring
XCU. The XCU is compatible with all existing control system components. An OCP 400 operational control panel can be connected directly to the XCU using a cross-over Ethernet cable. Full camera control is provided via a C2IP Ethernet-based control network. -
Page 15: Main Features
– 1080i50 and 1080i/59.94 – 720p50 and 720p59.94 – and many psf HD video formats. • Transports the following digital signals from camera to XCU: main video signal, four audio channels (including embedded digital audio), two intercom channels, control and private data. •... - Page 16 Chapter 1 - Introduction XCU eXchangeable Control Unit User’s Guide (v1.6)
-
Page 17: Chapter 2 - Installation
2.1 Rack installation 2.1.1 Installing rack mounting rails The XCU Cradle can be mounted in most standard 19-inch video or IT rack types. The unit needs two rack units (2 RU) of vertical space in the rack. Install two L-shaped rack mounting rails (not supplied) that match your rack type. Refer to the documentation of your mounting rails or rack for installation instructions. -
Page 18: Installing The Cradle
Use proper shock absorbers for the rack to prevent damage during transport. • To prevent any horizontal movement of the cradle and XCU during transport, make sure there is as little horizontal clearance as possible between the cradle and the mounting rails: 450 mm —... -
Page 19: Connecting Studio Cabling
2.2 Mounting the XCU To mount the XCU into the cradle, proceed as follows: • Place the XCU onto the sliding rails of the cradle, slide the unit into the cradle and push firmly. • Push down the right and left locking handles until they snap down. -
Page 20: Setting Up The Control Network
MCP 450 (Master Control PC), are also connected to the Ethernet network via a hub or router. An OCP 400 can also be connected directly to the XCU using a (cross-over or a straight-through) Ethernet cable. -
Page 21: Setting Up Studio Signalling
Chapter 2 - Installation 2.5 Setting up studio signalling Connect the studio signalling system to the rear of the XCU. The wiring of the signalling connector is shown below: Prev.out send Signal Send pin Return pin Prev.out ret. Call out send... -
Page 22: Dry Contact With Multiple Xcus
If a contact is closed, the corresponding function is Active or Inactive, depending on the selection in the INSTALL > SIGNALLING INPUT menu: Menu setting Input is shorted: Input is open: LH (low-high) Function is Active Function is Inactive HL (high-low) Function is Inactive Function is Active XCU eXchangeable Control Unit User’s Guide (v1.6) -
Page 23: Common Ground
☞ Note Note Ensure that a reliable ground coupling exists between the control device ground and the XCU ground. If a contact is closed, the corresponding function is Active or Inactive, depending on the selection in the INSTALL > SIGNALLING INPUT menu:... -
Page 24: Voltage Level
Leave the circuit open or apply a DC voltage to the inputs (respect polarity). If the circuit is open, the function is Active (or Inactive). If the voltage is high (4 to 24 V) the function is Inactive XCU eXchangeable Control Unit User’s Guide (v1.6) -
Page 25: Setting Up External Audio Level
2.6 Setting up external audio level The camera audio levels for channel 1 and 2 can be externally controlled by the XCU. In the camera system menu, go to the INSTALL > AUDIO > AUDIO GAIN MODE item and select Ext. -
Page 26: Using Private Data
25 μs and can be more than 30 μs depending on the type of cable. The duty cycle difference between input and output is max. 5%. XCU eXchangeable Control Unit User’s Guide (v1.6) -
Page 27: Chapter 3 - Setup
Back [2] to undo the selection. 3.3 Accessing the menu 3.3.1 Using the XCU front navigation panel To access the internal XCU menu, push the Select [5] button. The display [1] shows “nn”. XCU eXchangeable Control Unit User’s Guide (v1.6) -
Page 28: Using The Ocp 400 Operation Control Panel
Monitoring outputs. 3.4.1 Entering the menu Use the navigation panel on the XCU or the OCP 400 to access the menu. The functions of the XCU are grouped into menus and sub-menus. When accessed, the main menu appears on the... -
Page 29: Finding Your Way
If the cursor points to an item (and there are no double arrows to indicate a sub-menu) then the item pointed to has a value. The value can be: XCU eXchangeable Control Unit User’s Guide (v1.6) -
Page 30: User Levels
1. For full control set the level to 3. When you switch off the power, the access rights that were obtained by the use of the PIN code are disabled and the camera starts at the assigned user level when switched on again. XCU eXchangeable Control Unit User’s Guide (v1.6) -
Page 31: Intercom Setup
Chapter 3 - Setup 3.5 Intercom setup The studio camera systems offer extensive intercom facilities between cameraman, tracker (floor man), XCU and studio. To help you set up and operate the intercom system, the following controls are available: • XCU menu system •... -
Page 32: Color Bars
• To turn on the XCU color bar, go to the VIDEO > COLOR BAR > COLOR BAR item and select • The color bar type can be selected with the VIDEO > COLOR BAR > COLOR BAR TYPE item. -
Page 33: Chapter 4 - Operation
This indicator lights when a working signal transmission is established between the camera and XCU. In case of a Triax connection, this indicator lights green. A correct Fiber connection is indicated by a blue light. A red light indicates a connection error. -
Page 34: Transmission Diagnostics On The Ocp 400
Chapter 4 - Operation Camera Power indicator A green light means that the connected camera is powered by the XCU and switched on. A blinking green light indicates that a camera is connected but not switched on. A red light indicates a power supply error (e.g. -
Page 35: Replacement Of Fuses
Use only fuses of the type and rating specified. Always replace both fuses at the same time. The XCU is equipped with 2x T8AH type 250 V fuses . They are located in the mains entry at the back of the unit. Follow these steps to replace the fuses located in the mains entry:... - Page 36 Chapter 4 - Operation XCU eXchangeable Control Unit User’s Guide (v1.6)
-
Page 37: Chapter 5 - Xcu Menu Reference
Switches SD Soft Detail on or off. This function reduces the amount of detail added fo large transitions. Soft Detail Lvl 0..99 User 1 Sets the maximum limit level of detail for Soft Detail. XCU eXchangeable Control Unit User’s Guide (v1.6) -
Page 38: Monitoring Menu
Off, Alias, Dev ID, User 1 — Switch on and select Alias, device ID (of the Head ID XCU) or Head ID (of the connected camera) to be shown in the status bar. Cable Info Off, On User 1 —... -
Page 39: Install Menu
Alias <text> — User 2 Sets Alias for the camera system. Device ID <text> — User 2 Cradle Sets Device ID for the XCU. Timing H Phase 0..99 User 0 Cradle Sets the horizontal (H) synchronization phase. Shift Pixels 0..1920... - Page 40 BS IP digit 1 1..250 User 0 Cradle BS IP digit 2 0..255 User 0 Cradle Sets XCU IP address (when IP mode is manual). BS IP digit 3 0..255 User 0 Cradle BS IP digit 4 1..254 User 0...
-
Page 41: Security Menu
(advanced settings) Number 0 .. 1000 Service — (advanced settings) Factory Defaults Exec, ... Exec Service — Resets all XCU settings to their factory defaults. 5.6 Licenses menu Menu item Values Default Level File Description Active Licenses WorldCam Unknown, Not... -
Page 42: Diagnostics Menu
Service — (advanced settings) Transmission Transm. path T2F Conv, F2T None User 0 — (advanced settings) Conv, 3GTriax, 3GFiber, Unknown, None Transm. select Priority Auto, Triax, Fiber Auto User 0 — (advanced settings) XCU eXchangeable Control Unit User’s Guide (v1.6) - Page 43 (advanced settings) STtest, CStest, FBtest, Start, Shutdown, nonFlex, Family Package Ok. Not Ok Not Ok User 0 (advanced settings) Package 12NC 0..65535 User 0 (advanced settings) Package Version 0..65535 User 0 (advanced settings) XCU eXchangeable Control Unit User’s Guide (v1.6)
- Page 44 Signal Quality Good, Average, Undef Service — (advanced settings) Bad, Undef Avg MER Good, Average, Undef Service — (advanced settings) Bad, Undef Max MER Good, Average, Undef Service — (advanced settings) Bad, Undef XCU eXchangeable Control Unit User’s Guide (v1.6)
- Page 45 Audio mute Off, On Service — (advanced settings) Video mute Off, On Service — (advanced settings) Data Error Stats UART Errors 0..65335 Service — (advanced settings) Decompr Errors 0..65335 Service — (advanced settings) XCU eXchangeable Control Unit User’s Guide (v1.6)
- Page 46 Extern 3 Carrier Yes, No User 1 — (advanced settings) Locked Yes, No User 1 — (advanced settings) VideoMode Unknown, SD, Unkno User 1 — (advanced settings) 1080i59, 1080i50, 720p59, 720p50, 1080p59, 1080p50, 1080i47 XCU eXchangeable Control Unit User’s Guide (v1.6)
- Page 47 Total Run Hours 0..65535 User 2 — (advanced settings) Power Cycles 0..65535 User 2 — (advanced settings) Minimum Temp — — User 2 — (advanced settings) Maximum Temp — — User 2 — (advanced settings) XCU eXchangeable Control Unit User’s Guide (v1.6)
-
Page 48: Service Menu
Unknown, Busy..., OK, Error, Service — Shows status of the license partition of the NonGV, Init... internal SD Card. USB Available No, Yes Service — Shows Yes if an external USB flash drive is inserted. XCU eXchangeable Control Unit User’s Guide (v1.6) -
Page 49: Chapter 6 - Connectors And Signals
IEC style 3-pin male Power consumption: 450 W max. 6.1.2 Triax connector Various types of Triax connector are Pin Description available by request. Inner pin: signals + power Inner shield: return Outer shield: housing XCU eXchangeable Control Unit User’s Guide (v1.6) -
Page 50: Hybrid Fiber Connector
External 1 HD-SDI or SDI video input Ext 1-out External 1 HD-SDI or SDI loop-through signal Ext 2-in External 2 HD-SDI or SDI video input Ext 3-in External 3 HD-SDI or SDI video input XCU eXchangeable Control Unit User’s Guide (v1.6) -
Page 51: Main (Hd Video) Output Connectors
720p modes only) or SMPTE 259M (270 Mbit/s) (switchable) 6.2.4 SDI Out video connectors Connector Signal or function BNC, 0.8 Vpp, 75 , SMPTE 259M (270 Mbit/s) SD-SDI-1 BNC, 0.8 Vpp, 75 , SMPTE 259M (270 Mbit/s) SD-SDI-2 XCU eXchangeable Control Unit User’s Guide (v1.6) -
Page 52: Monitoring Connectors
Signal TP in Teleprompter input signal (analog SD) TP out Teleprompter loop-through* (output) signal *) This output signal is always looped-through even when the XCU is not mounted. 6.2.7 Reference connectors Connector Signal Ref in Reference input signal (HD Tri-Level sync or SD Black Burst are accepted) -
Page 53: Signalling Connector
Eng out return (4-wire out, 2- out) wire in/out) Prog in (4-wire only) Prog in return (4-wire only) Prog in shield (4-wire only) Housing Housing Shield of cable to the pin marked housing. XCU eXchangeable Control Unit User’s Guide (v1.6) -
Page 54: Auxiliary (Aux) Connector
Ethernet 10Base-T, 100Base-TX, Pin Description 1000BASE-T and Gigabit Ethernet compatible. Transmit data + (TX+ ) Transmit data - (TX-) Receive data+ (RX+) 8-pin standard TD2+ RJ-45 ethernet connector TD2- Receive data - (RX-) TD3+ TD3- XCU eXchangeable Control Unit User’s Guide (v1.6) -
Page 55: Digital Audio Out 1+2 Connector
Sensitivity range: -64 dBu to -22 dBu Pin Description Signal at pin 2 of audio output is in Audio shield phase with signal at pin 2 of audio input. Audio output Audio return XLR 3-pin male connector XCU eXchangeable Control Unit User’s Guide (v1.6) - Page 56 Chapter 6 - Connectors and signals XCU eXchangeable Control Unit User’s Guide (v1.6)
-
Page 57: Chapter 7 - Specifications
Video and signal connectors 1x BNC (+ loop-through output), (C)VBS, 1.0 Vp–p, 75 Teleprompter input 1x BNC (+ loop-through output), 1.0 Vp–p, 75 HD Tri-Level sync or Reference input SD Black Burst XCU eXchangeable Control Unit User’s Guide (v1.6) - Page 58 0 or +6 dBu (±2 dB, max 12 dBu), 600 Output Frequency response 150 Hz to 6 kHz (1 kHz, -10 dBu output level) Distortion less than 2% (1 kHz, +12 dBu output level) XCU eXchangeable Control Unit User’s Guide (v1.6)
-
Page 59: Dimensions
Chapter 7 - Specifications 7.2 Dimensions 482 mm 438 mm Communication Transmission Camera Power Cable On Air Power XCU eXchangeable Control Unit User’s Guide (v1.6) - Page 60 Chapter 7 - Specifications XCU eXchangeable Control Unit User’s Guide (v1.6)
- Page 61 XCU eXchangeable Control Unit User’s Guide (v1.6)
Need help?
Do you have a question about the XCU and is the answer not in the manual?
Questions and answers