Advertisement
Quick Links
INS1991BRB - 10/12
Installation Guide
Please Contact Moen First
For Installation Help, Missing or
Guía de instalación
Replacement Parts
(USA)
Guide d'installation
1-800-BUY-MOEN (1-800-289-6636)
Mon - Fri 8:00 AM to 8:00 PM, Eastern
Sat. 9:00 AM to 5:30 PM Eastern
WWW.MOEN.COM
(Canada)
1-800-465-6130
Mon - Fri 7:30 AM to 8:00 PM, Eastern
www.moen.ca
Por favor, contacte primero
con Moen
Para obtener ayuda de instalación, piezas
faltantes o de recambio
01-800-718-4345
Lunes a viernes de 8:00 a 20:00 hs. (Costa Este)
Sáb. 8:00 a 18:30 hs. (Costa Este)
WWW.MOEN.MX
Veuillez d'abord contacter Moen
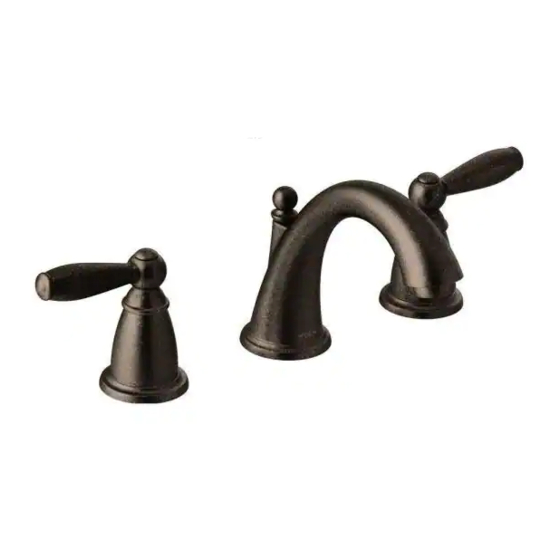
TWO HANDLE LAVATORY FAUCET
en cas de problèmes avec l'installation, ou pour
MODEL CA84440BRB, CA84924BRB, CA84004BRB
obtenir toute pièce manquante ou de rechange
MEZCLADORA PARA LAVABO DE
1-800-465-6130
DOS MANERALES
Du lundi au vendredi :
MODELO CA84440BRB, CA84924BRB, CA84004BRB
de 7 h 30 à 20 h, HE
WWW.MOEN.CA
ROBINET DE LAVABO
À DEUX POIGNÉES
MODÈLE CA84440BRB, CA84924BRB, CA84004BRB
Advertisement

Related Manuals for Moen CA84440BRB


Summary of Contents for Moen CA84440BRB
- Page 1 Sáb. 8:00 a 18:30 hs. (Costa Este) WWW.MOEN.MX Veuillez d’abord contacter Moen TWO HANDLE LAVATORY FAUCET en cas de problèmes avec l’installation, ou pour MODEL CA84440BRB, CA84924BRB, CA84004BRB obtenir toute pièce manquante ou de rechange MEZCLADORA PARA LAVABO DE 1-800-465-6130 DOS MANERALES...
- Page 2 For safety and ease of faucet replacement, Moen recommends the use of these helpful tools. HERRAMIENTAS ÚTILES Para que el cambio de la llave sea fácil y seguro, Moen le recomienda usar estas útiles herramientas. OUTILS UTILES Par mesure de sécurité et pour faciliter l’installation, Moen suggère l’utilisation des outils suivants.
- Page 3 INS1991BRB - 10/12 Parts List Lista de piezas Liste des pièces Handle Assembly Plug Poignée Assemblée Outil de montage Maneje Asamblea Herramienta de Spout Lift Rod Bouchon Caño montaje Valve Body Clip Waste Seat Clip du corps Soulevez de tige Válvula Clip Cuerpo Tapón Upper Mounting...
- Page 4 Thread lower mounting nuts (F) onto the hot and cold valve bodies (M & G) far enough to allow the valve body clip groove to be 1/2" above the sink surface. Place lower mounting washers (E) onto each valve body (M & G). Ensarte las tuercas de montaje inferiores (F) a los cuerpos de las válvulas caliente y fría (M y G) hasta Use mounting tool (N)
- Page 5 INS1991BRB - 10/12 Attach the hose (K) to the bottom of the spout base (L). After the hose (K) has been pushed up as far as possible, push the white clip in until a "click" is heard. Tug downward to test engagement. Ajuste la manguera (K) a la parte inferior de la base del pico (L).
- Page 6 Rotate pivot rod opening on side of drain body (T) Tighten drain nut (S) and drop plug (O) into From the underside of the sink, thread the drain waste seat (Q) as shown. to face towards wall as illustrated. body (T) into the waste seat (Q). Girar pivote orificios de la varilla en el lado del cuerpo Apretar la tuerca de desagüe y colocar el tapón...
- Page 7 INS1991BRB - 10/12 1.) Loosen nut on strap (T) to allow lift rod to rest in faucet. 2.) Verify pivot rod is still pushed down, and plug is open. 3) Tighten bolt with wrench. 1.) Afloje la tuerca sobre el perno de traba (T) para permitir que la varilla de elevación descanse en el grifo.
- Page 8 Moen will advise you of the procedure to follow in applicables selon l’ é tat, la province ou le pays. Moen avisera le también tener otros derechos que cambian de un estado a making warranty claims.