
Related Manuals for irinox ICY Series


Summary of Contents for irinox ICY Series
- Page 1 M A I N T E N A N C E I N S T R U C T I O N S N°REV REVISION DESCRIPTION DATE REV. REVISER FIRST EMISSION 01/12/2015...
- Page 2 Dear Customer, Thank you for having chosen IRINOX. Please take the time to read this manual carefully to make the most of all the potential and benefits of your new ICY. We would like to remind you that the perfect operation of the machine also depends on its correct use.
- Page 3 SAFETY INFORMATION Below find the main general Safety When loading the machine, the use of kitchen gloves is recommended in Standards: order to prevent burns on contact with the Do not touch or operate the machine with damp • hot trays and trolleys. or wet feet and hands.
-
Page 4: Table Of Contents
INDEX 1. GENERAL DOCUMENTATION 1.1 GENERAL RECOMMENDATIONS 1.2 FOREWORD 1.3 TRANSPORT AND HANDLING 1.4 UNPACKING 1.5 ELEMENTARY SAFETY STANDARDS 1.6 PRECAUTIONS FOR LOADING OR UNLOADING 1.7 DANGEROUS USE OF THE POINTED PROBE 1.8 PERIODICAL PERSONNEL TRAINING 2. INSTALLATION 2.1 PLATE DATA 2.2 POSITIONING 2.3 DIMENSIONAL DATA 2.4 ROOM TEMPERATURE AND AIR EXCHANGE... -
Page 5: General Documentation
1.2. PREAMBLE Installation must be carried out by authorised and The joints made by IRINOX S.p.a. comply with the specialised staff, respecting the instructions in this standard EN14276-2 manual. The manufacturer declares and assigns a... -
Page 6: Elementary Safety Standards
1.5. ELEMENTARY SAFETY STANDARDS The user is liable for negligence of operations on the before carrying out cleaning or routine maintenance, • machine which do not comply with the instructions in disconnect the machine from the power supply this manual. network, turning off the master switch and pulling the Hereafter are the general safety Standards: plug... -
Page 7: Installation
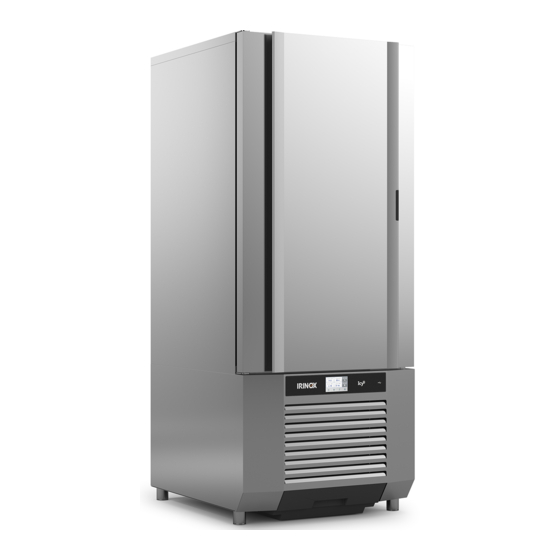
2. INSTALLATION 2.1. PLATE DATA • Make sure that the plate data and electrical line features correspond (V, kW, Hz, phase and available power). • The plate carrying the features of the appliance is 31020 applied on the side (fig.2). CORBANESE (TV) ITALY Model... -
Page 8: Dimensional Data
2.3. DIMENSIONAL DATA FRONT VIEW SIDE VIEW TOP VIEW Min 75 mm 804mm 474mm Min 70 mm 765mm Min 30 mm 694mm 383 mm AIR FLOW 80 mm ÷ 115 mm 63mm 63mm 56mm 153mm ICY S 884mm 383 mm min 70 mm 765mm min 30 mm... -
Page 9: Room Temperature And Air Exchange
2.4. ROOM TEMPERATURE AND AIR EXCHANGE Table 2 For the air condensed refrigeration units, operating MINIMUM AIR EXCHANGE room temperature must not exceed 32 °C. The declared MODEL Power supply frequency (Hz) AIR (m performances are not guaranteed beyond this tempera- ture. -
Page 10: Condensation Drain
Table 4 TYPE OF POWER CABLE POWER SUPPLY ABSORPTION MODEL CONDENSING SECTION Voltage (V) Frequency (Hz) Poles Power (kW) Current (A) UNIT 220-240 50/60 1P+N+PE 4G2,5 ICY S 200/208 50/60 2P+PE 3G12AWG 50/60 3P+N+PE 5G2,5 ICY M 3P+PE 4G2,5 50/60 200/208 50/60 3P+PE... -
Page 11: Safety And Control Systems
2.10. SAFETY AND CONTROL SYSTEMS • Door micro switch (A): blocks fan functioning in the chamber when the door is opened. • Protection fuses (B): they protect the circuits from short circuits and overloads. Fuse-holders (C): they contain the fuses and they •... - Page 12 2.12. R404A GAS SAFETY SHEET Contact with the skin • Identification of dangers Sprays of liquid and the nebulised liquid can cause High exposure to inhalation can have anaesthetic cold burns. effects. Very high exposure can cause anomalies of the It is improbable that it is dangerous due to cutaneous heart beat and cause sudden death.
-
Page 13: Operation
DELICATE +3° • characteristics unchanged. STRONG +3° • The ICY series has been studied to make this operation and 2 types of freezing: as easy as possible: touch screen, clear and essential • DELICATE -18° information for users who approach this new system;... -
Page 14: Description And Operation
3.4. DESCRIPTION AND OPERATION Preliminary Operations Phase Description Front panel screen FIRST TURN ON Power the blast chiller and leave it at “Stand-by” for about 60 minutes. This way the sump resistance will have time to heat the compressor. This avoids breakdown at the first turn-on, due to returning refrigerant liquid. - Page 15 Phase Description Front panel screen When the cycle has been selected, the selection screen appears: Automatic or Manual. Click on to access the automatic cycle. Click on to access the manual cycle. In the event of an incorrect selection: Press the key to go back to the “Automatic”...
- Page 16 Phase Description Front panel screen Press the info symbol to display the air temperature, core temperature and the cycle duration time for 3 seconds. At the end of the cycles a sound is emitted and the system switches to preservation mode, displaying the time elapsed since the beginning of the cycle.
- Page 17 Phase Description Front panel screen At the end of the cycles a sound is emitted and the system switches to preservation mode, displaying the time elapsed since the beginning of the cycle. Press home to go back to the initial grid. Do not use the Blast Chiller as a Holding Cabinet.
- Page 18 Data printing selection and start-up Function Description Front panel screen Connect the USB pen drive to the front of the machine, with the home screen active. Press to access the data download page. The bar at the top displays: “Download” in the centre and logo download to the right.
-
Page 19: Stopping Modes
3.5. STOPPING MODES To stop the machine in an emergency, press the Stand-By key and turn the power off on the control board (Fig. 15). Fig. 8 3.6. ADVICE FOR USE Before starting the machine, the inside of the cell must be cleaned well ( see par. - Page 20 If the machine is not loaded completely, concentrate the trays in the middle of the blast chiller, placing an empty tray (A) above the last one. Position the trays in the innermost part of the tray- holder, making sure that they are as close as possible to the evaporator.
- Page 21 3.6.5. Temperature Avoiding having the cooked food to be blast chilled and/or shock frozen remain for long at room tempera- ture. The more moisture is lost, the less food softness will be preserved. Start the blast chilling and/or shock freezing cycle as soon as preparation and/or cooking has ended.
-
Page 22: Parameter Programming
3.7. PARAMETER PROGRAMMING Function Description Front panel screen On the initial grid, press the following to access the parameter programming mode: to access the cycle parameters (“PrC”); to access the user parameters (“PrO”) The password is requested. Enter code and press to access the parameters;... - Page 23 Function Description Front panel screen USER PARAMETERS The list of parameters that can be modified appears after accessing the user parameters page. Press to switch to the next/previous parameters. To save the modified parameter, press Press the key to go back to the previous screen; is not pressed after modifying a parameter, and you go back, the modification is cancelled.
- Page 24 (-18 - DELICATE) A= automatic cycle – M = manual cycle Description Range Ris. Default Notes First stage freezing STAGE_1 air set -40 °C÷+40 °C 1°C 0°C air temperature Cycle end freezing STAGE_2 air set -40 °C÷+40 °C 1°C -35°C air temperature Storage air temp.
- Page 25 User Parameters Default Values Description Set No Range Hour 0÷23 Hour setting 0÷59 Minutes setting Year 15÷99 Year setting Month 1÷12 Month setting 1÷31 Day and month setting 0 = Yes 0÷1 Summer time selection setting 1 = No 0 = °C Scale 0÷1 Selection setting...
-
Page 26: Sanigen
Sanigen must be used when the Blast chiller is not perform- ing any cycle. How to use it: Sanigen is installed directly in the factory, when requested. The operation parameters are set in factory and are the result of experience and tests in Irinox laboratories. Its operation is totally automatic. - Page 27 Routine maintenance: EVERY 6 MONTHS: Cleaning Remove the power supply to the preserving unit and access the Sanigen Release the external tab, holding the glass cylinder still Remove the external net from the glass cylinder, paying attention not to break the glass Tighten the glass cylinder anti-clockwise, always acting on the red plastic base Wash the external net in warm water, paying...
- Page 28 YEARLY: replacement of the glass cylinder and external net Order the glass cylinder and external net from IRINOX CODE 3880410 Remove the power supply to the preserving unit and access the Sanigen Release the external tab, holding the glass cylinder still...
-
Page 29: Routine Maintenance
4. MAINTENANCE 4.1. ROUTINE MAINTENANCE The information and instructions in this chapter are inten- ded for all those who work with the machine: user, main- tenance technician, as well as non-specialised personnel. Elementary safety Standards To carry out cleaning and maintenance safely, we recall the safety Standards in par. - Page 30 4.2.1. Washing the evaporator Wear protective gloves during the following operations. HOW TO ACCESS THE EVAPORATOR: In order to clean the inside of the evaporator, use a flat-blade screwdriver to loosen the screw located at the right side of the fan-holding panel and turn it to the left.
-
Page 31: Cleaning The Condenser
4.2.2. Emptying condensation The models with a built-in condensing unit are equipped with a special tray to gather condensation and wash water. It is at the bottom part of the appliance. Empty and clean the tray periodically, pulling it out from beneath the appliance using the appropriate handle. -
Page 32: Trouble Shooting
4.4. TROUBLESHOOTING Electronically-managed diagnostics: The electronic control of the machinery is equipped with a visual system which signals the presence of alarms. • This symbol turns on The alarms are registered on an alarm list. • The alarm Code appears on the display ALARM LIST Alarm Possible cause... - Page 33 NON electronically-managed diagnostics: Malfunction Possible cause Possible solution Check connection No power supply of electrical line Insert Bus cable in dedicated connector The front board does not turn on Bus connector between both in the Front board two boards disconnected and in the Relay board Replacement of fuses by Protection fuses blown...
-
Page 34: Extraordinary Maintenance
4.5. EXTRAORDINARY MAINTENANCE The information and instructions in this paragraph are intended exclusively for specialised personnel, author- ised to intervene on the electrical and refrigeration parts of the machine. 4.5.1. How to access the front circuit board (Touch screen) • Disconnect the Blast Chiller from the power supply •... - Page 36 IRINOX headquarter via Madonna di Loreto, 6/B 31020 Corbanese di Tarzo (TV) - Italy production site via Caduti nei lager, 1 Z.I. Prealpi Trevigiane, loc. Scomigo 31015 Conegliano (TV) - Italy P. +39 0438 2020 F. +39 0438 2023 irinox@irinox.com...
Need help?
Do you have a question about the ICY Series and is the answer not in the manual?
Questions and answers