Table of Contents
Advertisement
Technical Service Provided by
China
Trina Energy Storage Solutions (Jiangsu) Co., Ltd.
Add: No. 2 Tianhe Road, Trina PV Park, New District,
Changzhou, Jiangsu, 213031
Tel: +86 519 8517 6686
E-Mail: trinabess@trinasolar.com
Japan
トリナ·エナジー·ストレジー·ジャパン株式会社
〒105-6133東京都港区浜松町二丁目4番1号
世界貿易センタービル21階
Tel: +81 (0) 3 6432 0581
E-Mail: jp.sales@trinabess.com
Europe
Trina Energie Storage Vertrieb und Service GmbH
Add: Otto-Schott-Str.4, 60438, Frankfurt am Main, Germany
Tel: +49 (0) 69 75844 361
E-Mail: eu.sales@trinabess.com
www.trinaenergystorage.com
Oceania
Trina Energy Storage Solutions (Australia) Pty. Ltd.
Add: Unit 60, 20 - 28 Maddox Street, Alexandria,
NSW 2015, Australia
Tel: +61 2 8034 6313
E-Mail: australia.sales@trinabess.com
Singapore
Trina Energy Storage Solutions (Singapore) PTE. Ltd.
Add: 600 North Bridge Road, #12-01 Parkview Square,
Singapore 188778
Tel: +86 519 8517 6686
E-Mail: trinabess@trinasolar.com
WI - IM - T Series - 0002 2018 V3.0_EN
Installation Manual
T series
Solar Battery Hybrid System
Advertisement
Table of Contents

Related Manuals for Trinabess Trinahome T Series

Summary of Contents for Trinabess Trinahome T Series
- Page 1 Add: No. 2 Tianhe Road, Trina PV Park, New District, Add: Unit 60, 20 - 28 Maddox Street, Alexandria, Changzhou, Jiangsu, 213031 NSW 2015, Australia Tel: +86 519 8517 6686 Tel: +61 2 8034 6313 E-Mail: trinabess@trinasolar.com E-Mail: australia.sales@trinabess.com Japan Singapore トリナ·エナジー·ストレジー·ジャパン株式会社 Trina Energy Storage Solutions (Singapore) PTE. Ltd.
- Page 2 Preface Published by Trina Energy Storage Solutions (Jiangsu) Co., Ltd. (Trinabess) NO. 2 Tianhe Road, Trina PV Park, New District, Changzhou, Jiangsu, P.R.China. Tel: +86 519 8517 6686 Trinabess@trinasolar.com Legal Disclaimer All information in this documentation has been compiled and checked with most care. Despite of this, errors or deviations cannot be completely excluded.
- Page 3 If you have any difficulty during installation or operation, please refer to this manual or send email to Trinabess@trinasolar.com, or contact your local Trinabess office. How to use this manual? Please read the safety instructions in this manual first.
-
Page 4: Table Of Contents
Content Safety Important Safety Information Safety Rules Exclusion of Liability Product Description General System Description System Connection Product Specification & Packaging Technical Specification 3.1.1 Hybrid Inverter Specification 3.1.2 Battery Bank Specification Component Dimension Unpacking the Device 3.3.1 Before Unpacking the Device 3.3.2 Packing Packing List... - Page 5 Commissioning System Commissioning Checklist System Commissioning System Settings 7.1.1 LCD Interface and Indication Lights 7.1.2 LCD Display Definition 7.1.3 LCD Display Menu Definition 7.1.4 LCD Setting Menu Wi-Fi 7.2.1 Wi-Fi Function 7.2.2 Wi-Fi Connecting Add Device on Cloud Platform Dealer/Installer User Account Registration Add New Device System Maintenance Commissioning Survey...
-
Page 6: Safety
1. Safety 1.1 Important Safety Information The following operating and maintenance instructions must be read before performing system installation, operation and maintenance acitivities. 1.1.1 Before Installation Check for damage on the device and package. If you are in doubt, please contact us or the distributor before installing the device. -
Page 7: Safety Rules
1.2 Safety Rules The following warning notices are adopted in safety related guidelines to describe the various risk grade: Death or severe personal injury will occur. Electric shock! Do not open the device! Dangerous voltage may still be applied DANGER inside the device even after it has been switched off. -
Page 8: Exclusion Of Liability
1.3 Exclusion of Liability Trinabess will not be liable for any direct, indirect or consequential damages, losses or costs including without restriction any economic losses of any kind, any loss or damage to property, any personal injury, any damage or injury arising from or as a result of misuse or abuse, or the incorrect installation, integration or operation of the product. -
Page 9: Product Description
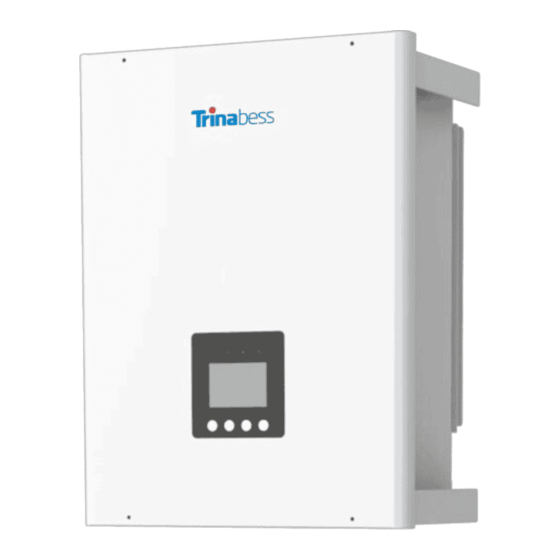
2. Description 2.1 General System Description The solar battery hybrid system is designed for a new PV installation as shown in Figure 2.1. Energy Meter 2 Inverter Energy Meter 1 Grid Hybrid Inverter Grid Meter Battery Bank Load Figure 2.1 Solar battery hybrid system The system includes three main parts: hybrid inverter (with integrated EMS), battery packs and energy meter as shown in Figure 2.2. -
Page 10: System Connection
A) Hybrid inverter The hybrid inverter converts the DC power generated by PV modules to AC power. During the daytime, the PV power will be first used by the household load, then the surplus be charged into battery packs for later use. Any further surplus PV power will be fed into public grid. - Page 11 Inverter N L3 L2 L1 N’ L3’ L2’ L1’ Communication RS485 Inverter N’ Grid L3’ Meter L2’ L1’ Grid Battery bank Load Figure 2.4 AC coupling system Inverter N L3 L2 L1 N’ L3’ L2’ L1’ Communication RS485 Inverter N’ Grid L3’...
-
Page 12: Product Specification & Packaging
3. Product Specification & Packaging 3.1 Technical Specification 3.1.1 Hybrid Inverter Specification Item Description TB5200TH TB5200TD TB9800TH PV input Max. PV input power/Max. PV array size 5200W / 6800W 9800W / 12800W Max. input voltage 800V 900V MPPT voltage range 150 ~ 700V 200 ~ 800V MPPT tracker... -
Page 13: Battery Bank Specification
3.1.2 Battery Bank Specification Item Description 720x600 720x820 720x1040 720x1260 720x1480 Dimension (WxHxD) (mm) x190 x190 x190 x190 x190 <70kg <100kg <130kg <160kg <190kg Weight Numbers of battery module Usable battery power 2x3kWh 3x3kWh 4x3kWh 5x3kWh 6x3kWh Continuous battery power -3kW -4.5kW -6kW... -
Page 14: Component Dimension
3.2 Component Dimension 410mm 230mm Figure 3.1 Hybrid inverter dimension (TB5200TH) 230mm 470mm Figure 3.2 Hybrid inverter dimension (TB5200TD) 540mm 270mm Figure 3.3 Hybrid inverter dimension (TB9800TH) Installation Manual Solar Battery Hybrid System (T Series) - Page 15 Figure 3.4 Battery bank dimension Item Description 720x600 720x820 720x1040 720x1260 720x1480 Dimension (WxHxD) (mm) x190 x190 x190 x190 x190 Table 3.3 Battery bank dimension Installation Manual Solar Battery Hybrid System (T Series)
-
Page 16: Unpacking The Device
3.3 Unpacking the Device 3.3.1 Before Unpacking the Device All products are thoroughly tested and inspected before they’re packed for transportation. Although they’re shipped in reliable package, damage during transportation could still occur. It is important to inspect the shipping package prior to the installation carefully. If any external damage on the package makes you suspect the device could be damaged or if you find that the device is damaged after unpacking it, please report the damage immediately to your distributor or the goods forwarder. -
Page 17: Packing List
3.4 Packing List 3.4.1 TB5200TH / TB5200TD Hybrid Inverter Packing List Item Quantity Description Hybrid inverter Hybrid inverter mounting bracket Aviation plug female (for AC grid connection) Expansion tube and screw Installation manual User manual Warranty Table 3.5 TB5200TH / TB5200TD hybrid inverter packing list 3.4.2 TB9800TH Hybrid Inverter Packing List Item Quantity... -
Page 18: Battery Module Packing List
3.4.3 Battery Module Packing List Item Quantity Description Battery pack Battery pack communication cable Grounding wire Expansion tube and screw Table 3.7 Battery module packing list 3.4.4 Battery Control Box Packing List Item Quantity Description Control box PCS communication cable Meter communication cable Resistor Expansion tube and screw... -
Page 19: Energy Meter Packing List
3.4.5 Energy Meter Packing List Item Quantity Description Energy meter Table 3.9 Energy meter packing list Installation Manual Solar Battery Hybrid System (T Series) -
Page 20: Installation
4. Installation 4.1 Selecting Installation Location Observe the minimum clearance distance between inverter and nearby object to ensure proper heat dissipation. 300mm Min. 300mm Min. 500mm 1000mm Max. Min. 300mm Min. 300mm Min. Figure 4.1 System clearance refernce Do not install inverter and battery modules in direct sunlight or direct rain fall. The shaded side of the building would be better. -
Page 21: Mounting
45⁰C. The inverter may reduce its output power if the ambient air temperature exceeds 45⁰C (The cooler the air temperature is, the longer the life expectancy of Trinabess sytem will be). The system should be installed in a location where is inaccessible to children. -
Page 22: Mounting Battery Bank
Fix the expansion tube into the hole. Fix wall bracket on the wall and fix screw through bracket to expansion tube, adjust the bracket position and screw up. Align with wall bracket, move the hybrid inverter in horizontal direction to proper position. Make the hook on wall bracket insert into the hole on the hybrid inverter. - Page 23 Cover boards are located on both side of the module. Remove them from the module unit. Drill holes into wall to suit M6 anchor bolts, please refer to hold drilling dimension figure. Insert and secure expansion bolt into the drilled holes. Move the first battery module to proper position.
-
Page 24: Electrical Connection
5. Electrical Connection Please ensure DC switch on inverter is “OFF”. Please ensure battery system is not connected to grid. Only electricians with proper license can carry out electrical work. WARNING The maximum current stand by energy meter is 80A. AC breaker should be installed after the “GRID”... -
Page 25: Connecting Battery Module Communication Cable
5.1.2 Connecting Battery Module Communication Cable Connect the communicaiton cables among battery modules and control box. Connect the last socket with the resistor. Insert the CAN PCS communication cable into the socket in control box. Figure 5.2 Connecting battery module communication cable Installation Manual Solar Battery Hybrid System (T Series) -
Page 26: Connecting Grounding Wire
5.1.3 Connecting Grounding Wire Connect the grounding wire with each battery module and control box, only on one side of the battery system. Figure 5.3 Connecting grounding wire 5.1.4 Covering Boards Cover the boards on both sides after connecting the cables. Figure 5.4 Covering boards Installation Manual... -
Page 27: Inverter Cable Connection
5.2 Inverter Cable Connection To Solar DRED RS485 Ethernet SET AS-BOX WIFI AC GRID Figure 5.5 TB5200TD connecting demonstration To Solar RS485 AS-BOX Ethernet WIFI AC GRID Figure 5.6 TB5200TH connecting demonstration Installation Manual Solar Battery Hybrid System (T Series) - Page 28 To Solar RS485 CAN WIFI AC GRID AS-BOX Ethernet Figure 5.7 TB9800TH connecting demonstration Figure 5.8 Cable connecting of MC4 plug View A Wiring details from View A Figure 5.9 Cable connecting of AC plug Installation Manual Solar Battery Hybrid System (T Series)
-
Page 29: Meter Cable Connection
5.3 Meter Cable Connection Please pay attention to the direction of energy meter, L/N port on the meter is to connect with the utility grid, L’/N’ port is to connect with the ‘AC GRID’ port of the hybrid inverter. To get further information please check the meter manual. 11 12 L1’... -
Page 30: Commissioning
6. Commissioning 6.1 System Commissioning Checklist Please complete checklist below prior to system first start. PV DC line and battery bank DC line are connected to the corresponding terminals and securely connected. Inverter AC cable connected to the corresponding terminals securely connected. 6.2 System Commissioning Turn on AC breaker, connect to the power grid. -
Page 31: System Settings
7. System Settings 7.1 LCD 7.1.1 LCD Interface and Indication Lights All information related to the inverter can be obtained from the LCD display. There are 4 navigation keys on the LCD display panel. The functions of these navigation keys and indication lights on the LCD screen are illustrated below: Figure 7.1 LCD screen Symbol... -
Page 32: Lcd Display Definition
7.1.2 LCD Display Definition Figure 7.2 LCD display Item Definition Time Current date and time Operating status of the inverter (Wait/Start/Normal System status /Warning/Fault/Off-grid) EIN/EOUT/EPV/ELD EIN: battery charging energy Energy EOUT: battery discharging energy EPV: PV generated energy ELD: load energy PV1 power Power of PV1 PV2 power... -
Page 33: Lcd Display Menu Definition
7.1.3 LCD Display Menu Definition Figure 7.3 LCD display of menu data The LCD menu includes display and setting menus. The display menu shows system parameters and their values. The setting menu is to configure the values of parameters to ensure the system is running according to customer requirements. -
Page 34: Lcd Setting Menu
7.1.4 LCD Setting Menu The default values for the system are shown in the table as below: Item Definition Password 1111 Time Battery number Max charging voltage Min discharging voltage Max discharging current (default 15A) Max charging current (default 15A) For seperate PV input (default) connection For splitting single PV input with high current... - Page 35 Please turn on the DC switch to connect inverter with utility grid, wait until the LCD is displaying the interface. Long pressing button for 3 seconds on the display menu to enter into setting menu, the password input interface will be displayed. Figure 7.4 Dispaly menu 7.1.4.1 Password Figure 7.5 Setting password...
- Page 36 The default password for setting is 1111 The default password for setting is 1111, user can key in the password through pressing buttons. If password is set wrong, user can press button to quit from setting interface and enter into the display menu, and then long press for 3 seconds and rekey the password.
- Page 37 7.1.4.3 Setting Battery Number Figure 7.7 Setting battery number Press navigation buttons to set BN, BN is set to the corresponding bus slave number, such as bus slave number is 2, BN is set to 02. Setting is successful, restart the BMS can realize automatic address assignment.
- Page 38 7.1.4.4 Setting Operation Mode Figure 7.8 Setting operation mode MDE refers to operation mode. The MDE code 00 refers to self-use mode, 01 refers to time-of-use mode. The default value is 00 and press to modify it. If modify MDE value into 01, press the system will enter the charging time range setting interface.
- Page 39 Figure 7.9 Setting operation mode 01 Figure 7.10 Setting charging time Installation Manual Solar Battery Hybrid System (T Series)
- Page 40 Figure 7.11 Setting discharging time Press to finish the MDE setting and you will enter the meter setting interface. 7.1.4.5 Setting Energy Meter Address Figure 7.12 Energy meter 1 address setting Installation Manual Solar Battery Hybrid System (T Series)
- Page 41 Figure 7.13 Energy meter 2 address setting ME refers to energy meter address. Please check the address column is the same as that on energy meter label. The meter address set inside the inverter can be read from the label on the meter as shown in Figure 7.14 (marked in red) . Press and change the meter address accordingly.
-
Page 42: Wi-Fi
TB5200TD/TB5200TH/TB9800TH solar battery hybrid inverter has integrated Wi-Fi module. User can be connected to the Internet after Wi-Fi connecting and setting. Log in the Trinabess web portal or Trinabess APP on your smart phone, you can monitor your system status timely and remotely. - Page 43 Battery Type Lithium-ion Enclosure Protection Grade IP65 Temperature Range -10~45℃ Storage Environment Weight (kg) Operating Temperature Randge(℃) -25 to 60 ( >45 derating ) VDE4105,VDE 0126 Certificate IEC62109,AS 47777 Type Approved Safety Regular Production Survelliance ® TUVRheinland Certificate www.tuv.com TB3500TEST0000001 Find serial number here! Figure 7.17 SSID on the label of inverter After connecting to the inverter, open the IE browser (i.e.
- Page 44 7.2.2.2 Account and Password Setting Please set your Wi-Fi network name and the password: * SSID: name of the Wi-Fi in your house You can click “Find AP” to display the list of SSID as shown in Figure 4.19. Figure 7.19 Input your home Wi-Fi data Select the SSID you want, and then click “select”...
-
Page 45: Add Device On Cloud Platform
User account registration should be done on the computer. The browser NOTE: must be one of the following: IE/EDGE/Firefox/Chrome Visit the website portal http://cloud.trinabess.com and click “register”, then the user register interface will be displayed. Username: free to create (with 5-15 letters/figures) . -
Page 46: Add New Device
If you are unable to bind NOTE: this device, please contact Trinabess for service. Figure 8.4 Add Device Serial Number Select and device record and Click “ ” to edit. Sale Date: the date of selling the device. -
Page 47: System Maintenance
9. System Maintenance When performing maintenance operation on the system, power off the inverter. Please follow strictly the following operation procedure: Turn off PV switch of inverter. DRED RS485 Ethernet SET AS-BOX WIFI AC GRID DRED RS485 Etherne SET AS-BOX WIFI Turn off the DC switch on the battery packs. -
Page 48: Commissioning Survey
Commissioning Survey Installer Company Name: Home Owner Location: Street City State Inverter Serial Number: Commisioning Date: Special Note: AC GRID Electrician’s Signature: The storage system was installed and commissioned according to instruction manual procesures. Date: Signature:...
Need help?
Do you have a question about the Trinahome T Series and is the answer not in the manual?
Questions and answers