
Related Manuals for E-Slide ES1200D

Summary of Contents for E-Slide ES1200D
-
Page 1: User Manual
USER MANUAL Translation of the original version BALANCE BIKE ELECTRIC FOLDING 12 inch ESLIDE ES1200D... - Page 2 Content of the manual 1. Warnings / Residual risks / Precautions for use a. Warnings / Precautions for use b. Residual risks c. Handling / Transport / Storage / Battery i) Handling / Transport / Storage ii) Battery 2. Product Description a.
- Page 3 v) Start / Driving vi) Mode CRUISE CONTROL vii) Braking 4. Cleaning / Maintenance / Repairs a. Cleaning b. Brakes : maintenance / settings i) Adjusting brake cable tension ii) Brake Caliper Adjustments c. Wheels i) Inflation ii) Wheel Alignment iii) Warnings on shocks 5.
- Page 4 Warnings / Residual risks / Precautions for use a) Warnings / Precautions for use - Do not lend your electric balance bike to anyone who is not familiar with the device. - When using the Balance Bike please wear suitable clothing and all necessary protective equipment: helmet, knee pads, elbow guards and other protections.
- Page 5 - Do not be distracted while driving, answering the phone, listening to music or doing any other activity. - This device is allowed to run only on private roads and is tolerated on pedestrian routes at a maximum speed of 6km / h according to local regulations, please make sure of these different regulations.
- Page 6 under no circumstances disassemble the device or modify the components of this product. - Do not open the device, if the device is defective or malfunctioning, contact the seller immediately, do not try to repair it yourself. While driving, you may be exposed to unexpected hazards or dangerous situations, which may result in serious injury, please exercise caution and caution.
- Page 7 Vibrations Strong vibrations can be harmful to your health in case of prolonged use, or if the product is not used and maintained in accordance with the instructions Inhalation of dust and noxious fumes Formation of dust and explosive Materials from the fumes environment Hydraulic fluids on the track...
- Page 8 uneven surface), the charger must be unplugged and the Balance Bike must be off (off). During transport, the Balance Bike must be off (off), stand closed, right on its wheels, properly packaged and protected to avoid shocks or accidental start-up, this may cause malfunctions of the device, see a significant deterioration of the device or the battery.
- Page 9 ii) Battery Your balance bike contains a high capacity Lithium-Ion battery, for a safe use please follow the following instructions: - The battery cover must not be disassembled by someone who is not authorized. - Only an authorized person can open the battery cover. - Do not use the balance bike in the following cases: o Overheating / smoke / strong smell o Substance leaking at the battery location...
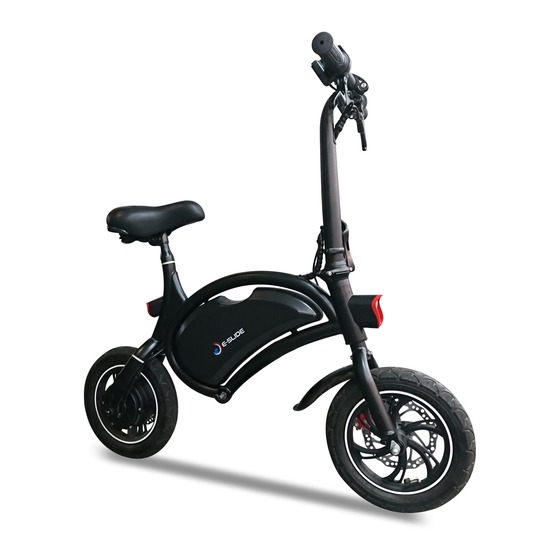
- Page 10 - Therefore the battery of your balance bike should not be disposed of as a household waste and should NEVER be incinerated as there is a risk of explosion. - Please contact local authorities for recycling practices in your jurisdiction. 2) Product Description a) Description / Presentation You have just purchased a ESLIDE model ES1200 electric...
- Page 11 List of product elements Page...
- Page 12 Pièces détachées * N° Réf. Left brake handle ES1201 Right brake handle ES1202 Start button ES1203 Folding buckle ES1204 Front lighting ES1205 Tire ES1206 Front & rear brake disc ES1207 Front mudguard ES1208 Frame ES1209 Footrest ES1210 Inner tube ES1211 Crutch ES1212 Brake caliper...
- Page 13 Accessories Fenders Seat Footrests BEFORE AFTER AC charger Manual Page...
- Page 14 b) Mounting accessories WARNING ASSEMBLY / DISASSEMBLY When mounting the elements you must comply with the following instructions and the precautions to take, if you do not comply with these instructions it could cause a malfunction of the device and cause a loss of balance (stability), a fall or an accident.
- Page 15 ii) Seat assembly A WARNING ASSEMBLY / DISASSEMBLY OF THE SEAT Make sure that the Balance Bike is in the "parking" position (kickstand in the open position, on a flat, sloping or uneven surface), that the charger is unplugged and that the Balance Bike is off (off).
- Page 16 WARNING ASSEMBLY / DISASSEMBLY OF MUDGUARDS Make sure that the Balance Bike is in the "parking" position (kickstand in the open position, on a flat, sloping or uneven surface), that the charger is unplugged and that the Balance Bike is off (off). Unpack the mudguards, the smaller one is fixed at the front using the screw and nut provided, the larger one is fixed at the back using the screw and the nut provided.
- Page 17 c) Technical characteristics PARAMETERS STANDARD DATA Materials Aluminum alloy / steel Size (folded) 1080*430*490mm Size (unfolded) Height and 1080*430*1140mm weight Wedge height 200mm Wheel size 12 inch Frame color Black Shipping weight 18.7kg Product weight 15.7 kg Maximum load 120kg ≈...
- Page 18 3) Functions The folding / unfolding system may be different depending on the product. There are 2 folding / unfolding systems: - Pin system - Loop system You will find below the details of the steps for each system. a) Pin system : Folding / unfolding the handlebar i) Pin system : unfolding the handlebar After unpacking the product, raise the steering column (photos n °...
- Page 19 Pin System: Unfolding Detail Photo n°1 Photo n°2 Photo n°3 Photo n°4 Photo n°6 Photo n°5 Page...
- Page 20 ii) Pin System: Unfolding Detail Unlock the handlebar locking buckle (photo n ° 4 / p20). Position the handlebars so that the brake handles are vertical. Re-lock the handlebar locking buckle (photo n ° 6 / p20). Unlock the safety pin up in the open position and unblock the folding loop AT THE SAME TIME: Then bend the steering column.
- Page 21 b) Buckle System: Folding / Unfolding the Handlebar WARNING FOLDING / UNFOLDING HANDLEBAR Make sure that the Balance Bike is in the "parking" position (kickstand in the open position, on a flat, sloping or uneven surface), that the charger is unplugged and that the Balance Bike is off (off).
- Page 22 Unfolding detail Photo n°1 Photo n°2 Photo n°4 Photo n°5 Photo n°3 Photo n°7 Photo n°5 Page...
- Page 23 ii) Buckle System: Handlebar Folding Unlock the handlebar locking buckle (photo n ° 5 / p23). Position the handlebars so that the brake handles are vertical. Re-lock the handlebar locking buckle (photo n ° 7 / p23). Unlock the safety pin by turning it to the left, lower the folding buckle: Then bend the steering column.
- Page 24 c) Charge the battery of the balance bike WARNING OF CHARGING Make sure that the Balance Bike is in the "parking" position (kickstand in the open position, on a flat surface, neither sloping nor rough), that the Balance Bike is off (off).
- Page 25 Photo n°2 Photo n°2 Photo n°3 Photo n°1 Version 02 Version 01 Once connected, check the digital display for BATTERY & VOLTAGE charge levels: 1 - Press 2 X on the Function button of the digital display 2 - The indication will appear in place of .
- Page 26 Loading steps After properly connecting the charging port and the power cable, the charger indicator light will turn red. After 4-5 hours the GREEN charging cycle will be complete, the indicator light of the charger will change from red to green. You must correctly disconnect the charging port and the power cable as seen in the previous step (See point i - description of the charging - photo n °...
- Page 27 You must ALWAYS unplug the charger from the balance machine and the power outlet after a full charge cycle to avoid overheating and do not alter the life of the battery, so do not leave the charger and the balance connected. continuous (whole day), this could increase the risk of fire or explosion.
- Page 28 ii) Turning on / turning on the balance bike WARNING START UP Make sure that the Balance Bike is in the "parking" position (kickstand in the open position, on a flat, sloping or uneven surface), folding ring, safety pin, tightening ring tightly closed, that the loader unplugged and the Balance Bike is off (off).
- Page 29 - Possibility of operating the accelerator - It is impossible to operate the accelerator before the ignition process is completed, that is to say before the end of the anti- start electronic security. This electronic immobilizer anti-start will allow you not to operate the accelerator as the power of the balance bike, thereby limiting the risk of falling at the start.
- Page 30 Front / rear lighting: press the RED button on the left of the handlebar for 3 seconds to switch on the headlights. A second press of 3 seconds on this push button will turn off the front and rear lights. NB: If you turn off the balance, the headlights will turn off automatically.
- Page 31 4. Gently turn the throttle grip on the right side of the handlebar. 5. The balance bike will move, you can accelerate to gain speed. 6. After a few meters, you can put your feet on the toes, the balance bike will be in balance position (stability). 7.
- Page 32 vii) Mode CRUISE CONTROL (Cruising speed) Cruise control mode allows you to lock the balance bike at maximum speed without having to accelerate. To activate it, keep the accelerator at maximum for 5s. To disable Cruise control, simply press the brake or throttle. viii) Braking Rear disc brake Front disc brake...
- Page 33 The balance bike is equipped with two disc brakes for a safe use experience. The brake handle on the right handlebar activates the front brake. The brake handle on the left of the handlebar activates the rear brake. During the action of one of the brake handles this cuts the electric motor preventing the effect of slippage and allowing a faster and softer braking.
- Page 34 Cleaning / Maintenance / Repairs a) Cleaning CLEANING WARNING Make sure that the Balance Bike is in the "parking" position (kickstand in the open position, on a flat, sloping or uneven surface), that the charger is unplugged and that the Balance Bike is off (off). Make sure that the charging port is protected by the rubber plug, to avoid damaging the device by introducing water.
- Page 35 Shorten the cable will release the brake voltage : Extending the cable will tighten the brake voltage : Tighten the screw with the key while holding the cable to the desired length: Page...
- Page 36 Test the cable tension with the corresponding brake handle : Right brake handle => front brake. Left brake handle => rear brake. The tension in the handle should be neither too strong nor too loose. WARNING THE DRAISIAN MUST ALWAYS REMAIN OFF DURING BRAKE ADJUSTMENTS.
- Page 37 BRAKING TEST Raise the balance wheel, manually turn the wheel corresponding to the brake you just adjusted. While the wheel rotates, operate the brake handle, stopping wheel rotation should be instantaneous. If the stop is not immediate, braking will not be optimal. Repeat the procedure.
- Page 38 Photo n°1 To make the settings: Loosen the screws (pictures n ° 2 and 3 p39). The stirrup must be able to move transversely when it is handled. Photo n°2 Photo n°3 Align the disc and the pads so that the space is parallel and identical from left to right of the disc.
- Page 39 If the adjustment is correct, tighten the screws slowly so as not to lose the position. Tighten the brake handle corresponding to the brake caliper you have just adjusted and then release. Visually check the alignment (photo n ° 1 / p39) If it is not optimal, repeat the procedure.
- Page 40 If the wheel seems to force or make friction noises, repeat the procedure. WARNING THE DRAISIAN MUST ALWAYS ATTENTION LA DRAISIENNE DOIT TOUJOURS RESTER REMAIN OFF DURING SETTINGS. HORS TENSION PENDANT LES REGLAGES DES FREINS. c) Wheels WARNING WHEELS Make sure that the Balance Bike is in the "parking" position (kickstand in the open position, on a flat, sloping or uneven surface), that the charger is unplugged and that the Balance Bike is off (off).
- Page 41 Make sure that the beak of the inner tube is perpendicular to the rim (see picture below) to avoid pinching the tube and / or premature wear of the tube. Use a suitable inflator, type car inflator to check the tire pressure and if necessary inflate the tube.
- Page 42 ii) Wheel Alignment The two wheels must be perfectly aligned with the frame, if this is not the case, do not use the balance bike, the wheels could be veiled, the frame, the fork or the twisted axis of direction making the use of the dangerous balance bike.
- Page 43 iii) Warnings on shocks If you suffer a shock on one of the wheels of your balance bike, it could result in: ▪ Abolish the tube ▪ Absorbing the rim of the wheel ▪ To sail the wheel ▪ Twist the fork ▪...
- Page 44 Time / Duration CAUTION - DANGER electric current ATTENTION / IMPORTANT CAUTION-Risk of electric shock / Do not open- DANGER Meaning High (up) Fragile Fear moisture - keep away from moisture. Product charger only for indoor use 6) Legal indications Imported by: DPA EUROPE Gildo Pastor Center - 7 Gabian Street, 98000 MONACO Copyright ®...
- Page 45 Declaration of conformity We, DPA EUROPE, Gildo Pastor Center - 7 Rue Gabian, 98000 MONACO, declare that this declaration of conformity is established under our sole responsibility: Brand: ESLIDE Reference: ES1200 Type: DRAISIENNE ELECTRIQUE PLIABLE To which this declaration refers, it complies with the essential requirements and other relevant provisions of EC Directive 2014/30 / EU and the MD 2006/42 / EC machine directive in application of the following relevant harmonized standards:...
Need help?
Do you have a question about the ES1200D and is the answer not in the manual?
Questions and answers