
Related Manuals for opto engineering COE HR AS-X Series


Summary of Contents for opto engineering COE HR AS-X Series
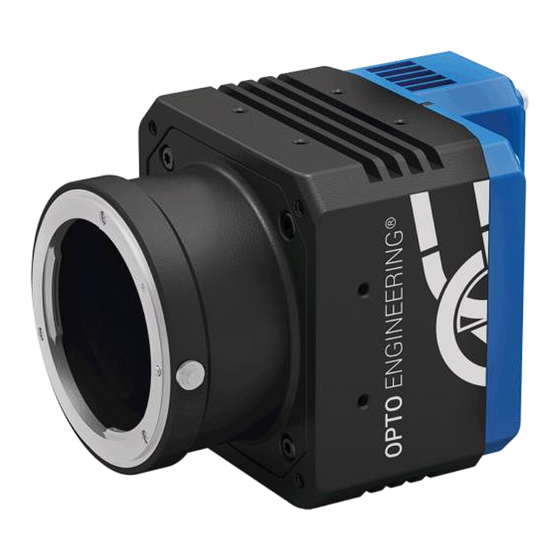
- Page 1 COE HR AS-X series COE-260 COE-290 & GigE Camera USER MANUAL Gidsds CAMERAS V1.0...
- Page 2 User Manual About this Manual This Manual is applicable to COE HR AS-X series GigE cameras. The Manual includes instructions for using and managing the product. Pictures, charts, images and all other information hereinafter are for description and explanation only. The information contained in the Manual is subject to change, without notice, due to firmware updates or other reasons.
- Page 3 If the product does not work properly, please contact your dealer or the nearest service center. Never attempt to disassemble the camera yourself. (We shall not assume any responsibility for problems caused by unauthorized repair or maintenance.) Cautions: Make sure the power supply voltage is correct before using the camera. ...
- Page 4 Part Number Part number Description COE-260-M-10GIGE-100-IR CMOS, Python 25K, APS−H, 5120x5120, 4.5pix, F mount, M58x0.75 FD11.48 COE-290-x-GIGE-110-yy-B CCD, KAI-29050, 35mm, 6576x4384, 4.5pix,F mount, M58x0.75 FD11.48, GIGE COE-290-M-GIGE-110-IR-A CCD, KAI-29050, 35mm, 6576x4384, 4.5pix,F mount, M58x0.75 FD11.48, GIGE COE-290-M-GIGE-110-IR-I-N CCD, KAI-29050, 35mm, 6576x4384, 4.5pix, M58x0.75 FD11.48, GIGE How to Order M = Monochrome C = Color...
-
Page 5: Table Of Contents
Table of Contents Chapter 1 Overview ................................... 6 Introduction..........................6 Main Features .......................... 6 Camera Physical Interfaces ....................... 6 1.3.1 Rear Panel Introduction ..........................6 1.3.2 Power and I/O Interface Introduction ......................7 1.3.3 Installation Accessories ..........................8 Chapter 2 Camera Installation and Configuration ........................ - Page 6 3.9.2 Efficient Bandwidth and Setting ........................35 3.10 User Parameter and Preference Setting ................... 36 3.10.1 Parameters Saving and Loading ........................36 3.10.2 Embedded Information ..........................36 3.11 Firmware Updating ........................ 38 Chapter 4 Revision History ..............................40 Chapter 5 Trouble Shooting ..............................
-
Page 7: Chapter 1 Overview
Chapter 1 Overview Introduction The COE camera is an image capturing device capable of real-time transmission of uncompressed image through a gigabit Ethernet interface. Remote image capturing and camera control, for example, the operating mode and the image parameters adjustment, are supported by client software. Main Features The gigabit Ethernet interface provides the bandwidth of 1 Gbps and reaches the maximum transmission distance of ... -
Page 8: Power And I/O Interface Introduction
Figure 1-3 Rear Panel Power and I/O Interface Introduction 1.3.2 The description of the 12-pin power and I/O connector is shown in the table below. Figure 1-4 Power and I/O Interface Table 1-1 Description Signal I/O Type Description Input Power ground DC_PWR Input DC 12V... -
Page 9: Installation Accessories
Installation Accessories 1.3.3 Prepare the installation accessories listed below before you install the COE camera. Table 1-2 Accessory List Accessory Name Number Description Camera The COE camera. Power I/O cable The 12-pin cable (included) or extension cable (not included). Power adapter 12V DC power adapter (Min. -
Page 10: Chapter 2 Camera Installation And Configuration
Chapter 2 Camera Installation and Configuration Installing the Camera Steps: Unpack the camera package and install the lens (optional) to the camera body by rotating the lens clockwise. Fix the camera to the desired position. Use CAT-5e or CAT-6 network cable to connect the camera with a switch or a network card. Choose a power supply method. - Page 11 Figure 2-1 IP Address Setting Click OK to save the settings. You also need to enable the jumbo frame of the NIC. For different operating systems, the path to setting the jumbo frame may be different. Here we take Windows 7 as an example. Click Start ->...
-
Page 12: Camera Ip Configuration
Note: Jumbo packet is not supported by some types of NIC. We recommend you to use the NIC which supports jumbo packet for better image transmission. Camera IP Configuration 2.2.2 You can use the client software to complete network configuration for the camera. Steps: Double click the “OECS IP Configurator.exe”... -
Page 13: Camera Configuration
Figure 2-4 Camera Network Parameters Setting (2) If you set the IP type as Static IP, you can set the IP address, subnet mask, and default gateway. You can also edit the the camera name in Device User ID field. Click Save to save the settings. - Page 14 software are shown in Figure 2-6 and Table 2-1. Figure 2-6 Main User Interface of the Client Software Table 2-1 Description of the Main User Interface Area Name Description Function modules including File, View, Camera, Settings, Tools, and Menu Bar Help.
- Page 15 Click the icon before each attribute to view and edit the details. Figure 2-7 Attribute Page Device Control: In the Device Control attribute, you can view the camera details and modify the camera name. Image Format Control: In the Image Format Control attribute, you can view the live view image width and height, pixel ...
-
Page 16: Chapter 3 Functions
Chapter 3 Functions Device Control Name Modification 3.1.1 Run client software and click Device Control. You will see the device type, the version information, the device serial number and so on. Input the device name in Device User ID as shown in Figure 3-1. Figure 3-1 Device Name Modification You can turn on the heartbeat detection mechanism, reset the device, and view the device temperature in Device Control, as shown in Figure 3-2. -
Page 17: Image Format And Frame Rate
Image Format and Frame Rate Support different image formats and customized image formats. Note: The following figures are for reference only. The actual format depends on the camera’s supported formats. 3.2.1 Camera Data Format Click Image Format Control in the attribute list and select Pixel Format. You will find the supported pixel format. Choose the appropriate data output format as shown in Figure 3-3 and finish the setting. -
Page 18: Roi Setting
Figure 3-4 Frame Rate Setting ROI Setting 3.2.3 The following three factors decide the maximum camera frame rate: Frame Readout time: the shorter the image height, the less the readout time and the higher the frame rate are. Exposure time: the less the exposure time, the higher the frame rate is. ... -
Page 19: Internal Trigger Mode
hardware external trigger mode. Select On or Off in Trigger Mode to select either internal trigger mode or external trigger mode. (Off refers to the internal trigger mode and On refers to the external trigger mode.) 3.3.1 Internal Trigger Mode The Camera can output one image or several images continuously in the internal trigger mode. - Page 20 Available parameter setting of input signal from hardware external trigger: (1) Trigger edge selection Selecting Rising Edge/Falling Edge under the external signal is available. (2) Trigger delay As shown in Figure 3-8, in order to integrate later, the camera can set delay time when receiving the trigger signal. As shown in Figure 3-9, the delay time can be set through Trigger Delay.
-
Page 21: Strobe Output
Strobe Output Strobe is external trigger output signal and is used for controlling external devices such as flashing light and so on. You can set the Strobe polarity, duration, output delay and pre-trigger through the client software. As shown in Figure 3-11, click Digital IO Control. Select Line Selector and choose output pin. Check Strobe Enabled and finish setting. - Page 22 Trigger_in3 Trigger_in2 Trigger_in1 Trigger Trigger Trigger delay delay delay Duration Strobe Intergration1 Intergration2 Intergration3 Sensor exposure Figure 3-13 Strobe Valid Electrical Level Duration (3) Strobe output delay The camera supports the function of Strobe signal output delay to satisfy special applications: as shown in Figure 3-14, when exposure starts, the Strobe output is not valid immediately.
-
Page 23: Acquisition Mode Under External Trigger
Acquisition Mode under External Trigger The acquisition mode under external trigger includes single frame mode, burst mode and PWM mode. The relationship among the input trigger signal, the Strobe output signal, the exposure time and readout time under different modes is as follows: (1) Single frame mode Expose only once when inputting one trigger signal. -
Page 24: Counter Control
Trigger Trigger Trigger delay delay delay Trigger_in1 Trigger_in3 Trigger_in2 Duration Strobe Intergration1 Intergration2 Intergration3 Sensor exposure Figure 3-18 PWM Mode Sequence Map Counter Control The counter can divide frequencies that from external inputting trigger signal. You can control the exposure depends on your expectations. -
Page 25: Imaging Parameter Setting
Figure 3-22 Counter Parameter Setting By default, Counter Reset Source is OFF as shown in the red 1 in Figure 3-22. Click Counter And Timer Control and select Counter Reset Source. Choose Software and click Execute to reset the counter, as shown in Figure 3-23. Figure 3-23 Resetting The Counter Imaging Parameter Setting 3.7.1... -
Page 26: White Balance
Figure 3-25 Gain Control The noise increases when Gain increases. Auto exposure and Auto Gain are mutually restricted. When the image is dark, the camera will firstly increase the exposure time. Secondly, the camera starts to adjust Gain Value when the exposure time turns to the maximum. -
Page 27: Look Up Table (Lut)
Click Analog Control in the attribute list. Select Auto Function AOI Selector. Choose AOI1 or AOI2. Adjust Auto Function AOI Width value and Auto Function AOI Height value and finish setting, as shown in Figure 3-27. Figure 3-27 AOI Setting Note The available exposure region and the white balance region are the overlapped part of the setting region and the image region. -
Page 28: Brightness, Hue And Saturation
Gamma=0.5 Gamma=1 Gamma=2 Gamma=4 Figure 3-29 Gamma Curve Click Analog Control in the attribute list. Select Gamma and Gamma Selector and set the parameter as shown in Figure 3-30. Figure 3-30 Gamma Setting Note: Different cameras versions have different default function parameters. The figures shown above are only for reference. Brightness, Hue and Saturation 3.7.7 ... -
Page 29: Image Reverse
Image Reverse 3.7.8 The camera supports image horizontal mirroring. Open the mirroring function to gain the horizontal mirroring image. Click Image Format Control. Tick Reverse X (horizontal) or Reverse Y (vertical) according to your preference, as shown in Figure 3-31. Figure 3-31 Tick Mirroring Function Output Reverse... - Page 30 Figure 3-33 Test Pattern The camera provides four test patterns, including Mono Bar, Checkboard, Oblique Mono Bar, and Gradual Mono Bar as shown in the following four figures. Note: Color camera and black and white camera have different test patterns. The specific test pattern is decided by the camera function.
-
Page 31: I/O Electric Feature
Figure 3-36 Oblique Mono Bar Test Pattern Figure 3-37 Gradual Mono Bar Test Pattern I/O Electric Feature 3.8.1 Line0 Opto-isolated Input Circuit In controlling camera I/O, Line0 input circuit can be shown in Figure 3-38. 2.5V_IO IO_IN0 GND_IO Figure 3-38 Input Circuit Logic 0 input level: 0 to 1 VDC (OPTO_IN pin) Logic 1 input level: 1.5 to 24 VDC (OPTO_IN pin) Maximum input current: 25 mA... -
Page 32: Line1 Opto-Isolated Output Circuit
Please make sure the input voltage is not from 1V to 1.5V as the electric status among the two values is not stable. Logic 1 Input Level Logic 0 Input Level Internal Logic Figure 3-39 Input Logic Level Input rising delay (TDR): 2.6μs Input falling delay (TDR): 19.2μs Line1 Opto-isolated Output Circuit 3.8.2... -
Page 33: Line2 Configurable Bi-Direction I/O Circuit
Parameter Symbol Value Output Logic Low Level 575mV Output Logic High Level 3.3V Output Rising Time 8.4us Output Falling Time 1.9us Output Rising Delay 16.6us Output Falling Delay 3.6us Table 3-6 shows the corresponding current and the parameter of output logic low level when the opto-isolated outputs the different external voltage and resistance. - Page 34 Figure 3-43 Inputting Logic Level Please connect to GND pin first to protect GPIO pin and then input voltage to Line2 pin. Configure Line2 to output pin The available maximum current is 25 mA and the output impedance is 40 Ω . When the environment temperature is 25 degree centigrade, the relationship among external voltage, impedance and the output low level can be shown in Table 3-4.
-
Page 35: Transport Layer Control
RS-485 3.8.4 The camera contains a full duplex RS485 interface, and the circuit shown as the figure below: RS485+ RS485- RS485- RS485+ Figure 3-45 RS-485 Circuit Transport Layer Control DHCP and Persistent IP 3.9.1 The camera supports connecting with PC through DHCP or Persistent IP. As shown in Figure 3-46, the camera will acquire IP according to the following order. -
Page 36: Efficient Bandwidth And Setting
Figure 3-46 The Transport Layer Control Interface Efficient Bandwidth and Setting 3.9.2 Packet Size and Packet Delay control the 1000M Ethernet’s actual bandwidth. The theoretical calculation of 1000M network port’s image loading bandwidth is: BandWidth=((PacketSize–(IP+UDP+GVSP Header))/(PacketSize + MACHeader+ CRC+ Packet-Delay)) * 1000M/bps. Normally, IP/UDP/GVSP Header takes 36 bytes. -
Page 37: 3.10 User Parameter And Preference Setting
3.10 User Parameter and Preference Setting Parameters Saving and Loading 3.10.1 The camera can save four groups of parameters, including one group of factory parameter and three groups of configurable parameters. You can save currently configured parameter and set corresponding default parameter when logging in at next time in User Set Control in the attribute list. - Page 38 Frame number Trigger counter ROI The above eight information will be embedded in the image data one by one according to the client sofware. If the information is not available, it will not be embedded. The AOI will not affect the embedding. If the region of AOI is small, the first line of the image data is not enough for embedding.
-
Page 39: 3.11 Firmware Updating
Trigger counter: Take 4 bytes. The range is from 0 to 2^32. ROI: Take three bytes in the initial position. The length and the width consume three bytes. The data format of ROI: The initial position of ROI takes three bytes. The length and the width consume three bytes. The initial coordinate of ROI’... - Page 40 Figure 3-52 Firmware Update...
-
Page 41: Chapter 4 Revision History
Chapter 4 Revision History Table 4-1 Revision History Description Serial Date Revision Version Section Change Description 2017-12-01 V1.0.0 — —... -
Page 42: Chapter 5 Trouble Shooting
Chapter 5 Trouble Shooting Indicator Status Definition Table 5-1 LED Indicator Status LED Status Definition Steady On The LED indicator keeps lights on all the time Unlit The LED indicator keeps unlit all the time Fast Flicker The LED indicator flickers every 200ms to 300ms Slow Flicker The LED indicator flickers every 1000ms. -
Page 43: Faq
Table 5-3 FAQ Problem Description Possible Reasons Solutions camera 1. The camera does not 1. Confirm if the power supply of camera is cannot be detected work properly. well connected (via LED indicator), and the client 2. The network cable is network connects properly (via network software.
Need help?
Do you have a question about the COE HR AS-X Series and is the answer not in the manual?
Questions and answers