
Related Manuals for Welby 7734


Summary of Contents for Welby 7734
- Page 1 User Guide Manual del usuario Adjustable Rollator Andador ajustable English... Page 2 Español... Página 17 AFTER SALES SUPPORT platinumcs@drivemedical.com 866-694-5085...
-
Page 2: Table Of Contents
Contents Introduction..................3 Parts List.....................4 Parts Diagram Safety Precautions................6 Assembly..................7 Height Adjustment Operation..................9 Loop Lock Operation Measuring Preparing to Sit Preparing to Stand Preparing to Walk Maintenance................14 Hand Brake Adjustment Warranty..................15 AFTER SALES SUPPORT platinumcs@drivemedical.com 866-694-5085... -
Page 3: Introduction
Adjustable Rollator Introduction Adjustable Rollator Congratulations on your purchase of an adjustable rollator. Our rollators are a product of quality engineering and are manufactured to meet our own highly rigid specifications and will surpass all your expectations. In this manual, you will find the assembly, use and safety instructions for the adjustable rollator. -
Page 4: Parts List
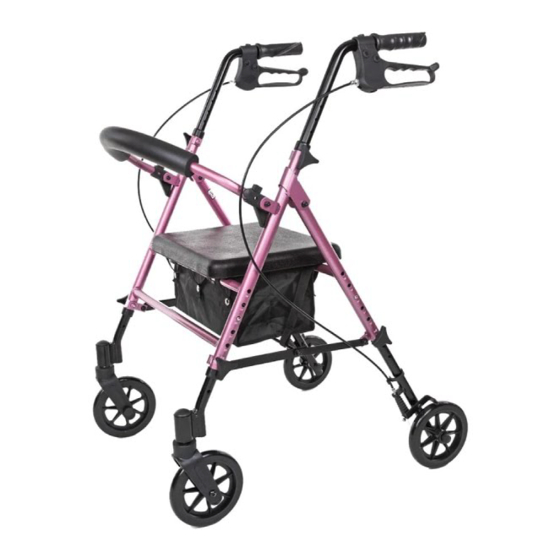
Parts List Adjustable Rollator Parts List Hand Grips (2) Loop Locks (2) Handle Height Adjustment Knobs (2) Backrest (1) Folding Hinge Seat (1) Hanging Bag (1) Leg Height Adjustment Knobs (4) Rear Wheels With Locks (2) Front Swivel Wheels (2) AFTER SALES SUPPORT platinumcs@drivemedical.com 866-694-5085... -
Page 5: Parts Diagram
Adjustable Rollator Parts List Parts Diagram AFTER SALES SUPPORT platinumcs@drivemedical.com 866-694-5085... -
Page 6: Safety Precautions
Safety Precautions Adjustable Rollator Safety Precautions Do not attempt to adjust or operate Rollator without carefully reading all instructions in this manual. Please make sure the Rollator is fully opened, seat is down and the folding bar under seat is locked in the down position. Be sure that all knobs are fully tightened and are at equal heights. -
Page 7: Assembly
Adjustable Rollator Assembly Assembly Remove all contents from carton. Open frame and place up-side-down on the floor. Attach legs without brakes to the front of the rollator by depressing push pin and sliding leg into the receptacle, making sure to match the number on the frame with the number on the leg. -
Page 8: Height Adjustment
Assembly Adjustable Rollator Height Adjustment The height of the rollator can be adjusted in two ways to accomodate many different users. Handle Height Adjustment Remove tightening knob from handle. Set handle to desired height. Replace tightening knob into handle, making sure to insert knob from the outside. -
Page 9: Operation
Adjustable Rollator Operation Loop Lock Operation Always engage and disengage wheel locks on both sides simultaneously. To slow down or come to a temporary stop — Pull up slowly on the loop locks with four fingers until unit slows down or comes to a temporary stop (Figure 5). -
Page 10: Measuring
Operation Adjustable Rollator Measuring • First measure the handle height. Start by standing up straight with your shoes on. Have a friend or family member mea- sure from the crease in your wrist to the ground. This measurement should be the approximate height of the handle bars. -
Page 11: Preparing To Sit
Adjustable Rollator Operation Preparing to Sit • Stand directly in front of the chair, facing away from it. The back of your legs should be almost touching the chair. Do not start to sit until you are balanced and standing still. •... -
Page 12: Preparing To Stand
Operation Adjustable Rollator Preparing to Stand • Engage the brakes by pushing down on the loop locks until they lock in the down position. Refer to loop lock operation for complete instructions. • Move forward and sit as close to the edge of the chair as you feel comfortable. -
Page 13: Preparing To Walk
Adjustable Rollator Operation Preparing to Walk • Place your rollator ahead of you before you take any steps. • Gently roll the rollator ahead of you as you walk. Keep the rollator close enough to you that it is supportive. •... -
Page 14: Maintenance
Maintenance Adjustable Rollator To ensure that your rollator is operating safely and smoothly, please check the following peridoically: Be sure that all knobs are fully tightened and are at equal heights. Test Rollator for stability before applying full weight to hand grips. Test the loop locks before operating the Rollator. -
Page 15: Warranty
Warranty Adjustable Rollator Warranty Conditions Dear Customer, The ALDI warranty offers you extensive benefits compared to the statutory obligation arising from a warranty: Warranty period: 2 years from date of purchase Costs: Free repair/exchange or refund. No transport costs ADVICE: Please contact our service hotline by phone, e-mail or fax before sending in the device. - Page 16 If after contacting the manufacturer you are requested to return the faulty 866-694-5085 platinumcs@drivemedical.com product please return the completed warranty card together with it. MODEL: 7734 02/2016 Drive Medical Phone lines available 99 Seaview Boulevard Monday to Friday, Port Washington, NY 11050, USA 8:30am - 8pm.
- Page 17 Contenido Introducción..................18 Lista de piezas ................19 Diagrama de las piezas Medidas de seguridad ..............21 Ensamblaje..................22 Ajuste de la altura Operación..................24 Operación del freno de mano Mediciones Preparación para sentarse Preparación para pararse Preparación para caminar Mantenimiento .................29 Ajuste del freno de mano Garantía..................30 SERVICIO POSVENTA platinumcs@drivemedical.com...
-
Page 18: Introducción
Andador ajustable Introducción Andador ajustable Felicitaciones por su compra de un andador ajustable. Nuestros an- dadores son el producto de una ingeniería de calidad y están fabrica- dos para satisfacer nuestras especificaciones propias muy rígidas y superarán a todas sus expectativas. En este manual puede encontrar las instrucciones de montaje, utilización y de seguridad del caminador ajustable. - Page 19 Lista de piezas Andador ajustable Lista de piezas Agarraderas (2) Frenos de mano (2) Perillas de ajuste de altura del mango (2) Respaldo (1) Bisagra plegable Asiento (1) Bolso colgante (1) Perillas de ajuste de altura de las patas (4) Ruedas traseras con tranques (2) Ruedas delanteras giratorias (2) SERVICIO POSVENTA...
-
Page 20: Diagrama De Las Piezas
Andador ajustable Introducción Diagrama de las piezas SERVICIO POSVENTA platinumcs@drivemedical.com 866-694-5085... -
Page 21: Medidas De Seguridad
Medidas de seguridad Andador ajustable Medidas de seguridad No intente ajustar o utilizar al andador sin haber leído detenidamente todas las instrucciones de este manual. Asegúrese de que el andador está completamente abierto, el asiento está hacia abajo y la barra plegable bajo el asiento está bloqueada en la posición hacia abajo. -
Page 22: Ensamblaje
Andador ajustable Ensamblaje Ensamblaje Extraiga el contenido de la caja. Abra el marco y colóquelo invertido en el piso. Coloque las patas sin frenos en la parte delantera del andador presionando el pasador de empuje y deslizando la pata en el receptáculo, asegurándose de que el número que aparece en el marco coincida con el número en la pata. -
Page 23: Ajuste De La Altura
Ensamblaje Andador ajustable Ajuste de la altura La altura del andador se puede ajustar de dos maneras para acomodar a muchos usuarios diferentes. Manija de ajuste de la altura Quite la perilla de apriete del mango. Ajuste el mango a la altura deseada. Vuelva a colocar la perilla de apriete en el mango, asegurándose de insertar la perilla desde el exterior. -
Page 24: Operación
Andador ajustable Operación Operación del freno de mano Siempre active y desactive los frenos de las ruedas en ambos lados a la vez. Para reducir la velocidad o detenerse temporalmente - Levante lentamente los frenos con cuatro dedos hasta que la unidad reduzca la velocidad o se detenga temporalmente (Figura 5). -
Page 25: Mediciones
Operación Andador ajustable Mediciones • La primera es la altura del mango. Para medir la altura del mango, comience por ponerse de pie derecho, con los zapatos puestos. Haga que un amigo o miembro de la familia tome la medida desde el pliegue de su muñe- ca hasta el suelo. -
Page 26: Preparación Para Sentarse
Andador ajustable Operación Preparación para sentarse • Colóquese de pie directamente delante de la silla, de espaldas a ella. La parte posterior de sus pier- nas debe estar casi tocando la silla. No empiece a sentarse hasta que esté equilibrado y parado firmemente. -
Page 27: Preparación Para Pararse
Operación Andador ajustable Preparación para pararse • Aplique los frenos presionándolos hasta que encajen en la posición hacia abajo. Consulte la operación del freno de mano para obtener las instrucciones completas. • Muévase hacia adelante y siéntese lo más cerca posible del borde de la silla en que se sienta cómodo. -
Page 28: Preparación Para Caminar
Andador ajustable Operación Preparación para caminar • Coloque el andador delante de usted antes de dar ningún paso. • Ruede suavemente el andador delante de usted mientras camina. Mantenga el andador lo suficientemente cerca de usted para que le sirva de apoyo. •... -
Page 29: Mantenimiento
Mantenimiento Andador ajustable Para asegurarse de que su andador está funcionando de manera segura y sin problemas, revise lo siguiente de manera periódica: Asegúrese de que todas las perillas estén bien apretadas y a la misma altura. Compruebe la estabilidad del andador antes de aplicar todo el peso a las agarraderas. -
Page 30: Garantía
Andador ajustable Garantía Condiciones de la garantía Estimado cliente: La garantía de ALDI le ofrece amplios beneficios en comparación con la obligación legal que se deriva de una garantía: Período de garantía: 2 años a partir de la fecha de la compra. Costos: Reparación/sustitución gratis o reembolso. - Page 31 Si después de contactar al fabricante se le pide que devuelva 866-694-5085 platinumcs@drivemedical.com el producto defectuoso por favor devuelva la tarjeta de garantía MODEL: 7734 02/2016 completada junto con él. Drive Medical Líneas telefónicas 99 Seaview Boulevard disponibles de lunes a Port Washington, NY 11050, USA viernes, 8:30 am - 8 pm.
- Page 32 DISTRIBUTED BY • DISTRIBUIDO POR: ALDI INC. BATAVIA, IL 60510 www.aldi.us AFTER SALES SUPPORT • SERVICIO POSVENTA 866-694-5085 platinumcs@drivemedical.com MODEL: 7734 02/2016 YEAR WARRANTY AÑOS DE GARANTÍA...
Need help?
Do you have a question about the 7734 and is the answer not in the manual?
Questions and answers
Can I buy a replacement rear wheel assembly?