
Related Manuals for Cinergia GE7.5

Summary of Contents for Cinergia GE7.5
- Page 1 Grid Emulator (GE) Installation and operation manual Caltest Instruments GmbH Kohlmattstrasse 7 Tel: +49(0)7842-99722-00 D-77876 KAPPELRODECK Fax: +49(0)7842-99722-29 info@caltest.de www.caltest.de...
-
Page 2: Table Of Contents
INDEX INTRODUCTION ........................5 Symbols used ......................... 5 Safety notes ........................5 Quality and regulations ....................5 PRESENTATION ........................7 Introduction ........................7 Power supply features....................9 Operation and connection modes ................10 Configuration and control of the power supply ............10 Functional diagram ...................... - Page 3 GE AC Instalation and operation manual V10.docx 4.2.2. Standby ........................ 29 4.2.3. Precharge ......................30 4.2.4. Ready ........................30 4.2.5. Run ........................30 4.2.6. Alarm ........................30 Operation modes ......................30 4.3.1. Constant Voltage (CV) ..................33 4.3.2. Faults Generation (FG) ..................34 Connection modes ......................
- Page 4 10.4. Warranty ......................... 62 10.5. Claim procedure ...................... 63 / 63 V 19...
-
Page 5: Introduction
GE AC Instalation and operation manual V10.docx 1. INTRODUCTION Dear customer, on behalf of CINERGIA team, thank you for the confidence placed in our company and for the purchase of this product. Please, read carefully this manual before using the equipment to get familiarized with it and to obtain the maximum performance from it. - Page 6 GE AC Instalation and operation manual V10.docx • EN-IEC 62040-1. Uninterruptible power supply (UPS). Part 1-1: General and safety requirements for UPS’s used in accessible areas by end users. • EN-IEC 60950-1. IT equipments. Safety. Part 1: General requirements. • EN-IEC 62040-2. Uninterruptible power supply (UPS). Part 2: Prescriptions for Electromagnetic compatibility (EMC).
-
Page 7: Presentation
GE AC Instalation and operation manual V10.docx 2. PRESENTATION Introduction As a grid emulator, the GE is an AC programmable power supply specially designed to emulate grid disturbances. Its programmable parameters will allow the generation of different type of grids and its common faults and disturbances. The main functionalities of the GE are the following: It converts the AC input, of the main grid, in a controlled programmable AC (optionally also DC) output by using an IGBT-based switching topology and DSP-based state-of-the-... - Page 8 GE AC Instalation and operation manual V10.docx REFERENCE RATED POWER (25ºC) RATED CURRENT (25ºC) WEIGHT DIMENSIONS Independent mode Parallel mode DxWxH (mm) Arms/ch Adc/ch Arms GE7.5 6.75 ±10A ±10A ±30A 770x450x1100 GE10 ±15A ±15A ±45A GE15 13.5 ±20A ±20A ±60A GE20 ±25A...
-
Page 9: Power Supply Features
GE AC Instalation and operation manual V10.docx Power supply features MAGNITUDE VALUE Power 7.5kVA-200kVA Input side (GRID side) AC Voltage Rated 3x400Vrms+Neutral+Earth Voltage range +15% / -20% Rated AC Current Depends on model (see table) 10-290Arms per phase Frequency 48-62Hz THDi (at rated power) <3%... -
Page 10: Operation And Connection Modes
Remote interface: an Ethernet communication interface with protocol MODBUS/TCP can be used to configure, monitor and operate the grid emulator. By using HMI software application provided by CINERGIA, downloading of excel files is also possible. Functional diagram The diagram below is the conceptual functions blocks diagram of the power supply:... -
Page 11: Principle Of Operation
GE AC Instalation and operation manual V10.docx Isolation transformer: a 50/60Hz isolation transformer can be provided optionally in order to isolate the output phases. In this case, an isolation monitor can be integrated in the power supply to detect isolation faults too. Input protections: these protections include a thermal-magnetic circuit breaker and fuses. - Page 12 (Please note that earth protection cable is only connected to the cabinet chassis). State-of-the-art digital control is used in all CINERGIA products. In the GE case, the control system algorithms are computed in a dual core DSP-based hardware, designed by CINERGIA, allowing a multitask execution of the regulation systems for the Active Rectifier and the Inverter output.
- Page 13 GE AC Instalation and operation manual V10.docx Setpoint Σ PR ω0 PWM x3 generator PR ω1 PR ω2 PR ω3 Feedback Therefore, the main characteristics of the Resonant Control applied are the ones listed below: Control loop rate of 15 kHz. Harmonics controlled up to 800Hz (1-15 with f =50Hz, 1-13...
-
Page 14: Installation
GE AC Instalation and operation manual V10.docx Where: A: EUT current (EUT is connected to the phase W of GE) B: GE output voltage U C: GE output voltage U D: GE output voltage U E: Instant at which the EUT is started. F: Fundamental harmonic of U (shown in the FFT) G: 15... -
Page 15: Equipment Views
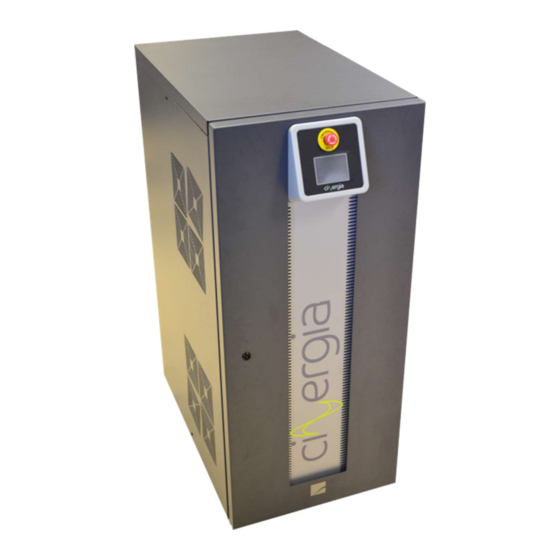
GE AC Instalation and operation manual V10.docx It must never be forgotten that the GE is a power supply, so users must take all necessary precautions against direct or indirect contact. Warning labels should be placed on all primary power switches installed in places far from the device to alert the electrical maintenance personnel of the presence of a voltage in the circuit up to 10 minutes after stopping the device. - Page 16 GE AC Instalation and operation manual V10.docx Front view (with the door open): Detailed view of the front protections and switches: 16 / 63...
- Page 17 GE AC Instalation and operation manual V10.docx Detailed view of the signal connectors: General view (with the front door closed): / 63...
- Page 18 GE AC Instalation and operation manual V10.docx Protection elements (Q*): (Q1) Input thermal-magnetic circuit breaker or disconnector according to power of the equipment. (Q2) Output disconnector. (Q3) Output fuses (inside). (Q4) AC/DC switch (only DC case). ...
-
Page 19: Equipment Reception
On receiving the device, make sure that the power supply has not suffered any damage during the transportation. Otherwise, make all pertinent claims to the supplier or to CINERGIA. The packing of the device consists of a wooden palette, a cardboard or wooden packaging (depending on the case), expanded polystyrene corner pieces, a polyethylene sleeve and bands;... -
Page 20: Transport To Location
GE AC Instalation and operation manual V10.docx 3.3.3. Transport to location The equipment includes castors to facilitate its transport to its final location. It is important to check previously if the weight of the power supply is appropriate for the site where it will be located. - Page 21 GE AC Instalation and operation manual V10.docx Recommendable minimum distance, 1 m. Recommendable minimum distance, 1 m. The equipment may be installed in any place as long as the safety and ventilation requirements are fulfilled. The power supply includes 2 levelling elements located near the front castors, which serve to immobilize the unit once it is in place.
-
Page 22: Connection
GE AC Instalation and operation manual V10.docx Connection 3.4.1. Earth protection As a device with class l protection against electric shocks, it is essential to install a protective earth wire (connect earth ). Connect the protection earth wire to the terminal (X5) before connecting the grid to the grid emulator input. -
Page 23: Output Connection, Terminals (X6 To X10)
Neutral point N (X9) 3.4.5. Emergency Power Off terminals (X12) CINERGIA units are equipped with a local Emergency Stop pushbutton at the front panel. When this local pushbutton is pressed, the unit will be completely switched off by disconnecting the main contactors at the input and at the output. -
Page 24: Output Signal Of Local Emergency Stop Pushbutton (Optional)
NC contact is wired to the lower front of the equipment, along with the connection power terminals. The additional contact could be used by the customer to integrate CINERGIA equipment into the Emergency Power Off sequence of the installation. -
Page 25: Communications
GE AC Instalation and operation manual V10.docx EPO - NC contact 3.4.7. Communications There are several connectors dedicated to communications, which are listed below: (Optional) Connector for RS485 communications (X11): DB9 connector to be used when Modbus RS485 option is chosen. (Optional) Connectors for CAN communications (X13, X14): DB9 connectors to be used when several communications in parallel are required (X13 works as input and X14 works as output). -
Page 26: Digital Inputs And Outputs
GE AC Instalation and operation manual V10.docx 3.4.8. Digital inputs and outputs Digital inputs and outputs are gathered in X16. All of them are isolated and configurable. Specifically, there are 5 digital inputs which operate at 24 V and 3 relay digital outputs. The list of each digital functionality is the following (Note that those are default functionalities). - Page 27 GE AC Instalation and operation manual V10.docx ANALOGUE AC mode DC mode CONTROL ANALOG_IN_1 0Vdc 10Vdc 0Vdc 5Vdc 10Vdc Rated AC Rated DC Voltage voltage voltage - rated DC + rated DC Current No available current current - rated DC + rated DC Power No available...
-
Page 28: Operation
GE AC Instalation and operation manual V10.docx 4. OPERATION Safety Before operating the equipment, check that the Protective Earth is properly connected. Check out the electrical installation in both sides (input and output) of the cabinet. All wires shall be connected and secured before proceeding to the power supply start-up. -
Page 29: Initialization
GE AC Instalation and operation manual V10.docx From any Initialization Error EMCY Reset? sequence? Standby Enable? Precharge Ready Run? Enable? Run? Enable? 4.2.1. Initialization During the initialization, the power supply control system checks the presence of all internal components and the embedded PC loads the operating system. No voltage is present at the DC bus and the IGBTs PWMs are completely stopped. -
Page 30: Precharge
GE AC Instalation and operation manual V10.docx The transition from the Standby state is the Enable signal or, in case of errors, a Fault signal. The Enable signal will bring the State Machine to Precharge and eventually to the Ready state. If an error is detected the power supply will go into Alarm state. - Page 31 GE AC Instalation and operation manual V10.docx Constant Voltage (CV): the power supply regulates the output voltage to the setpoint defined by the user. Faults generation (FG): the user defines the type of fault to be applied at the output voltage.
- Page 32 GE AC Instalation and operation manual V10.docx Standby Alarms Initialization, Interface General: Precharge LCD/Modbus/Console Vbusmax Vbusmin Comms OverTemp Configuration Vmax INPUT Vmin (disconnection) INPUT Alarms, limits Imax INPUT Precharge Constant Voltage Mode OverLoad INPUT PR Limit Parameters: Freq INV: (x3) Vrms, φ, R_emulated grid (Fundamental) Imax (OverCurrent) OUTPUT...
-
Page 33: Constant Voltage (Cv)
GE AC Instalation and operation manual V10.docx 4.3.1. Constant Voltage (CV) This mode allows the user to define and generate a specific grid. Parameters and limits (AC mode) In CV mode, the user can modify the value of the following emulated grid parameters as long as it is within the specified range: Parameter Allowed range of values... -
Page 34: Faults Generation (Fg)
GE AC Instalation and operation manual V10.docx Harmonic set point It should be noted that no V of any phase can exceed the 400 V, i.e., after adding harmonics peak to the fundamental voltage, the resultant wave cannot exceed 400 V peak The maximum set point value can see below: Harmonic... - Page 35 GE AC Instalation and operation manual V10.docx That is, when the trigger is activated, the GE will wait until phase U voltage reaches 0 V. Once are reached, then GE will wait until phase U reaches angle β (Fault delay). At this point, the specified fault will start.
- Page 36 GE AC Instalation and operation manual V10.docx Additionally, in the FG mode, each kind of fault has its own particular parameters to be modified by the user. These parameters are listed below: Parameters of Voltage Dip* Allowed range of values Voltage of fundamental harmonics of phases U, 0-100% V, W...
- Page 37 GE AC Instalation and operation manual V10.docx Example Overvoltage 120% Parameters of Frequency variation Allowed range of values Fundamental frequency of phases U,V,W 10-66 Hz Frequency ramp 0.01-0.5s/Hz Parameters of Flicker Allowed range of values Voltage of fundamental harmonics of phases ±...
- Page 38 GE AC Instalation and operation manual V10.docx Harmonic set point It should be noted that no V of any phase can exceed the 400 V, i.e., after adding harmonics peak to the fundamental voltage, the resultant wave cannot exceed 400 V peak The maximum set point value can be seen in the table of the Harmonic setpoint part.
-
Page 39: Connection Modes
GE AC Instalation and operation manual V10.docx Connection modes As it has been previously mentioned, for the GE there are two possible connection modes: Independent phases: Three phase power grid. Each phase (U,V,W) is controlled independently. The voltage setpoint can be different in angle and magnitude for each of the three phases. -
Page 40: Start-Up
GE AC Instalation and operation manual V10.docx The grid side of the power supply is protected by a thermal-magnetic circuit breaker. Be sure that this breaker (Q1) is switched off: Check that all wires are connected and secured before proceeding to the power supply start-up. -
Page 41: Stop
GE AC Instalation and operation manual V10.docx 8. Send the Run signal (Ready Run) Please keep in mind that not all EUTs are compatible with all operation modes. If the power supply is operated as a voltage source, please do not connect any other voltage sources at the output. -
Page 42: Emergency Stop
GE AC Instalation and operation manual V10.docx When the power supply is running, the user may send the Not run signal at any time. This will stop the IGBT PWM signals but all internal parts will be kept powered. To restart operation, send the Run signal. -
Page 43: Alarms
Otherwise, contact Cinergia for technical support. PID Saturation The PID controller is saturated Reset the equipment. Contact Cinergia for technical support if this alarm persists. Alarm in node One of the two control boards Reset alarms. has an alarm. -
Page 44: Alarms Reset
2. Send a Not enable and Not run signals (note: this step is done automatically when the user is interfacing the power supply by the LCD or by the software provided by Cinergia). 3. Proceed as a standard start-up process by deactivating the emergency stop (pull out the button). -
Page 45: Local Touchscreen Control Panel
GE AC Instalation and operation manual V10.docx 5. LOCAL TOUCHSCREEN CONTROL PANEL Basic functions The LCD touchscreen main purpose is to provide the user with the necessary information about the power supply principal variables. Besides, the touchscreen allows the user to interact with the power converter and control some of these variables. - Page 46 GE AC Instalation and operation manual V10.docx Operational The main purpose of the Operational menu is allowing the user to introduce set-points as well as manage the power supply State Machine (as long as the Local control is activated). The user gets to read the following information as well: ...
- Page 47 GE AC Instalation and operation manual V10.docx The power supply State Machine must be in either READY or RUN for the user to introduce these set-points. If it was the case that the analog input is activated, then the voltage set-point button would no longer be activated.
- Page 48 GE AC Instalation and operation manual V10.docx In order to change the sign of the set point the +/- button is used. First enter the value of the setpoint and then click the +/- button (if +/- button is pressed before entering the setpoint value, it does not work).
-
Page 49: Supervision
GE AC Instalation and operation manual V10.docx Supervision The Supervision window is exclusively informative. It shows the main variables of the inverter. Configuration The Config. window abbreviation of Configuration window is used to set the configuration mode of the converter. ... - Page 50 GE AC Instalation and operation manual V10.docx In order to change the IP address four numbers have to be introduced. These numbers have to be compressed between [0,255]. The first octet corresponds to the most significant part of the address. The procedure is equivalent to the procedure explained in Commands section.
- Page 51 GE AC Instalation and operation manual V10.docx About This window shows the basic hardware and software information of the converter. / 63...
- Page 52 GE AC Instalation and operation manual V10.docx 6. CONSOLE CONTROL The GE can be controlled using Digital and Analog Inputs and Outputs. I/O pin Function DIG_IN_1 Console select control DIG_IN_2 DIG_IN_3 Not used DIG_IN_4 REARME DIG_IN_5 READY/DISABLE DIG_OUT_1 RUN Output signal DIG_OUT_2 ALARM Output signal DIG_OUT_3...
-
Page 53: Remote Communications
GE AC Instalation and operation manual V10.docx 7. REMOTE COMMUNICATIONS CINERGIA’s power supplies can be operated and supervised remotely through an Ethernet communications bus. An internal embedded PC, with CINERGIA’s proprietary software, allows the exchange of information between the internal CAN bus and the external Modbus TCP/IP (Ethernet). -
Page 54: Iq Managements
GE AC Instalation and operation manual V10.docx 8. IQ MANAGEMENTS Many of the parameters of this equipment are defined as IQ (Texas Instruments nomenclature). An IQ number refers to a 32 bit signed integer and in its name it is specified in which bit the decimal number begins. - Page 55 GE AC Instalation and operation manual V10.docx IQ21 functions: public double IQ21toFloat(double Var) if (Var > 2147483648) //if the value is bigger than 2^31 (positive) Var = Var - 4294967296; // Var - 2^32 Var = Var / (2097152); // Var / (2^21) else Var = Var / (2097152);...
- Page 56 Connect a standard RJ45 Ethernet cable to terminal X15. The unit can be connected directly either to a computer or to a router (wired or wireless). If the CINERGIA unit is connected through a router, several computers could be connected to the unit at the same time.
-
Page 57: Operation
GE AC Instalation and operation manual V10.docx Operation A: Information about the status of the equipment and buttons to control it: Enable / Disable: the corresponding led shows whether the equipment is enabled or disabled. Run / Ready: the corresponding led shows whether the equipment is running or is ready for operation. -
Page 58: Alarms
GE AC Instalation and operation manual V10.docx Alarms In this tab, the alarm status of each converter is shown. When there is an alarm, the light turns to red. Supervision A: Information about the electrical parameters of both converters: Voltage Current Frequency Temperatures... -
Page 59: Ac Operation
GE AC Instalation and operation manual V10.docx Voltage DC link B: Current trend plots: Three variable per plot are allowed at the same time. Due to a long refreshing time, it is not possible to detect fast current transients of the variables. -
Page 60: Ac Faults
GE AC Instalation and operation manual V10.docx AC Faults Before introduce any fault to the emulated grid, set any grid using Grid Mode in the AC Operation tab. The faults are going to be done in this emulated introduced grid. A: Selection of the fault. - Page 61 GE AC Instalation and operation manual V10.docx D: Frequency Variation configurations. This fault makes the frequency grid to reach the introduced frequency according to the also introduced ramp. The minimum and maximum frequency are 10Hz and 65Hz. If the duration of the fault (introduced in H) is not long enough, the frequency will not reach the introduced one.
-
Page 62: Warranty And Maintenance
(1) year from the Ex Works delivery date. If a purchased CINERGIA product becomes defective because of a faulty component or manufacturing, at any time during its standard warranty period, CINERGIA shall provide one of the following solutions: •... - Page 63 If defect of malfunction is detected, please proceed as follows: • Immediately notify in writing CINERGIA by submitting a brief report describing the type of fault detected and all the data contained in the product data plate, attaching a copy of the purchase invoice/receipt.
Need help?
Do you have a question about the GE7.5 and is the answer not in the manual?
Questions and answers