
Related Manuals for Rehau REH FC-BMS3


Summary of Contents for Rehau REH FC-BMS3
- Page 1 67346 02-15 (HKT) User Manual REH FC-BMS3 REH TA3 REH TD3 REH DT3 REH C T3 REH BA3 www.rehau.uk...
- Page 2 CONGRATULATIONS Congratulations with you new control system for underfloor heating and cooling. The control system has been developed to provide a temperature control system for room heating and cooling, integrating the switching of primary heating and cooling sources with the control of water temperature and mixing devices.
-
Page 3: Table Of Contents
INSTRUCTIONS Master with Display - Type REH FC-BMS3/REH BA3......8 Introduction ........... . . 8 Supply water temperature control . -
Page 4: Quick Guides
QUICK GUIDES QUICK GUIDE, ANALOGUE ROOM SENSORS These room sensors have an adjustment knob which enables you to increase or decrease the room temperature setting by up to 4°C. Room sensors type REH TM3 and REH TD3 have a slide switch for selecting the sensor's mode of operation. 4 diff erent modes can be selected: Auto, Day, Night and OFF REH TA3 REH TD3... - Page 5 c. The display will show “CH 1” (channel 1). - Press the OK (√) button. - Select “ON” if this channel (room sensor) is to be controlled by the REH CT3 room controller, otherwise select “OFF”. - Now press the OK button to go to the next channel (CH 2) and repeat this step until all the required channels have been set to “ON”.
-
Page 6: Quick Guide, Reh Dt3 Room Sensor With Display
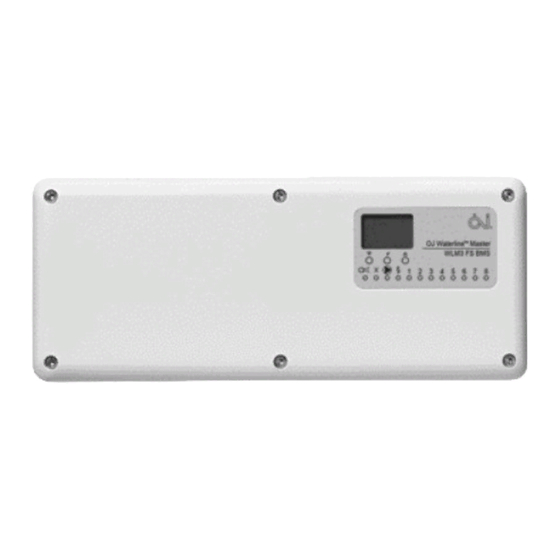
QUICK GUIDE, MASTER MODULES REH BA3 masters are preset and need no adjustment - see “Factory settings”. With REH FC-BMS3 masters, you can adjust the operating temperatures for any rooms which are not controlled by a CT room sensor. Setting day temperature REHAU BA3 To adjust the day temperature (indicated by a sun in the display), press the OK button. -
Page 7: Troubleshooting
TROUBLESHOOTING - If any LED on the master is flashing - see “Error indication”. Room is too cold The room sensor is placed in a position that is not representative of the general temperature in the room. For example mounted on an external wall or near an external heat source. (after running for at least 48 hours) If the room is controlled by a REH CT3 room controller, check that the time and temperatures are set correctly. -
Page 8: Instructions
Using external switch The day temperature setpoint is defaulted to the factory setting of 21°C and the night temperature to the factory setting of 18°C. These default settings can be changed on the REH FC-BMS3 master. for night setback The current operating setpoint of the master can be forced into night temperature by connecting a separate timing device to the master. - Page 9 Navigating the menu By using the UP (△), DOWN (▽) and OK/CONFIRM ( ) buttons, you move through the main menu into submenus. These submenus are described below. If you want to change a value, press the CONFIRM ( ) button once, then alter the value with the UP (△) and DOWN (▽) buttons.
-
Page 10: Supply Water Temperature Control
Using the supply water sensor A limit sensor must be used with the REH FC-BMS3, but can be used without an outdoor compensation module (WLOC3. In this case, the master will control the temperature of the supply water flowing into the system via a 3- or to limit supply water temperature: 4-port mixing valve and actuator. - Page 11 Max. supply temperature The max. permissible supply water temperature is set according to the design requirements of the installation (line A on the curve). This is the safety maximum. Weather compensation Winter A design outdoor temperature and the corresponding design supply water temperature are set (point B).
- Page 12 The offset value is calculated as three times the worst temperature deviation in the system. The maximum permissible BOOST compensation is limited to +/-15°C. The BOOST function is an additional input to the current outdoor temperature compensation calculation and gives the following algorithm: Water supply temperature setpoint = outdoor temperature compensated water supply temp.
-
Page 13: Service Menu
Service menu Service menu Press the OK button to enter the menu. The controller will automatically return to the main menu after 10 minutes. 5.00 Software version OK, no faults/errors E0 to E11 shown if a fault/error is present. See page 15 for explanation. LS = Low signal on wireless room sensors/controllers LB = Low battery on wireless room sensors/controllers Submenu 2... - Page 14 “E:CHANNEL” – This is a channel error which must be checked locally on the master concerned. “E1:0-COMM” – Channel 0 or channel 15 are no longer sending data. “E2:UNITNUM” – Units are set for channels 9-14 but no BA module found. “E3:APPSENS”...
- Page 15 Read-out Room temperature in the various rooms. Press the OK ( ) button and then the UP or DOWN button to select another room. The actual room temperature is shown in the centre of the display. If a maximum 24.0°C limitation sensor is connected, the temperature measured by the sensor is shown above the actual room 22.9°C temperature.
- Page 16 Read-out Output runtimes in years, days, hours and minutes can be viewed. Total system runtime Boiler relay runtime UFH pump relay runtime X-OUTPUT runtime Runtime of each channel output relay on master YY:DDD:HH:MM Years: Days: Hours: Minutes Runtime of each channel output relay on add-on module YY:DDD:HH:MM Years: Days: Hours: Minutes Return to the main menu by pressing the OK button briefl y.
- Page 17 Cooling channel settings Mode: OFF: Channel output (room) not used for cooling. ON: Channel output (room) used for both cooling and heating. Dual: Channel output (room) used for heating and the following channel output used for cooling. Channel Mode Default Ch 1 OFF / ON / Dual...
- Page 18 Advanced service menu on REH FC-BMS3 Masters Press the UP and DOWN buttons simultaneously for 5 seconds while the “sun” is shown on the display. To enter Then also press the “OK” button for 1 second. Number of units on the 1-wire bus...
-
Page 19: Using Cooling Functions
INSTRUCTIONS Using cooling functions Factory settings, masters Master Settings Factory setting Own setting Room temperature 21.0°C BA/FC-BMS Night temperature 18.0°C OFF temperature 5.0°C Floor limit temp., high 27.0°C Floor Limit temp., low 17.0°C Max. water temperature 55.0°C FC-BMS Weather compensation Outdoor temperature -3.0°C Cold (winter) - Page 20 Additional information Master Settings Factory settings Cooling mode Day cooling temperature Day heating temperature + 3°C BA/FC- Night cooling temperature Day cooling temperature +3°C Dew point safety zone Dew point + 3°C Room temperature control PI-control P = 4°C I = 90-180 sec K-factor = 0.1 Floor Limit temperature control P-control...
-
Page 21: Error Indication
Error number will be indicated by the number of flashes, with a pause of less than a 1/2 second between flashes. Indication will be followed by a pause of 2 seconds, after which the sequence will be repeated. Error codes can also be seen in the service menu of REH FC-BMS3 masters (submenu 2). - Page 22 Flashing output LED (red): A flashing output LED indicates that the room sensor/controller on that channel has a fault/error. Error codes can also be seen in the service menu (submenu 2a). E1, 1 flash The master has lost communication to the room sensor. The fault can be corrected by re-establishing connection to the room sensor. The fault condition will be automatically reset once correct communication is resumed.
-
Page 23: Rehau Intelligent Room Controller - Type Reh Ct3
In addition to the REH CT3's immediate area of control, set in the ‘AREA’ option of its internal menu, the REH can control the time and temperature characteristics of other sensors (up to 14) connected to the REH FC-BMS3/BA3 master. This maximises comfort and efficiency while saving energy and reducing costs. - Page 24 Display Buttons Automatic mode Manual mode Time and temperature Day number 4-event symbol Wake Night Home Activating the room controller (fi rst-time startup) 1. The fi rst time power is connected (or after a factory reset), the clock and weekday will fl ash and must be set.
- Page 25 ArEA - (group of rooms) The rooms/channels set as part of the REH CT3 area will follow the automatic temperature settings of this room controller (4-event timer, min. and max. floor temperature limits). Set a channel (room) to ON if it is to be part of this area. Example: An area could be the living room, kitchen, and children’s rooms, all of which have a high temperature requirement during the afternoon and early evening and a lower temperature requirement during the morning and night.
-
Page 26: Everyday Use Of The Room Controller
Everyday use of the room controller 4-Event Clock Mode The day has been split into 4 events describing a typical day. When the room controller is in 4-event mode, it will automatically change the temperature to the required level at the programmed times. As standard, Wake up the room controller uses 4 events on days 1 to 5 (Monday to Friday) 2 events on days 6 and 7 (Saturday and Sunday). -
Page 27: Programming 4-Event Times And Temperatures
Programming 4-event times and temperatures For each event, start time and required temperature must be set. Press the OK (√) button for 3 seconds to start programming Example: You want the heating to start at 07:00 in the morning Days 1-5 and the temperature to be 25°C. -
Page 28: Advanced Settings And Read-Outs
Advanced settings and read-outs Press the UP (△) and DOWN (▽) buttons simultaneously for 3 seconds. INFO will be displayed. 3 sec. INFO - Information INFO allows you to view the room and floor temperatures actually measured. The floor temperature is only shown if a floor sensor is installed. Software Version Room temperature Press the UP (△) or DOWN (▽) button to view the various read-outs. - Page 29 2-step mode Operates an additional output as a boost output. The selected channel output is the normal floor heating output. The next channel output is the boost output, which is activated under the conditions below. tEmP sets the temperature hysteresis. (The tolerance before the second output is allowed to activate).
- Page 30 PRO - 4-event sequence It is possible to change the factory-set sequence for Days 1-5 (4 events) and Days 6-7 (2 events). Days 1 to 5 are usually Monday to Friday, while Days 6-7 are usually Saturday and Sunday. An event is either a comfort temperature or a setback temperature. You can select from the following sequences, which are displayed in the form of a code.
- Page 31 The maximum permissible floor temperature setting is shown. Use the UP (△) or DOWN (▽) button to increase or reduce the setting, then press the OK (√) button to accept. The display now shows LoLi. Press the OK (√) button to continue. The minimum permissible floor temperature setting is shown.
- Page 32 1. Press the UP (△) or DOWN (▽) button to select the channel/room. 2. Press the OK (√) button to view the ON/OFF settings. 3. Press the UP (△) or DOWN (▽) button to change the ON/OFF settings. 4. Press the OK (√) button to return to the channel/rooms select menu. Set the channel/room (Ch) to ON if it is to follow the settings of this room controller.
-
Page 33: Reset To Factory Settings - Room Controllers
Reset to factory settings - room controllers NOTE: If more than one REH CT3 is present in the system, please copy this page. Press the pinhole button R for 3 second. and the thermostat will Group Room return to factory settings. Remember to set time, day and area. -
Page 34: Radiator Mode
Where a radiator circuit is used, it is possible to control room temperature using a special REH CT3 mode called Radiator Mode, thus optimizing energy savings. The controller measures the temperature in the room, and a zone valve is then controlled via the REH FC-BMS3/ BA3 master, which in turn activates the boiler on demand. -
Page 35: Rehau Intelligent Room Sensor With Display - Type Reh Dt3
INSTRUCTIONS Intelligent Room Sensor with Display - Type REH DT3 Introduction REH DT3 is a room sensor with display. It displays and controls room temperature with the possibility of adjusting the standard set point in the system by ±4°C. It also features mode selection, where Auto, Day, Night and OFF (frost protected) are available, and allows connection of a floor sensor for minimum or maximum floor temperature limitation. -
Page 36: Everyday Use
Everyday use: (Home screen functions) Automatic mode: In automatic mode, a clock symbol ( ) is shown along with the actual temperature. The temperature is controlled by the master's comfort setpoint or by a room controller (REH CT) if this REH DT is included in the REH CT's area (zone). -
Page 37: Advanced Settings And Read-Outs
Advanced settings and read-outs: Press the UP (△) and DOWN (▽) buttons simultaneously for 3 seconds. INFO will be displayed. Continue pressing the UP(△) button until you reach the submenu you want. 3 sec. Select the submenu with the OK (√) button. INFO - Information INFO allows you to view the room and floor temperatures actually measured. -
Page 38: Rehau Intelligent Room Sensors - Type Reh Tx3
With REH FC-BMS3 masters, the default DAY, NIGHT and OFF temperature settings can be adjusted via the display. Changing the temperature setting on a REH FC-BMS3 master also changes the default temperature for all connected room sensors. However, the temperature setting of each REH TA3, REH TM3 or REH TD3 room sensor is locally adjustable via its own adjustment knob. With this knob, the temperature setting from the master can be increased or decreased by 4°C for that specific room. - Page 39 We recommend that a suitable check is made as to WALFORD whether the REHAU product is suitable for the envisaged purpose. Application, use and processing of the products is carried out beyond ROS--ON-WYE, HEREFORDSHIRE the scope of our control and are therefore carried out exclusively at your own responsibility.
Need help?
Do you have a question about the REH FC-BMS3 and is the answer not in the manual?
Questions and answers