Table of Contents
Advertisement
Quick Links
Advertisement
Table of Contents

Related Manuals for Jeep CJ-3A


Summary of Contents for Jeep CJ-3A
- Page 2 Lock Your Car Your Jeep is equipped with an Ignition Lock to protect it against theft. Locking is a part of parking. The igni- tion switch is operated by a key which should be removed after turning off the ignition.
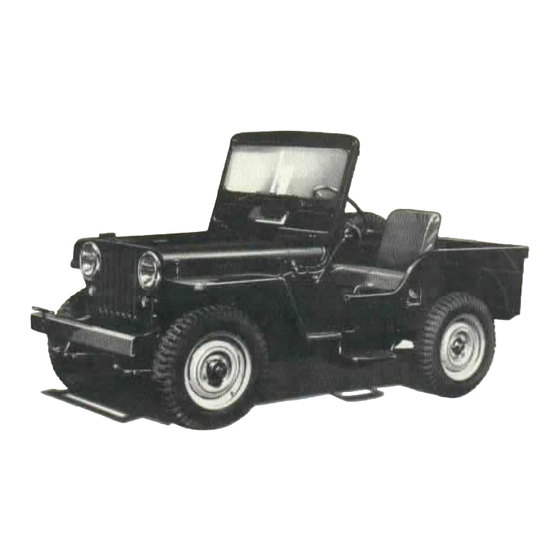
- Page 3 Willys-Overland OWNER’S MANUAL Universal Jeep Model CJ-3A FIRST EDITION Copyright 1948 Willys-Overland Motors Willys-Overland Export Corporation Toledo, Ohio, U. S. A...
- Page 5 Foreword YOUR possession is a motor vehicle that has been thoroughly tested and inspected. Like any other piece of machinery, to maintain it in first class condition, you should lubricate it at the time prescribed with the proper grade of oil and grease and keep all working parts and oil holes clean and free from dirt and grit.
-
Page 6: Standard Warranty
Standard Warranty HE only Warranty under which new Willys-Overland Motor Vehicles are sold is that of the Manufacturer, being the Standard Warranty recommended by the Automobile Manufacturer’s Association, and is as follows: “This is to certify that we, WILLYS-OVERLAND MOTORS, INC., TOLEDO, OHIO, U.S.A. warrant each new motor vehicle manufactured by us, to be free from defects in material and workmanship under normal use and service, our obligation under this Warranty being limited to making good at our factory any part or parts thereof, including all equipment or trade accessories (except tires) supplied by the Car Manufacturer, which shall, within ninety (90) days after making... -
Page 7: General Data
General Data Engine—Model CJ-3A Number of Cylinders Bore 3-1/8” 79.37 mm. Stroke 4-3/8" 111.12mm Piston Displacement 134.2 cu. in. 2199.53 cc Compression Ratio 6.48 to 1 Horsepower 15.6 Horsepower Actual Revolutions per minute 4000 Torque ~Maximum Lbs. Ft 14.5 kg.m... - Page 8 Inspection Your Jeep was carefully lubricated and inspected at the factory and again thoroughly serviced by the Selling Dealer. After your vehicle has been operated 1000 miles (1600 Km.) and also 2000 miles (3200 Km.), return it to your Dealer for the free inspections in accordance with Factory Service Policy. These inspections are free with the exception of engine oil and anti-freeze solution used.
-
Page 9: Special Precautions
“cautions” below: The Jeep is equipped with a transfer case and four-wheel drive to provide additional traction and a lower gear ratio for use on difficult terrain. Use the front wheel drive only when necessary. Consider the front wheel drive and the transfer case as a lower gear ratio than the standard transmission low gear and use it only when greater power is required. -
Page 10: Proper Operation
DRIVING A NEW “JEEP” Do not run your “Universal Jeep” faster than 40 miles an hour (64 Km. /h.) for the first 500 miles (800 Km.) or if used on the farm or for industrial operation, use care when pulling heavy loads in the lower gear ratios. If the vehicle is operated at high speeds while new or used for heavy pulling for a long period, the closely fitted parts might possibly become overheated, resulting in scored pistons, cylinders or burned bearings. - Page 11 Pull the choke control button No. 8 one-fourth of the way out which also opens the throttle slightly. Place the key in ignition lock No. 29 and turn it to the right, closing the ignition circuit. Disengage the clutch by depressing the pedal. Depress the foot starting switch No. 15. Should the engine fail to start at once, pull the choke all the way out and press the starting switch.
- Page 12 FIG. 2 SIDE SECTIONAL VIEW OF ENGINE 1—Fan Assembly 2—Water Pump Bearing and Shaft Assembly 3—Water Pump Seal Washer 4—Water Pump Seal Assembly 5—Water Pump Impeller 6—Piston 7—Wrist Pin 8—Thermostat Assembly 9—Water Outlet Elbow 10—Thermostat Retainer 11—Exhaust Valve 1 2—Intake Valve 13—Cylinder Head 14—Exhaust Manifold Assembly 15—Valve Spring...
- Page 13 TO START VEHICLE. Release hand brake, if set. Depress clutch pedal. Move transmission gearshift lever to first speed position—see Fig. 3. (Note that the front axle and transfer case shift levers are not used when the vehicle is driven on the highway in rear wheel drive.) Depress the foot accelerator pedal gradually and at the same time, slowly release the clutch pedal.
- Page 14 FIG. 4—END SECTIONAL VIEW OF ENGINE 1—Ignition Coil 2—Cylinder Head Gasket 3—Exhaust Valve Guide 4—Intake Manifold Assembly 5—Valve Spring Cover Assembly 6—Heat Control Valve 7—Crankcase Ventilator Gasket 8—Exhaust Manifold Assembly 9—Crankcase Ventilator Assembly 10—Distributor Shaft Friction Spring 11—Oil Pump Driven Gear 12—Oil Pump Gasket 13—Oil Pump Assembly 14—Oil Pump Pinion...
- Page 15 USE OF FOUR WHEEL DRIVE. The “Universal Jeep” is equipped with four-wheel drive and transfer case to provide additional traction and a lower gear ratio for use on difficult terrain and to provide low speed pulling power for industrial and agricultural use. Four-wheel drive should be used only when greater traction and power are required than that provided by the standard transmission low gear.
- Page 16 Balance tire wear between the front and rear wheels as closely as possible. Keep tires inflated to recommended pressure (Page 51) especially when operating the vehicle with maximum load. Avoid the use of four-wheel drive on hard surfaced highways as it will result in rapid tire wear and hard shifting of the transfer case gears.
-
Page 17: General Lubrication
General Lubrication The use of high grade lubricants and regular application is specially essential when operating the “Jeep” because of the diversified service it performs. The amount of trouble free service received will be in proportion to the care given. Lubricate the vehicle in accordance with the type of service performed. -
Page 18: Engine Lubrication
Lubrication Capacities U. S. Imperial Metric Engine Crankcase—oil filter empty (qts.) 4-1/2 4.73 liters Transmission Transfer Case (pts.) 6-1/2 5-1/2 3.7 liters Differential—Front Axle (pts.) 2-1/2 1.18 liters Differential—Rear Axle (pts.) 2-3/4 2-1/4 1.30 liters Oil Bath Air Cleaners (pts.) 1-1/4 591.40 CC Brake System Fluid (pts.) - Page 19 period for lubrication depends entirely upon the type of work being done. When doing dusty field work, lubricate these points daily as grit and dirt will work into the bearing surfaces and cause rapid wear unless forced out by new lubricant. The importance of using a good grade of chassis lubricant can not be exaggerated, for the cost will be more than repaid by longer wear and good service.
- Page 20 UNIVERSAL JOINTS (PROPELLER SHAFT). Every 1000 miles (1600 Km.) lubricate propeller shaft universal joints and slip joints with a good quality lubricant. Lubricate daily for field work. UNIVERSAL JOINTS (FRONT AXLE SHAFT). The front axle universal joints are inclosed in the steering knuckle housings which are filled with lubricant so require no attention other than checking each 1000 miles (1600 Km.) to be sure the housings are filled to plug level.
-
Page 21: Proper Maintenance
“Jeep” at the factory. In the following paragraphs are methods of making minor adjustments and preventive maintenance suggestions. -
Page 22: Checking Valve Timing
VALVE AND IGNITION TIMING. Piston Measurements From Top Center 039” (0.991 Inlet opens 9 degrees before top center mm.) Inlet closes 50 degrees after bottom center 3.772” (95.81 mm.) Exhaust opens 47 degrees before bottom center. .3.799” (96.49 mm.) Exhaust closes 12 degrees after top center 054”... -
Page 23: Ignition Timing
IGNITION TIMING. The breaker points should be cleaned and adjusted to .020” (0.51 mm.) opening. Remove all the spark plugs except No. 1. Rotate the crankshaft until No. 1 piston is coming up on the compression stroke which can be determined by the resistance in the cylinder. -
Page 24: Engine Fails To Start
ENGINE FAILS TO START. Should the engine suddenly stop or fail to start, check the cause as follows. Also see “Emergency Chart” Page 54. 1. Make sure there is gasoline getting to the carburetor (Note: Should the trouble be traced to the gasoline supply see “Fuel System”... -
Page 25: Engine Mountings
6. To test the secondary coil circuit, remove the distributor cap and turn the engine until the breaker points are making contact. Turn “ON” the ignition switch and remove the high tension wire (center wire) from the distributor cap. Hold this wire about one- eighth of an inch from a clean, unpainted surface of the engine, then open and close the breaker points with the finger, giving them a short, snappy break. -
Page 26: Oil Pump Assembly
FIG. 11—OIL PUMP 1—Cover Screw 2—Cover 3—Cover Gasket 4—Outer Rotor 5—Shaft and Rotor 6—Body 7—Driven Gear 8—Gasket 9—Gear Retaining Pin 10—Relief Valve Retainer 11—Relief Valve Retainer. Gasket 12—Relief Valve Spring 13—Relief Valve Plunger OIL PUMP ASSEMBLY. The oil pump assembly is provided with a pressure relief valve which controls the maximum oil pressure at all speeds. - Page 27 pump gear must be correctly meshed with the camshaft gear to allow mesh of the distributor driving key and slot with the distributor rotor in the original position. Should it be necessary to reset the ignition timing refer to Page 21 FLOATING OIL INTAKE.
-
Page 28: Voltage Regulator
In operation (see Fig. 12) clean air flows from the air cleaner through the short connecting tube to the oil filler tube and then through the crankcase and valve compartment to the intake manifold. Any vapors in the crankcase are carried into the manifold and burned. -
Page 29: Distributor Assembly
DISTRIBUTOR ASSEMBLY. The distributor delivers the spark to the right cylinder at the right time. The mechanical breaker, built in the distributor, opens and closes the primary circuit at the exact time for ignition. See Fig. 7. The distributor cap should be kept clean for efficient operation. It should be inspected periodically for cracks, carbon runners, evidence of arcing and badly corroded high tension terminals. -
Page 30: Fuel System
FUEL SYSTEM. FIG. 13—FUEL AND VACUUM PUMP 1—Fuel Pump Bowl 2—Fuel Pump Filtering Screen 3—Fuel Pump Bowl Gasket 4—Fuel Pump Inlet Valve Assembly 5—Fuel Pump Diaphragm Assembly 6—Fuel Pump Diaphragm Spring 7 —Fuel Pump Rocker Arm Spring 8—Fuel Pump Rocker Arm Assembly 9—Fuel Pump Rocker Arm Pin 10—Vacuum Pump Diaphragm Assembly 11—Vacuum Pump Inlet... -
Page 31: Fuel Pump
FIG. 14—CARBURETOR I—Pump Operating Lever Assembly 15—Idle Adjustment Screw 2—Choke Valve Assembly 16—Idle Adjustment Screw Spring 3—Choke Shaft and Lever Assembly 17—Idle Port Rivet Plug 4—Metering Rod Spring 18—Throttle Valve S—Nozzle 19—Pump Jet 6—Nozzle, Retaining Plug 20—Pump Jet Strainer Nut 7—Metering Rod Disc 21—Pump Jet Strainer 8—Needle, Pin, Spring and Seat Assembly... -
Page 32: Cooling System
COOLING SYSTEM. The practice of checking the condition of the cooling system of your Jeep while lubricating it will guard against costly delays in service. Inspecting the condition of the radiator and heater hoses; also the fan belt and water pump will eliminate the possibility of an overheated engine due to a water leak or loose fan belt. - Page 33 RADIATOR FILLER CAP. This cap is of the pressure type, which prevents evaporation and loss of cooling solution. A pressure up to 4-1/2 pounds (.25 Kg./sq. cm.) makes the engine more efficient by permitting a slightly higher operating temperature. Vacuum in the radiator is relieved by a valve in the cap which opens at 1/2 to 1 pound (.035 to .070 Kg./sq.
-
Page 35: Electrical System
ELECTRICAL SYSTEM. The wiring diagram Fig. 16 shows the general arrangement of all the electrical circuits, together with all the units in correct relation to the position in which they are found. Regular inspection of all electrical connections avoids failures in the electrical system. When tracing any one particular circuit, note that the wires have different colored tracers to identify each individual wire. -
Page 36: Lighting System
LIGHTING SYSTEM. The wiring of the lighting system is shown in Fig. 16. The lighting circuit is protected by an overload circuit breaker mounted on the back of the main light switch and no replaceable fuse is required. It clicks off and on in the event of a short circuit in the wiring. - Page 37 The screen should be made of light colored material and should have a black center line for use in centering the screen with the vehicle. The screen should also have two vertical black lines, one on each side of the center line at a distance equal to the lamp centers.
-
Page 39: Transmission Assembly
CAUTION: Avoid the practice of resting the foot continuously on the clutch pedal while driving and do not slip the clutch excessively instead of shifting gears. Slipping the clutch causes excessive heat, with the result that the clutch is finally made inoperative. -
Page 40: Transfer Case Assembly
Shift is smooth and positive through a cane type control lever mounted in a shift housing at the top of the assembly. Poppet balls and springs retain the gears in mesh and an interlock prevents shifting into two gears at one time. Should any trouble be experienced with the transmission assembly, consult your Willys-Overland Dealer. - Page 41 FIG. 23—TRANSFER CASE 1—Output Shaft Oil Seal 2—Speedometer Driven Pinion 3—Output Shaft Bearing Shims 4—Intermediate Shaft 5—Intermediate Gear Thrust Washer 6—Intermediate Gear 7—Main Shaft Gear 8—Intermediate Gear Bearing 9—Output Shaft Clutch Gear 10—Output Clutch Shaft Pilot Bushing 11—Companion Flange Assembly—Front 12—Output Clutch Shaft 13—Output Clutch Shaft Bearing 14—Output Clutch Shaft Bearing Snap Ring...
-
Page 42: Propeller Shaft
The shifting mechanism is located on the transfer case for engaging and disengaging the drive to the front axle, also for shifting the gears. On hard surface and level roads, disengage the front axle drive by placing the transfer case left shift lever in the forward position. - Page 43 FIG. 25 FRONT STEERING KNUCKLE 1—Wheel Hub Cap 2—Driving Flange Cap Screw 3—Axle Shaft Universal Joint Adjusting Shims 4—Wheel Bearing Cup 5—Front Wheel Spindle 6—Brake Drum 7—Front Brake Cylinder 8—Brake Backing Plate 9—Pivot Pin Bearing Cap 10 —Pivot Pin Bearing Cap Nut l1—Pivot Pin 12—...
- Page 44 FIG. 26—FRONT AXLE DIFFERENTIAL 1—Hypoid Bevel Drive Gear and Pinion Set (Matched) 2—Drive Pinion Oil Seal 3—Universal Joint End Yoke Assembly 4—Drive Pinion Nut 5—Pinion Shaft Bearing Cone and Rollers (Outer) 6—Pinion Shaft Bearing Cup 7—Pinion Bearing Adjusting Shims (Front and Rear) 8—Drive Pinion Bearing Cone and Rollers (Rear) 9—Drive Pinion Bearing Cup (Rear) 10—Differential Bevel Pinion Mate Shaft Lock Pin...
- Page 45 the road clearance under the engine. The axle is of the full floating type and the axle shafts can be removed without dismantling the steering knuckles. Once each year have your Willys-Overland Dealer remove the front axle universal joint and shaft assemblies to thoroughly wash out the steering knuckle housings and check the shim adjustment of the universal joints.
- Page 47 The master cylinder may be reached by removing the five screws in the inspection cover on the toe board below the steering column. Keep the master cylinder reservoir full at all times. Use only genuine hydraulic brake fluid. Check the level each 1000 miles (1600 Km.) and use care, when removing the filler cap, that no dirt enters the reservoir.
- Page 48 FIG. 29—HYDRAULIC BRAKE SYSTEM 1—Brake Hose—Front Axle to Frame 2—Brake Tube—Master Cylinder to Front Hose 3—Brake Tube—Tee to Frr,nt Brake Hose Right 4—Brake Pedal 5—Brake Hose—Front Axle 6—Brake Tube—Wheel Cylinder to Hose 7—Wheel Brake Cylinder—Front 8—Brake Hose Spring Lock Clip 9—Brake Hose Assembly 10—Rear Axle Tee 11—...
-
Page 49: Steering System
FIG. 30- STEERING SYSTEM 1—Tie Rod—Right 11—Socket Assembly 2—Tie Rod Socket—Right 12—Bell Crank Support Clamp Bolt 3—Steering Knuckle and Arm—Right 13—Bell Crank Bearing 4—Steering Bell Crank 14—Bell Crank Bearing Sleeve S—Steering Connecting Rod 15—Bell Crank Support Pin 6—Steering Gear Arm 16—Bell Crank Bearing Seals —Steering Gear Housing i 7—Clamp Bolt Nut... -
Page 50: Front Wheel Bearings
FIG. 31--STEERING GEAR 1—Housing Oil Seal 12—Steering Wheel & Horn Button Nut 2—Lever Shaft Assembly 13—Horn Button 3—Housing Oil Filler Plug 14—Horn Button Spring 4—Steering Column Clamp Assembly 15—Horn Button Spring Cup 5—Cam & Wheel Tube Assembly 17—Side Adjusting Screw 6—Steering Column Oil Hole Cover 18—Housing Assembly 7—Steering Wheel... -
Page 51: Rear Wheel Bearings
moved. Rotate the wheel and tighten the adjusting nut until the wheel binds slightly. Then back off the nut 1/6 turn, or more if necessary, making sure the wheel turns freely without sidewise shake. Replace the locking washer and lock nut and bend over the locking washer lip. -
Page 52: Springs And Shackles
MOUNTING AND DISMOUNTING WHEELS. The wheel mounting nuts and studs on both left wheels have left hand threads to prevent them from being loosened by wheel action. The studs are identified by an “L” stamped on the end. The left hand threaded nuts are identified by a groove cut around the hexagonal faces. -
Page 53: Shock Absorbers
out or break on rebound. Broken leaves may make the vehicle hard to handle or permit the axle to shift out of line. Weakened springs may break causing difficult steering. The front springs are interchangeable, as are the two rear. The front ends of the front springs and the rear ends of the rear springs are shackled, using “U”... -
Page 54: Cold Weather Precautions
170 F. (76.67 C.). The operating temperatures of the Jeep when used as a farm tractor and especially when used for belt work through the power take-off is somewhat higher. As a result, alcohol will not be satisfactory to use as an anti-freeze due to evaporation. -
Page 55: Engine Stops
quality allows it to congeal at the prevailing temperature. This condition will also probably apply to the transfer case and the differentials. If the oil is too heavy to allow ease in shifting, it is too heavy to properly lubricate the close fitting parts. -
Page 56: Loss Of Power
Spark plug points improperly set. Points too close together or too far apart may cause missing. Spark plug points should be set .030 inch (0.76 mm.). Accumulation of carbon or oil on spark plug porcelain. Corrosion on end of spark plug cables at distributor cap connection. Distributor faulty. -
Page 57: Extra Equipment
Extra Equipment Much of the utility of the Jeep is due to the extra equipment which has been designed to adapt it for farming and diversified occupations and industries. The maintenance and use of this equipment is outlined in the following paragraphs. - Page 58 to the last or ninth notch and the carburetor throttle is WIDE OPEN. The adjusted length will be approximately 6-3/4” (.17 m.) between the ball stud centers. Start the engine and allow it to run until operating temperature is reached. Set the throttle idle adjusting screw to provide an idle speed of 600 to 650 rpm.
- Page 59 To operate the vehicle WITH governor control pull the governor hand control out. The hand control has nine notched positions. Pulling the control out to the first notch sets the controlled engine speed at approximately 1000 rpm and each successive notch increases the speed 200rpm until 2600 rpm is set in the ninth notch. The hand control may be released by turning the handle one-quarter turn in either direction.
- Page 60 KING SEELEY GOVERNOR OPERATION. When speed control is not desired the governor may be disengaged with the twin-pin type clutch mounted on the driven pulley hub. Never attempt to engage this clutch with the engine running. To operate it pull the cap out toward the radiator and rotate it turn in either direction until you feel the two driving lugs drop into the recesses provided.
- Page 61 FIG. 36—POWER TAKE-OFF ASSEMBLY 1—Fork and Rod 2—Ball 3—Lever 4—Nut 5—Spring 6—Button and Spring 8—Cup 7—Trunnion and Ball 9—Bearing 10—Snap Ring 11—Plate 12—Gasket 13—Retainer 14—Gasket 15—Gear 16—Oil Seal 17—Oil Seal 18—Oil Seal 19—Gear and Shaft 20—Cup 21—Cone and Roller 22—Shims 23—Spacer 24—Shims 25—Shims...
- Page 62 MONARCH GOVERNOR OPERATION. The operation of the Monarch governor is the same as that of the King Seeley excepting the clutch control. Clutch control is through a spring loaded lever mounted on the top of the unit. To engage the drive unlatch the lever and allow the spring to carry the engaging assembly forward.
-
Page 63: Propeller Shaft And Universal Joints
drive assembly (mounted at the rear of the vehicle). The rear units are driven through the shift assembly by a propeller shaft and two universal joints. The assembly, mounted at the rear of the vehicle, is designed to drive trailed equipment or operate belt driven machines. - Page 64 Some power take-off assemblies are supplied with a 1 to 1 gear ratio to provide one standard output shaft speed and are so identified. Other assemblies are equipped with a gear ratio of 5 to 6 (20 teeth to 24 teeth), the gears of which may be interchanged to vary the output shaft speed in relation to vehicle ground speed.
- Page 65 CAUTION: When the vehicle is reversed, the power take-off shaft drive will turn in the reverse direction. Some farm machines will be damaged if reverse driven. When operating trailed equipment, be sure to disengage the power take-off with the shift lever before reversing the vehicle.
- Page 66 FIG. 39 CAPSTAN WINCH 1—Cover Plate Gasket 12—Filler Plug 2—Gear Box 13— Worm Shaft Oil Seal 3—Capstan Shaft Grease Fitting 14—Worm Shaft Needle Bearing 4 —Capstan Shaft Thrust Washer 15—Worm and Gear Set 5—Capstan Shaft Retaining Washer 1 6—Worm Shaft Ball Bearing 6—Capstan Shaft Screw Lockwasher 17—...
- Page 67 Draw Bar Pull The power plant of the Universal Jeep is particularly well adapted to the great variety of applications of the Jeep. For higher speed highway use, and draw bar pull requirements for towing loads, the full engine power is available;...
- Page 68 POWER TAKE-OFF SHAFT AND VEHICLE GROUND SPEEDS ALL GEAR SHIFT POSITIONS MILES PER HOUR POWER TAKE-OFF 5 TO 6 GEAR RATIO Transmission Gear In Engine Intermediate High Speed Take-Off Vehicle Take-Off Vehicle Take-Off Vehicle Shaft Speed Shaft Speed Shaft Speed R.P.M.
- Page 69 POWER TAKE-OFF SHAFT AND VEHICLE GROUND SPEEDS ALL GEAR SHIFT POSITIONS MILES PER HOUR POWER TAKE—OFF 1 TO 1GEAR RATIO Transmission Gear In Governor Transfer Engine Control Intermediate High Speed Position Take-Off Vehicle Take-Off Vehicle Take-Off Vehicle Shaft Speed Shaft Speed Shaft Speed...
- Page 70 POWER TAKE-OFF 6 TO 5 GEAR RATIO Governor Transfer Transmission Gear In I Control Intermediate High Engine Position Speed Take-Off Vehicle Take-Off Vehicle Take-Off Vehicle Shaft Speed Shaft Speed Shaft Speed R.P.M. K.P.M. R.P.M. K.P.M. R.P.M. K.P.M. 3.57 1200 10.00 2435 lOGO 9.04...
- Page 71 Pulley Speeds (R.P.M.) 8” (20. 3CM.) Pulley Power Take-Off Gear Ratios Governor 6-6 RATIO 6-5 RATIO 1-1 RATIO Control TRANSMISSION TRANSMISSION TRANSMISSION Engine Positions Sp~eds Inter High Inter. High Inter. ‘6 — 1 255 460 1028 1000 1234 1028 1200 1000 1440 1200...
- Page 72 Directions For Ordering Parts When new parts are necessary, it is recommended that these be ordered from the nearest Willys-Overland Dealer. Do not order parts in a letter in which some other subject is treated. When ordering parts for a particular vehicle, give the model, engine and serial number of the vehicle. The serial number will be found stamped on a plate located on the right side of the dash under the hood.
-
Page 73: Alphabetical Index
Alphabetical Index Aiming Headlamps Light Switch Air Cleaner Lubrication Anti-Freeze Solution Lubrication Chart Axle—Front Lubrication Specifications Axle Lubrication Main Light Switch Axle—Rear Maintenance of Vehicle Battery Manifold Heat Control Belt—Fan Oil Filter Brakes Oil Pump Brake—Hand Operation of Vehicle Bumper Weight Power Take-off Cap—Radiator Filler Power Take-off Lubrication...
Need help?
Do you have a question about the CJ-3A and is the answer not in the manual?
Questions and answers