
Related Manuals for Axiom AR8 ELITE

Summary of Contents for Axiom AR8 ELITE
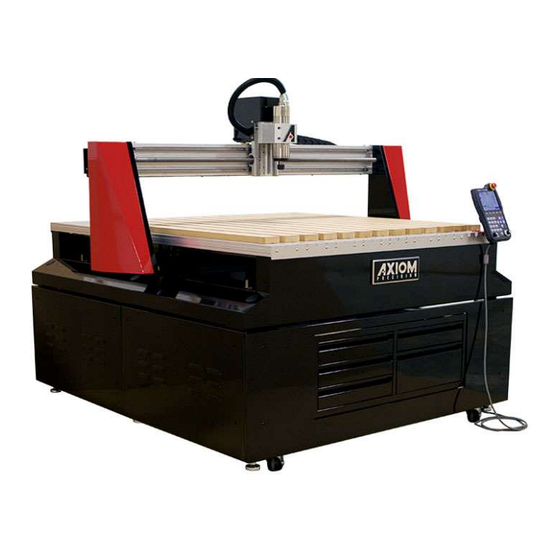
- Page 1 AR8/16 ELITE MANUAL ©Axiom Tool Group, Inc. All rights reserved. Rev. 14/March/2018...
-
Page 2: Safety Information
Your AutoRoute™ machine is intended for cutting wood, acrylics, wood-fiber composites, certain plastics and non- ferrous metals. Do not use this machine for other than its intended use. If used for other purposes, Axiom disclaims any real or implied warranty and holds itself harmless from any injury that may result from that use. - Page 3 Health and Safety 10. Always wear approved personal health and safety equipment as indicated for the materials and type of operations that will be performed. These should include a dust mask, hearing protection, safety clothing, and safety glasses/face shield. Do not rely on prescription or over-the-counter eyeglasses; they are not safety glasses.
- Page 4 26. Control liquids in your shop to limit the possibility of spillage that can damage the AutoRoute™ which can cause damage or personal injury from electric shock or fire. Be careful with storage and use of cleaning fluids, finishes and solvents. Never use the table to apply or dry finishes. Maintenance 27.
-
Page 5: Emergency Switch Padlock
The Elite series CNC machines, feature the use of several Emergency switches. WARNING: FOR YOUR OWN SAFETY READ INSTRUCTION MANUAL BEFORE OPERATING TOOL: To lock out using an Emergency switch on the AR8 Elite: Open the padlock. Insert through hole in the Emergency switch (need depress this button). -
Page 6: Table Of Contents
Table of Contents Section Page 1. Safety Information 2. Emergency Switch Padlock 3. Router specifications 4. Glossary of terms 5. Setup and Assembly 5.1. Packaging Contents 5.2. Stand assembly 5.3. Installing Router 5.4. Finishing Machine Assembly 6. Electrical Connections 7. Post Processor Information 8. -
Page 7: Router Specifications
Specifications AutoRoute: 8 Elite 16 Elite 24" (610mm) • X Axis Travel 48” (1210mm) • Y Axis Travel 48" (1220mm) • • Z Axis Travel 8" (200mm) • • 28.5" x 63" (724mm x 1600mm) • Table Work Area 51"x 69" (1300mm x 1750mm) •... -
Page 8: Glossary Of Terms
Glossary Axis – An accessory that enables the CNC to operate as a lathe. Axis – Direction of movement. On a three-axis machine: X (left-right), Y (front-back) & Z (up-down). Array Work – Division of the machine work surface into square or rectangular work spaces so that the toolpath can be ran in each space to produce several identical profiles. - Page 9 Flute Length – The length of the cutting portion on a router bit or cutting tool. Flutes – The cutting edges or inserts of a router bit or cutting tool. Finish Cut – A 3D tool-path the reduces or eliminates the irregular contours left by the rough cut. Form Bit –...
- Page 10 Soft Limits – Limits on movement availability. Imposed by the work space boundaries and based on controller settings and the location of HOME. An “out of soft limits error” implies that based on the positioning of the workpiece, there is not enough room to move in a designated direction. Speed Scale –...
-
Page 11: Setup And Assembly
Setup and Assembly Failure to read and understand all the assembly and setup instructions before attempting assembly may result in serious injury. Packaging contents for the Axiom Precision Stand. (AR8 Elite Only) 2-Stand upright (front & back) 2-Cross braces 1-Lower shelf plate... -
Page 12: Stand Assembly
Assembling Stand (AR8 Elite Model Only): Assembly for the AR8 Elite series machines is the same as Pro+/ Basic machines. The difference being that the stand and tool-box are included as part of the Elite machine. 1- Thread a (1) loose hex-nut onto each of the (4) leveling feet. -
Page 13: Installing Router
8- The tool-box will sit to the front of the stand, so be sure to orient the shelf towards the rear to serve as storage. a. Turn the tool-box upside down. Install (1) of each hanger on either side of the toolbox using the installed rivnuts and (2) 3mm cap- screw each. -
Page 14: Finishing Machine Assembly
Finishing machine assembly: With the machine mounted on the stand, or safely on a secure work surface if a stand was not acquired, now it’s time to begin finishing the setup. 1- Insert the control box into the front right cavity of the tool-box. a. -
Page 15: Electrical Connections
All Axiom machines are equipped with an electrical cord with grounding conductor and plug. The plug must be used with a matching outlet that is properly installed and grounded in accordance with local codes and ordinances. -
Page 16: Post Processor Information
Important Post Processor Info: With the purchase of a new Axiom Precision Elite Model CNC, there will also be a new Post Processor that will need to be installed into the VCarve or Aspire software. Customers should receive along with the tracking information for their order…a link to download this post processor and instructions from the website. -
Page 17: Operations
Operations Before getting started with the machine, it is recommended to become familiar with the handheld controller for operation of the machine, setting up a job and processing a file. Controller: Toolpaths, that are created in the design software are communicated to the CNC router through the handheld controller. -
Page 18: Operating Procedure
Operating Procedure: Machine operations may be done several ways; either through the controller keypad or through the design files (tool-paths) which can be downloaded to the controller through the USB (Udisk) or ran from internal memory. Before performing an operation: 1- Make sure machine stand leveling feet (if available) have been lowered to prevent the machine from moving. -
Page 19: Moving Router (Spindle Head)
It is important that a HOME operation is performed at every start-up to ensure that the limit switches and internal software settings are properly working. All machine movements are software driven and based upon the HOME position. Performing a HOME Operation: The HOME operation can be selected to run from the controller at any time. -
Page 20: Setting Work Origin
Slow speed- continuous speed that is set at 2000mm/min default. Fast speed- continuous speed that is set at 6000mm/min default. Step movement uses a predetermined set of units which can be selected while on the JOG screen. The Function F2 key will cycle between these units (MPGx100=0.1mm, MPGx10=0.01mm, MPGx1=0.001mm), which will allow the Positioning Dial to be used to make these fine incremental movements. - Page 21 4- There are several ways to set the Z-0 or Z-axis Origin, which may change depending on the material or router bit that is being used. a. Using the provided tool touch-off device. (Plugs in behind the spindle on the HOME side of the Z axis cover.).
-
Page 22: Programming Additional Origins
Programming Additional Origins: The HUST 4 Axis Industrial controller allows multiple offsets (Origins) to be programmed. Where the number found in the top left corner of the screen identifies the coordinate state the controller is in. Each coordinate state will have a unique programmed Origin for all axes. To switch between coordinate states, use the Selection Dial to switch to the Auto screen. -
Page 23: Setting Spindle Rpm
Setting Spindle RPM: The Elite Model machines are equipped with a internal VFD invertor for spindle RPM control. To adjust the RPM, simply turn the Selection Dial to the Auto screen. RPM will be listed here as a percentage. Maximum of 100% = 24,000 RPM, with adjustments possible in 5% increments which can be adjusted at any time. Included during a machine operation. -
Page 24: Deleting Internal Files
c. Press the Reset button to go back one screen. d. From the previous screen, press the Function F4 button (SD) e. On the SD (Internal Memory) screen, firmly press the Paste button (Function F4). Deleting Internally Saved Files: Those same files can easily be deleted from the Internal memory storage. To delete any file saved to Internal Memory (SD): 1- Start on the Auto Screen. -
Page 25: Part Work
Part Work: Like the Pause function, a Breakpoint or Stop can also be used. However, with the HUST controller there are no defined Breakpoints. Instead users can take note of the line of gcode in operation and resume from that point. While on the Auto screen, there is a display box to the right of the Work Coordinates. -
Page 26: User Defined Controller Settings
User Defined Settings In addition to the normal operation of the controller. There are a set of user defined parameters that can be adjusted offering ease of use and customization for the many different applications for which the Elite machines may be used. - Page 27 In which case the user setup Z-0 point would not be used. For Axiom machines, this is simply used as a starting location and it can be programmed to any point using the machine coordinates.
-
Page 28: Editing User Defined Settings
Height of Safe Z (Additional Features) This setting will also affect the operation using the Tool Touch-off Device. During this operation the machine will lower to the pre-defined safe height using the Tool Touch Speed Step 1, after-which the controller begins searching for a signal from the device while continuing to lower at Speed Step 2. The Spindle Speeds are setup matching the on board VFD and controller specifications with the Max Speed being set to 24,000RPM and the Starting Speed set to 100% of the max. -
Page 29: Error Messages
Each axis to return to the mechanical origin. The distance for the servo motor to find the grid should be >1024. Check setting item: MCM parameters 401-409. Recommended Remedy: Check if MCM parameter setting data is correct, contact Axiom Technical Services for steps to reprogram the controller. Error Details... - Page 30 USB/SDC ERROR—FR_MKFS_ABORTED USB/SDC ERROR—FR_TIMEOUT Recommended Remedy: 1. Please make sure that the USB format is FAT and that the file extension is correct (.cnc) 2. Try another USB drive 3. Please contact the Axiom Technical Services Error Details Causes Code For ZDNC operation, the address for the program data is incorrect MDI command error (command is >...
- Page 31 Error Details Causes Code Program CHECKSUM error Startup check program SUM error Program Memory address error (DOWN MODE) Program Memory is full Program Memory address error (UP MODE) Recommended Remedy: 1. Execute G10 P2001 in MDI mode to clear all programs. 2.
- Page 32 Error Details Causes Code X, Y, Z, A, C-Axis Over-travel Recommended Remedy: Use MPG hand-wheel (or manually) move the tool in the Axis within the operating range (or inside the hardware limit switches). Error Details Causes Code When servo motor searching for GRID signal, the distance exceeds the setting range. Message: While the Axis is returning to the origin, the servo motor is unable to find the GRID signal.
- Page 33 3. Check if the single block data or the ID number of the single block data (N) has error. Error Details Causes Code X, Y, Z, A, B, C-Axis has reached the software limit The number of limit points for the software limits exceeds 4000. Recommended Remedy: Check the program or revise the settings in MCM #581-586, #601-606 for software travel limit.
- Page 34 Error Details Causes Code X-C is the declaration distance when C28=1 and R190>0, R190<G31 Recommended Remedy: 1. Check if the setting of R190 is too short to be less than the declaration distance. 2. Reduce the accel./decal. time setting. (The motor loading should be considered) Error Details Causes...
- Page 35 Error Details Causes Code The E in G92 is not within the range 1.0-100.0 (Imperial) The P in G76 is not within the range of 30-90 The end point of the cutting – the over cut for the finish turning < the coarse cutting depth The maximum cutting depth for G76 <...
- Page 36 Error Details Causes Code The communication format of the USB/SDC is not ‘O8001’. The communication format of the USB/SDC is not ‘O8002’. The communication format of the MCM is not ‘O9002’. The communication format of the memory is not ‘O9140’. The communication format of the variable is not ‘O9004’.
- Page 37 Error Details Causes Code In the tool compensation mode, the paths of the single block and the command between the block are 2 parallel lines. OVER CUT The distance between the start point and the end point is shorter than 0.005µ C251=0, the arc offset compensation radius in a single block <0 In the tool compensation mode, while executing the arc command the system cannot determine the intersection point for the center.
-
Page 38: Alarm Codes
Alarm Codes AL01 Over Voltage Cause Inspection Remedy Power supply voltage excess Review the power voltage Use the proper power voltage Input power error (incorrect power) Review the power supply Use proper power source Drive hardware damaged Use voltmeter to check if the power Contact agent for proper service voltage is within rated voltage while error still occurred. - Page 39 AL04 Regenerative Alarm Cause Inspection Remedy Break transistor fault Set PC36 to be 0 and re-power on. Contact agent for proper service If AL04 occurs quickly it indicates the brake transistor is broken Built-in brake resistor or brake Check the wiring Check the wiring option disconnected AL05 Overload 1...
- Page 40 AL07 Pulse Command Cause Inspection Remedy Pulse frequency of the command is Check frequency of command 1. Set the command pulse too high pulses exceeds the permissible frequency correctly range 2. After RD output signal activated, the host starts the command Command device failure Check if the command device is Change the command device...
- Page 41 AL0D Fan Error Cause Inspection Remedy Cooling fan stops working Change the fan by user or contact agent for proper service AL0E IGBT Overheat Cause Inspection Remedy Operate the drive in over-rate duty Check the mechanism for over-load Reduce load, or use Servo drive and continuously or motor for large current motor providing larger output...
- Page 42 AL13 LSP/LSN Activated Cause Inspection Remedy LSP activated Check if limit switch is activated Release the cause of the activated limit switch LSN activated AL14 Software Positive Limit Cause Inspection Remedy Command pulses exceeds PF86 Check whether PF86 is proper Set the proper PF86 value AL15 Software Negative Limit Cause...
- Page 43 AL19 ABS Time Out Warning Cause Inspection Remedy Position command counter overflow Incremental system: Execute the ORIGIN return When the motor keeps rotating in the same direction, the feedback pulse register would overflow. Absolute system: 1. Feedback pulse register overflow 2.
- Page 44 AL24 Encoder Type Error Cause Inspection Remedy Try to enable the absolute encoder 1. Check the encoder type 1. Select the proper type of function with an incremental type 2. Check the PA28 setting encoder encoder 2. If the absolute position function is not performed, set “0”...
- Page 45 AL2A ABS Encoder Abnormal 1 Cause Inspection Remedy Voltage of encoder battery is low Check the voltage of the encoder If less than 2.45V, replace the battery battery and execute the ORIGIN return Bad contact between encoder and 1. Check the encoder wiring Repair the wiring and execute the battery, or battery power lines 2.
- Page 46 AL2E Control Circuit Abnormal Cause Inspection Remedy The SON signal is malfunctioning Check the SON signal for Prevent any noise interference disturbance Current feedback circuit is abnormal Reset power of the servo drive. If the problem continues contact your agent for service. AL2F Regenerative Energy Abnormal Cause Inspection...
- Page 47 AL33 Memory Error 2 Cause Inspection Remedy The flash memory abnormal Power reset the servo drive, if the problem continues; contact your agent for service. AL34 Overload 4 Cause Inspection Remedy The external load exceeds the rate Check if the reciprocating stroke is Upgrade the motor capacity or of drive capacity in continuous use too fast...
- Page 48 AL62 Parameter Number Range Excess Cause Inspection Remedy Parameter group number request Check if the communication Execute one of the following: exceeds specific range command is correct 1. Power OFF the drive 2. Activate the RES signal 3. Press “SET” key at alarm message screen AL63 Pr Mode Parameter Range Excess Cause...
- Page 49 Shipment for items replaced under warranty is free, but the shipment method is at the discretion of Axiom Tool Group, Inc. In general delivery for domestic customers will be by UPS ground service or USPS. If overnight or express delivery is requested, additional fees will apply.
- Page 50 Visit us online at: www.axiomprecision.com Need Assistance? The Axiom Precision CNC Support Team can be reached at: support@axiomtoolgroup.com For machine and accessory orders, the Axiom Precision Sales Team can be reached at: sales@axiomtoolgroup.com Axiom Tool Group, Inc. 1181 Claycraft Rd...
Need help?
Do you have a question about the AR8 ELITE and is the answer not in the manual?
Questions and answers