
Related Manuals for Nostalgia Electrics CCP399COKE


Summary of Contents for Nostalgia Electrics CCP399COKE
- Page 1 All products are trademarks of Nostalgia Products LLC. Worldwide design & utility patented or patents pending. © 2017 Nostalgia Products LLC. www.nostalgiaproducts.com (rev. 09/11/17 DL)
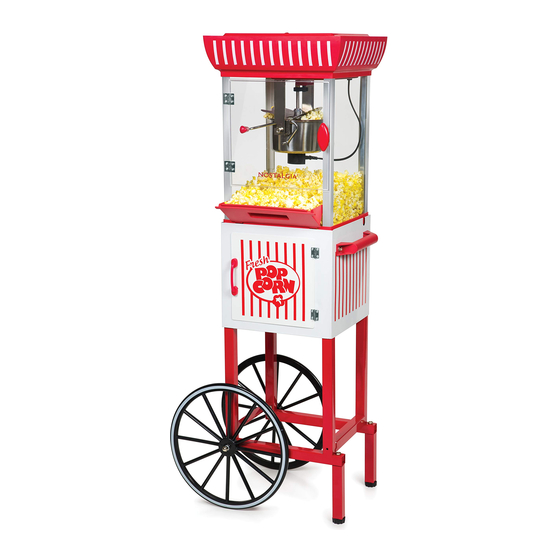
- Page 2 Coca-Cola® 2.5 Oz. Popcorn Cart Coca-Cola® Palomitas Carrito Coca-Cola® Chariot à Popcorn Instructions and Recipes Instrucciones y recetas Instructions et recettes...
-
Page 4: Table Of Contents
Make everyday a party! Visit www.nostalgiaproducts.com for more fun products. CONTENTS SAFETY ......... 2 IMPORTANT SAFEGUARDS . -
Page 5: Important Safeguards
IMPORTANT SAFEGUARDS A person who has not read and understood all operating and safety instructions is not qualified to operate this appliance. All users of this appliance must read and understand this Instruction Manual before operating or cleaning this appliance. When using electrical appliances, basic safety precautions should always be followed, including: Read all instructions before operating this appliance. -
Page 6: Introduction
Exercise caution when emptying popcorn. Always use Crank Handle to empty popcorn, and make sure the unit is over a countertop so that residual hot oil running out will not cause burns. DO NOT use the appliance for other than its intended use. Instructions for the Electrical Cord and Plug ELECTRICAL SHOCK HAZARD: Failure to follow these instructions can result in death, fire, or electrical shock. -
Page 7: Parts & Assembly
PARTS & ASSEMBLY Hardware #1 Bolt (10mm) #2 Bolt (38mm) #3 Bolt (60mm) Qty. 10 Qty. 2 Qty. 2 #4 Screw (10mm) #5 Screw (15mm) #6 Flat Washer (6mm) #7 Flat Washer (8mm) Qty. 4 Qty. 2 Qty. 10 Qty. 8 #8 Locking Washer #9 Magnet #10 Nut Cap... - Page 8 Parts (A) Main Unit (B) Storage (C) Push Handle (D) Bottom Plate Compartment (E) Wheel (2) (F) Base Support (G) Cross Bar (H1) Kernel Measuring Qty. 2 Qty. 2 Cup (2-oz.) (H2) Oil Measuring (I) Leg (J) Popcorn Scoop (K1) Wrench Spoon (1 Tbsp.) Qty.
- Page 9 Assembly of Base Support Attach Push Handle (C) from inside Storage Compartment (B) using two #1 Bolts and two #6 Flat Washers. Attach two #11 Nuts to bottom. Attach Cross Bar (G) to Base Support (F) and secure with four #1 Bolts and four #6 Flat Washers. Secure Bottom Plate (D) to Base Support (F) using four #1 Bolts and four #6 Flat Washers.
- Page 10 Assemble Base Support (F) into the bottom of the Storage Compartment (B) and secure with four #4 Screws. Assembly of Wheels Place #7 Flat Washer onto #3 Bolt and insert into pre- drilled hole on inside of Base Support (F). Put #7 Flat Washer and #13 Sleeve Barrel on end of inserted #3 Bolt.
- Page 11 Assembly of Main Unit ON / OFF / LIGHT Switch Crank Handle Stainless Steel Kettle Attaching Door Handle Attach #9 Magnet to transparent door of Main Unit (A). Place #12 Door Handle using two #5 Screws. Place Main Unit (A) onto the top of the Storage Compartment (B). Ensure that the two inserting pins at the bottom of the Main Unit (A) line up correctly so that Main Unit (A) can be locked under the beam of the Storage Compartment (C).
-
Page 12: How To Operate
HOW TO OPERATE Before first use, clean the inside of the unit by wiping with a moist, non-abrasive sponge, towel or cloth and then wipe with a non-abrasive dry towel. Wipe down the inside of the Kettle and be sure it is properly placed in the brackets before starting. First, find a flat surface near an electrical outlet before starting. -
Page 13: Helpful Tips
HELPFUL TIPS NEVER leave the unit unattended while operating. SMOKING If your POPCORN POPPER begins to smoke during cooking, it may be due to grease build up. In order to reduce smoking, make sure that you clean the inside of the Kettle between uses. POPCORN The POPCORN POPPER is designed for all regular and premium brands of popping corn. -
Page 14: Cleaning & Maintenance
CLEANING & MAINTENANCE Before cleaning, make sure appliance is unplugged from wall outlet, and the kettle cord is unplugged from the kettle. Allow the unit to cool completely before cleaning. After kettle cord has been unplugged and Kettle has completely cooled, turn Crank Handle clockwise to loosen and remove from Kettle. -
Page 15: Recipes
RECIPES The COCA-COLA® POPCORN CART makes hot, fresh, theater style popcorn every time – anytime! Enjoy your freshly popped corn in a variety of ways: • Regular theater style popcorn – add butter and salt. • Add a pinch of sugar and salt to popcorn for a sweet kettle corn taste. •... - Page 16 CHUNKY MONKEY • 1 Gallon Popped Corn Pop corn kernels using the COCA-COLA® POPCORN CART as directed on page 10. • 1 (12-oz.) Bag Semi-Sweet Melt chocolate chips and peanut butter morsels Chocolate Chips over stove, as packaging recommends. • 1 (12-oz.) Bag Peanut Line cookie sheet with wax paper.
-
Page 17: Returns & Warranty
SHOULD YOUR UNIT NOT WORK OR IF DAMAGED WHEN YOU FIRST TAKE IT OUT OF THE BOX, PLEASE RETURN IT TO THE PLACE OF PURCHASE IMMEDIATELY. COCA-COLA® 2.5 OZ. POPCORN CART / CCP399COKE Should you have any questions, please contact us via email or at the customer service number listed below between the hours of 8:00 AM and 5:00 PM, Monday through Friday, Central Standard Time. -
Page 18: Seguridad
¡Convierta todos los días en una fietsa! Visite www.nostalgiaproducts.com para ver más productos divertidos. CONTENIDO SEGURIDAD ........16 SALVAGUARDIAS IMPORTANTES . -
Page 19: Salvaguardias Importantes
SALVAGUARDIAS IMPORTANTES Una persona que no haya leído y comprendido todas las instrucciones de uso y seguridad no está calificada para utilizar este aparato. Todos los usuarios de este dispositivo deben leer y comprender este Manual de instrucciones antes de utilizar o limpiar este aparato. Cuando utiliza aparatos eléctricos, siempre se deben seguir algunas medidas básicas de seguridad que incluyen las siguientes: Lea todas las instrucciones antes de utilizar este aparato. -
Page 20: Introducción
NO use la unidad sin aceite ya que las pepitas de palomitas de maíz pueden provocar quemaduras o humo. NO deje el motor del caldero encendido cuando hayan terminado las explosiones. Tenga cuidado al vaciar las palomitas de maíz. Siempre use la manivela para vaciar las palomitas de mazí... -
Page 21: Piezas Y Ensamble
PIEZAS Y ENSAMBLAJE Tornillería #1Perno (10mm) #2 Perno (38mm) #3 Perno (60mm) Cantidad 10 Cantidad 2 Cantidad 2 #4 Tornillo (10mm) #5 Tornillo (15mm) #6 Arandela plana #7 Arandela plana Cantidad 4 Cantidad 2 (6mm) Cantidad 10 (8mm) Cantidad 8 #8 Arandela de #9 Imán #10 Tuerca ciega... - Page 22 Piezas (A) Unidad principal (B) Compartimiento de (C) Manija (D) Placa base almacenamiento (E) Rueda (2) (F) Soporte de la base (G) Barra transversal (H1) Medidor Cantidad 2 Cantidad 2 Taza (2-oz.) (H2) Cuchara para medir (I) Patas (J) Cuchara para recoger (K1) Llave el aceite (1 cucharada) Cantidad 2...
- Page 23 Montaje del soporte de la base Coloque la manija (C) desde dentro del Compartimiento de almacenamiento (B) utilizando los dos Pernos #1 y dos Arandelas planas #6. Coloque dos Tuercas #11 en la parte inferior. Coloque la Barra transversal (G) en el Soporte de la base (F) y asegúrela con cuatro Pernos #1 y cuatro Arandelas planas #6.
- Page 24 Monte el Soporte de la base (F) dentro del Compartimiento de almacenamiento (B) y asegúrelo con cuatro tornillos #4. Montaje de las ruedas Coloque la arandela plana #7 en el perno #3 e insértelo dentro del orificio pre-perforado dentro del Soporte de la base (F). Coloque una arandela plana #7 y un Cilindro #13 en el extreme del perno #3 colocado.
- Page 25 Montaje de la unidad principal LUZ DE ENCENDIDO/ APAGADO Manija accionadora Olla de acero inoxidable Manija de la puerta Coloque el Imán #9 en la puerta transparente de la Unidad principal (A). Coloque la Manija #12 usando dos tornillos #5. Coloque la Unidad principal (A) sobre la parte superior del Compartimiento de almacenamiento (B).
-
Page 26: Cómo Funciona
CÓMO FUNCIONA Antes del primer uso, limpie el interior de la unidad con una esponja, toalla o paño no abrasivos húmedos y entonces séquelo con una toalla seca no abrasiva. Limpie el interior del caldero y asegúrese de que esté correctamente colocado en los soportes antes de comenzar. -
Page 27: Consejos Útiles
CONSEJOS ÚTILES NUNCA deje la unidad sin supervisión mientras está en uso. FUMAR Si el PALOMITAS CARRITO comienza a producir humo al cocinar, puede deberse a acumulación de grasa. Con el fin de reducir la producción de humo, asegúrese de limpiar el interior del caldero entre usos. PALOMITA DE MAÍZ El PALOMITAS CARRITO está... -
Page 28: Limpieza Y Mantenimiento
LIMPIEZA Y MANTENIMIENTO Antes de limpiar, asegúrese de que el aparato esté desenchufado del tomacorriente y que el cable del caldero esté desenchufado del caldero. Deje enfriar la unidad antes de limpiar. Después de haber desenchufado el el cable del caldero y se haya enfriado completamente el caldero, gire la manivela en sentido horario para aflojar y retirarlo del caldero. -
Page 29: Recetas
RECETAS ¡Este PALOMITAS CARRITO prepara palomitas de maíz frescas y calientes: en cualquier momento! Disfrute de palomitas de maíz frescas de muchas formas: • Palomitas de maíz al estilo del cine: con manteca y sal. • Agregue una pizca de azúcar y sal a las palomitas de maíz para un sabor dulce. •... - Page 30 CHUNKY MONKEY • 1 galón de maíz Explote los granos de maíz con el PALOMITAS CARRITO como se indica. • 1 (12 oz) bolsa de chispas de chocolate Derrita las chispas de chocolate y las golosinas semi amargo de manteca de maní, como indica el envase. •...
-
Page 31: Devoluciones Y Garantía
SI LA UNIDAD NO FUNCIONA O ESTÁ DAÑADA AL SACARLA POR PRIMERA VEZ DE LA CAJA, DEVUÉLVALA AL LUGAR DE COMPRA INMEDIATAMENTE. COCA-COLA® PALOMITAS CARRITO / CCP399COKE Si tiene preguntas, contacte con nosotros por correo electrónico o por el número telefónico de servicio al cliente que aparece a continuación en el horario de... -
Page 32: Sécurité
Faire une fête tous les jours! Visiter le site Web www.nostalgiaproducts.com pour d’autres produits agréables. TABLE DES MATIÈRES SÉCURITÉ ........30 PRÉCAUTIONS IMPORTANTES . -
Page 33: Précautions Importantes
PRÉCAUTIONS IMPORTANTES Une personne n'ayant pas lu et compris toutes les instructions de fonctionnement et de sécurité n'est pas qualifiée pour faire fonctionner cet appareil. Tous les utilisateurs de cet appareil doivent lire et comprendre ce mode d'emploi avant d'utiliser ou de nettoyer cet appareil. Lorsque l'on utilise un appareil électrique, il faut toujours respecter des précautions de base, y compris celles-ci : Lisez toutes les instructions avant d'utiliser cet appareil. -
Page 34: Introduction
substances peut causer des dangers et peut endommager l'appareil. NE PAS faire fonctionner la machine sans l'huile car les grains de maïs pourraient brûler voire fumer. NE PAS laisser le moteur de la marmite fonctionner une fois que le maïs a cessé d'éclater. Soyez prudent lorsque vous videz le maïs éclaté. -
Page 35: Pièces Et Assemblage
PIÈCES ET ASSEMBLAGE Quincaillerie 1 Boulon (10mm) 2 Boulon (38mm) 3 Boulon (60mm) Qté 10 Qté 2 Qté 2 4 Vis (10mm) 5 Vis (15mm) 6 Rondelle plate 7 Rondelle plate Qté 4 Qté 2 (6mm) Qté 10 (8mm) Qté 8 8 Rondelle-frein 9 Aimant 10 Cache-écrou... - Page 36 Pièces (A) Appareil principal (B) Compartiment (C) Poignée-poussoir (D) Plaque de fond de rangement (E) Roue (2) (F) Base (G) Barre transversale (H1) Godet à mesurer Qté 2 Qté 2 le maïs (55 g) (H2) Cuillère à mesurer (I) Montant (J) Godet à...
- Page 37 Assemblage de la base Fixer la Poignée-poussoir (C) depuis l'intérieur du Compartiment de rangement (B) à l'aide de deux Boulons n 1 et de deux Rondelles plates n Fixer les deux Écrous n 11 au fond. Fixer la Barre transversale (G) à la Base (F), puis la fixer à l'aide de quatre Boulons n 1 et de quatre Rondelles plates n Fixer la Plaque de fond (D) à...
- Page 38 Assembler la Base (F) dans le fond du Compartiment de rangement (B), puis fixer solidement à l'aide de quatre Vis n Assemblage des roues Mettre la Rondelle plate n 7 sur le Boulon n 3 Bolt, puis insérer dans le trou prépercé à l'intérieur de la Base (F). Mettre la Rondelle plate no 7 et la Douille no 13 à...
- Page 39 Assemblage de l'appareil principal Commutateur de MARCHE / ARRÊT / LUMIÈRE Manivelle Chaudière en inox Fixation de la poignée de la porte Fixer l'Aimant no 9 à la porte transparente de l'Appareil principal (A). Mettre la Poignée de porte no 12 à l'aide de deux Vis n no 5. Mettre l'Appareil principal (A) sur le dessus du Compartiment de rangement (B).
-
Page 40: Comment Faire Fonctionner
COMMENT FAIRE FONCTIONNER Avant la première utilisation, nettoyer l'intérieur de l'appareil en l'essuyant avec une éponge, serviette ou chiffon non abrasif puis essuyer avec une serviette sèche non-abrasive. Essuyer l'intérieur du chaudron et s'assurer qu'il est correctement placé dans les supports avant de commencer. Tout d'abord, trouver une surface plane à... -
Page 41: Conseils Pratiques
CONSEILS PRATIQUES Ne jamais laisser l'unité sans surveillance lorsqu'il est en fonction. CHAUFFAGE Si votre CHARIOT À POPCORN commence à fumer pendant la cuisson cela peut être dû à la graisse accumulée. Afin de réduire la fumée s'assurer de nettoyer l'intérieur du chaudron entre les utilisations. MAÏS ÉCLATÉ... -
Page 42: Nettoyage Et Entretien
NETTOYAGE ET ENTRETIEN Avant le nettoyage, s'assurer que l'appareil est débranché de la prise murale et que la cordon du chaudron est débranché du chaudron. Permettre à l'unité de se refroidir complètement avant le nettoyage. Après que le cordon du chaudron ait été débranché et que le chaudron a complètement refroidi, tourner la manivelle dans le sens horaire pour desserrer et retirer le chaudron. -
Page 43: Recettes
RECETTES Le CHARIOT À POPCORN fait du maïs chaud, frais, de style salle de cinéma chaque fois - en tout temps ! Dégusté un maïs fraîchement soufflé de plusieurs façons : • Maïs régulier de style salle de cinéma - ajouter du beurre et du sel. •... - Page 44 DÉLICES CHUNKY MONKEY • 4 litres (1 gallon) Faites éclater les grains de maïs dans votre de maïs soufflé CHARIOT À POPCORN tel qu'indiqué dans la section COMMENT FAIRE FONCTIONNER. • 1 emballage (340 g/12 oz) de grains de Faire fondre les grains de chocolat avec les chocolat semi-sucré...
-
Page 45: Retours Et Garantie
SI VOTRE APPAREIL NE FONCTIONNE PAS OU S'IL EST ENDOMMAGÉ QUAND VOUS LE RETIREZ DE LA BOÎTE, VEUILLEZ LE RETOURNER IMMÉDIATEMENT À L'ENDROIT OÙ IL A ÉTÉ ACHETÉ. COCA-COLA® CHARIOT À POPCORN / CCP399COKE Pour toute question, communiquer par courriel ou au numéro de téléphone du service à...
Need help?
Do you have a question about the CCP399COKE and is the answer not in the manual?
Questions and answers