Table of Contents
Advertisement
Quick Links
Advertisement
Table of Contents

Related Manuals for Power-Pole Signature Series


Summary of Contents for Power-Pole Signature Series
- Page 1 INSTALLATION MANUAL Power-Pole ® Signature Series Shallow Water Anchor Installation Instructions CAUTION: Read this instruction manual carefully. Become familiar with the controls and know how to operate the Power-Pole shallow water anchor system safely. US Pat No. 6,041,730...
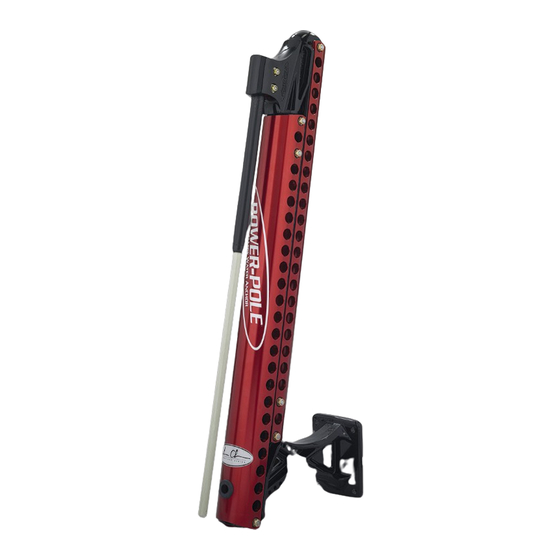
- Page 2 CONGRATULATIONS on your purchase of a Power-Pole Signature Series shallow water anchor featuring C-Monster Control System. It has been designed, engineered, and manufactured to provide the best possible performance and dependability for years of enjoyment. Please read all installation instructions carefully.
- Page 3 Installation Hardware Qty(4) 5/16” x 3.5” all-thread transom mount bolts 2. While holding the Power-Pole anchor in place, turn and Qty(4) 5/16” neo-bond washers tilt the motor as far as possible toward the unit. With Qty(4) 5/16”...
- Page 4 Step 4: Installing the HPU Step 2: Mounting the Power-Pole ® 1. Remove the fill cap on the HPU, and fill the reservoir 1. Once the mounting location has been selected, place to the “full” line with the supplied quart of the stern bracket against the transom, and mark the Green Marine biodegradable hydraulic ® mounting holes with a fine point marker. Carefully fluid or an ISO 32 hydraulic fluid. drill pilot holes in each of the four marked locations with a 9/64” drill bit. Then, drill out each of the four Using anything other than an ISO 32 hydraulic fluid, such as Green Marine, pilot holes with a 5/16” drill bit. may cause damage to the HPU, and will 2. Once all of the holes have been drilled, apply a liberal...
- Page 5 Step 4: Continued 2. At this point, the hydraulic tubing may be routed Figure 4 in one of two ways. It may be routed either over the transom or through the transom using the (2) supplied thru-hull bushings . If the hydraulic tubing is not being installed through the transom, route the tubing to the HPU as per your preference, and proceed to Step E. If the hydraulic tubing is to be installed through the transom, holes will need to be drilled for the thru-hull bushings Note: When choosing a location for the holes, ensure that the tubing will form a natural curve when leaving the stern bracket, and that the transom holes will be above the water line.
- Page 6 (See Figure #8) Figure 8 Step 7: Pairing the Dash Switch and Remote Control 1. Locate the “program” button on the top of the pump unit, depress and hold it for 3 seconds until the LED steadily illuminates green in color. The pump unit is now ready to be paired with the switch. The HPU will remain in the pairing mode for 20 seconds. (See Figure #10) Note: When dual Power-Pole shallow water anchors are installed, this procedure should be performed on BOTH pump units.
- Page 7 2. With both HPUs identified, begin with the starboard instructions to ensure that the pairing procedure was side unit. Locate the “program” button on the top of completed successfully. the HPU, and depress and hold it for 6 seconds until 4. Repeat the same programming procedure with the the LED steadily illuminates red in color. The LED will remote control. (See Figure #10) initially illuminate green (after 3 seconds), but will change to red after 6 seconds, thus indicating that the unit is ready to be programmed. Step 8: Programming the HPU/HPUs 3. Next, depress and hold the “up” button on the starboard side HPU. The LED will flash red 2 times In order to utilize the full potential of the Power-Pole indicating that the programming has been completed shallow water anchor, the HPU/HPUs must be assigned successfully, and the HPU has been assigned as the as either a single, port side, or starboard side unit. starboard side unit. Follow the “single unit” instructions when installing only one anchor, and use the “dual units” instructions when 4. Repeat the programming procedure with the port side installing two anchors. The “dual units” instructions must HPU, but instead depress and hold the “down” button also be used when installing a second unit at a later date. on the HPU. This time the LED will flash red 1 time Note: Assigning a single unit as either a port side...
- Page 8 (See Figure #13) Need help? Contact our Technical Support Team at 813.689.9932 option 2 9208 Palm River Road, Suite 303, Tampa, Florida 33619 Phone 813-689-9932 Fax 813-689-8883 www.power-pole.com ©2012 all rights reserved. Power-Pole Shallow Water Anchor U.S. Patent No. 6,041,730...
Need help?
Do you have a question about the Signature Series and is the answer not in the manual?
Questions and answers