
Related Manuals for kromo KP202E


Summary of Contents for kromo KP202E
- Page 1 Istruzioni per l'uso e la manutenzione Instructions for Use and Maintenance COD.: 4500_U APPLICARE ETICHETTA Ed. 01 - 10/2011 MATRICOLA...
- Page 2 Thank you for choosing our machine. The instructions for installation, maintenance and use found on the following pages have been prepared to ensure a long life and perfect operation of your unit. Please, do follow the instructions carefully. We have designed and built this machine using the latest innovative technologies. Now you shall take good care of it.
-
Page 3: Table Of Contents
TRANSLATION OF THE ORIGINAL INSTRUCTION CONTENTS Page WARNINGS 1. MACHINE DESCRIPTION 1.1 Machine description 1.2 Machine features 2. OPERATION 2.1 Control panel and relative symbols 2.2 Machine start-up 2.2.1 Start-up 2.2.2 Operation 2.2.3 Switching OFF 2.3 Detergent use 2.4 Rinse aid use 2.5 Drain pump system (optional) 2.6 Emptying boiler and break tank (anti-freeze function) WARNINGS... -
Page 5: Warnings
WARNINGS This instruction booklet must be kept with the machine for future consultation. If this machine is sold or transferred to other users, make sure the booklet always goes with the unit so that the new owner can have all the necessary information on operations and all relevant instructions. -
Page 6: Machine Description
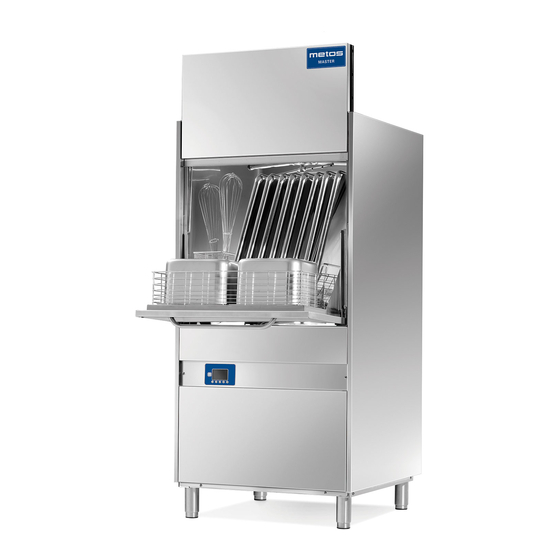
1. MACHINE DESCRIPTION Machine Description Wall-hung main power switch: at installation ser- viceman supply and care, according to local laws Door Control panel page 28... -
Page 7: Machine Description
Standard equipment: nr. 1 Stainless steel rack nr. 1 Inox spatulas rack nr.1 Trays support 8 pcs Optional: Optional equipment: Heat Recovery Sac à Poche Support Optional: Probe lack detergent/rinse aid Optional: Optional: Drain pump Detergent dispenser page 29... -
Page 8: Machine Features
To operate the machine, 3 connections are needed: • Electrical; • Water supply; • Water drain. This is a cycle machine comprising a 55°C wash cycle with detergent, a 85°C rinse cycle with injection of rinse-aid in the boiler hull. This machine is designed exclusively for washing trays, baking-pans, food containers and pans in general with human food type of residue. -
Page 9: Operation
2. OPERATION 2.1 Control panel and relative symbols Pict. 1 A: Cycle Start/Stop. Multi-chromatic button: Firm red light: machine fi lling/heating; Flashing red light: alarm signal (check the code on the alarm chart chap. 11); Green light: machine ready. Select cycle; Firm blue light: machine in operation; Flashing blue light: machine in stand-by, anti-freeze function (see chap. 2.6). B: Machine power ON/OFF (in stand-by only). C: Cycle Selection; D: Cycle Selection; E: Cut out; F: Cut out; G: LCD Display 2.2 Machine start-up 2.2.1 Start-up • Put the surface fi lters in place. -
Page 10: Operation
On the "G" display the "STAND-BY" message will be off. The button “A” will light in white for a few seconds, while loading the software. After loading is complete, the button will light in red. At this moment, the water filling starts. The display "G" will read "FILLING WATER". Check the proper positioning of the overflow pipe. -
Page 11: Switching Off
At cycle-end, keeping the door closed, objects will not dry. Extract the rack or keep the door open to allow evaporation, helping the drying of the objects. BOILER 85 C TANK 57 C CyCLe 1 (3 MIN) cycle ended When opening the door, the button "A"... -
Page 12: Detergent Use
Detergent use The machine can be equipped with the detergent dispenser. If provided, the machine will automatically take the needed detergent amount The detergent shall be the NO FOAM type, suitable for industrial dishwashers and must comply with the EN 60335-2-58/A11 norms. The use of good quality liquid detergents is recommended. -
Page 13: Emptying Boiler And Break Tank (Anti-Freeze Function)
After the draining is complete, the machine will turn automatically in "STAND-BY" mode. If you want to refill the machine for a new cycle, see chap. 2.2. DRAIN THE SUMP DRAIN THE WASHTANK Emptying boiler and break tank (anti-freeze function) This function permits the draining of the boiler and the break tank for any extraordinary maintenance or emptying function. -
Page 14: Ecological Aspects
3. ECOLOGICAL ASPECTS Recommendations for optimal use of energy, water and additives Use the machine fully loaded when possible. This shall prevent detergent, rinse aid, water and energy consumption waste. Detergent and rinse-aids Use detergents and rinse-aid chemicals with high biodegradability, to best respect the environment. -
Page 15: Maintenance
5. MAINTENANCE Routine maintenance WARNING: The machine is not protected against pressurized water jets. Do not use pressure cleaning system against the machine. It is recommended to contact the seller of chemicals for proper cleaning instructions, in order to have detailed indications on methods and products for the correct periodical machine sanitation. -
Page 16: Extraordinary Maintenance - By Qualified Service Personnel
• Turned off the machine by switching the main power switch OFF. 5.2 Extraordinary Maintenance – by qualified Service Personnel Once or twice a year have the machine inspected by a qualified technician, in order to: 1 Clean the solenoid-valve(s) filters; 2 Remove scale from the heating elements; 3 Control the status of the seals; 4 Control for components integrity and/or consumption; 5 Control the dispenser(s) efficiency; A qualified electrician, should check all electric connections inside the page 38... -
Page 17: Machine Installation
machine, at least once a year. 6. MACHINE INSTALLATION Handling 6.1.1 Handling the product The machines must be handled strictly as shown in pict. 4 regarding the grip points indicated for lifting with a lift truck. Latch the machine in a way that secures no vibration or shocks during transportation. N.B.: Slinging with ropes not recommended. -
Page 18: Electrical Connection - Characteristics
perature. 6.2.2 Electrical connection - Characteristics The electrical connection to network shall be carried out in accordance to the local laws in force. Make sure that the supply voltage is the same as reported on the machine plate and that the network can stand the needed power absorption shown on the same plate. -
Page 19: Installation
Installation 6.3.1 Positioning the machine Remove the packing with care. Lift the machine as described in chap. 6.1.1 " Handling the product". Position the machine as shown on the installation diagram (lay-out) approved at the time of the offer. Pict. 5 Maintain a minimum distance of about 50 mm from the walls, so that motors are ventilated. -
Page 20: Signals And Alarms
7. SIGNALS AND ALARMS The alarm messages are displayed, based upon their meaning. When displaying "DETERGENT LEVEL" add detergent in the detergent tank (only with optional "Sensor for Chemicals Low Level"). When displaying "RINSE-AID LEVEL" add rinse-aid chemical in the rinse-aid tank (only with optional "Sensor for Chemicals Low Level"). When displaying "DOOR OPEN" means that the open door does not allow the maneuver tried, or a wash cycle was in progress, when lifting the door. TYPE OF ALARM CAUSE REMEDIES... -
Page 21: Environmental Aspects
8. ENVIRONMENTAL ASPECTS Packaging Packaging is made of the following components: • a wooden pallet; • a nylon sack (LDPE); • a multi-layer carton; • polystyrene (PS) strips; • polypropylene (PP) banding. All above materials, shall be disposed and treated in accordance with the Local Laws in force. Disposal The symbol WEEE/RAEE used on this product indicates that it cannot be treated as domestic waste. -
Page 22: Troubleshooting
TROUBLESHOOTING Type of Problem Possible Causes Cure The machine does not turn Main switch not ON. Turn switch ON. The machine does not load Water valve shut. Open the hot and/or cold water valve. water Solenoid-valve filter blocked Clean the filter Overflow pipe not in place Check the correct placement of the overflow pipe. Defective pressure-switch. Replace pressure-switch.
Need help?
Do you have a question about the KP202E and is the answer not in the manual?
Questions and answers