
Related Manuals for MRC MTX5000

Summary of Contents for MRC MTX5000
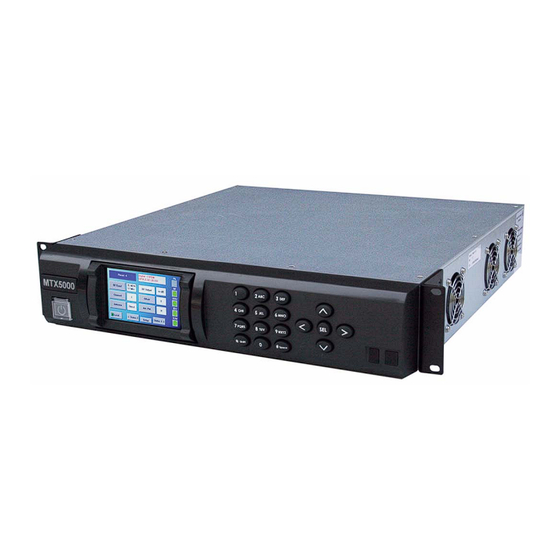
- Page 1 MTX5000 Transmitter System User and Technical Manual Manual Part No. 400591-1 Rev. A June 2009...
-
Page 3: Note To User
Always wait a minimum of 10 seconds between powering the radio down and then powering the radio The MTX5000 Transmitter System (MTX5000) is a state-of-the- art transmitter system. The MTX5000 Indoor Unit (IDU) contains up again. a central processor used to control all functions and operations •... -
Page 4: Radio State Incorrect
If the software is corrupted and the Main screen is not to the radio was momentarily lost and was then reapplied displayed, contact MRC Technical Support for assistance. without waiting a minimum of 10 seconds between loss of power and reapplication of input power. -
Page 5: Rf Levels Too High
3-49. Color Bar Generator Operations Software Recovery All MTX5000 Indoor Units (IDU) contain a built-in digital Color Bar Generator (CBG) as standard equipment. The IDU is also If the software becomes corrupted, the MTX5000 IDU will available with an optional analog CBG. Potential operator attempt to self-recover the software. -
Page 6: Using The Color Lcd Display Panel Touch Screen
Gen, or A Stby and you do not have the optional analog Whenever you use the MTX5000 IDU color LCD display panel CBG installed in your MTX5000 IDU, you will have a blank MTX5000 User and Technical Manual NOTE TO USER... -
Page 7: Remote Location Operations
The correct screen will then be displayed Ethernet Connections If you are connected to the Ethernet via the IDU rear panel ETHERNET RJ45 connector and you find that the color LCD MTX5000 User and Technical Manual NOTE TO USER... - Page 8 MTX5000 User and Technical Manual NOTE TO USER...
- Page 9 MTX5000 User and Technical Manual NOTE TO USER...
- Page 10 MTX5000 User and Technical Manual NOTE TO USER viii...
-
Page 11: Notices
The information and design contained within this manual was prior written consent of MRC. originated by and is the property of MRC. MRC reserves all MRC reserves the right to make changes to equipment and patent proprietary design, manufacturing, reproduction use, and... -
Page 12: General Safety Information
RF Exposure - Safe Working Distances R = distance to the center of radiation of the antenna in MRC provides this warning for safety purposes with the intent to centimeters inform the user of the potential hazard to RF exposure. The S = MPE in mW/cm²... - Page 13 MRC, in accordance with the requirements set forth by the FCC, User Input provides this information as a guide to the user. It is assumed RF power delivered to the antenna = Watts that the users of this equipment are licensed and qualified to...
-
Page 14: Conventions
Figure 2 with its corresponding table shows the 7GHz MPE. Conventions Figure 2: MTX5000 MPE 7GHz Pay special attention to information marked in one of the following ways: WARNING Follow WARNINGS closely to prevent personal injury or death. CAUTION Follow CAUTIONS to prevent damage to the equipment. -
Page 15: Symbols Used
Protective Earth Ground - Identifies any terminal which is intended for connection to an external conductor for protection against electric shock in case of a fault, or the terminal on a protective earth electrode. MTX5000 User and Technical Manual Notices Notices-v... - Page 16 MTX5000 User and Technical Manual Notices Notices-vi...
-
Page 17: Table Of Contents
MTX5000 IDU Controls, Indicators, and Connectors - 3-2 MTX5000 ODU Connectors - - - - - - - - - - - - - - - - - 3-6 For Whom It’s Written - - - - - - - - - - - - - - - - - - - - - - - - 1-1... - Page 18 Monitor IDU Status - - - - - - - - - - - - - - - - - - - - - - 3-37 MTX5000 - - - - - - - - - - - - - - - - - - - - - - - - - - - - - - - 5-2...
- Page 19 Power Down - - - - - - - - - - - - - - - - - - - - - - - - - - - 6-29 Installing the MTX5000 IDU - - - - - - - - - - - - - - - - - - - 6-2...
- Page 20 Check the Configuration- - - - - - - - - - - - - - - - - - - - B-13 MTX5000 User Interface - - - - - - - - - - - - - - - - - - - - 8-2...
-
Page 21: Introduction
This manual is intended for use by qualified operators, installers, and service personnel. Users of this manual should already be MRC Technical Support is available 24 hours a day, 7 days a familiar with the basic concepts of radio, video, and audio. -
Page 22: Tell Us What You Think
If you’re viewing this manual electronically, it’s easy - just click on the link below to send us an E-mail. Feedback Or, you can E-mail our Technical Support team at: technicalsupport@mrcbroadcast.com Be sure to tell us what product you’re writing about, and which manual. MTX5000 User and Technical Manual Introduction... -
Page 23: Product Description
For dual band MTX5000 Transmitter System configurations, the system will contain both a 2 GHz and a 7 GHz ODU. All IDU Operating Controls configurations of the MTX5000 IDU provide a 70 MHz IF output External Connectors and control to the 2 GHz and/or 7 GHz ODU. - Page 24 2.2.3 Analog Video Encoding and FM Modulation • SD/HD SDI interfaces with multiplexing When in the analog FM mode, the MTX5000 will accept a standard composite video input. It will also accept analog audio • Integrated SD/HD MPEG-2/H.264 encoding technologies inputs.
-
Page 25: System Components
7 GHz operation. (Inside Vehicle) Figure 2-2: Outdoor Unit - Typical System Components The MTX5000 system consists of the IDU and the ODU(s). A Outdoor Unit - typical system is shown in Figure 2-4 on page 2-4. The IDU... -
Page 26: Idu Operating Controls
Conduit (Nycoil) Subnotebook PC, or PC All controls are located on the front panel of the MTX5000 IDU. There are no controls on the ODU. All transmitter functions are controlled using the color LCD display panel touch screen and/or function keys, as shown in Figure 2-5 on page 2-5. -
Page 27: External Connectors
All ODU configurations contain a standard Type “N” connector for connection to the antenna. The rear panels of the MTX5000 IDU configurations contain the If your MTX5000 system IDU is equipped with either Type “N” or I/O connectors and an input fuse, as shown in Figure 2-6 on... - Page 28 Figure 2-6: MTX5000 IDU Rear Panel Configurations AUDIO POWER IN BB IN IF MON ASI 1 HD-SDI ASI 2 RFU POWER OUT WAYSIDE + G - + G - + G - + G - - - + + - - + +...
-
Page 29: Configuration Options
• Power for mast top lights AC power is applied to the MTX5000 IDU, which in turn, provides DC power to the ODU via the wiring harness between them. • Control and power for the Pan and Tilt assembly Refer to the “... -
Page 30: Antenna Options
Subnotebook PC to the MTX5000 system, refer to the Remote Access Subnotebook PC Operator’s Guide, part number The MTX5000 system is designed to cover one or more bands. 400573-1, provided with the optional Remote Access It can be ordered as a single-band unit or as a dual-band Subnotebook PC. -
Page 31: Single-Band/Dual Antenna Transmission
ANTENNA 70 MHz IF + POWER SWITCH + POWER + CONTROL POWER/ NYCOIL CONDUIT + CONTROL CONTROL MTX5000 IDU NYCOIL CONDUIT MPEG Encoder & COFDM Modulator MTX5000 IDU MPEG Encoder & COFDM Modulator MTX5000 User and Technical Manual Product Description... -
Page 32: Dual-Band Simultaneous Transmission
MTX5000 IDU Analog Video Analog Video MPEG Encoder & Digital Video + Audio MPEG Encoder & Digital Video + Audio DVB/ASI DVB/ASI COFDM Modulator COFDM Modulator 2 Analog Audio 2 Analog Audio MTX5000 User and Technical Manual Product Description 2-10... -
Page 33: Operating System Modes
System setup mode operations may be performed locally at the Setup Mode. MTX5000 IDU using the front panel color LCD display panel with either the touch screen or the function keys or remotely using the Regardless if you are operating in the normal user mode or in the remote web page software. - Page 34 MTX5000 User and Technical Manual Product Description 2-12...
-
Page 35: Routine Operation
Perform RF Level Adjust 3-49 Mobile Installation Select Color Bar Generator Mode 3-52 Powering the MTX5000 System Set Time and Date 3-54 Using the MTX5000 Screens in Local Mode 3-10 Perform IDU Diagnostics 3-56 Overview 3-10 Review System Information 3-57... -
Page 36: Overview Of Controls, Indicators, And Connectors
Page and Connectors Power Switch Color LCD Display Panel with Touch Screen This section describes the controls, indicators, and connectors used on the MTX5000 Indoor Unit (IDU) and Outdoor Unit Alphanumeric Keypad (ODU). Function keys USB 2.0 Connector Figure 3-1: MTX5000 IDU Front Panel Controls, Indicators, and Connector... - Page 37 MTX5000 system. All option selections are made using the color LCD display panel When power is applied to the MTX5000 system, the symbol on and either the color LCD display panel touch screen or the the switch illuminates.
- Page 38 Figure 3-2: MTX5000 IDU Rear Panel Connectors - Typical BB IN IF MON HD-SDI ASI 2 WAYSIDE AUDIO ASI 1 ETHERNET AC Power 1 thru 4 Fuse (Behind AUDIO POWER IN Cover) BB IN IF MON ASI 1 HD-SDI ASI 2...
- Page 39 The IF IN 75 ohm BNC female connector HD-SDI Connector The HD-SDI 75 ohm BNC female connector provides the 70 MHz IF input to the unit. provides the HD-SDI data stream input to the MTX5000. MTX5000 User and Technical Manual Routine Operation...
-
Page 40: Mtx5000 Odu Connectors
The RF IN connector is either a Type “N”, TNC, or Triax, as applicable to the options ordered with your If your MTX5000 contains a type “N” or TNC RFU 1 connector, MTX5000 system. The RF IN connector receives 70 MHz IF... -
Page 41: Preparing For Operation
If the MTX5000 was transmitting when power RF IN connector. was removed, the IDU will not automatically return to the transmit mode. If the MTX5000 was in the remote mode when POWER Connector The POWER connector receives DC power was removed, the IDU will not return to the remote mode. - Page 42 The progress bar will appear on the introduction screen, but progress will be much Power to the MTX5000 must never be cycled off and on without slower than during a normal power up. Do not interrupt the self-...
- Page 43 ODU or ODUs, as applicable to your system options, are properly connected. Connect the MTX5000 IDU power cable to AC power of the correct type and voltage. Progress Verify the power source is turned on.
-
Page 44: Using The Mtx5000 Screens In Local Mode
Local Mode The steps required to properly power down the MTX5000 system are contained in the following steps. Once the MTX5000 is powered up, you will be able to monitor and/or change certain operating parameters through the use of CAUTION To allow proper shutdown of MTX5000 the options displayed on the color LCD display panel. -
Page 45: Main Screen
3.4.2 Main Screen Figure 3-7: MTX5000 Front Panel Color LCD Display The Main screen is your starting point for navigating through the Function Panel with Touch various status screens. The Main screen provides access to the Keys Screen current values of the selected Preset options. - Page 46 Each menu page has multiple selections available. Once you the different options available. have navigated to the menu page required, you can observe or change an operating parameter, as required. To observe or MTX5000 User and Technical Manual MTX5000 User and Technical Manual Routine Operation Routine Operation...
-
Page 47: Color Lcd Display Panel
To use the function keys (See Figure 3-10 on page 3-14) to outline. select a specific active option, use the Up, Down, Left, and Right function keys to select the required active option button, press MTX5000 User and Technical Manual Routine Operation 3-13... -
Page 48: Navigation Between Main And Status Screens
Transmitter operation buttons are described in the following or the function keys and SEL key, the ODU Status screen (See paragraphs. Figure 3-11 on page 3-15) will be displayed indicating the current MTX5000 User and Technical Manual Routine Operation 3-14... - Page 49 The SUM status button will display a condition of the Indoor Unit (IDU). The IDU status button will green status indicator to indicate no alarms exist in the MTX5000 display a green status indicator indicating no alarm conditions system.
-
Page 50: Local/Remote Control Status Button
When the option button is in the L mode, all control operations must be performed at the MTX5000. When in the R mode and the MTX5000 is connected via your web browser to a PC at a User remote location or to the optional Remote Access Subnotebook... -
Page 51: Radio Screen Options
Radio screen to the Main screen. Next Option Button Selection of the Radio screen Next option button takes you to the Radio- 2 screen. See Figure 3-16. MTX5000 User and Technical Manual Routine Operation 3-17... - Page 52 PA DC power for individual ODUs (RF Units), as Submit Main Cancel applicable to the options contained in your MTX5000 system, by selecting the Start option button. The Factory option button is password-protected for factory use only. Level Adjust Option Button...
- Page 53 SEL key to toggle through the Attenuation level options. License Key Option Button The License Key option button allows you to add optional factory licensed options to your MTX5000 IDU without having to return your IDU to the factory for Color Bars A Gen A Stby upgrade.
- Page 54 See Figure 3-24. select the displayed options. The System Info screen will display the current software versions contained in the MTX5000 IDU. Touch screen options must only be selected using your fingers, a soft-pointed stylus, or the front panel function keys.
- Page 55 To select the remote operation mode when the mode is contained in the following steps. In order to operate the MTX5000 remotely, you must connect the MTX5000 to a PC via MTX5000 is in the local mode and you do not know your web browser.
- Page 56 After a short delay, observe the remote log in screen is displayed. See Figure 3-26. Figure 3-26: Remote Log In Screen - Typical At the MTX5000, verify the L/R option button indicates Select the Setup option button and observe the Setup screen is displayed. See Figure 3-28.
-
Page 57: Mtx5000 Local Operations
Select Remote Ctrl Opt screen is displayed. See Figure 3-31. Touch screen options must only be selected using your fingers, a soft-pointed stylus, or the front panel function keys. MTX5000 User and Technical Manual Routine Operation 3-23... -
Page 58: Select Preset
During performance of this procedure, you may select from a list of factory Default Presets or from a list of custom User Presets. Once the MTX5000 is powered up, you will be able to check its Factory Default Presets are identified alphabetically from Preset configuration and monitor and control its operation in the local A thru Preset J. - Page 59 Figure 3-32: Main Screen - Typical the Preset screen. Analog Preset A 4.83 & 5.8, 3MHz Vid Dev If the MTX5000 IDU is transmitting when a Preset is selected, Preset X the PA operation button will become greyed out, indicating the Option RFU2...
- Page 60 Defaults Digital – COFDM QPSK 4:2:0,8,1/2,1/8,comp Typical Digital – COFDM 16 QAM 4:2:0,8,5/6,1/8,HD 1080i Back Main Next -> PA Off <- Previous Main Select the Presets Option option button and observe MTX5000 User and Technical Manual Routine Operation 3-26...
-
Page 61: Select Rf Band
DO NOT POWER OFF RADIO UNTIL RECONFIGURED! If your MTX5000 system is a dual band configuration containing both a 2 GHz and a 7 GHz ODU (RF head), the procedure required to select the RF head required for either 2 GHz or 7 GHz operation is contained in the following steps. - Page 62 Preset A 4.83 & 5.8, 3MHz Vid Dev required. RFU2 If your MTX5000 system is a single 2 GHz or 7 GHz RF Band RF Output configuration, the RF head may be connected to either the IDU RFU 1 or RFU 2 rear panel connector. The MTX5000 software...
- Page 63 Change Plan Figure 3-45: RECONFIGURING RADIO Screen - Typical RF Band RFU2 RECONFIGURING RADIO. PLEASE WAIT! PA On Main 60 % Main Screen DO NOT POWER OFF RADIO UNTIL RECONFIGURED! Option Button MTX5000 User and Technical Manual Routine Operation 3-29...
-
Page 64: Select/Customize Operating Channels
If the Main option button is selected to return to the Main screen Figure 3-46: Main Screen - Typical without selecting a new channel, the Main screen will be displayed and no changes will be made to current MTX5000 Analog Preset A 4.83 &... - Page 65 Figure 3-49: Channel Screen - Typical Channel User Def Option Button User Def CH 1 Enter frequency required, select the ENT option 1.999000 GHz button, and observe the USER CHANNEL screen is PA Off Main displayed. MTX5000 User and Technical Manual Routine Operation 3-31...
-
Page 66: Select Channel Offset
If the Main option button is selected to return to the Main screen without selecting a new offset, the Main screen will be displayed and no changes will be made to current MTX5000 settings. Note In the following steps, option buttons may be selected using either the touch screen or the function keys and the SEL key. -
Page 67: Select Antenna
If the Main option button is selected to return to the Main screen without selecting a different antenna, the Main screen will be displayed and no changes will be made to current MTX5000 PA On Main settings. -
Page 68: Select Antenna Polarization
Setup Option Button Antenna Antenna1 Ant. Pol. 3.6.6 Select Antenna Polarization PA On <- Status Setup Status -> The procedure required to select the antenna polarization is contained in the following steps. MTX5000 User and Technical Manual Routine Operation 3-34... -
Page 69: Enable/Disable Transmitter
To disable the transmitter, go to step PA On <- Status Setup Status -> Select the PA operation button, observe the PA option button becomes active (green) after a short delay, and MTX5000 User and Technical Manual Routine Operation 3-35... -
Page 70: Select High/Low Power Mode
In the following procedure, the ODU status button screen shown in Figure 3-63 is therefore typical. may be selected using either the touch screen or the function keys and the SEL key. MTX5000 User and Technical Manual Routine Operation 3-36... -
Page 71: Monitor Idu Status
4.83 & 5.8, 3MHz Vid Dev O D U S tatus RFU2 RF Band RF Output xxxxxxxxxxx Channel Offset Status Antenna Antenna1 Ant. Pol. Button PA On <- Status Status -> Setup MTX5000 User and Technical Manual Routine Operation 3-37... -
Page 72: Monitor Sum Errors
Monitor SUM Errors Sum m ary A larm xxxxxxxxxxxxxxxxx The procedure required to monitor current summary alarms in the MTX5000 Transmitter System is contained in the following steps. Note In the following procedure, the SUM status button may be selected using either the touch screen or the function keys and the SEL key. - Page 73 Figure 3-70: Main Screen (Analog Mode) - Typical Analog Preset A 4.83 & 5.8, 3MHz Vid Dev RFU2 RF Band RF Output Channel Offset Antenna Antenna1 Ant. Pol. PA On <- Status Setup Status -> MTX5000 User and Technical Manual Routine Operation 3-39...
- Page 74 Video Loss Reduction Bars Main HD Test SDI Auto Line Pattern PA On Back Main Select the COFDM option button and observe the selected Preset COFDM Status screen is displayed. See Figure 3-74. MTX5000 User and Technical Manual Routine Operation 3-40...
- Page 75 Back option button and observe the COFDM Mode Status screen is displayed. Select the Video option button and observe the Video Status screen is displayed. See Figure 3-79 on page 3-42. MTX5000 User and Technical Manual Routine Operation 3-41...
- Page 76 Bit Rate 128kb Back Main Encoder 2 PA On PA On Back Main Audio 2 When review of the Encoder screen is complete, select the Encoder 2 option button and observe the MTX5000 User and Technical Manual Routine Operation 3-42...
- Page 77 COFDM Mode Status screen is displayed. Select the PID option button and observe the PID Program ID Network ID Status screen is displayed. See Figure 3-84. Transport ID Back Main PA On MTX5000 User and Technical Manual Routine Operation 3-43...
-
Page 78: Perform Pa Voltage Adjust Setup
Video Bitrate 5.2 Mbps Back Main When review of the IP Status screen is complete, select the Main option button and observe the Main screen is displayed. Procedure is complete. MTX5000 User and Technical Manual Routine Operation 3-44... - Page 79 Note This procedure should be performed following Notes If your MTX5000 system is a single band system, initial installation of the MTX5000 System with a go to step Standard ODU, after replacement of the IDU or Standard ODU, or following any repairs to the...
- Page 80 RF Band Select the RFU1 or RFU2 option button, as required, RFU2 and observe the RECONFIGURING RADIO screen (Figure 3-92 on page 3-47) is displayed. PA On Main Main Screen Option Button MTX5000 User and Technical Manual Routine Operation 3-46...
- Page 81 Select the Calibration option button and observe the Select the Setup option button and observe the Setup PA Voltage Adjust Setup screen is displayed. screen is displayed. See Figure 3-94. Figure 3-96 on page 3-48. MTX5000 User and Technical Manual Routine Operation 3-47...
- Page 82 Do not select the Factory option button. The Factory option button is used for factory test only. Start When calibration is complete, observe the Calibration <-Previous Main Factory-> Successful message is displayed. See Figure 3-99 on page 3-49. MTX5000 User and Technical Manual Routine Operation 3-48...
-
Page 83: Perform Rf Level Adjust
Select the Main option button and observe the Main screen is displayed. 3.6.14 Perform RF Level Adjust The procedure required to adjust the RF output level when operating in the digital mode is contained in the following steps. MTX5000 User and Technical Manual Routine Operation 3-49... - Page 84 RF Band screen is displayed, select the Main option button, observe the Main screen is displayed, and observe the new RF band setting is displayed. Note If your MTX5000 system is a dual band system, Select the Setup option button and observe the Setup step 3 thru...
- Page 85 When the Attenuation setting required has been selected, select the Back option button and observe Attenuation Output Power the Radio screen is displayed. See Figure 3-106 on Auto 40.0 dBm page 3-52. Back Main MTX5000 User and Technical Manual Routine Operation 3-51...
-
Page 86: Select Color Bar Generator Mode
Select Color Bar Generator Mode Gen, or A Stby option, selection of an analog Preset will All MTX5000 IDUs contain a built-in digital Color Bar Generator result in no audio, video, or color bar outputs. (CBG). An optional analog CBG is available. The procedure... - Page 87 Level Adjust Color Bars Antenna Antenna1 Ant. Pol. Calibration License Key Change Pwd PA On <- Status Status -> Setup Time & Date Diagnostics System Info Setup Option Main Back Next Button MTX5000 User and Technical Manual Routine Operation 3-53...
-
Page 88: Set Time And Date
Select the Color Bars screen Main option button and observe the Main screen is displayed. 3.6.16 Set Time and Date The procedure required to set the date and time is contained in the following steps. MTX5000 User and Technical Manual Routine Operation 3-54... - Page 89 When all date and time entries are complete, select the Submit option button and observe the Radio screen is displayed. Select the Main option button and observe the Main screen is displayed. MTX5000 User and Technical Manual Routine Operation 3-55...
-
Page 90: Perform Idu Diagnostics
Select the Setup option button and observe the Setup screen is displayed. See Figure 3-117. Select the Diagnostics option button and observe the Diagnostics screen is displayed. See Figure 3-119 on page 3-57. MTX5000 User and Technical Manual Routine Operation 3-56... -
Page 91: Review System Information
Figure 3-121: Setup Screen screen is displayed. 3.6.18 Review System Information Setup The procedure required to review the current software versions contained in your MTX5000 IDU is contained in the following User steps. Radio Note In the following procedure, option buttons may be... -
Page 92: Set Last Pa State
Select the Setup option button and observe the Setup screen is displayed. screen is displayed. See Figure 3-125 on page 3-59. Select the Main option button and observe the Main screen is displayed. MTX5000 User and Technical Manual Routine Operation 3-58... - Page 93 Calibration License Key Change Pwd Time & Date Diagnostics System Info Back Back Main Next Select the Next option button and observe the Radio - 2 screen is displayed. See Figure 3-127. MTX5000 User and Technical Manual Routine Operation 3-59...
-
Page 94: Using The Mtx5000 In Remote Mode
Select the Main option button and observe the Main screen is displayed. 3.7.1 Overview As you operate the MTX5000 from a PC at a remote location, Using the MTX5000 in Remote you will interact with the MTX5000 via a web browser. The Mode optional Remote Access Subnotebook PC may also be used for mobile remote control operations. -
Page 95: Remote Screen Display
Figure 3-129: MTX5000 Color LCD Display Panel - Typical in the local mode. When the MTX5000 is in the remote mode, no indicator is displayed on the remote screen. Analog Preset A 4.83 & 5.8, 3MHz Vid Dev Figure 3-130: Remote Screen Display - Typical... - Page 96 The remote screen provides access to options available in your MTX5000 through Tab options available from the Status tab are those applicable to the use of various tabs and pull-down menus.
- Page 97 Monitor current RF Select -, 0, +, or Select H, V, RC, or Select Low power Select Off or On output level ++, as applicable or High power to the channel plan MTX5000 User and Technical Manual Routine Operation 3-63...
-
Page 98: Remote Configuration Setting Selections
When a new Preset is selected, a progress bar will be displayed selection options consist of both factory Presets and custom on the MTX5000 display, the PA Control state will change to Off Presets. if the IDU was transmitting when the new Preset was selected, and the Reconfiguring Radio. - Page 99 Preset configuration settings will be displayed on the Radio, Analog, Digital, or IP tabs, as applicable to the Preset Figure 3-136: Analog Tab - Typical selected and the licensed options contained in your MTX5000 IDU. If the Preset selected is analog, the selected Preset information...
-
Page 100: Transmitter Controls
Select the OK option button to close the error message window. MTX5000 User and Technical Manual Routine Operation 3-66... -
Page 101: Remote Location Operations
5 seconds before attempting to select another Preset. Once the MTX5000 system is powered up and has been set for remote operation per “Select Local/Remote Operation Mode” on Failure to wait a minimum of 5 seconds... -
Page 102: Select Rf Band And Channel Plan
If your MTX5000 system is a dual band configuration, the procedure required to select the RFU required for dual band operation is contained in the following steps. This procedure is also used to select the channel plan required for operation. -
Page 103: Select Operating Channel
RFU1 or RFU2 option required. Select the Channel Plan pull-down menu and select If your MTX5000 system is a single band configuration, the RF the Channel Plan option required. head may be connected to either the IDU RFU 1 or RFU 2 rear panel connector. -
Page 104: Select Antenna
3.8.4 Select Antenna Verify the MTX5000 system is powered up and the system is in the remote operating mode. The procedure required to select the operating antenna is contained in the following steps. When the Antenna pull-down... -
Page 105: Enable/Disable Transmitter
(PA) (transmitter) is contained in the following steps. When the operating mode. new power amplifier operating mode is selected, the PA Control Verify the MTX5000 system is powered up and the pull-down menu will display the new operating mode. system is in the remote operating mode. -
Page 106: Monitor Alerts
ODU, IDU, or SUM option buttons to review the current alert status of the MRX5000 System. Verify the MTX5000 system is powered up and the system is in the remote operating mode. Observe the Remote screen is displayed on the remote PC display. -
Page 107: Routine Vs. Advanced Operation Configuration Settings
Offset -, 0, or + Antenna • Antenna 1 Configuration Settings • Antenna 2 The design of the MTX5000 and the internal software makes Antenna • Horizontal (H) commonly available settings accessible from the MTX5000 color Polarity • Vertical (V) LCD display during routine operations and during advanced •... - Page 108 Level Adjust Perform Output Defaults (deletes all custom Level Adjust user Presets) Color Bars • System Info Review software revision number • • A Gen • A Stby Perform PA Voltage Calibration Adjust MTX5000 User and Technical Manual Routine Operation 3-74...
- Page 109 8300 kHz Pedestal Mode) • 8590 kHz • SDI 525 • Custom Input (SD • Pre- • PAL Mode) • PAL-M Emphasis • • PAL-N Digital COFDM Presets: • SDI 625 User: MTX5000 User and Technical Manual Routine Operation 3-75...
- Page 110 Mode • Standard • Low Delay Audio In Bit Rate • MP@ML AUDIO 1 and AUDIO 2 • 422P@ML Mode • Stereo Bit Rate Enter bit rate • Dual Mono (Manual) required MTX5000 User and Technical Manual Routine Operation 3-76...
- Page 111 Enter PID required User: VIDEO Enter PID required ASI Setup: DATA Enter PID required • AUDIO A Enter PID required • AUDIO B Enter PID required • Enter PID required • • MTX5000 User and Technical Manual Routine Operation 3-77...
- Page 112 Noise • Reduction • • MPEG Setup: SDI Auto • Line • Video In HD Test • Input (SD • NTSC Pattern NTSC • • NTSC No Pedestal Mode) • SDI 525 MTX5000 User and Technical Manual Routine Operation 3-78...
- Page 113 PID Data Invert • Inverted Default Select default PIDs Encoder Enter PID required Mode • Standard VIDEO Enter PID required • Low Delay DATA Enter PID required AUDIO A Enter PID required MTX5000 User and Technical Manual Routine Operation 3-79...
- Page 114 Baud Rate • 1200 RF B/W • 6 MHz • 2400 • 7 MHz • 4800 • 8 MHz • 9600 DVB-S Setup: • 19200 DVBS Roll • • 38400 • • MTX5000 User and Technical Manual Routine Operation 3-80...
- Page 115 1080psf23 • Analog • 1080psf24 • SDI EMB • 1080psf25 Balance • Unbalanced • 1080psf29 (AUDIO 2 • Balanced • 1080psf30 only) Noise • Spectrum • Normal Reduction • Invert • Inverted MTX5000 User and Technical Manual Routine Operation 3-81...
- Page 116 Baud Rate • 1200 Ratio • 16:9 • 2400 PTS per • • 4800 Picture • • 9600 • 19200 • • 38400 • PID Data Default Select default PIDs Enter PID required MTX5000 User and Technical Manual Routine Operation 3-82...
- Page 117 IP Setup • 1080psf23 IP Transfer • IP Only • 1080psf24 Mode • IP + Video • 1080psf25 • 1080psf29 Video Enter bit rate Bitrate required • 1080psf30 Noise • Reduction • MTX5000 User and Technical Manual Routine Operation 3-83...
- Page 118 • Analog Picture • • SDI EMB • Balance • Unbalanced • (AUDIO 2 • Balanced only) PID Data Spectrum • Normal Default Select default PIDs Invert • Inverted Enter PID required MTX5000 User and Technical Manual Routine Operation 3-84...
- Page 119 • CJM2 Format • Low Delay CJM2 Baud Rate • 1200 • 2400 • 4800 • 9600 • 19200 • 38400 Enter PID required VIDEO Enter PID required DATA Enter PID required MTX5000 User and Technical Manual Routine Operation 3-85...
- Page 120 MTX5000 User and Technical Manual Routine Operation 3-86...
-
Page 121: Troubleshooting
4-3, and Figure 4-4 on page 4-2. The MTX5000 has a library of diagnostic error messages to help you pinpoint any problems. Figure 4-2: ODU Status Dialog Box - Typical Errors detected during normal operation of the MTX5000 system O D U S tatus... - Page 122 Verify audio input is +12V Powersupply operation. Verify IDU connected Error Audio2 Unlocked input power. Audio3 Unlocked • Call MRC Technical Audio4 Unlocked Support. Analog Video Unlocked Minor Verify composite video input is connected. MTX5000 User and Technical Manual Troubleshooting...
- Page 123 Outdoor Unit (ODU) error messages ODU. Verify DC and what to do when they appear. power is being supplied to the ODU and verify RF cable connection between the IDU and ODU. • Call MRC Technical Support. MTX5000 User and Technical Manual Troubleshooting...
-
Page 124: Ethernet Connections
Ethernet cable from the ETHERNET connector. This should free up the color LCD display Panel and the IDU should resume operating properly. MTX5000 User and Technical Manual Troubleshooting... -
Page 125: Advanced Operations
Internet Protocol (IP) address for remote operations, Create or Update Custom Digital COFDM 5-77 and to update the MTX5000 software. This information is Preset Configuration in Remote Mode provided and intended for use by the technical staff. -
Page 126: Mtx5000
The procedures described in this chapter assume you already when the software update progress bar is know how to operate your MTX5000. If this is not the case, displayed, as the software update can please review the information presented in the following become corrupted. -
Page 127: Configuration Settings
MTX5000 IDU. procedures. • The MTX5000 IDU must not be placed in the transmit mode when performing any procedures contained in Local Mode Password Control this Chapter. - Page 128 Preset Analog settings. Local mode password control of the system may only Preset A 4.83 & 5.8, 3MHz Vid Dev be performed with the MTX5000 IDU in the Local mode of operation. RFU1 RF Band RF Output No RF All passwords are case-sensitive.
- Page 129 Enter Password Enter the old password, select the Enter key, and observe the Change Password screen is displayed. Re-Enter Password See Figure 5-6 on page 5-6. Clear Accept Cancel Main MTX5000 User and Technical Manual Advanced Operations...
-
Page 130: Create Or Update Preset Configuration Settings In Local Mode
Select the Main option button and observe the Main created or updated for the following types of Presets: screen is displayed. • Analog FMT Presets • Digital COFDM Presets • Digital ASI Presets • Digital LMS-T Presets MTX5000 User and Technical Manual Advanced Operations... -
Page 131: Create Or Update Custom Analog Preset Configuration In Local Mode
SEL key. When preparing a new analog Preset, you must first select an Verify the MTX5000 IDU is powered up. existing analog Preset from either one of the analog factory ”Powering the MTX5000 System” on page 3-7. - Page 132 Save As Preset Radio Back Main Main Select the FMT option button and observe the FMT SETUP screen is displayed. See Figure 5-11 on page 5-9. Select the User option button and observe the MTX5000 User and Technical Manual Advanced Operations...
- Page 133 Use the up and down arrows, as required, to select the audio deviation for Audio Ch1 thru Audio Ch4. Audio deviation range is 0 thru 31 for each audio channel. Select the Back option button and observe the FMT SETUP screen is displayed. MTX5000 User and Technical Manual Advanced Operations...
- Page 134 Select the Audio CH1 option button and observe the option and observe the PRE-EMPHASIS option button AUDIO CH1 screen is displayed. See Figure 5-16. becomes active (not greyed-out). Select the PRE-EMPHASIS option button and select On or Off, as required. MTX5000 User and Technical Manual Advanced Operations 5-10...
- Page 135 Use the FREQUENCY pull-down menu to select the Custom option and observe the FREQUENCY option button becomes active (not greyed-out). Back Main Select the FREQUENCY option button and observe the numeric keypad is displayed. See Figure 5-18. MTX5000 User and Technical Manual Advanced Operations 5-11...
- Page 136 Use the FREQUENCY pull-down menu (See Figure 5- 4830 kHz to 8590 kHz), select the ENT key, and 20) to select the frequency option required and go to observe the AUDIO CH2 screen is displayed. step MTX5000 User and Technical Manual Advanced Operations 5-12...
- Page 137 Use the FREQUENCY pull-down menu to select the inactive (greyed-out). Go to step Custom option and observe the FREQUENCY option Select the ENABLE option button and observe the button becomes active (not greyed-out). MTX5000 User and Technical Manual Advanced Operations 5-13...
- Page 138 To select a custom audio frequency, go to step 4830 kHz PRE-EMPHASIS Use the FREQUENCY pull-down menu (See Figure 5- 26 on page 5-15) to select the frequency option Back Main required and go to step MTX5000 User and Technical Manual Advanced Operations 5-14...
- Page 139 Save As Preset screen is displayed. Figure 5-29 on page 5-16. Enter the custom audio frequency required (range is 4830 kHz to 8590 kHz), select the ENT key, and observe the AUDIO CH4 screen is displayed. MTX5000 User and Technical Manual Advanced Operations 5-15...
- Page 140 “Are you keyboard screen is displayed. See Figure 5-30. sure?”. Select the Yes option button. Once an existing custom Preset is overwritten, it cannot be recovered. It must be re-entered from scratch. MTX5000 User and Technical Manual Advanced Operations 5-16...
-
Page 141: Create Or Update Digital Cofdm Preset
Preset configuration or to update an existing digital COFDM Preset configuration is contained in the following steps. When preparing a new digital COFDM Preset, you must first select an existing digital COFDM Preset from either one of the MTX5000 User and Technical Manual Advanced Operations 5-17... - Page 142 SEL key. Select the Main screen PA operation button for PA Off, as required. Verify the MTX5000 IDU is powered up. ”Powering the MTX5000 System” on page 3-7. MTX5000 User and Technical Manual...
- Page 143 Shift Back Main Enter Clear Cancel Use the FEC (Forward Error Correction) pull-down Enter your password, select the Enter key, and menu and select 1/2, 2/3, 3/4, 5/6, or 7/8, as required. MTX5000 User and Technical Manual Advanced Operations 5-19...
- Page 144 In the following step, select an Input option applicable to the licensed options contained in your MTX5000 IDU only. Selection of an option that is not licensed in your radio will cause the IDU to operate in the NTSC default mode.
- Page 145 Use the Mode pull-down menu to select Stereo or Dual Mono, as required. Use the Standard pull-down menu to select Off, MPEG Layer II, Linear PCM, or MPEG Layer I, as required. MTX5000 User and Technical Manual Advanced Operations 5-21...
- Page 146 4.9 Mb/s Mb/s Analog, SDI Emb, AES-EBU, or Channel Ide, as Bit Rate Auto GOP Length required. Use the Balance pull-down menu to select Back Main Encoder 2 Unbalanced or Balanced, as required. MTX5000 User and Technical Manual Advanced Operations 5-22...
- Page 147 Encoder screen is displayed. Select the Aspect Ratio pull-down menu and select Select the GOP Length option button and observe the 4:3 or 16:9, as required. numeric keypad is displayed. See Figure 5-49. MTX5000 User and Technical Manual Advanced Operations 5-23...
- Page 148 PID screen is displayed. Select the Program ID option button and observe the Select the PMT option button and observe the numeric numeric keypad is displayed. See Figure 5-53 on keypad is displayed. page 5-25. MTX5000 User and Technical Manual Advanced Operations 5-24...
- Page 149 Select the VBI option button for On or Off, as required. Select the Service Name option button and observe Select the Back option button and observe the the keyboard screen is displayed. See Figure 5-56 on Encoder screen is displayed. page 5-26. MTX5000 User and Technical Manual Advanced Operations 5-25...
- Page 150 (greyed-out). Notes If your MTX5000 IDU contains a licensed EBS or BISS encryption option, go to step Select the Scrambling pull-down menu EBS, BISS-1,...
Need help?
Do you have a question about the MTX5000 and is the answer not in the manual?
Questions and answers