Advertisement
Quick Links
www.eos.com.au
Monitor
Model : FUTURO-SD4 (Photo Memory feature / GUI)
Door Station
Model : FUTURO-CZ4 (Surface mount )
It is very important to install and operate this product according to the following
instructions. Failure to do so may render your guarantee void.
1. The Monitor includes following items:
● 1x monitor
● 3x screws
Adapter
FUTURO VIDEO DOORPHONE
FUTURO-SD4B (No Photo Memory feature)
FUTURO-CP4 (Flush Mount)
● 1x adapter
● 3x plastics plug
Monitor
3x plastics plug
● 1x bracket for the monitor
● 1x TF card (MicroSD)
Bracket
TF card
(SD4 Model only)
1
3x screws
Instruction Manual
Advertisement

Subscribe to Our Youtube Channel
Related Manuals for EOS FUTURO-SD4

Summary of Contents for EOS FUTURO-SD4
-
Page 1: Door Station
FUTURO VIDEO DOORPHONE Monitor Model : FUTURO-SD4 (Photo Memory feature / GUI) FUTURO-SD4B (No Photo Memory feature) Door Station Model : FUTURO-CZ4 (Surface mount ) FUTURO-CP4 (Flush Mount) It is very important to install and operate this product according to the following instructions. -
Page 2: Installation
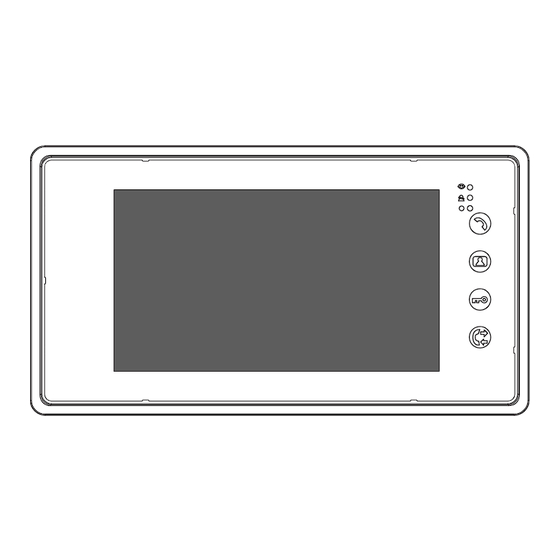
/left Talk Menu/OK Return Monitoring Door Open Interphone TF Card slot (FUTURO-SD4 Only) Microphone 2.2. Installation Mount the bracket on the wall with screws and do the wiring according to the wiring diagram in next page. ø8mm 1.5M Connect necessary wires to the terminal and mount the monitor on the bracket. - Page 3 3. Door Station 3.1 Description FUTURO-CZ4 FUTURO-CP4 1. Microphone 2. LEDs for Night vision 3. Speaker 4. Call button 5. Camera 6. Terminals A : Audio G : Ground B : 12V DC from Monitor V : Video to Monitor D/O : Door Open M+ : DC Power for automatic recording by motion detection...
- Page 4 3.2 Door Station Installation 3.2.1 FUTURO-CZ4 With Weatherhood ( Optional ) Overall Dimension (W/H/D) 99 x 148 x 28 mm...
- Page 5 3.2.2 FUTURO-CP4 Embedding Box Dimension (W/H/D) 98x155x55 mm Cover Plate Dimension (W/H/D) 128x182x4 mm...
-
Page 6: Wiring Diagrams
4. Wiring diagrams 4.1. Typical diagram #1: One outdoor station with one monitor(FUTURO-SD4/4B) 13V DC 1.2A Power Supply for Lock Lock Outdoor Station Monitor 4.2. Typical diagram #2: One outdoor station with two indoor monitors 13V DC 1.2A Power Supply... - Page 7 4.3. Typical diagram #3: 3 outdoor stations with 4 monitors (with FUTURO-CPU4) 6 wires 6 wires 6 wires 6 wires FUTURO-CPU4 Camera#1 Camera#3 Camera#2 DC13V 3Amp Power Supply for FUTURO-CPU4 4 wires 5 wires 4 wires 4 wires & M+ wire Futuro-CZ/CP4 Electric Lock Power Supply...
- Page 8 Monitor Terminal description Video Standby:0V, When monitor is On:appx 0.5V DC Audio Standby:appx 4.6VDC When talking :appx 3.6VDC, When Door open:appx 12VDC Data Data signal between Monitors, Cameras and CPU4 Power 13V DC power for Monitor / G Ground Note: ●...
- Page 9 5.2. Calling / Talking / Unlocking The calling sound rings from indoor monitors with visitor’s image Press the “Call” button shown on the screen on the outdoor station Photo icon Video icon When the photo icon appears, the When the video icon appears ( in monitor will automatically take two Video mode), the monitor will take photos.
- Page 10 5.3. Monitoring Press the ‘Monitoring’ button to see the entrance and press again to exit the monitoring mode. But when there are more than one outdoor stations, press “Monitoring” to see the entrance from one outdoor station and press again to see from next outdoor station.
- Page 11 5.4. Interphone Calling Monitor Called Monitor Interphone button When you press ’Interphone’ on one monitor, the other monitor in the house will ring. Calling Monitor Called Monitor To answer, press ‘Talk’ button on the called monitor. Press ‘Talk’ again to end the talking. 5.5.
- Page 12 4 seconds to enter ringtone selection. If you need to change the ringtone,just press ”Monitoring’’ button once again. Press ”Talk” button to Press “Unlock’’ to confirm adjust the ringtone volume. and exit. * See Page 15 for FUTURO-SD4 Ringtone adjustment.
- Page 13 ” for the third time, “VOLOME...”will show on the screen. If you need to adjust the talking volume, please press Press “Menu ”again to save and exit . * See Page 15 for FUTURO-SD4 Brightness / Color / Volume adjustment.
- Page 14 (FUTURO-SD4 Model Only) 6. GUI Menu setting Date and Setup time setting Video Photo checking checking In standby, press any button at the right hand side to enter the menu and press ‘Left/Right’ button to select the required icon. 6.1. Date and time setting 6.1.1.
- Page 15 6.2. SETUP Press ‘left/right’ to select ‘Setup’ icon, and then press ‘OK’ to confirm and access the selected setting. Select ‘Screen’ icon and press ‘OK’ to enter next menu. 6.3. SCREEN Press ‘OK’ to select ‘color’, ‘brightness’ or ‘Speaker volume’ icon, and then press ‘left/right’...
- Page 16 6.4.2. Press ‘OK’ to select the required icon, and then press ‘left/rignt’ to adjust the ringtone volume, press ‘OK’ to save and exit. 6.4.3. Press ‘OK’ to select the required icon, and then press ‘left/rignt’ to select the ringtone, press ‘OK’ to save and exit. 6.5.
- Page 17 6.5.2. Press ‘left/right’ to select ‘Language’, and then press ‘OK’ to save and exit. 6.6. UNLOCK TIMING (Default 1 second) 6.6.1. Press ‘left/right’ to select ‘Unlock timing’, and then press ‘OK’ to confirm and access the selected setting. 6.6.2. Press ‘left/right’ to adjust the values, and then press ‘OK’ or ‘return’ to save and exit.
- Page 18 6.7. MODE 6.7.1. Press ‘left/right’ to select ‘Mode’, and then press ‘OK’ to confirm and access the selected setting. 6.7.2. Press ‘OK’ to select the required icon, and then press ‘left/rignt’ to select ‘Video’ or ‘Photo’ mode, press ‘OK’ to save and exit. 6.7.3.
- Page 19 6.8. RESET 6.8.1. Press ‘left/right’ to select ‘RESET’, and then press ‘OK’ to confirm and access the selected setting. 6.8.2. Press ‘OK’ to select the required icon, and then press ‘left/right’ to select ‘Format TF’ or ‘Reset’. 6.8.3. Press ‘OK’ to select the required icon, press ‘left/right’ to select ‘Yes’, and then press ‘OK’...
- Page 20 6.9. PHOTO 6.9.1. Press ‘left/right’ to select ‘Photo’ and then press ‘OK’ to enter next menu. 6.9.2. Menu with no recorded photo. 6.9.3. If photo recorded, press ‘left/right’ to check the photos.
- Page 21 6.9.4. Press ‘OK’ to enter the menu, and then delete the photo or not. 6.10. VIDEO 6.10.1. Press ‘left/right’ to select ‘Video’ and then press ‘OK’ to enter next menu. 6.10.2. Menu no recorded video.
- Page 22 6.10.3. With recorded video, press ‘left/right’ to check the video. 6.10.4. Press ‘OK’ to enter the menu, and then delete the video or not.
-
Page 23: Technical Specification
● Do not install the indoor monitor at high temperature, high humidity place. ● Please use only a soft cloth to clean the monitor screen or camera. Do not use dish washing liquid, thinner, or corrosive liquid to clean. ● Please turn the power off when installing or repairing the product. www.eos.com.au...
Need help?
Do you have a question about the FUTURO-SD4 and is the answer not in the manual?
Questions and answers
lights flashing on main screen