
Related Manuals for Astro Machine AstroJet L1

Summary of Contents for Astro Machine AstroJet L1
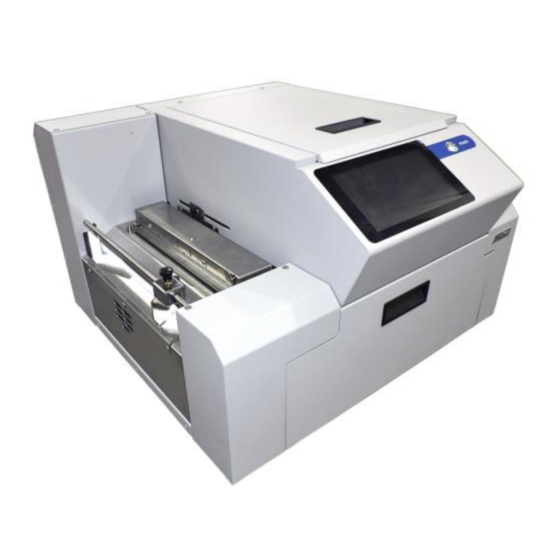
- Page 1 AstroJet COLOR LABEL PRINTER OPERATOR MANUAL ASTRO MACHINE CORP. 630 Lively Blvd. Elk Grove Village, IL 60007 Phone: (847) 364-6363 Fax: (847) 364-9898 www.astromachine.com...
- Page 2 To the best of our knowledge, that information is accurate in all respects. However, neither Astro Machine Corp. nor any of its agents or employees shall be responsible for any inaccuracies contained herein.
-
Page 3: Table Of Contents
TABLE OF CONTENTS SECTION 1 – Getting Acquainted Front View Rear View Print Engine View Print Area View (Under Clamshell) Ink Tank Door View SECTION 2 – Installing Printer Contents of Packaging Choose a Location Unpack and Set-up Attachments Install Ink Drip Tray Assembly Connect Printer Install Printer Driver Install Over USB Connection... - Page 4 TABLE OF CONTENTS Appendices Appendix A – Printer Specifications Appendix B – Supplies and Optional Hardware Appendix C – Borderless Printing: Borderless Print vs. Oversize Index Printer Maintenance Schedule...
- Page 5 TABLE OF CONTENTS NOTES ______________________________________________________ ______________________________________________________ ______________________________________________________ ______________________________________________________ ______________________________________________________ ______________________________________________________ ______________________________________________________ ______________________________________________________ ______________________________________________________ ______________________________________________________ ______________________________________________________ ______________________________________________________ ______________________________________________________ ______________________________________________________...
-
Page 7: Section 1 - Getting Acquainted
SECTION 1 GETTING ACQUAINTED SECTION 1 – Getting Acquainted Front View Control Panel Touchscreen – Displays Menu and information about Printer status. Controls Printer functions and set-up. Top Cover – Provides access to Print Engine, Printhead and Service Station. ON/OFF LED Button – Turn power ON or OFF during idle time and maintenance. SD Card USB Port –... -
Page 8: Rear View
SECTION 1 GETTING ACQUAINTED Rear View Top Cover – Provides access to Print Engine, Printhead and Service Station. ON/OFF LED Button – Turn power ON or OFF during idle time and maintenance. Clamshell – Holds upper section of Print Engine including Printhead and Service Station. -
Page 9: Print Engine View
SECTION 1 GETTING ACQUAINTED Print Engine View Printhead Latch – When closed, connects Ink Revolver Couplings with Printhead Cartridge. When opened, retracts Ink Couplings from Printhead Cartridge and provides access to Printhead Cartridge for cleaning and replacement. WARNING! Never attempt to open Printhead Latch manually, severe damage will result. Use the Printhead Release in the Touchscreen "Service"... -
Page 10: Print Area View (Under Clamshell)
SECTION 1 GETTING ACQUAINTED Print Area View (Under Clamshell) Forwarding Rollers – Move media into Printer. Clamshell "Open" Switch – Signals Printer when the Top Assembly Latch is released and Top Assembly is opened. Shows on Touchscreen display and in Toolbox System Status icon. -
Page 11: Ink Tank Door View
SECTION 1 GETTING ACQUAINTED Ink Tank Door View Print Engine Assembly Latch – Release to raise Printhead Assembly to clear media jams or for other maintenance. Ink Tank Latches – Used to hold Ink Tanks in slots. NOTE: Make sure both sides at bottom part of latch are engaged. Ink Tanks –... -
Page 12: Section 2 - Installing Printer
SECTION 2 INSTALLING PRINTER SECTION 2 – Installing Printer Contents of Packaging L1 Label Printer Ink Drip Tray Assembly Five Ink Tanks – Cyan, Magenta, Yellow, Black, Black Printhead Cartridge AC Power Cord USB Cable Operator Manual Driver Software CD Before using Label Printer: ... -
Page 13: Install Ink Drip Tray Assembly
SECTION 2 INSTALLING PRINTER Install Ink Drip Tray Assembly Open Ink Tank Door [A]. Release Latch [B] to raise the Clamshell. Insert tabs on Ink Drip Tray into frame slots [C] as shown. Close Clamshell. -
Page 14: Connect Printer
SECTION 2 INSTALLING PRINTER Connect Printer Plugging in Printer Plug power cord into receptacle [1] located on the rear panel of the Printer. Internal power supply in Printer is rated 100 to 240VAC, 50/60 Hz. CAUTION DO NOT USE AN ADAPTER PLUGS OR EXTENSION CORDS TO CONNECT PRINTER TO WALL RECEPTACLE. -
Page 15: Install Printer Driver
SECTION 2 INSTALLING PRINTER Install Printer Driver For Printer software to operate properly, check that computer system meets minimum requirements: Operating System: Windows 8/8.1, Windows 10 (Desktop Mode only). Windows XP, Windows Vista, Windows 7. Supports 32 and 64 bit systems. (You must have administrative privileges on system.) NOTE: Windows 8, 8.1 and Windows 10 will only work in desktop mode. - Page 16 SECTION 2 INSTALLING PRINTER License Agreement. Check “I accept…” then click “Next>”. Printer Connections. Click “Configure to print using USB”. Then click “Next>”. Installing Printer Software. Software download begins. Would You Like to Install This Device Software? Click “Install”. Connect Device Now. Turn Printer ON and connect USB cable.
-
Page 17: Install Over Network Connection, Version A
SECTION 2 INSTALLING PRINTER Finished software installation. Do not check the Print Test Page as Printer is not set up yet. You can check “Set this printer as the default printer” at this time. Click “Finish”. Install Printer Software. Click “Exit” to close CD. 10. - Page 18 SECTION 2 INSTALLING PRINTER License Agreement. Check “I accept…” then click “Next>”. Printer Connections. Click “Configure to print using the Network”. Make sure the Printer is connected to the Network. Then click “Next>”. Printers Discovered. A list of available Printers opens. Check the Printer column to verify you have an L-Series printer.
- Page 19 SECTION 2 INSTALLING PRINTER Finished software installation. Do not check the Print Test Page as Printer is not set up yet. You can check “Set this printer as the default printer” at this time. Click “Finish”. Install Printer Software window. Click “Install Print Software”...
-
Page 20: Install Over Network Connection, Version B
SECTION 2 INSTALLING PRINTER Install Over Network Connection, Version B Use this procedure to install the Print Driver over the Network connection on Static IP systems requiring that an IP address is assigned manually. NOTE: Copy the 12-digit Hardware ID number listed on the Printer(s) on the label just below Ethernet port so you can identify the Printer(s) in a later step. - Page 21 SECTION 2 INSTALLING PRINTER Installing Printer Software. Software download begins. Would You Like to Install This Device Software? Click “Install”. Finished software installation. Do not check the Print Test Page as Printer is not set up yet. You can check “Set this printer as the default printer”...
-
Page 22: Install Ink Tanks
SECTION 2 INSTALLING PRINTER Install Ink Tanks Printer uses one Printhead Cartridge and five Ink Tanks (two Black, one Cyan, one Magenta, and one Yellow). Look at the Control Panel Touchscreen. Ink Tank status information appears in right side of the Touchscreen. Note that the Ink Tank indicator boxes are empty. -
Page 23: First Time Install Printhead Cartridge
SECTION 2 INSTALLING PRINTER First Time Install Printhead Cartridge Printhead Cartridge is a delicate precision device. Handle with extreme care to avoid damage and issues that could degrade print quality. CAUTION Use electrostatic discharge (ESD) protection when handling. Hold Printhead Cartridge by handles ONLY. ... - Page 24 SECTION 2 INSTALLING PRINTER [A] Carefully remove Printhead Cartridge from foil packaging. Tear foil at notch or cut the end with scissors. [B] Remove protective plastic cover. Hold Printhead by handle and unclip cover from Printhead. [C] Remove protective strip from Printhead Electrical Contacts.
- Page 25 SECTION 2 INSTALLING PRINTER Close Printhead Latch [6]. Printer starts up and primes ink into Printhead (this may take a few minutes.) Make sure ink is flowing through hoses. Watch the Control Panel Touchscreen. Check that the Printhead icon [7] in Printer image is primed (solid color).
-
Page 26: Connect Printer To External Device
SECTION 2 INSTALLING PRINTER Connect Printer to External Device WARNING! HAZARDOUS MOVING PARTS! KEEP FINGERS AND OTHER BODY PARTS AWAY! CAUTION MAKE SURE THAT PRINTER IS TURNED OFF BEFORE CONNECTING EXTERNAL DEVICE. Connect to External Device (Winder, Laminator, Dryer, etc.): Connect one end of the interconnect cable into 9-pin connector port on Printer [1] (located just below USB port). -
Page 27: Section 3 - Operating Printer
SECTION 3 OPERATING PRINTER SECTION 3 – Operating Printer Once the Printer Driver is installed and the Printhead is primed, you are ready to start printing. Set up your job and send it to the Printer. The Printer will start and print. Set the Printer Driver installed in Section 2 as the default driver. -
Page 28: General Tab
SECTION 3 OPERATING PRINTER General Tab General tab lets you select: Orientation – Set print direction as Portrait (default), Landscape, Rotate 180° and Mirrored. Job Management – Stitch is for printing on continuous media (no gaps). Buffer loads entire print job before printing starts. Mask Optimization (checked is default) optimizes images for printing in most applications. -
Page 29: Layout Tab
SECTION 3 OPERATING PRINTER Layout Tab Layout allows you change how the document prints without changing the original document. Resizing – Specify Original Size or Custom Resize: Resizes original as a % of normal size. Printer prints document in size you selected regardless of paper size selected. -
Page 30: Media Tab
SECTION 3 OPERATING PRINTER Media Tab Media Tab shows the the type of media the Printer is configured to run and allows minor changes to the positioning and cutting of the media. Media – Displays the type of media currently selected for the Printer. - Page 31 SECTION 3 OPERATING PRINTER Using Media Tab Printing Adjustments Top Adjustment /Top of Form (TOF) – Moves image up or down (-5mm up to +200mm down) from top left corner of media used. Left Adjustment moves image area away (-3mm left to +200mm right) from left edge of media. (0.1mm increments) Bottom Adjustment/Bottom of Form (BOF) –...
-
Page 32: Import/Export Tab
SECTION 3 OPERATING PRINTER Import/Export Tab Import/Export is used to preserve any custom Watermarks, Media Sizes, and/or Print Settings you may have developed and saved for various jobs when you update Printer firmware. Export – Send custom settings to a holding file before downloading new firmware. -
Page 33: Using Printer Touchscreen
SECTION 3 OPERATING PRINTER Using Printer Touchscreen Once the Printer Driver is installed, and the Printer is turned ON, you can use the Printer's Touchscreen. You can check Printer status, monitor ink usage, perform diagnostic checks, print reports and run maintenance tasks on the Printer from the Touchscreen. - Page 34 SECTION 3 OPERATING PRINTER Job (Status Screen) The opening screen provides information about the status of the Printer. Status Indicator box shows Printer activity as ONLINE, ERROR, MAINTENANCE, PRINTING or PAUSED. The gray box (below Status Indicator) shows the name of the job being processed.
- Page 35 SECTION 3 OPERATING PRINTER CONTROL BUTTONS (located along the bottom of the screen): Provide quick access to often-used functions. Pause: Tap to temporarily stop printing. Tap again to resume printing. Cancel Job: Cancels a paused job from the printing queue. Cancel is unavailable unless the Pause button has been pressed first.
- Page 36 SECTION 3 OPERATING PRINTER Select a job by tapping the job icon or the list name. The Job Print Options screen opens. The (4) Control buttons let you Exit, Print, Save or Delete the print job. The Save button saves any changes you make to the job specifications in the Print Options on the right side of the screen.
- Page 37 SECTION 3 OPERATING PRINTER Service Screen Tap the Menu button, then Service button to open the Service screen. Release Printhead – Pumps ink back into Ink Tanks and opens Printhead Latch to remove or install Printhead Cartridge. NOTE: Button is only active if the system is deprimed first.
- Page 38 SECTION 3 OPERATING PRINTER Maintenance Screen Tapping Menu, then Maintenance opens the Maintenance screen. These buttons operate functions for Printer and Printhead maintenance. Inspect Sled – Moves Service Station out from under the Printhead Assembly for inspection, cleaning or service. Circulate Ink –...
- Page 39 SECTION 3 OPERATING PRINTER Media Scan Screen Tapping Menu, then Media Scan opens the Media Scan screen. Use Media Scan to fine tune sensor sensitivity and/or adjust scan length if media is not printing correctly, or to determine if a type of media is going to have problems printing.
- Page 40 SECTION 3 OPERATING PRINTER Tap Auto Scan. The Touchscreen will display a graph together with results marked Legend and Edge Distances. The graph shows the difference between the high points (gaps/backing) and flats (label media). If there is little difference between the highs and the flats, the Printer may have trouble differentiating the labels from the gaps.
- Page 41 SECTION 3 OPERATING PRINTER Wiper Screen Tapping Menu, then Wiper opens the Wiper options screen. Selections are Wiper Transfer, Condition Wiper and New Wiper. Wiper Transfer – Manually initiates a Wiper Transfer instead of waiting for a Transfer to automatically occur during normal operating cycles.
- Page 42 SECTION 3 OPERATING PRINTER Using the SD Card USB Back-Up Port When a FAT 32 formatted USB Flash Drive is plugged into the USB port [A] (located below the Touchscreen), the USB Backup screen opens: IMPORTANT CONNECT ONLY A FAT32 FORMATTED FLASH DRIVE WITH THE PRINTER.
-
Page 43: Using Printer Toolbox
SECTION 3 OPERATING PRINTER Using Printer Toolbox Once Printer Driver is installed, you can access the Printer Toolbox remotely from a computer. You can check Printer status, monitor ink usage, perform diagnostic checks, print reports and run maintenance tasks on Printer from your computer. - Page 44 SECTION 3 OPERATING PRINTER System Status This screen opens when you access the Toolbox. It provides information about the Printer. Status Indicator shows Printer activity as ONLINE, ERROR, MAINTENANCE, PRINTING or PAUSED. The gray box (below Status Indicator) shows the name of the job being processed.
- Page 45 SECTION 3 OPERATING PRINTER CONTROL BUTTONS (located along bottom of screen): Provide quick access to often-used functions. Pause/Resume: Tap to temporarily stop printing. Tap again to resume printing. Cancel Job: Cancels a paused job from the printing queue. Cancel is unavailable unless the Pause button has been pressed first.
- Page 46 SECTION 3 OPERATING PRINTER DISPLAY LANGUAGE: Selects language EWS (Toolbox) and Touchscreen will display. Click “Submit” after selecting language. FIRMWARE DOWNLOAD: Get the latest version of firmware for your Printer. Two types of firmware files are normally provided: “.bin” files and “.fbf” files.
- Page 47 SECTION 3 OPERATING PRINTER Ink Usage Displays the amount of ink used and other information about each job sent to the Printer. Also tracks estimated Page and Job Costs if information is entered in Job Cost Settings. INK ESTIMATION MODE – Lets you predetermine how much ink a given job may use prior to printing a job.
- Page 48 SECTION 3 OPERATING PRINTER Service Menus Clicking Service Menus opens the Service Menus (Diagnostics) screen and service menu buttons. Diagnostics button. Click to check the status of the Printer. (See Diagnostics below.) System Settings button. Click to view, enter or change settings to connect Printer to your network.
- Page 49 SECTION 3 OPERATING PRINTER System Settings Set up a network connection for the Printer. You can also configure and set the Printer Date and Time, set the Debug Log Level and set the Screensaver Timeout (sleep delay). Network Settings – Permits you to view, enter or change settings to connect the Printer to your network. Network Connection Set -Up: Printer is still connected to computer via USB cable.
- Page 50 SECTION 3 OPERATING PRINTER Date and Time – Enter or change the way the date and time will appear in the Printer Status section of the Toolbox screens. To enter or change Date and Time: From the Toolbox, select “View” drop-down menu, click “Service Menus”, then click “System Settings”.
- Page 51 SECTION 3 OPERATING PRINTER Screensaver – Set the amount of time the Touchscreen will remain idle before automatically going to Sleep Mode. From the Toolbox, select “View” drop-down menu, click “Service Menus”, and then click “System Settings”. “System Settings” page opens. Go to Screensaver. Enter the number of seconds the Touchscreen will remain idle before going to Sleep Mode.
- Page 52 SECTION 3 OPERATING PRINTER Debug Logs Access, print or send activity logs for the Printer and for jobs run on the Printer. These files are valuable for diagnosing and servicing problems. All – Shows all log files available. Debug – Shows only Debug log files. Jobs –...
- Page 53 SECTION 3 OPERATING PRINTER Media Scan Use Media Scan to fine tune sensor sensitivity and/or adjust scan length if media is not printing correctly, or to determine if a type of media is going to have problems printing. This is generally due to the sensors having trouble differentiating between the label surface and backing/gap.
- Page 54 SECTION 3 OPERATING PRINTER Click “Submit” to enter your selections, then click the “Scan Media” button. Blank media moves across sensors to create the graph shown on the screen. NOTE: Tapping or rolling the cursor over the blue graph line provides readouts of the points on the graph.
-
Page 55: Maintenance Drop-Down
SECTION 3 OPERATING PRINTER Maintenance Drop-Down Perform maintenance tasks on the Printer. Circulate Ink – Purges air from lines and primes system after replacing Ink Tanks or Printhead Cartridge. Normal Clean Printhead – Runs cleaning and wiping routine twice for better flushing and cleaning. -
Page 56: Update Firmware Using ".Bin" Files
SECTION 3 OPERATING PRINTER Update Firmware using “.bin” Files Get latest version of firmware for your Printer. NOTE: Use this procedure to update firmware AFTER you have updated the Printer Driver. Printer Driver update procedure is included with an “Update Package”... -
Page 57: Section 4 - Maintenance
SECTION 4 MAINTENANCE SECTION 4 – Maintenance General, periodic maintenance is needed to keep Printer in good working order. This section covers how to care for Ink Tanks, Printhead Cartridge, Service Station, and clear paper jams. Replace Ink Tanks Replace Ink Tanks when ink runs out. Look at the Control Panel Touchscreen. -
Page 58: Clean Ink Tank Contacts
SECTION 4 MAINTENANCE Clean Ink Tank Contacts When reinstalling or replacing Ink Tanks, the Ink Level indicators on the Touchscreen may not refresh. This may be due to a dirty Ink Tank Level Prism and/or QA Chip contacts on that Ink Tank(s). Clean contacts as follows: Remove Ink Tank(s). -
Page 59: Clean/Replace Printhead Cartridge
SECTION 4 MAINTENANCE Clean/Replace Printhead Cartridge Cleaning The Printhead is cleaned automatically each time the Printer is turned on or when the “Quick Clean Printhead” routine is performed. This can be found under “Service” Tab, “Normal Clean Printhead” in the Printer Driver or “Maintenance”... - Page 60 SECTION 4 MAINTENANCE Replace Printhead Cartridge Open Top Cover. From the Touchscreen, tap “Service” in the Menu drop-down, then tap “System Deprime”. The Printer pumps any ink in system back into Tanks. Then the Printhead Latch pops open. CAUTION DO NOT PRY OR MANUALLY LIFT PRINTHEAD LATCH OR LATCH MAY BREAK.
- Page 61 SECTION 4 MAINTENANCE Wet Printhead Surface. (Ensures that Printhead will prime correctly.) Moisten Printhead nozzles using distilled water and a damp, lint-free cloth, wiping end to end. (Gray strip located below copper contact strip.) Take care not to damage copper contacts, metal plate, or gold Printhead surface.
- Page 62 Printhead may be returned for replacement. Returns for these conditions can be made: Up to 12 months after shipping date from Astro Machine Corp. and Printhead's “Total pages printed” = 40,000 or fewer pages (at 15% page coverage), whichever comes first.
- Page 63 5. Reseal Printhead and Cover in a plastic bag (reuse and reseal original packaging if possible). 6. Place Printhead, Printhead Page Count printout and Color Bars printout in a shipping box. Remember to include your company name, contact information and return address as well. 7. Return to your Astro Machine distributor.
-
Page 64: Inspect The Service Station
SECTION 4 MAINTENANCE Inspect the Service Station The Service Station (located directly under the Printhead Assembly) cleans Printhead Cartridge of excess ink and debris, keeps Printhead hydrated and protected when not in use, captures and removes ink used to keep nozzles clear. -
Page 65: Replace Ink Waste Tray
SECTION 4 MAINTENANCE Replace Ink Waste Tray Ink Waste Tray soaks up any excess ink that may drip from Print Engine during operation. After a period of time it may become saturated and need replacement. Open Ink Tank Door. Push in on the Tabs [A] to release Ink Waste Tray and remove it from unit. -
Page 66: Cleaning
SECTION 4 MAINTENANCE Cleaning WARNING! PRINTER IS A PRECISION MACHINE. CLEAN REGULARLY TO INSURE MANY YEARS OF SERVICE. BEFORE PERFORMING ANY MAINTENANCE, DISCONNECT MACHINE FROM ITS POWER SOURCE! DO NOT REMOVE SIDE COVERS! HIGH VOLTAGES PRESENT. Clean Printer regularly to remove accumulated paper dust and ink. Depending on types of media run, paper dust may accumulate inside Printer and on Transport. - Page 67 SECTION 4 MAINTENANCE Print Engine Areas in Print Engine can become glazed with a buildup of dust, paper lint and accumulated ink and have to be cleaned regularly. Open Top Cover. Open Clamshell Assembly by releasing two latches. Use a vacuum to pick up any loose debris.
-
Page 68: Shipping Or Transporting Printer
SECTION 4 MAINTENANCE Shipping or Transporting Printer If you have to ship or transport Printer for any reason, the unit will have to be prepared. Once the Printer is prepared, carefully package the Printer, Printhead Cartridge, Service Station and Ink Tanks in the original packaging. Remove Printhead Cartridge Open Top Cover. - Page 69 SECTION 4 MAINTENANCE TURN PRINTER POWER OFF. CAUTION WHENEVER POWERING DOWN UNIT, ALWAYS: 1. PRESS POWER BUTTON ON CONTROL PANEL. 2. WAIT FOR PRINTER TO STOP PROCESSING. 3. THEN PRESS MAIN POWER SWITCH ON REAR PANEL. Remove Ink Tanks After depriming the system.
-
Page 70: Section 5 - Troubleshooting Guide
SECTION 5 TROUBLESHOOTING SECTION 5 – Troubleshooting Guide Troubleshooting Guides are provided to assist in solving any problems that might occur with Printer. We tried to make them as complete as possible. The best advice we can offer is to make sure that system is set up properly, plugged in, and has an adequate supply of ink before attempting to troubleshoot any problem. -
Page 71: Printer
SECTION 5 TROUBLESHOOTING Printer CONDITION PROBLEM SOLUTION Ink Tank installed, no Ink Ink Tank contacts dirty, Remove Ink Tank(s). Level indication in Toolbox preventing Printer/Ink Tank Clean prism and QA Chip contacts, see communication. Maintenance, Cleaning Ink Tank Contacts. Extra lines; losing data Database problem. -
Page 72: Errors And Warnings
SECTION 5 TROUBLESHOOTING Errors and Warnings Printer Alert Window Messages Messages sent from Driver and displayed on PC screen in a small popup window. MESSAGE SOLUTION Wait until message disappears. Printer will start printing your job once cleaning Cleaning in Progress process is complete. -
Page 73: Appendices
APPENDICES Appendix A – Printer Specifications Best: 1600 x 1600 DPI PRINT RESOLUTION Normal: 1600 x 800 DPI Best: 6" (15 cm)/second PRINT SPEED Normal: Up to 12" (30 cm)/second MEDIA PRINTSIZE 8.5" W x 75" L (215.9 mm x 1905 mm) MEDIA TYPES Roll or Fanfold (Label, Tag) Minimum: 1"... -
Page 74: Appendix B - Supplies And Optional Hardware
APPENDICES Appendix B – Supplies and Optional Hardware The following supply items and optional hardware are available from your Astro Machine Distributor: SUPPLIES Printhead Cartridge 123-2393 Waste Ink Tray Assembly (Tray with Ink Waste Pad) 123-2487 Waste Ink Tray Pad (Pad only) -
Page 75: Appendix C - Borderless Printing: Borderless Print Vs. Oversize
APPENDICES Appendix C – Borderless Printing: Borderless Print vs. Oversize L-Series Print Driver (under Printing Preferences) offers two ways for printing to the edge of the media, sometimes called “borderless” or “full-bleed” printing. Each option adjusts the relationship between the target image, selected media size and the actual media on which is it printed, but in different ways. - Page 76 APPENDICES Prerequisites for Borderless Print Since scaling can distort the image, do not use Borderless Print for targets that have barcodes or text because this setting could render them unreadable. If target image is a photograph or other graphical image, scaling may not be noticeable or objectionable.
- Page 77 APPENDICES Page Setup for Oversize When using Oversize option, Resizing (located in Layout Tab of Driver) needs to be set to “Original Size”. Page Setup for Oversize Option Impact of Using Oversize Selecting Oversize extends Custom Sizes dimensions beyond that of actual media being printed on. Since this size extension is equal in both X- and Y- axes, there is no distortion of target image.
- Page 78 APPENDICES ADDITIONAL CONSIDERATIONS AND TIPS Some additional considerations apply to both Borderless Print and Oversize in certain circumstances. Minimum Label Gap and Maximum Width For both Borderless Print and Oversize, additional consideration and testing are required when approaching limitations for minimum label gap and maximum label width. ...
-
Page 79: Index
INDEX Print.............. 31, 49 Service ............31, 49 Adjustable System Test ............35 Media Guide ............2 Toolbox .............. 37 Media Sensor ........... 2, 4 Touchscreen ............27 View ..............37 Wiper ..............35 Borderless Print vs. Oversize Printing ..... 69 Encoder .............. - Page 80 INDEX Install Ink Drip Tray Assembly ........7 Network Ink Tanks ............16 Connect ............2, 8 Printer Driver ............9 Settings, Toolbox ..........43 Printer Driver Over USB ........9 Settings, Touchscreen ........31 Printer Driver, Network Version A ....11 Printer Driver, Network Version B ....
- Page 81 INDEX UpdateFirmware ..........50 Service Station ............3 USB Port .............. 2 Clean ..............58 Using Printer Job Library ........29 Inspect ..............58 Inspection Motor ..........3 Printer Driver Borderless Print vs. Oversize ......69 Set-up Color Tab ............23 Network, Toolbox ..........
- Page 82 INDEX System Test ............35 USB Backup Port ........... 1, 36 Using ..............27 Using Media Scan ..........33 Using Reprint ............. 29 Wiper ..............35 Transport Rollers ............4 Tray, Drip ..............4 Tray, InkWaste ............1 Troubleshooting ............. 64 Errors and Warnings ..........
-
Page 83: Printer Maintenance Schedule
PRINTER MAINTENANCE SCHEDULE General, periodic maintenance is needed to keep the Printer in good working order. Many tasks can be performed by operators with basic supplies, no special tools needed. Other tasks should only be performed by trained service personnel. NOTE: High volume usage may require more frequent maintenance. Maintenance Supplies &... - Page 84 NOTES ______________________________________________________ ______________________________________________________ ______________________________________________________ ______________________________________________________ ______________________________________________________ ______________________________________________________ ______________________________________________________ ______________________________________________________ ______________________________________________________ ______________________________________________________ ______________________________________________________ ______________________________________________________ ______________________________________________________...
- Page 86 Copyright © 2019 ASTRO MACHINE CORP. Elk Grove Village, IL 60007 03/12/2019 Part Number: 200-L1...
Need help?
Do you have a question about the AstroJet L1 and is the answer not in the manual?
Questions and answers